This special page shows all uploaded files.
| Date | Name | Thumbnail | Size | Description | Versions |
|---|---|---|---|---|---|
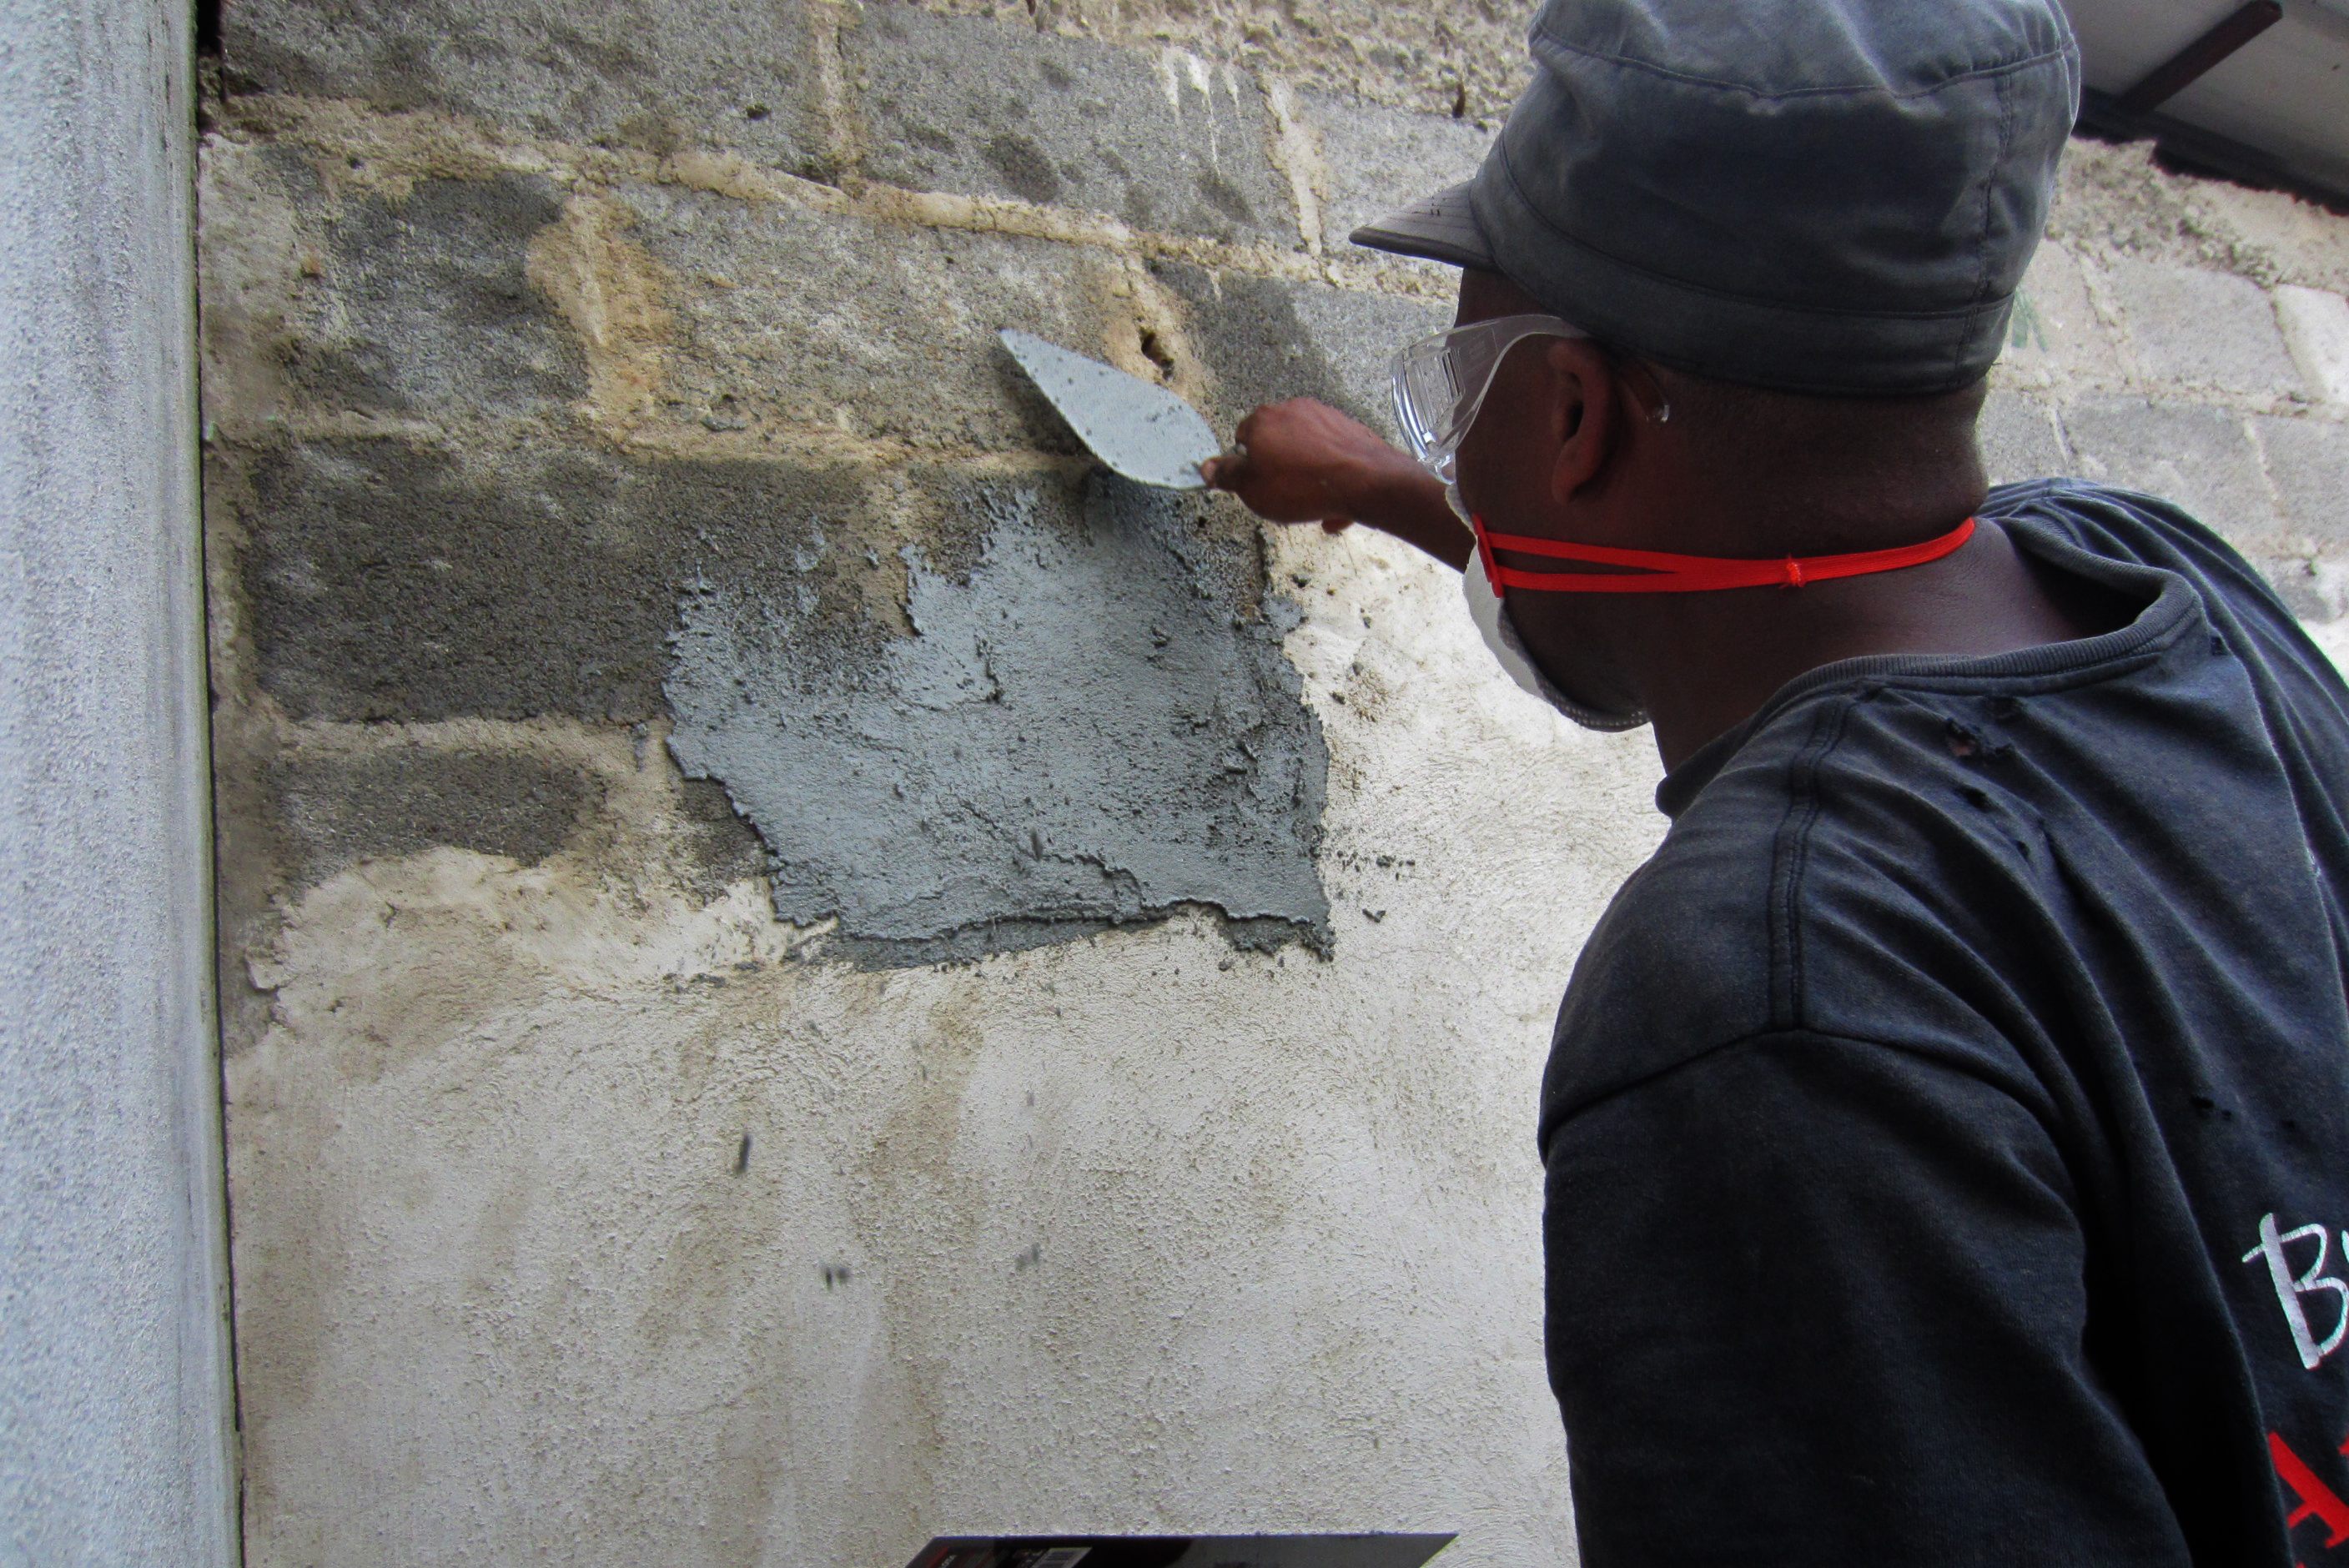
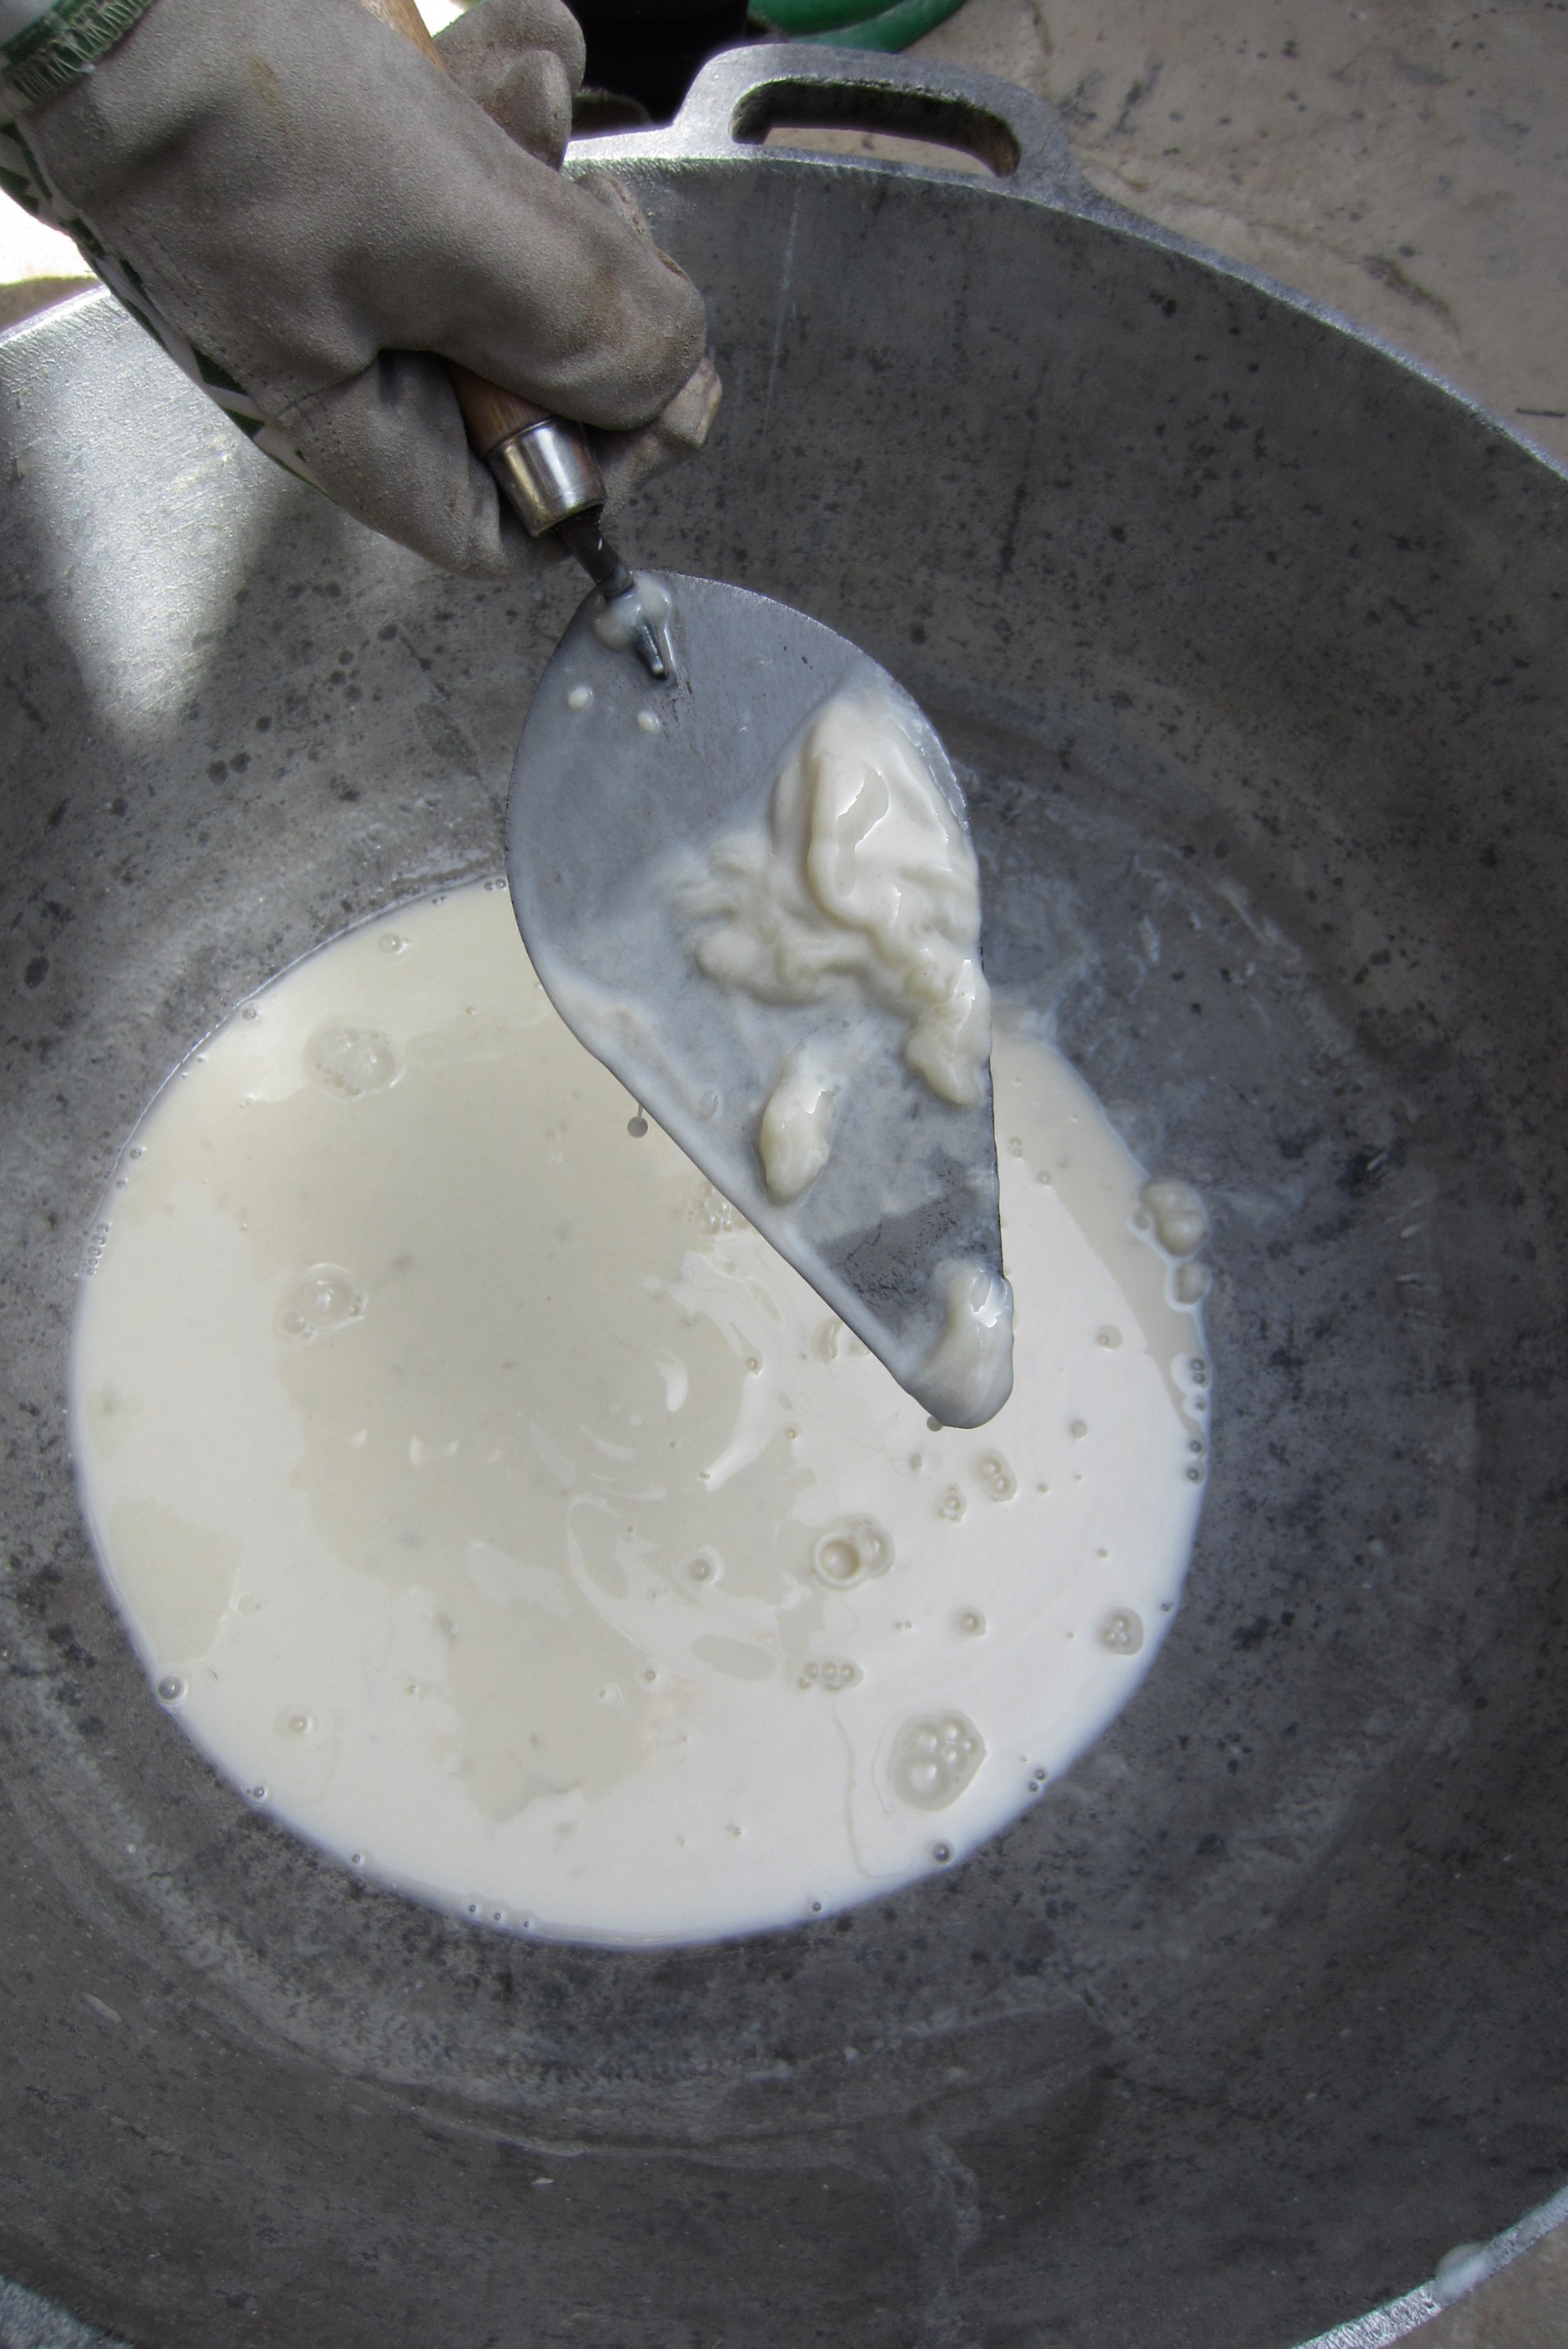
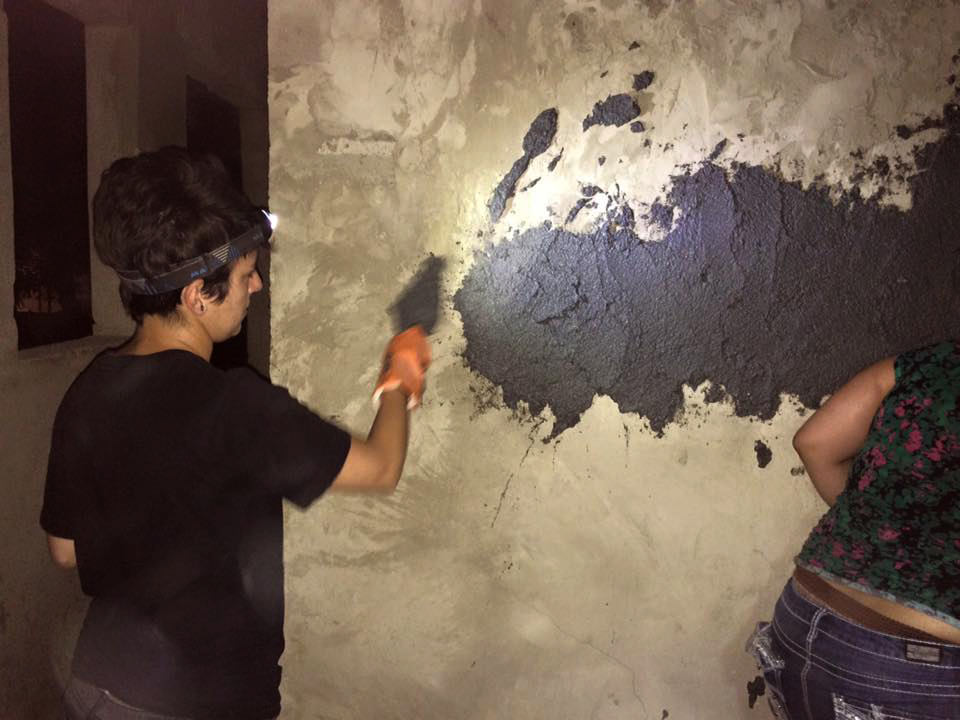
| 14:11, 23 June 2015 | EnriquePlana.jpg (file) |  |
3.16 MB | Applying plaster with a plana. I took this photo 9 Junio, 2015 Botica Popular, Las Malvinas, Santo Domingo | 1 |
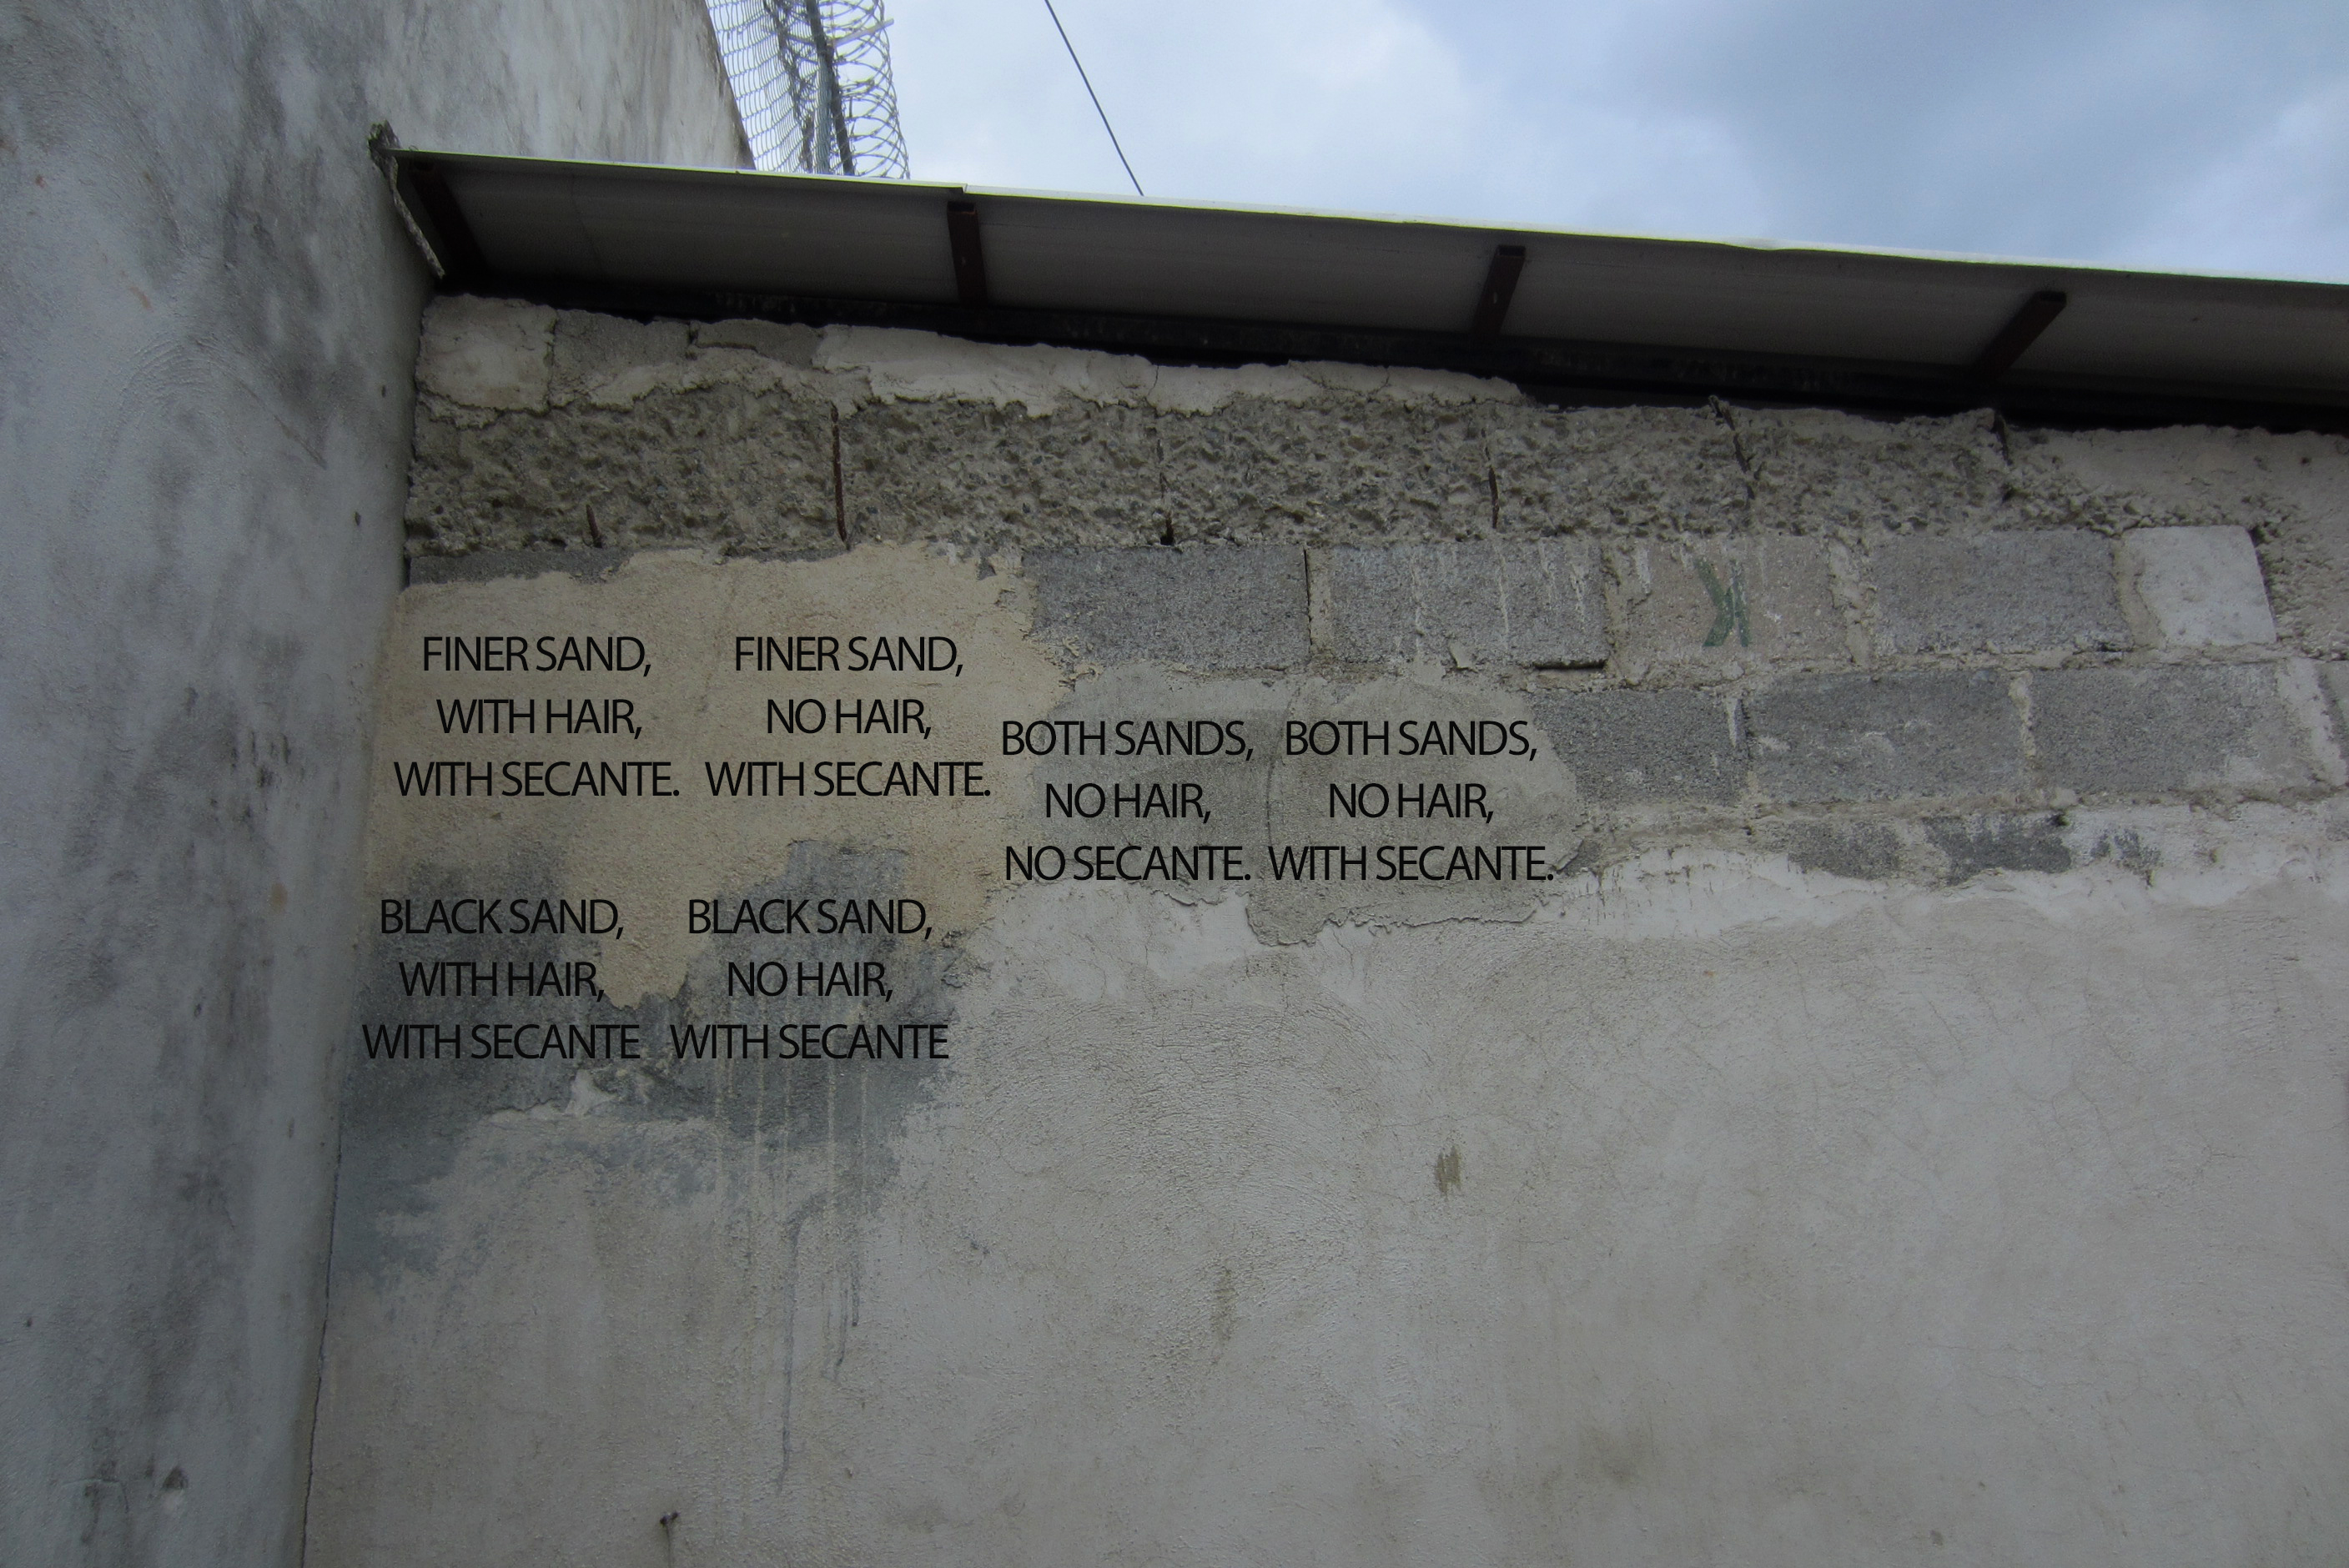
| 13:50, 23 June 2015 | TestPlastersExplained.jpg (file) |  |
2.22 MB | Explanation of Plaster Tests Photo taken by me. 11 Junio 2015. Botica Popular, Las Malvinas, Santo Domingo, Dominican Republic. | 1 |
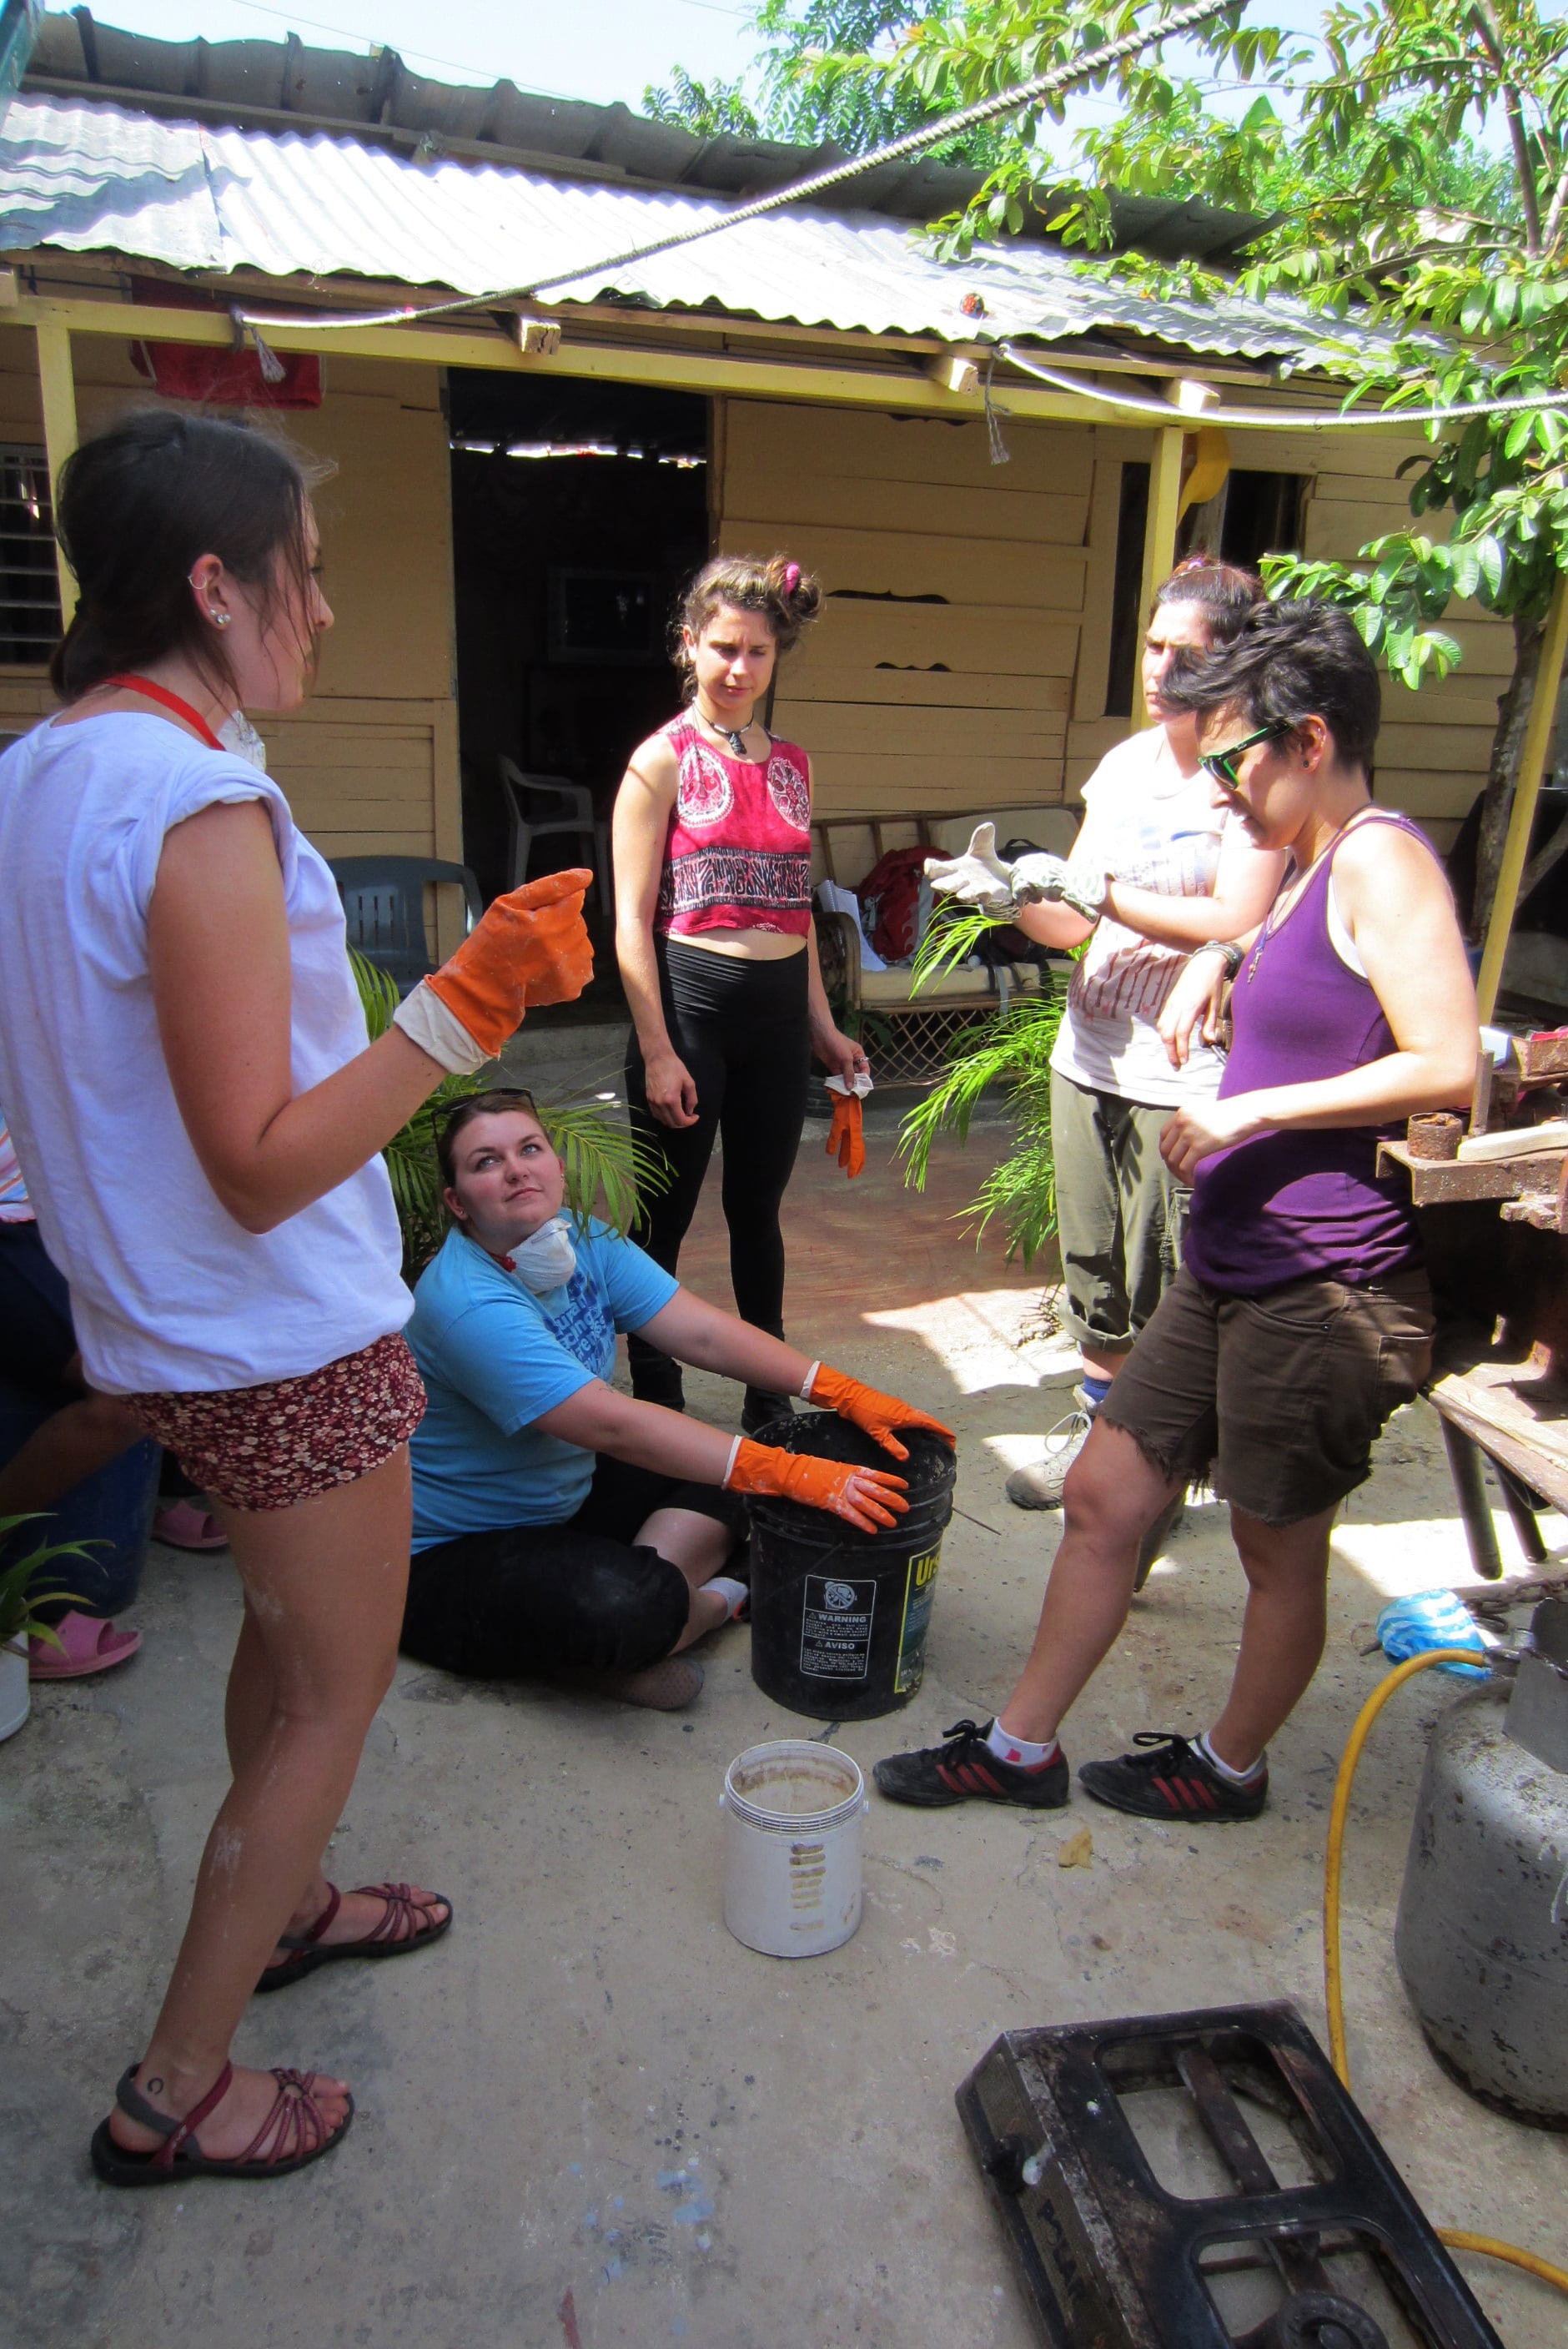
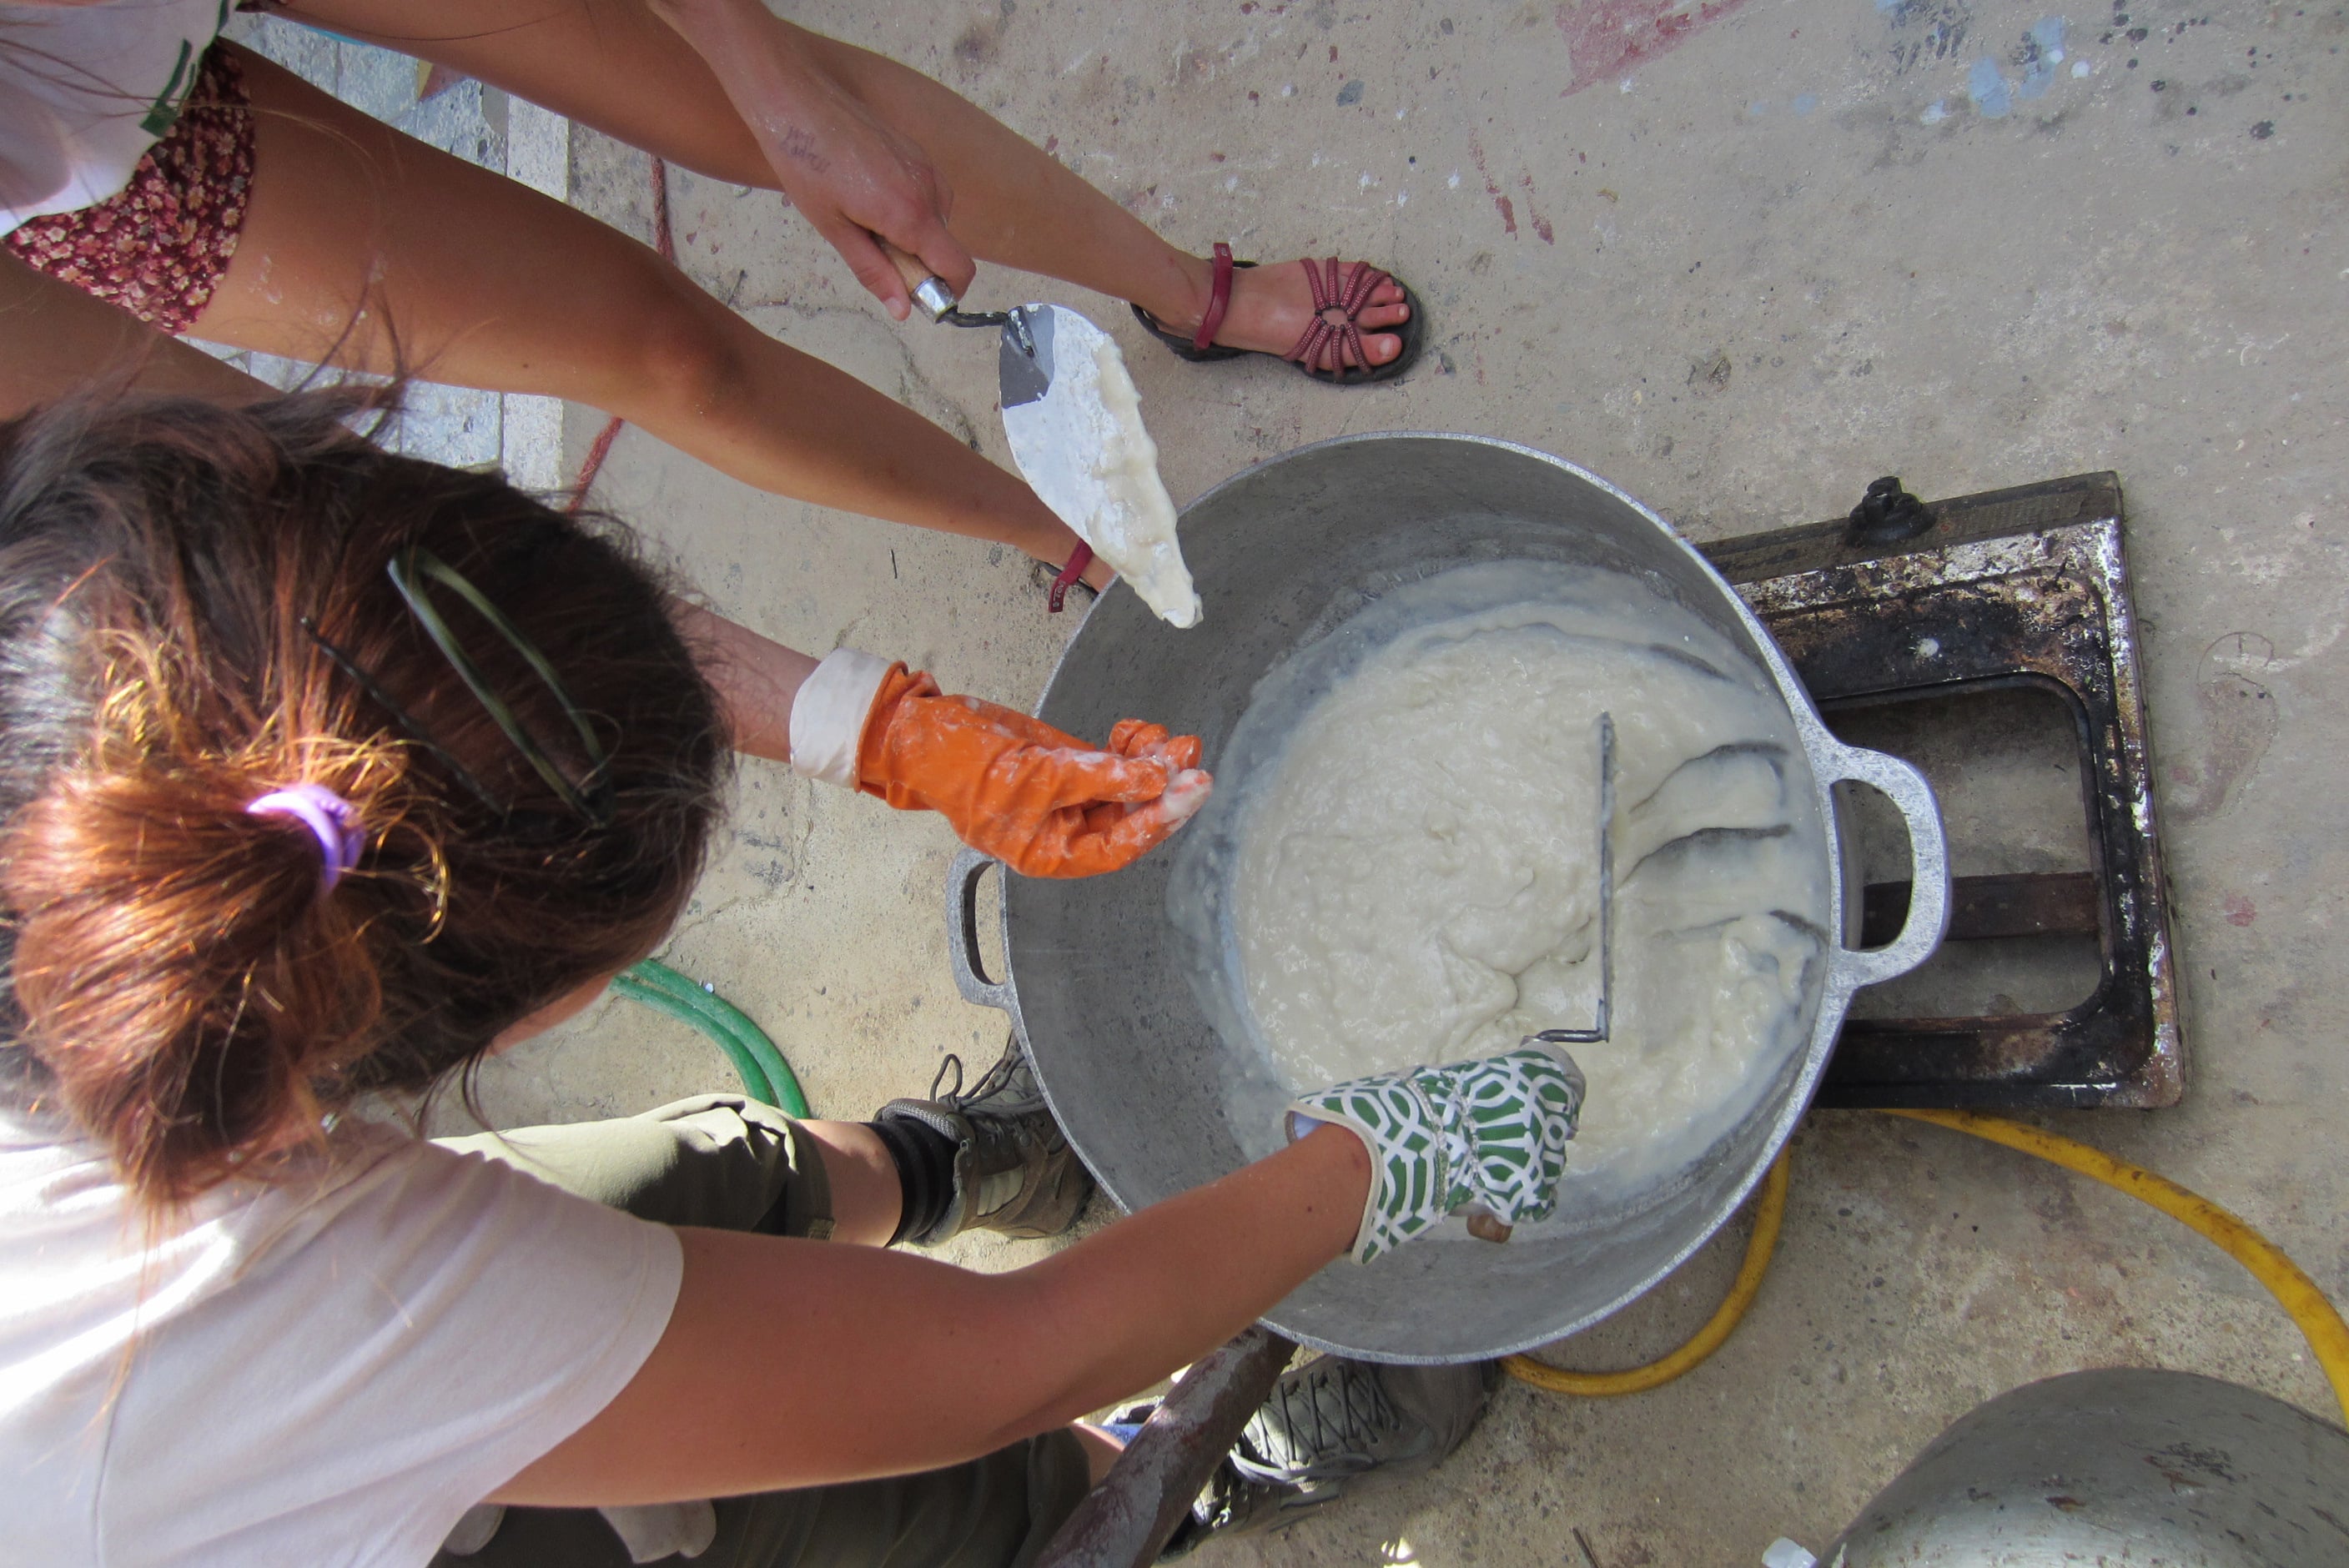
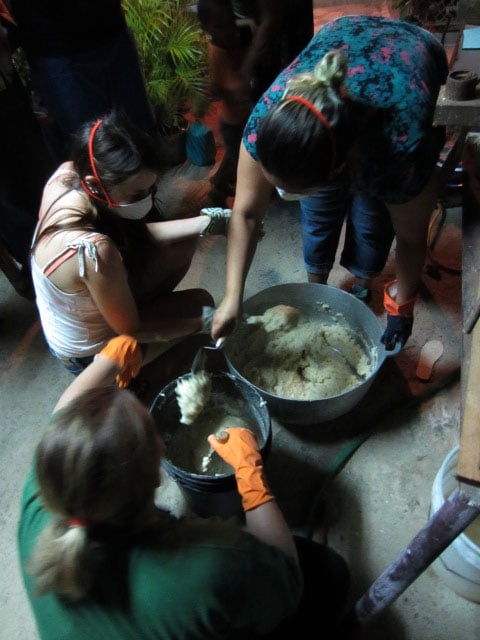
| 14:36, 12 June 2015 | StopandTalk LexieMixture.jpg (file) |  |
2.48 MB | Plastering Day 2: Talking things out! 9 Junio, 2015. Botica Popular, Las Malvinas, Santo Domingo, Dominican Republic Photo by Athena Vescott | 1 |
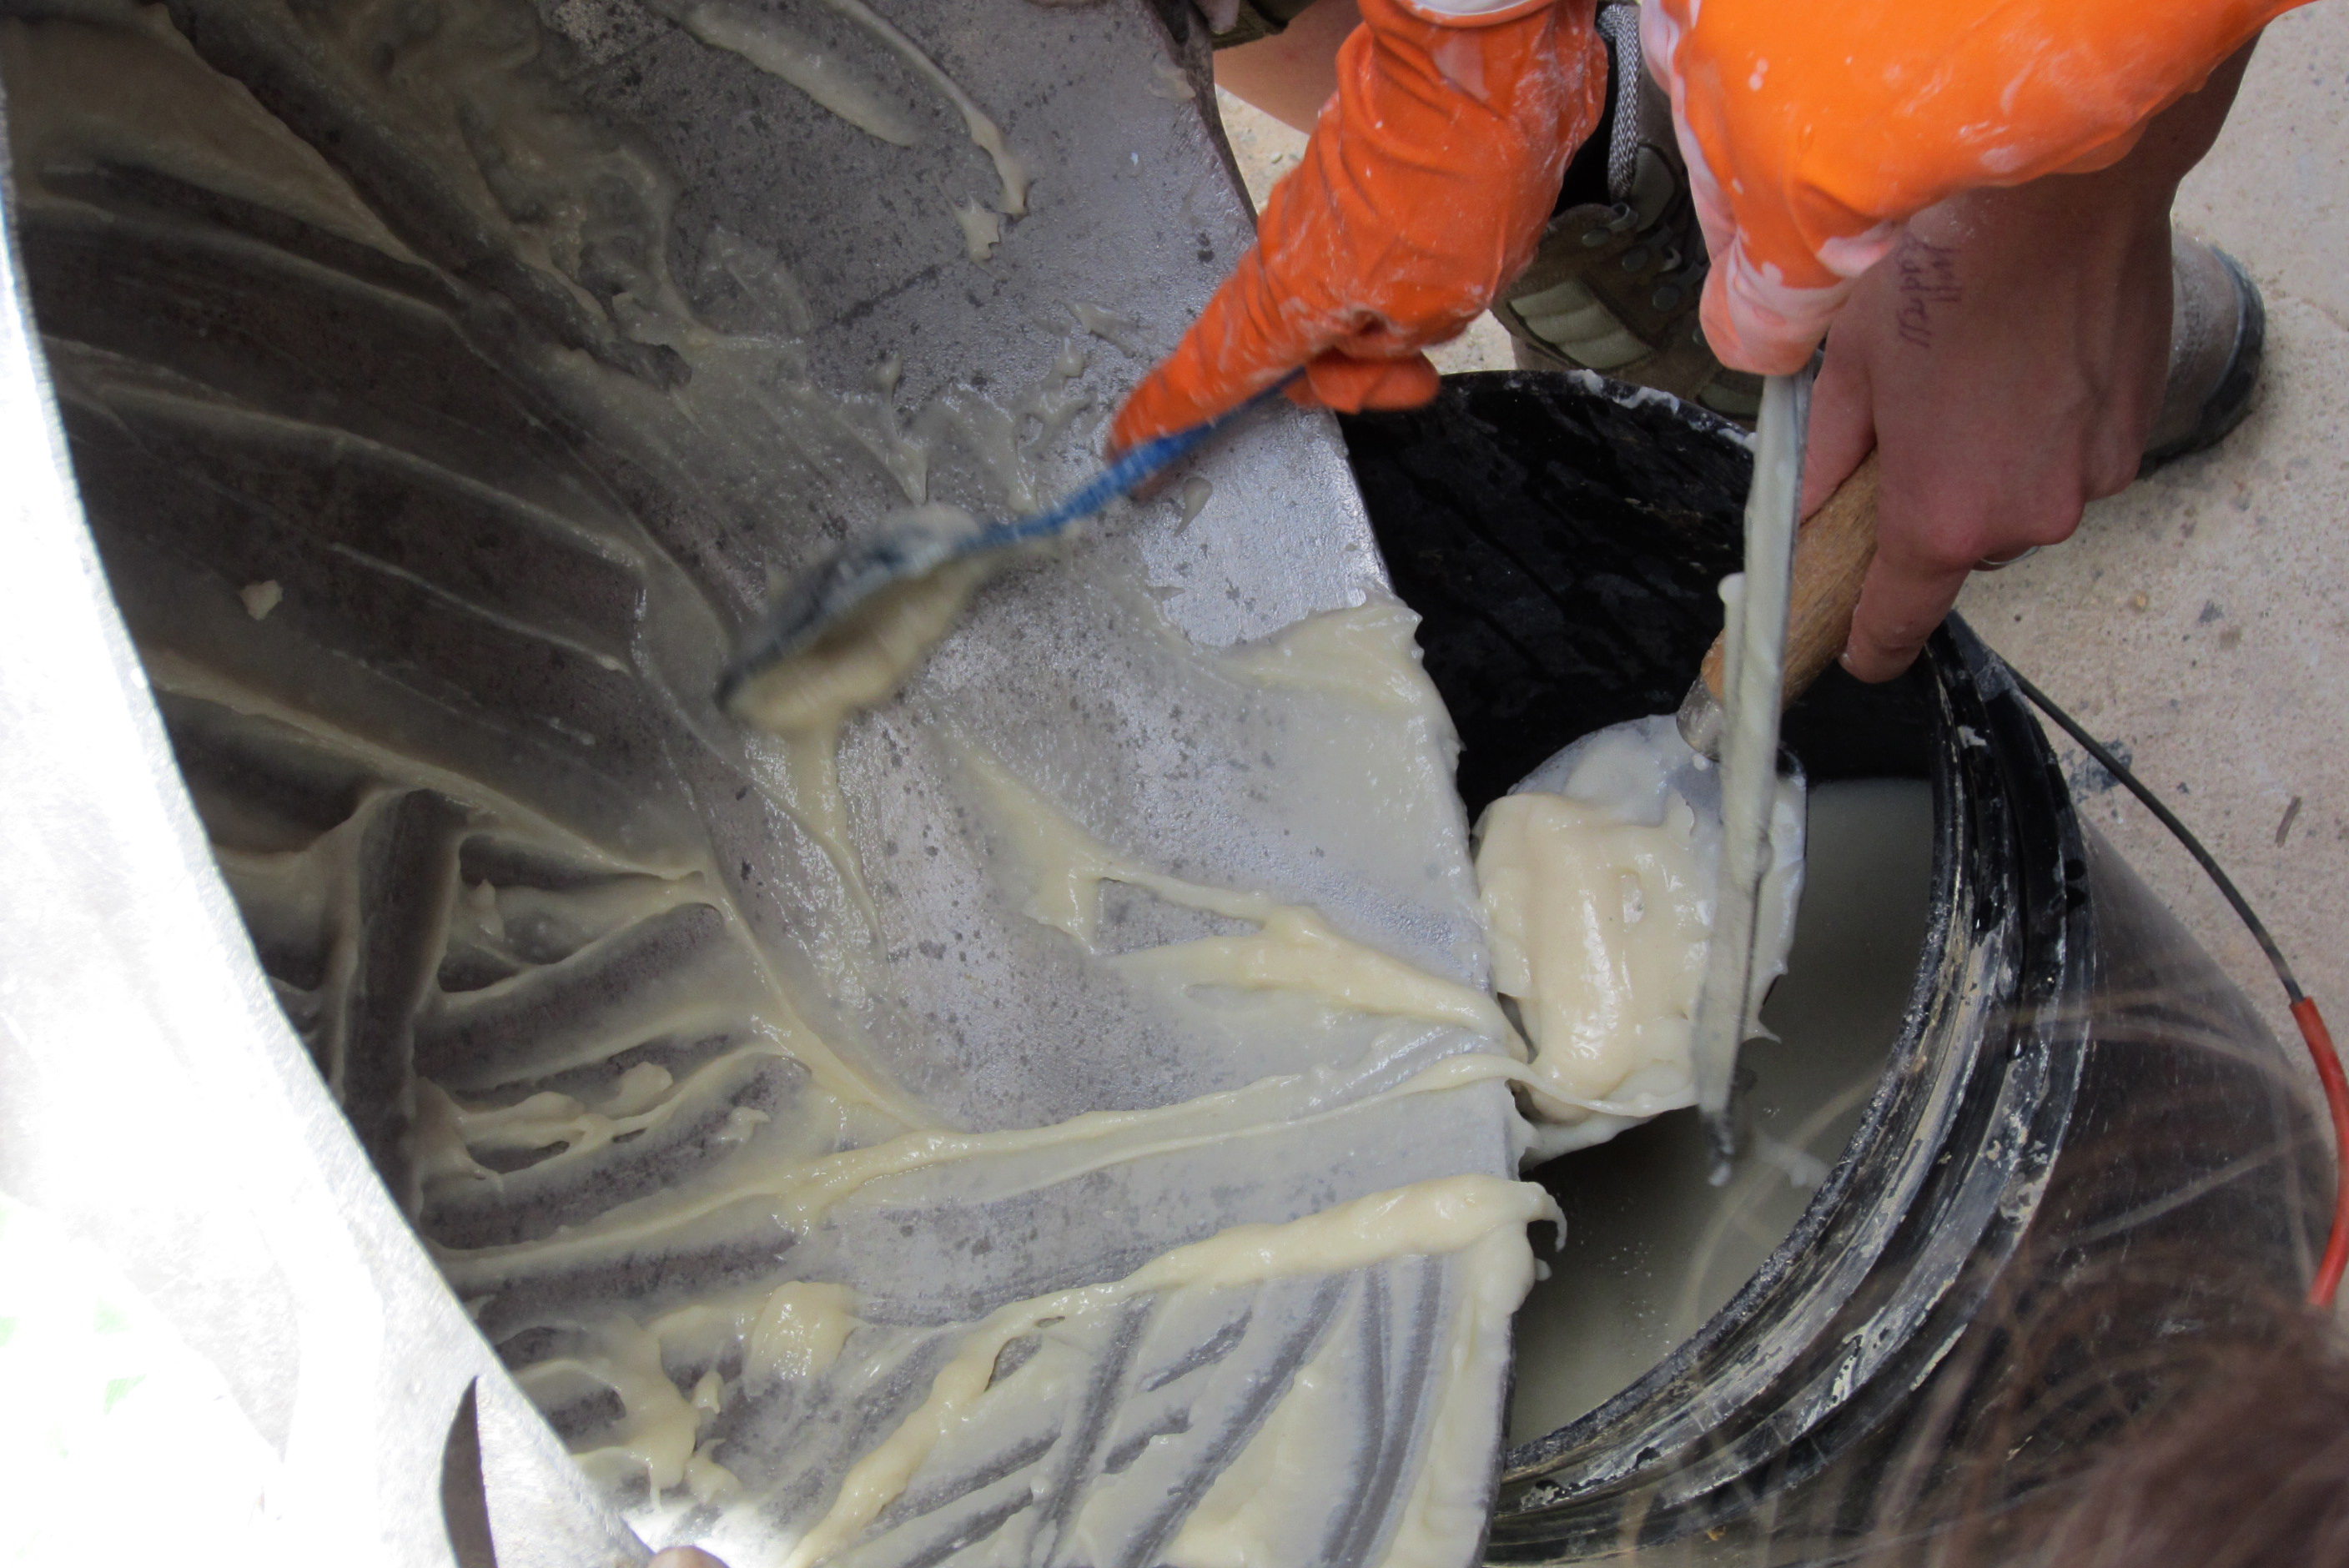
| 14:35, 12 June 2015 | WheatPasteAddToCalWater.jpg (file) |  |
1.8 MB | Plastering Day 2: Adding flour waste to lime water. We put the wheat paste on the trowel then lowered into the lime water to avoid splashing ourselves with the toxic water. 9 Junio, 2015. Botica Popular, Las Malvinas, Santo Domingo, Dominican Republ... | 1 |
| 14:21, 12 June 2015 | Paste thickeningmore.jpg (file) |  |
1.66 MB | Plastering Day 2: The plaster is beginning to thicken! Be sure to scrape the bottom so it doesn't burn. It only looks clumpy because some of it is still runny. Once it's all runny, it's not clumpy, it's smooth, creamy, thick, and sticky! 9 Junio, 2015... | 1 |
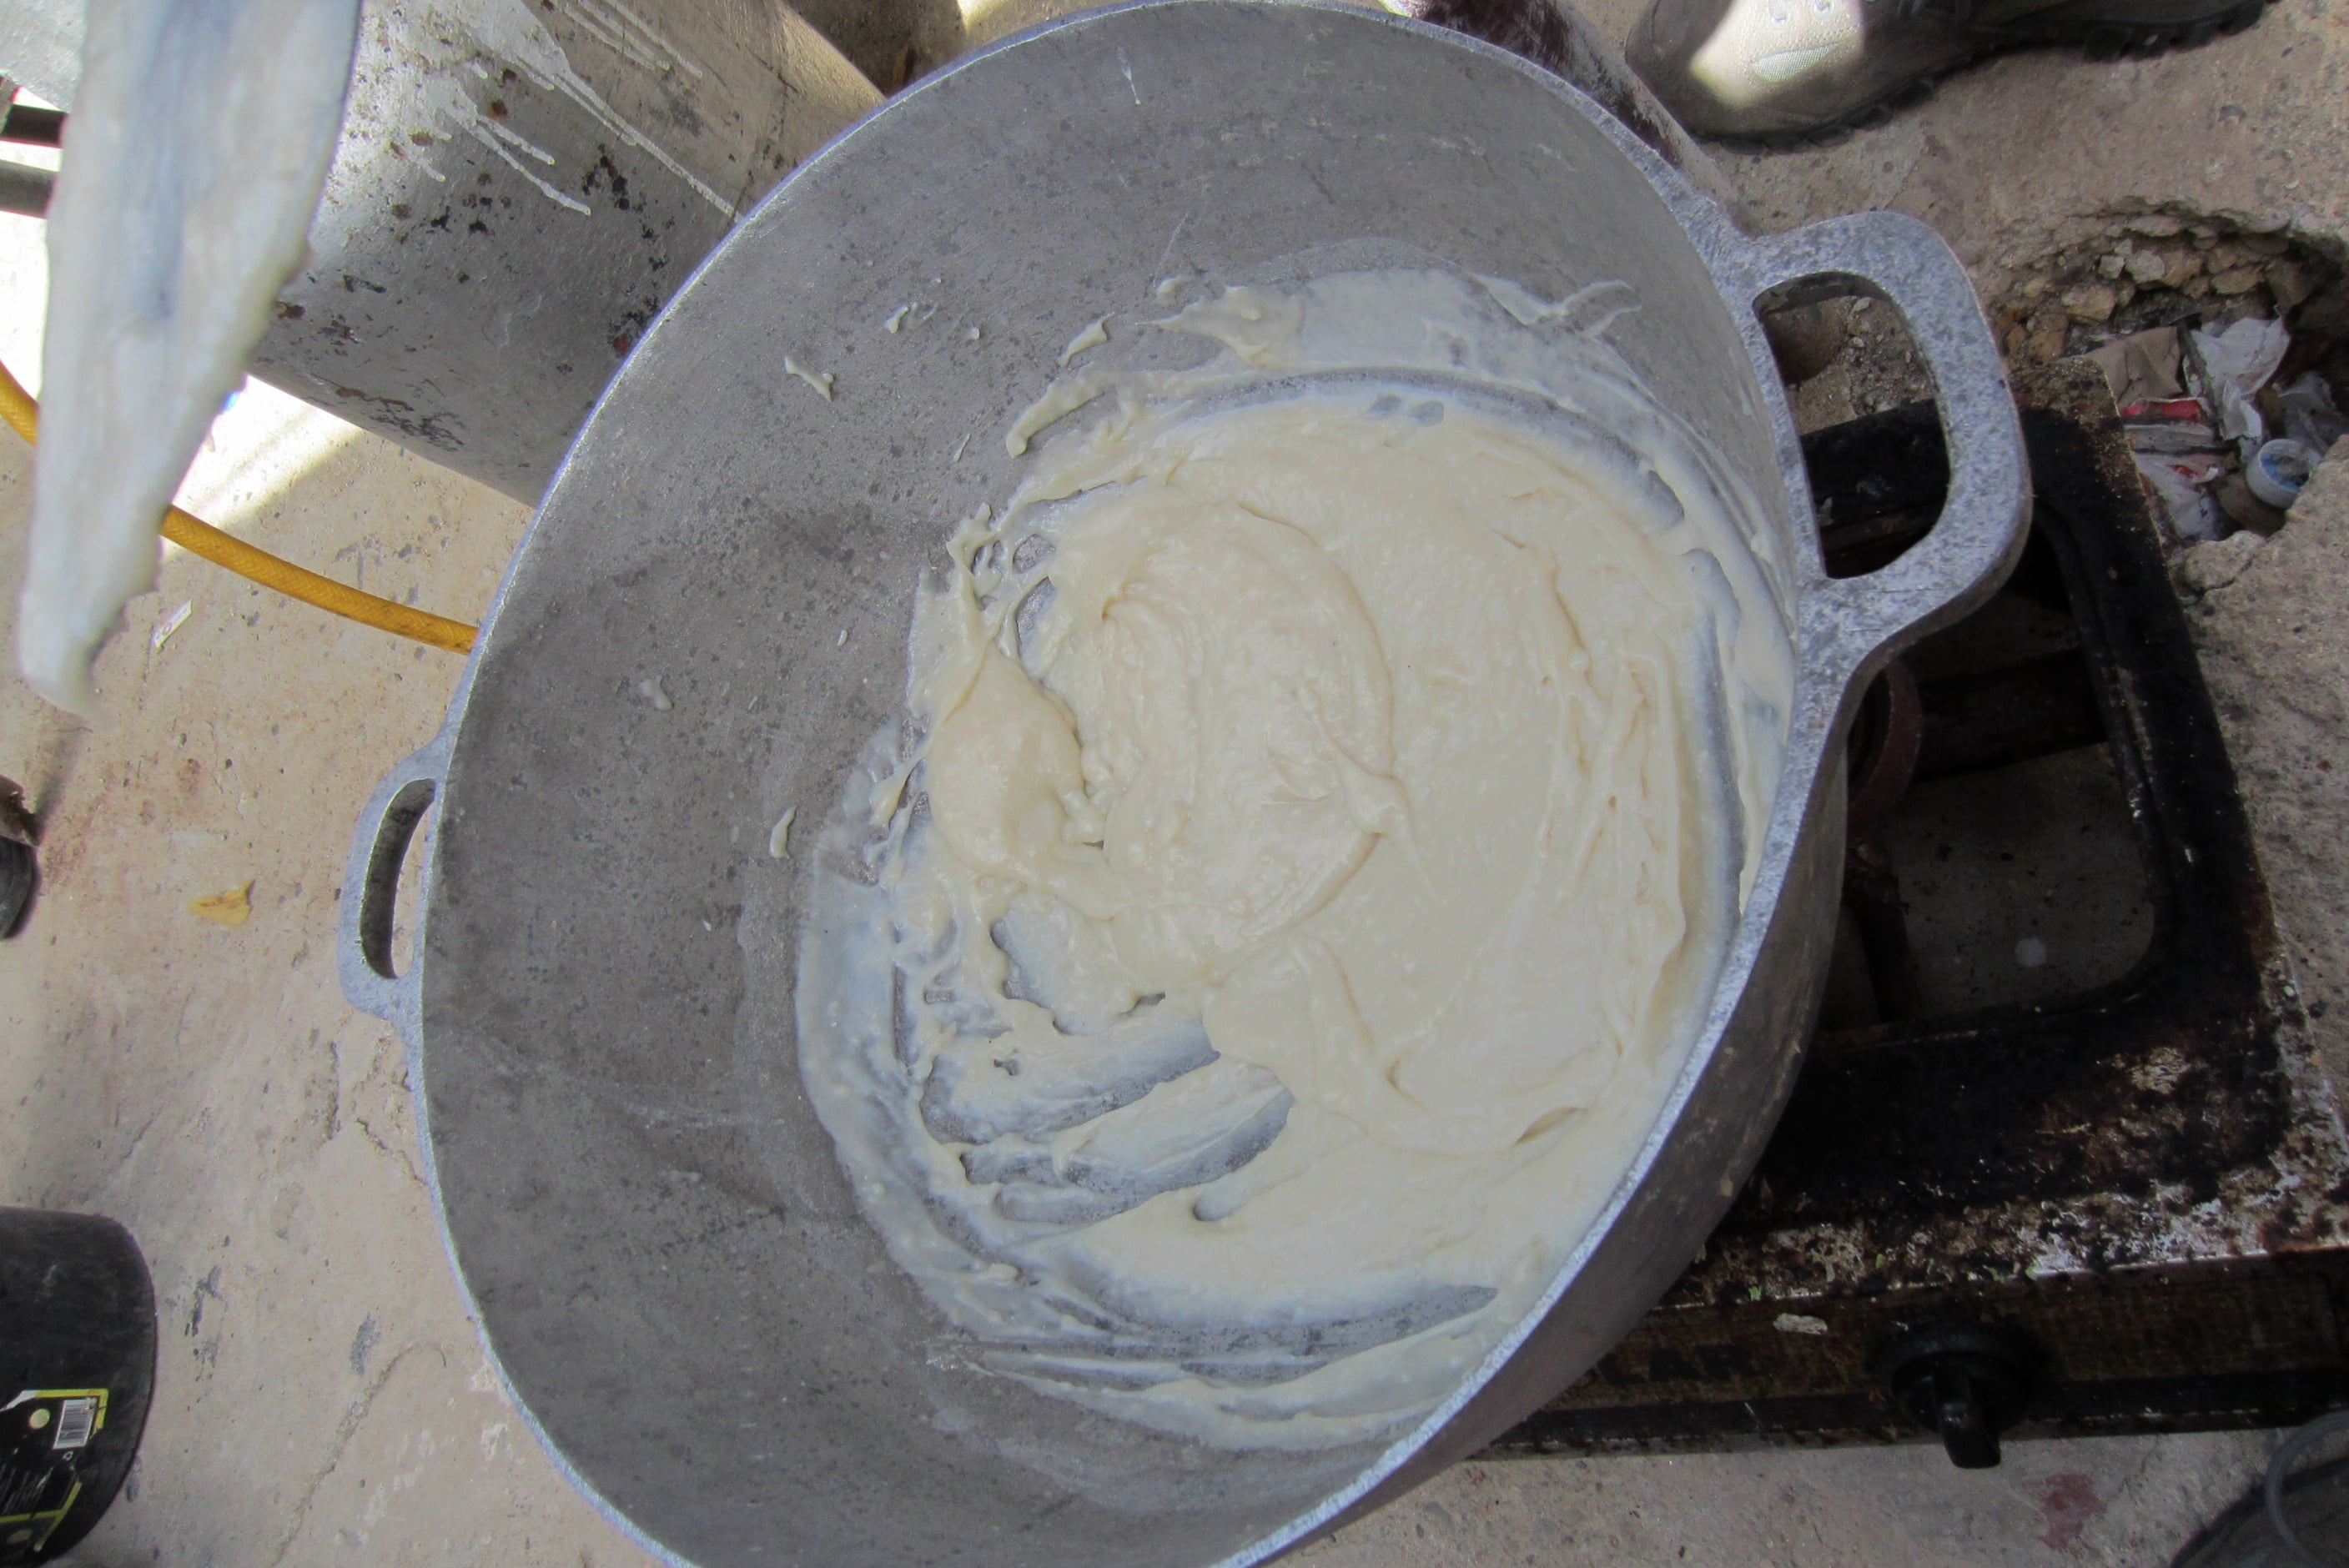
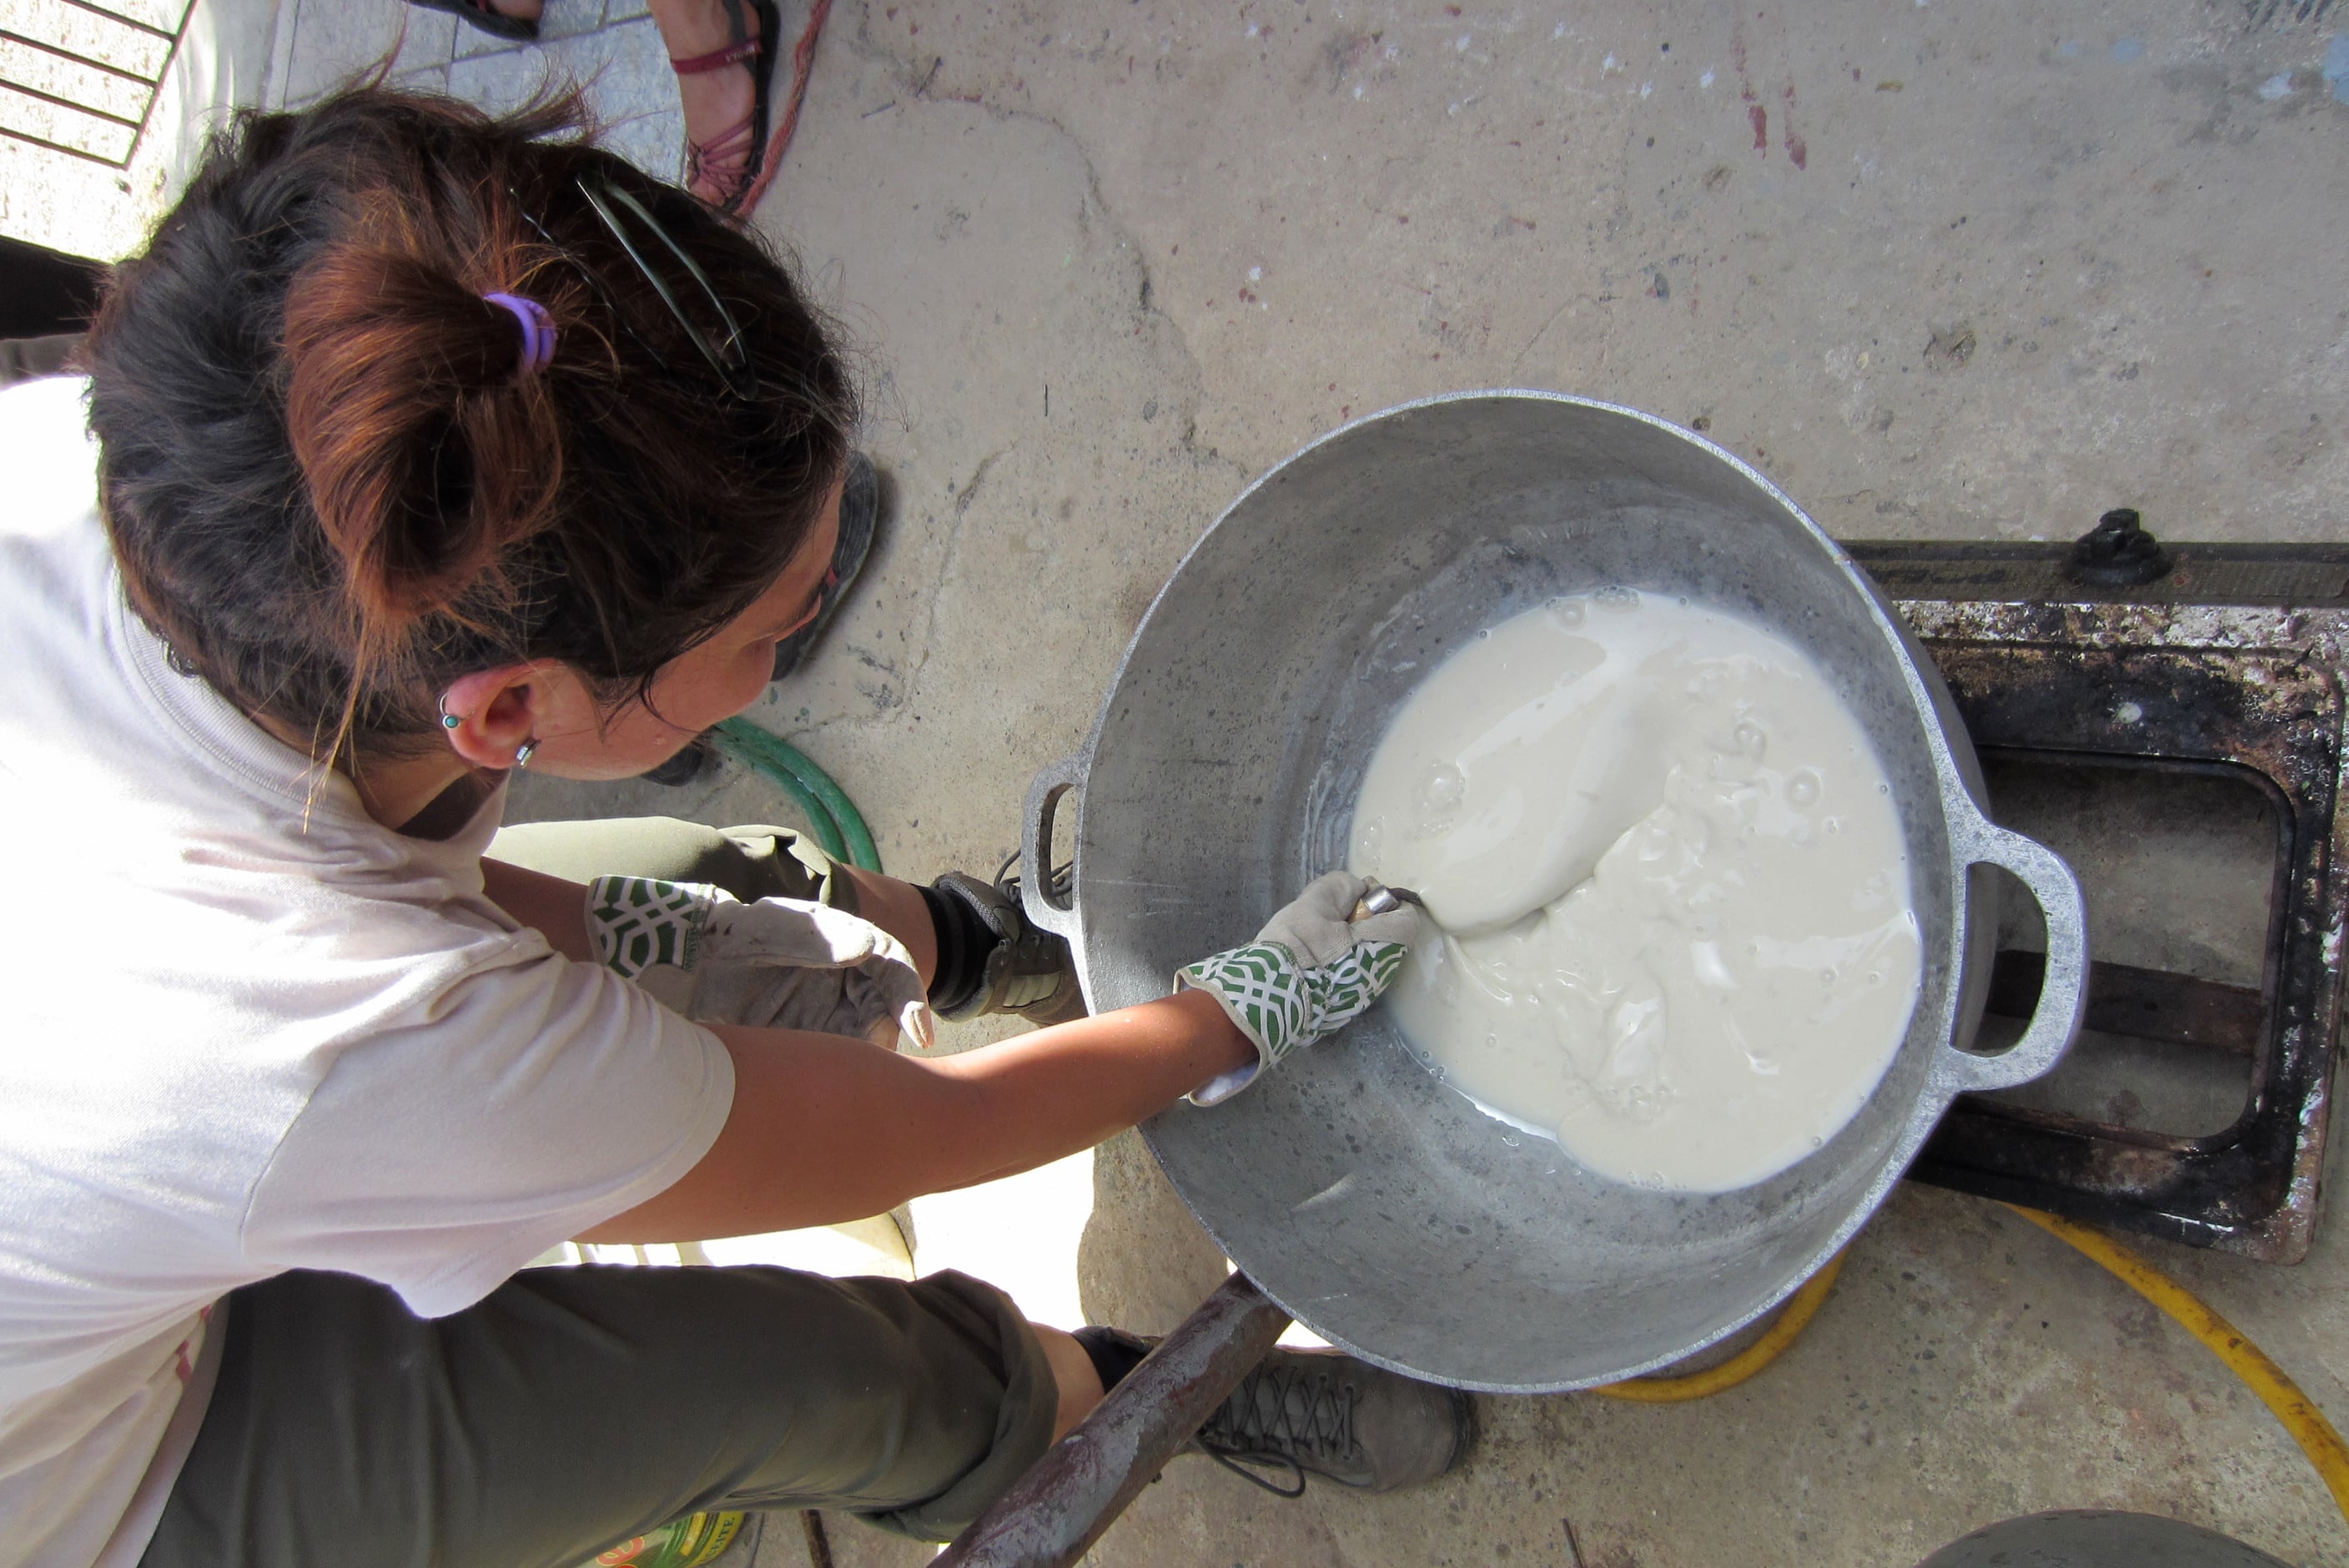
| 14:19, 12 June 2015 | Paste thick.jpg (file) |  |
2.03 MB | Plastering Day 2: Wheat paste is ready! It's thick and sticks to itself! 9 Junio, 2015. Botica Popular, Las Malvinas, Santo Domingo, Dominican Republic | 1 |
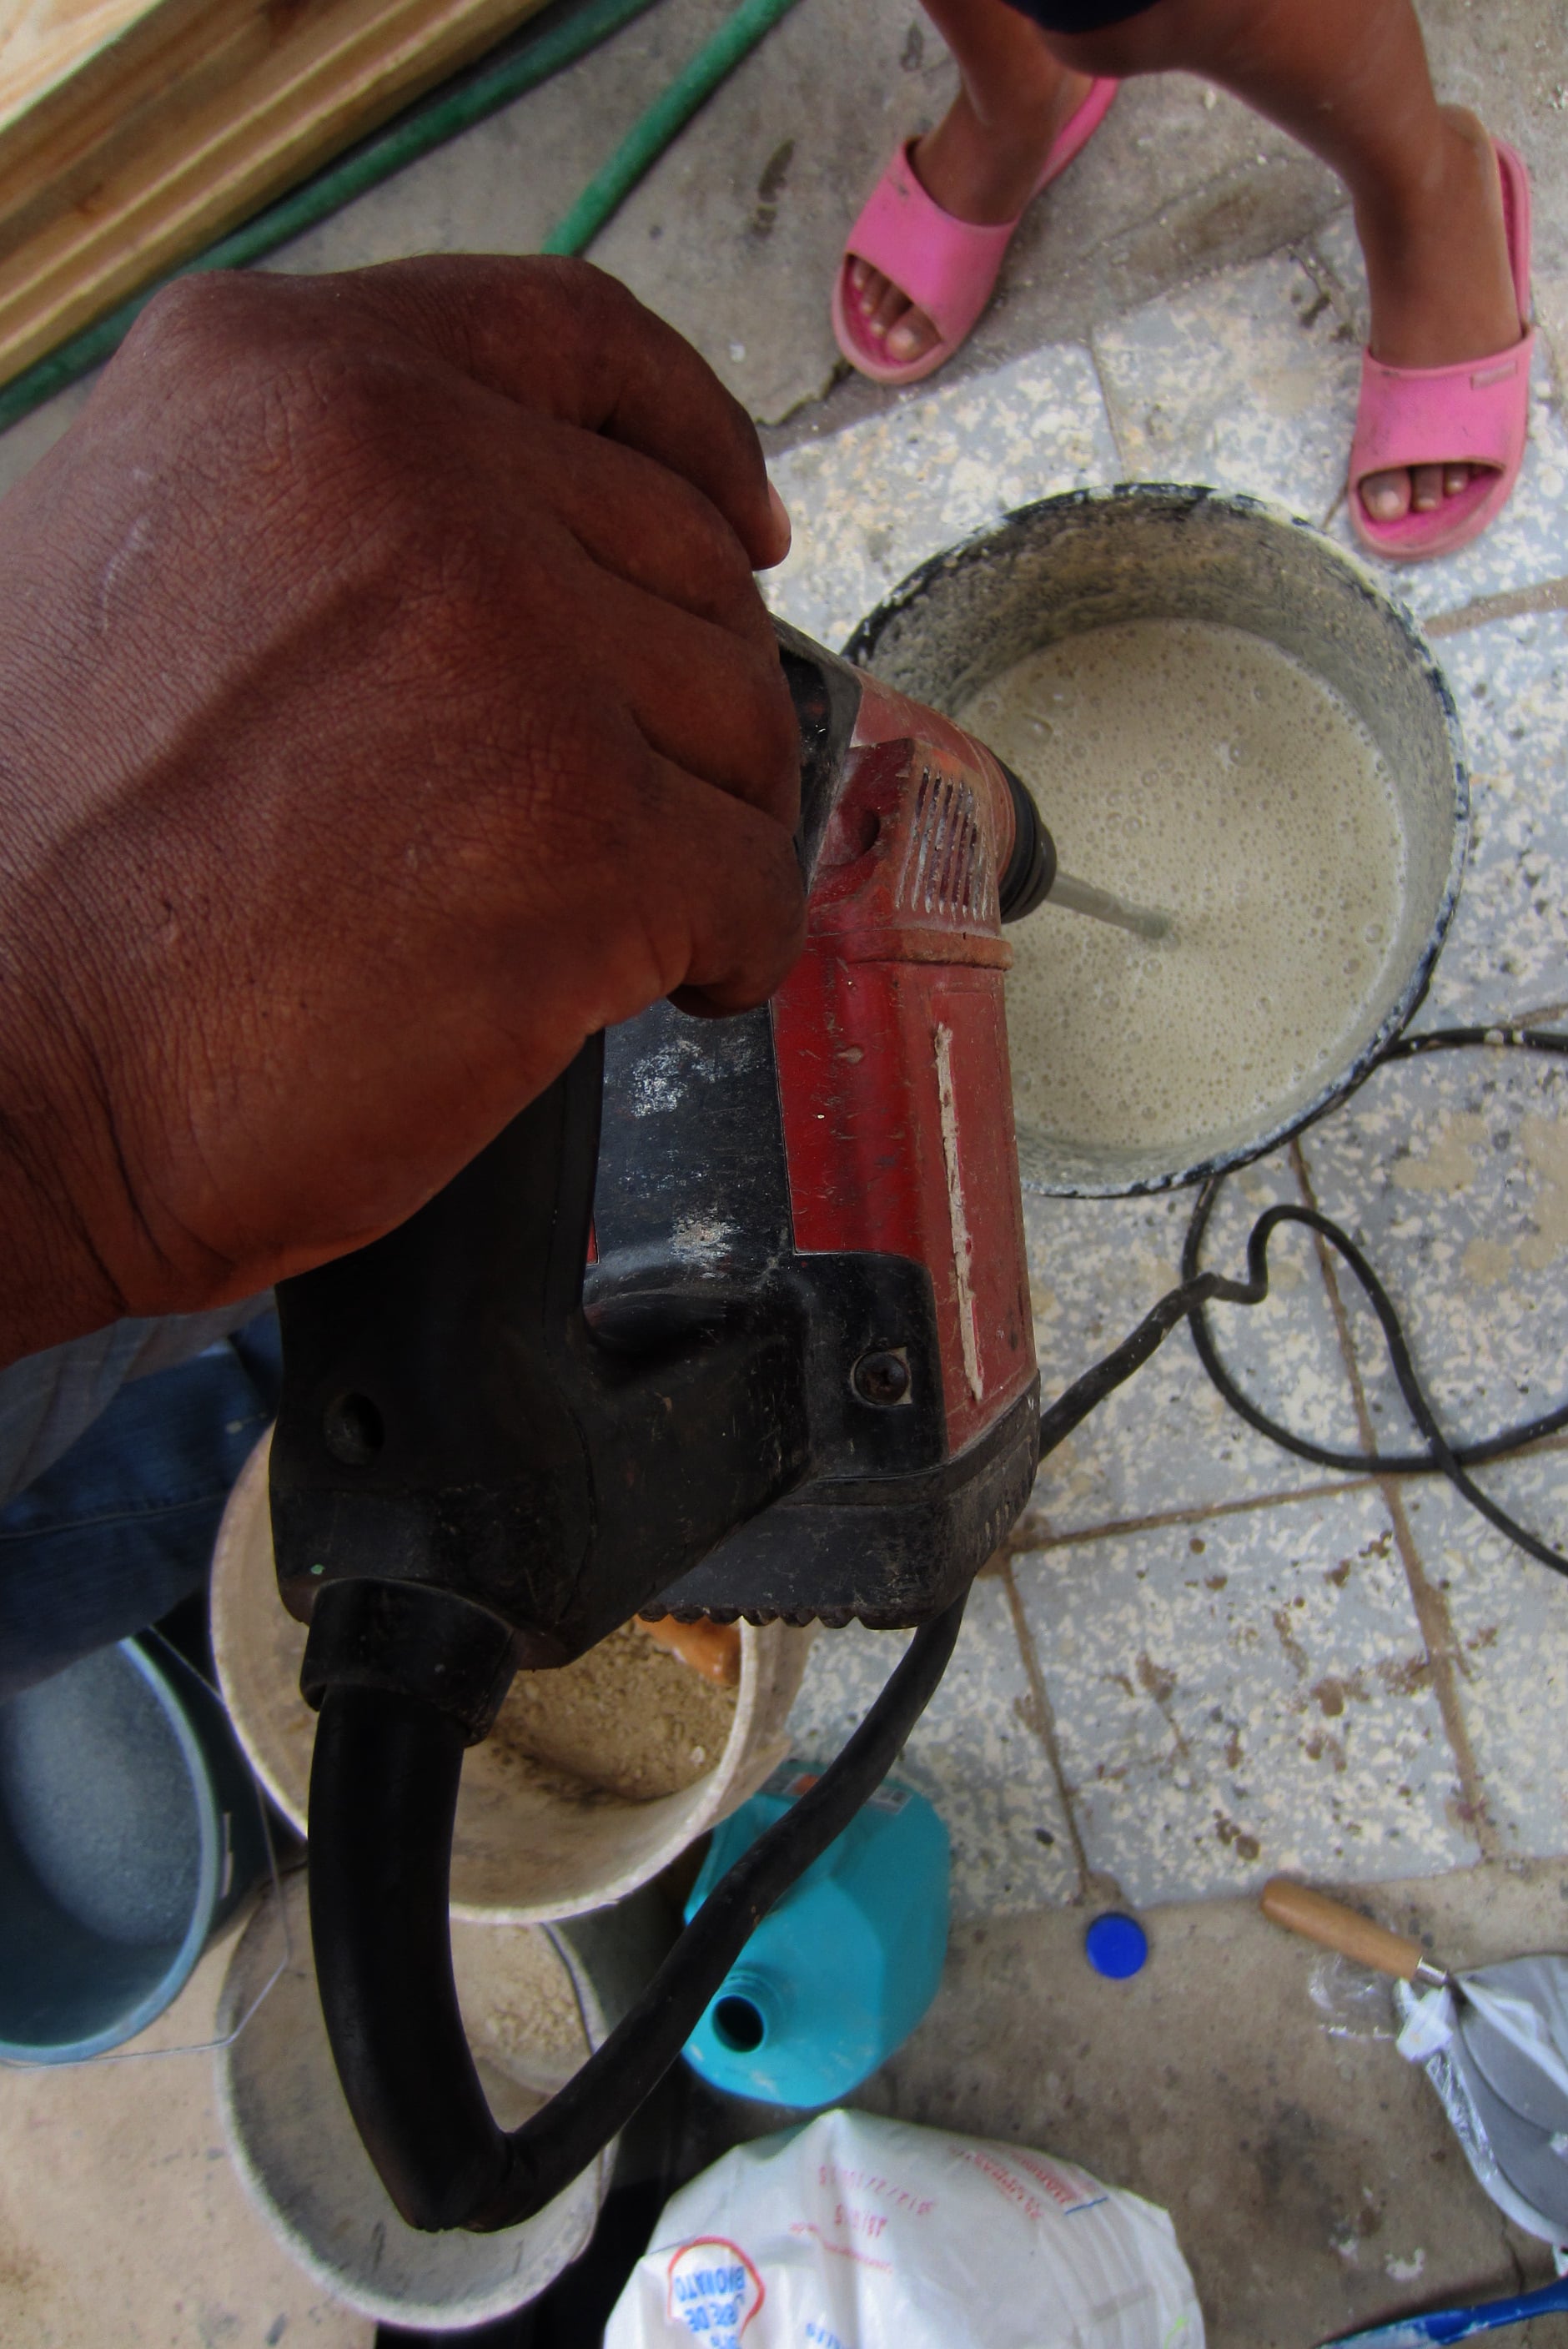
| 14:18, 12 June 2015 | MixingMixture.jpg (file) |  |
2.04 MB | Plastering Day 2: Mixing the mixture was a lot easier and less messy with this large mixing device! | 1 |
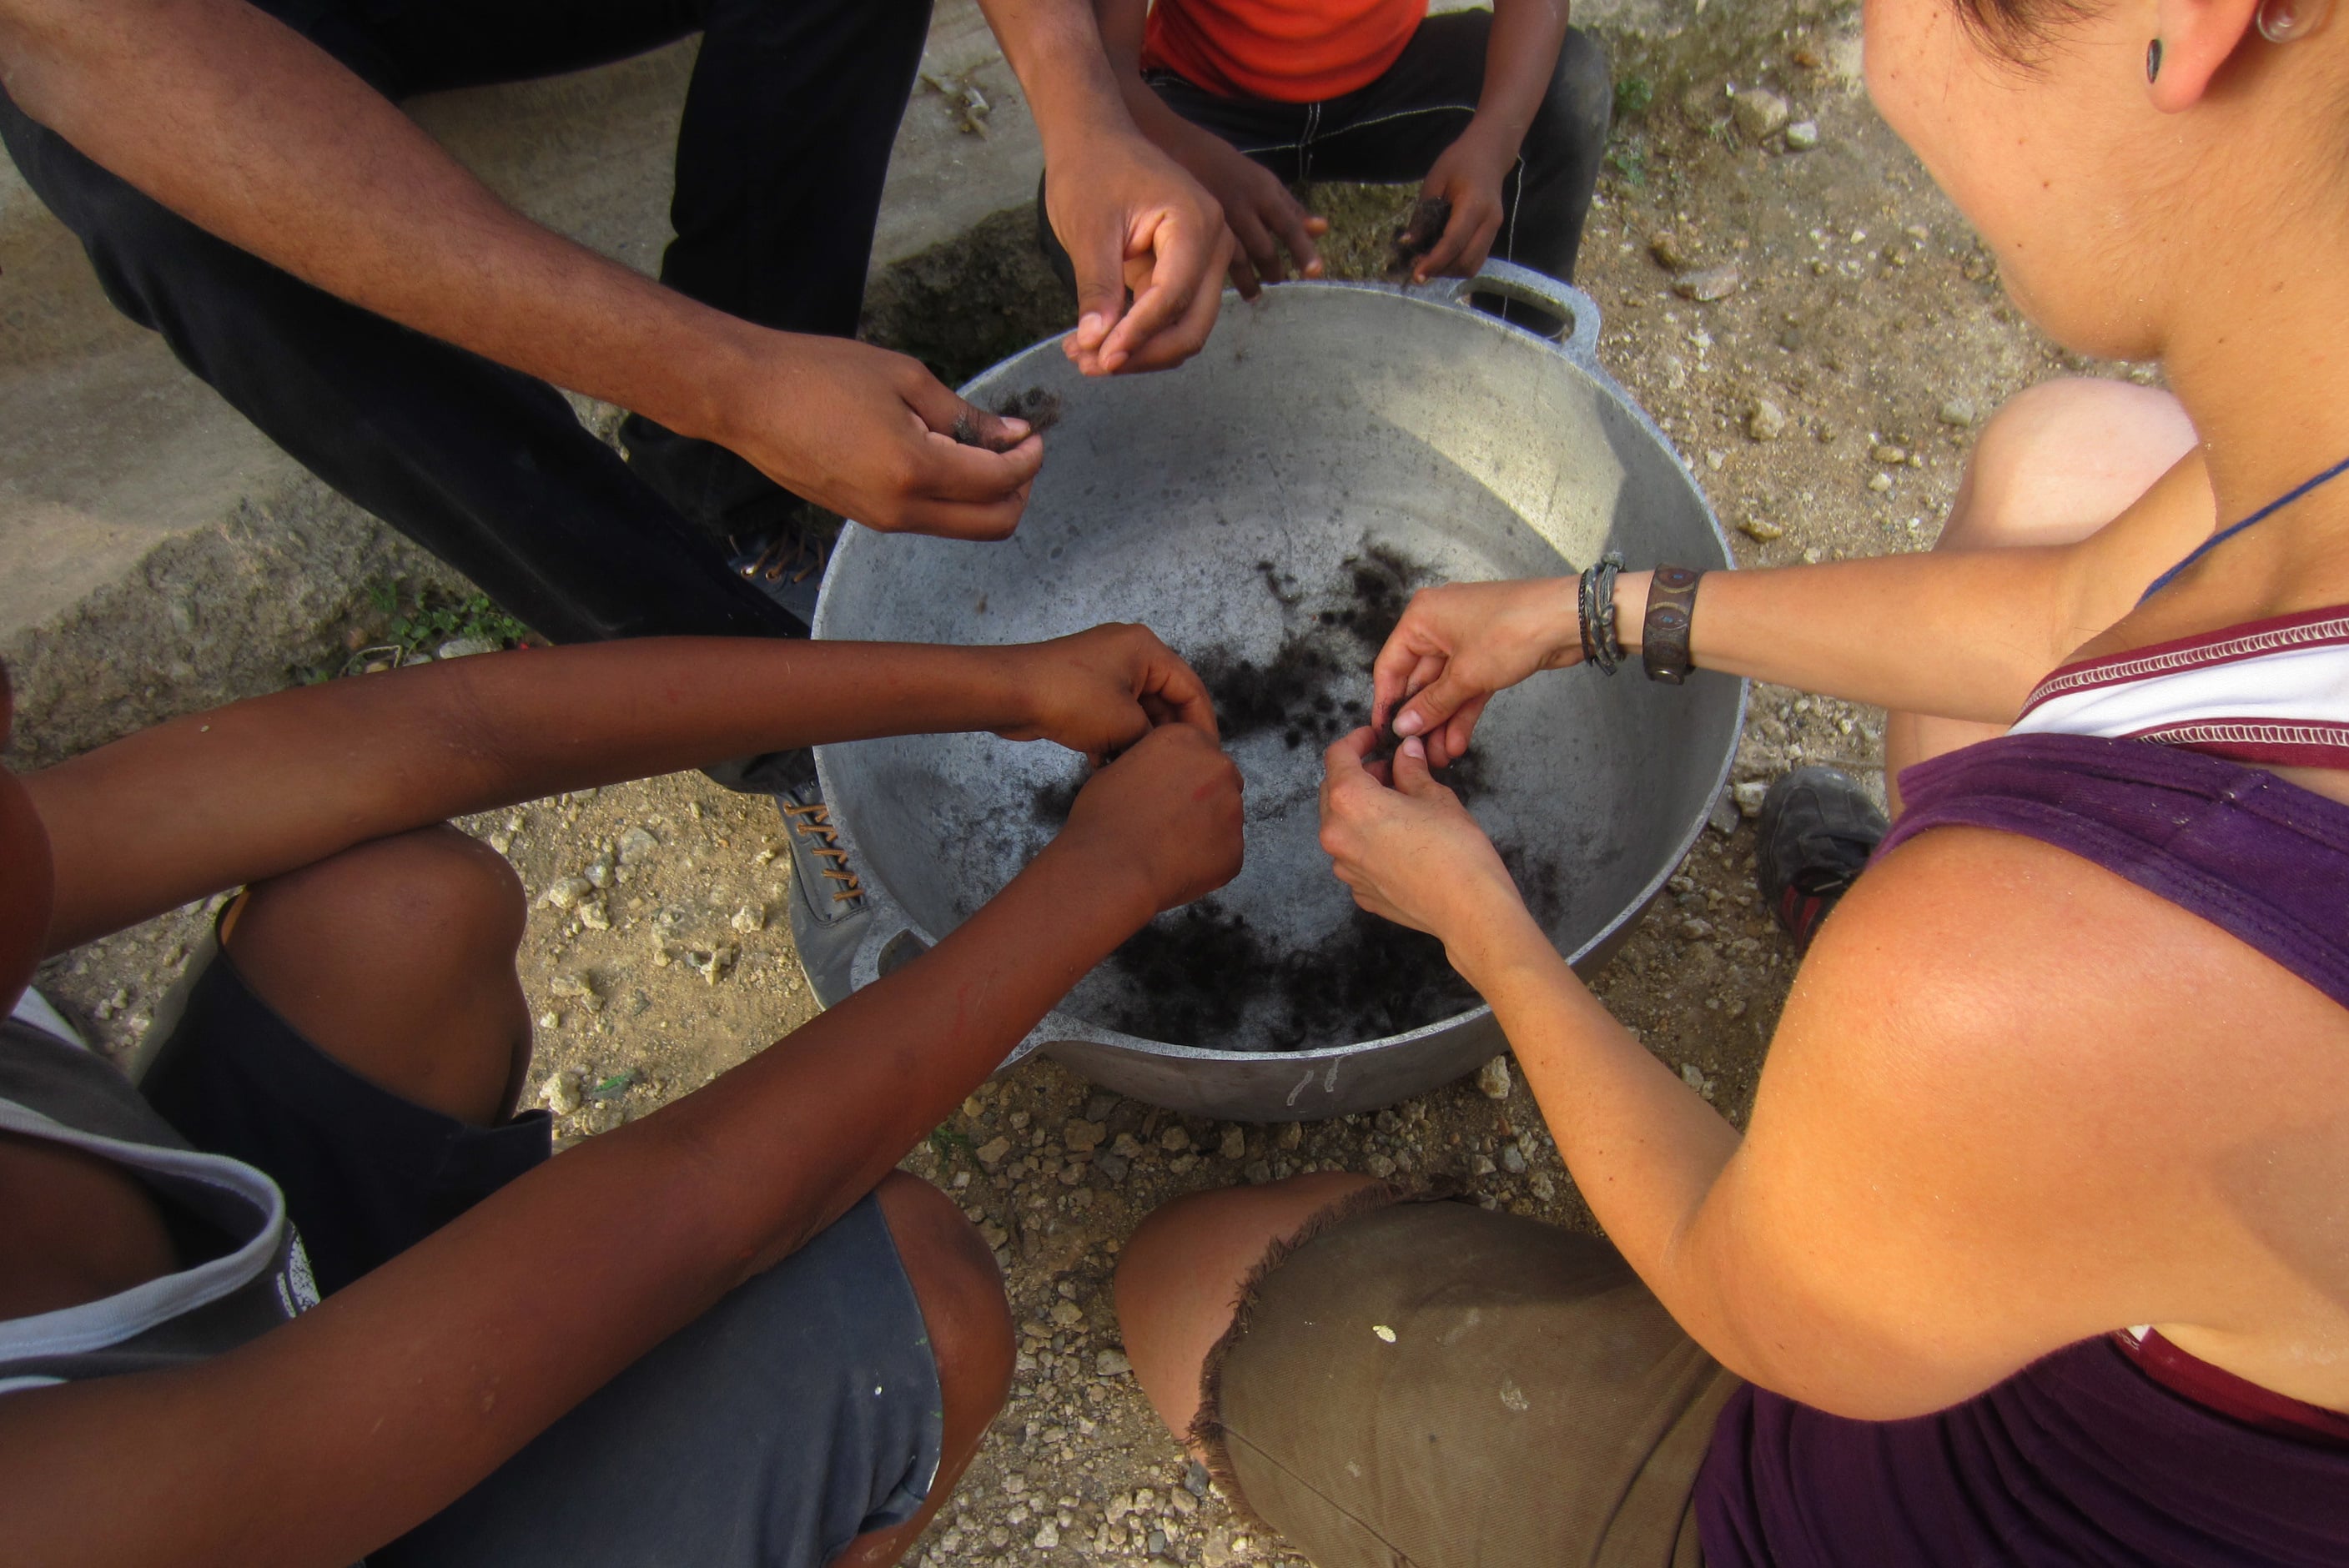
| 14:06, 12 June 2015 | HairPullingApart.jpg (file) |  |
2.01 MB | Plastering Day 2: Pulling the hair apart after it has been washed. 9 Junio, 2015. Botica Popular, Las Malvinas, Santo Domingo, Dominican Republic. Photo taken by community child. | 1 |
| 13:57, 12 June 2015 | CarleyMixingPaste thickeningmoretexture.jpg (file) |  |
2.17 MB | Plastering Day 2: Wheat paste is almost ready. Texture is very thick and gluey and a little lumpy, but only until the runny stuff also thickens up. It is beginning to stick to itself. 9 Junio, 2015. Botica Popular, Las Malvinas, Santo Domingo, Domini... | 1 |
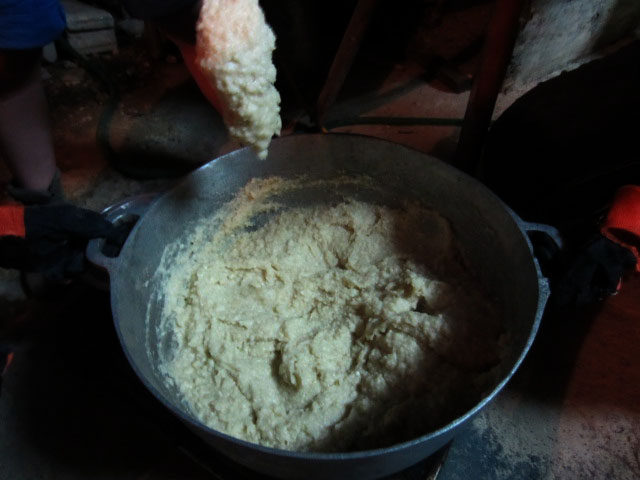
| 13:53, 12 June 2015 | CarleyMixingPaste thickeningmore.jpg (file) |  |
1.87 MB | Plastering Day 2: Wheat Paste being cooked. It is thickening even more and getting glue like and less runny. 9 Junio, 2015. Botica Popular, Las Malvinas, Santo Domingo, Dominican Republic | 1 |
| 13:41, 12 June 2015 | CarleyMixingPaste thickening.jpg (file) |  |
2.02 MB | Plastering Day 2: Carley mixing the wheat paste. It is beginning to get creamy and thicken. 9 Junio, 2015. Botica Popular, Las Malvinas, Santo Domingo, Dominican Republic | 1 |
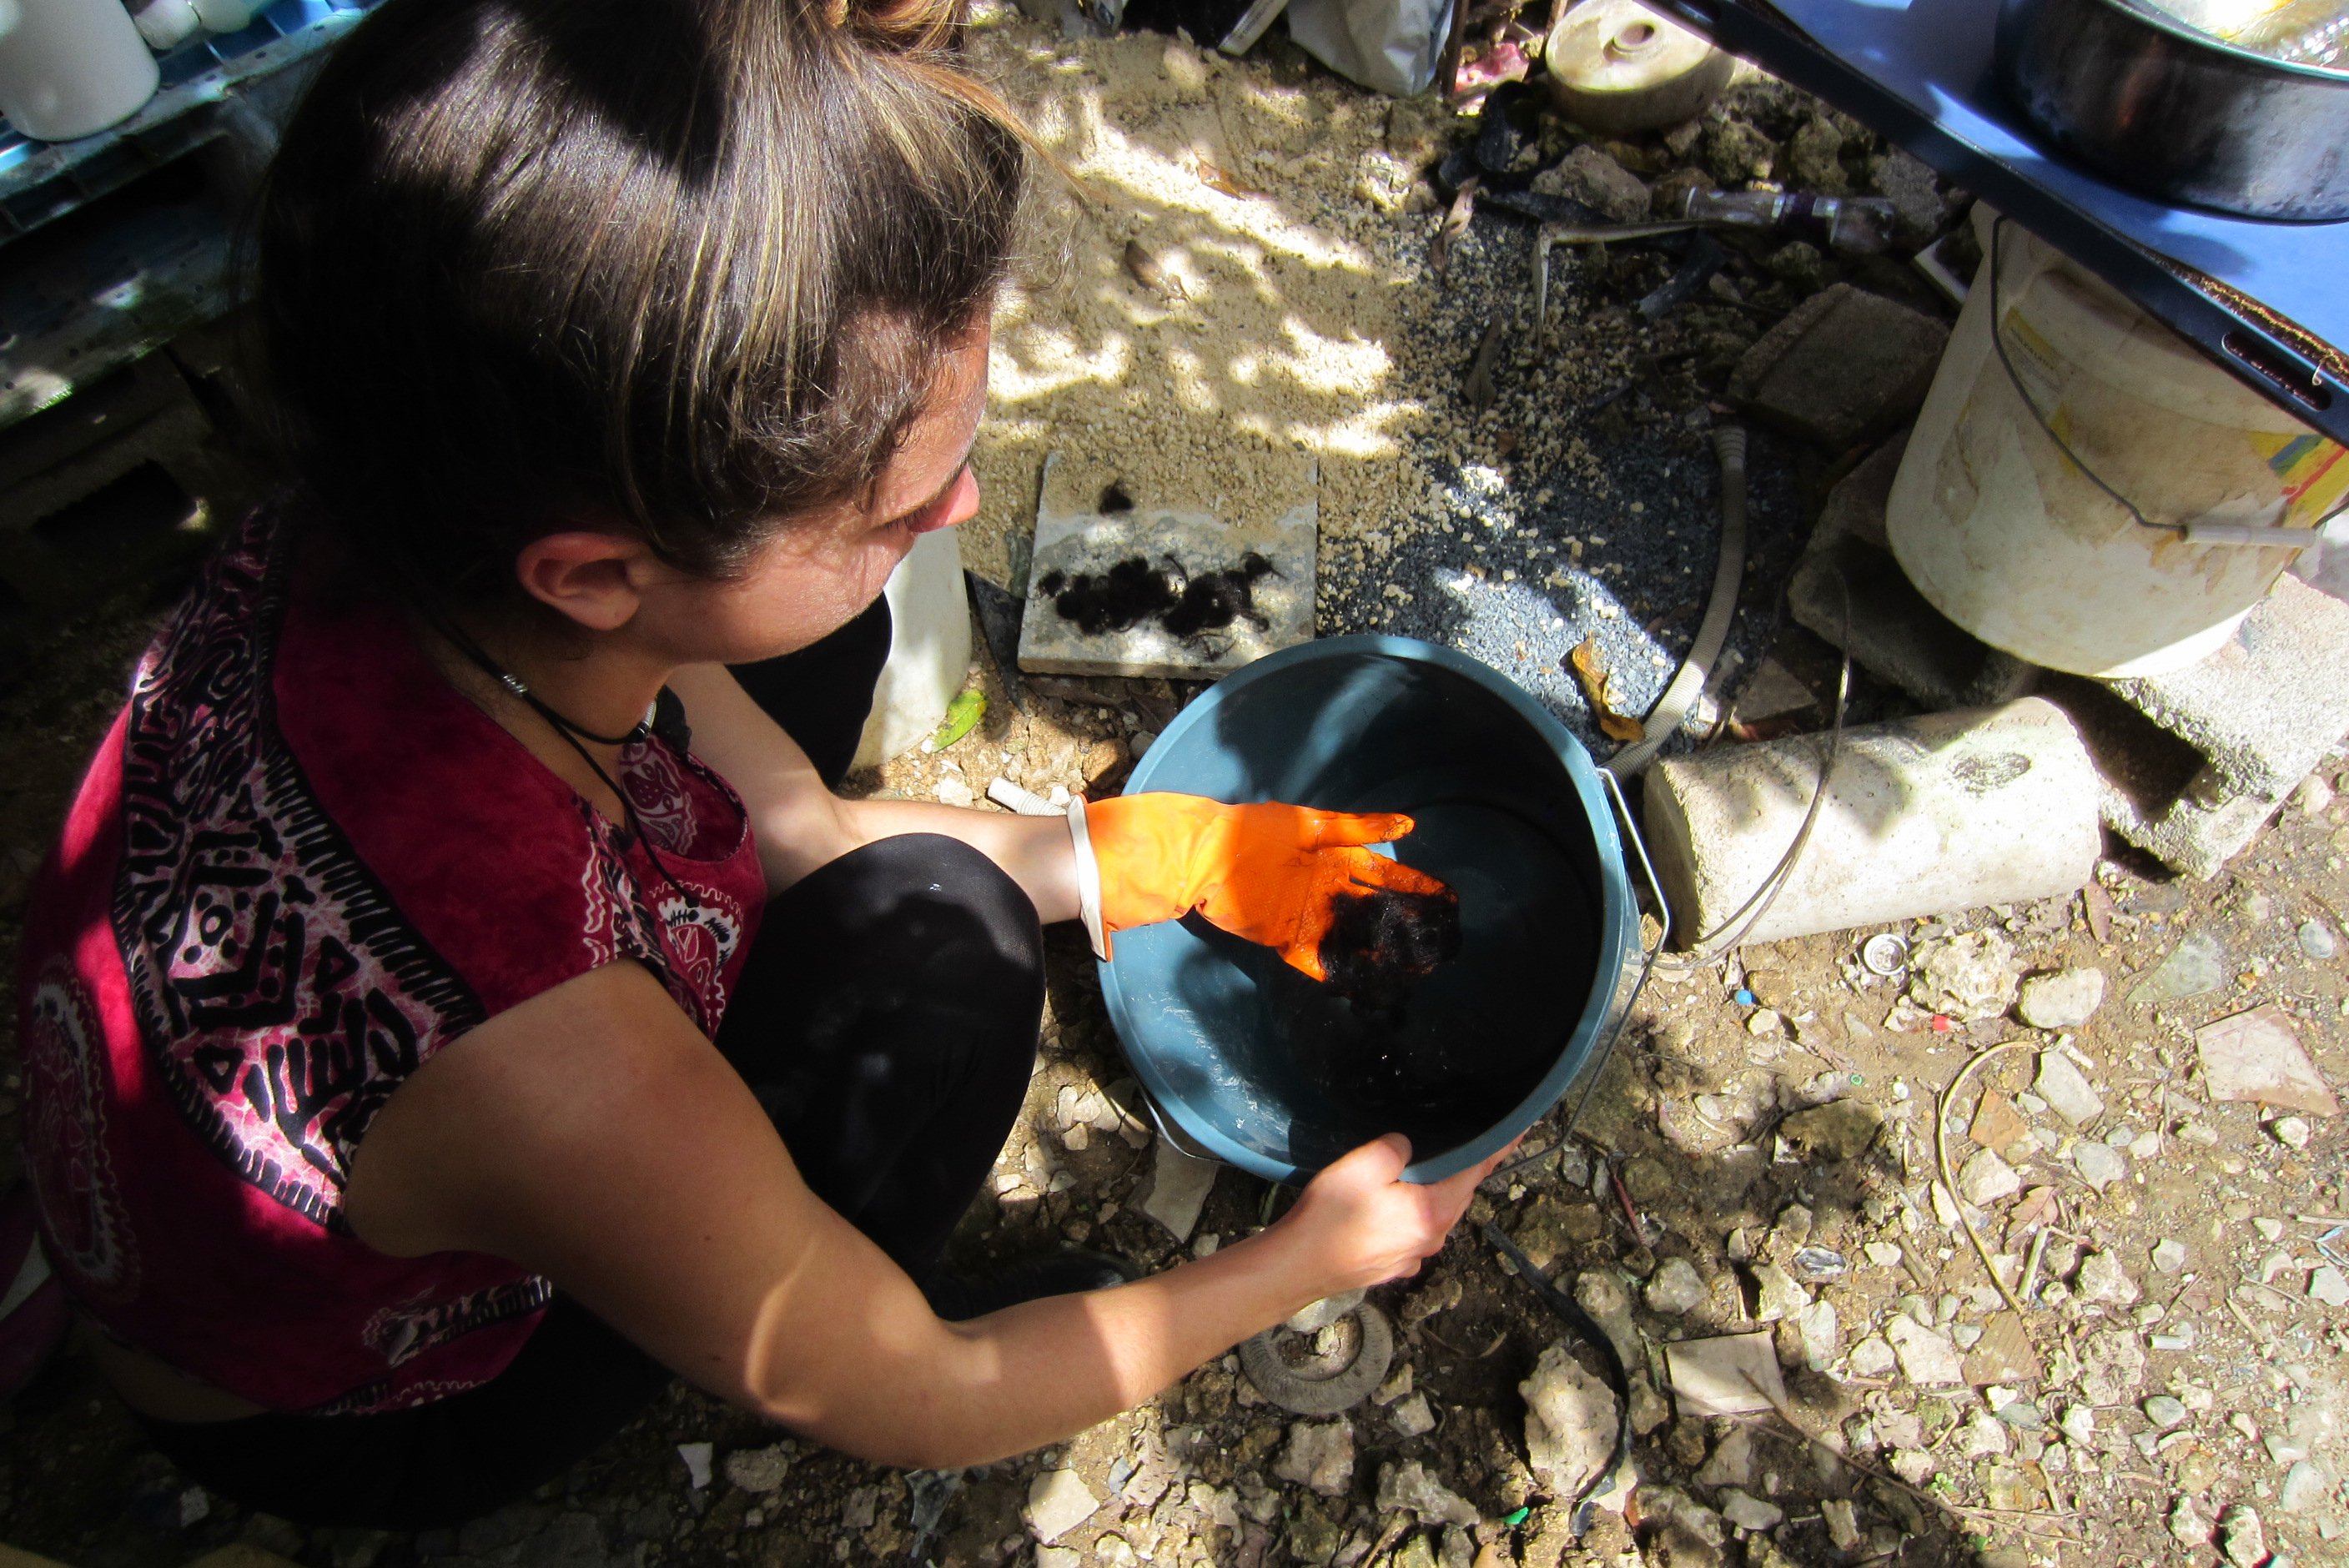
| 13:34, 12 June 2015 | AllisonWashingHair.jpg (file) |  |
2.51 MB | Washing the hair we acquired from a nearby barbershop (peluquería) | 1 |
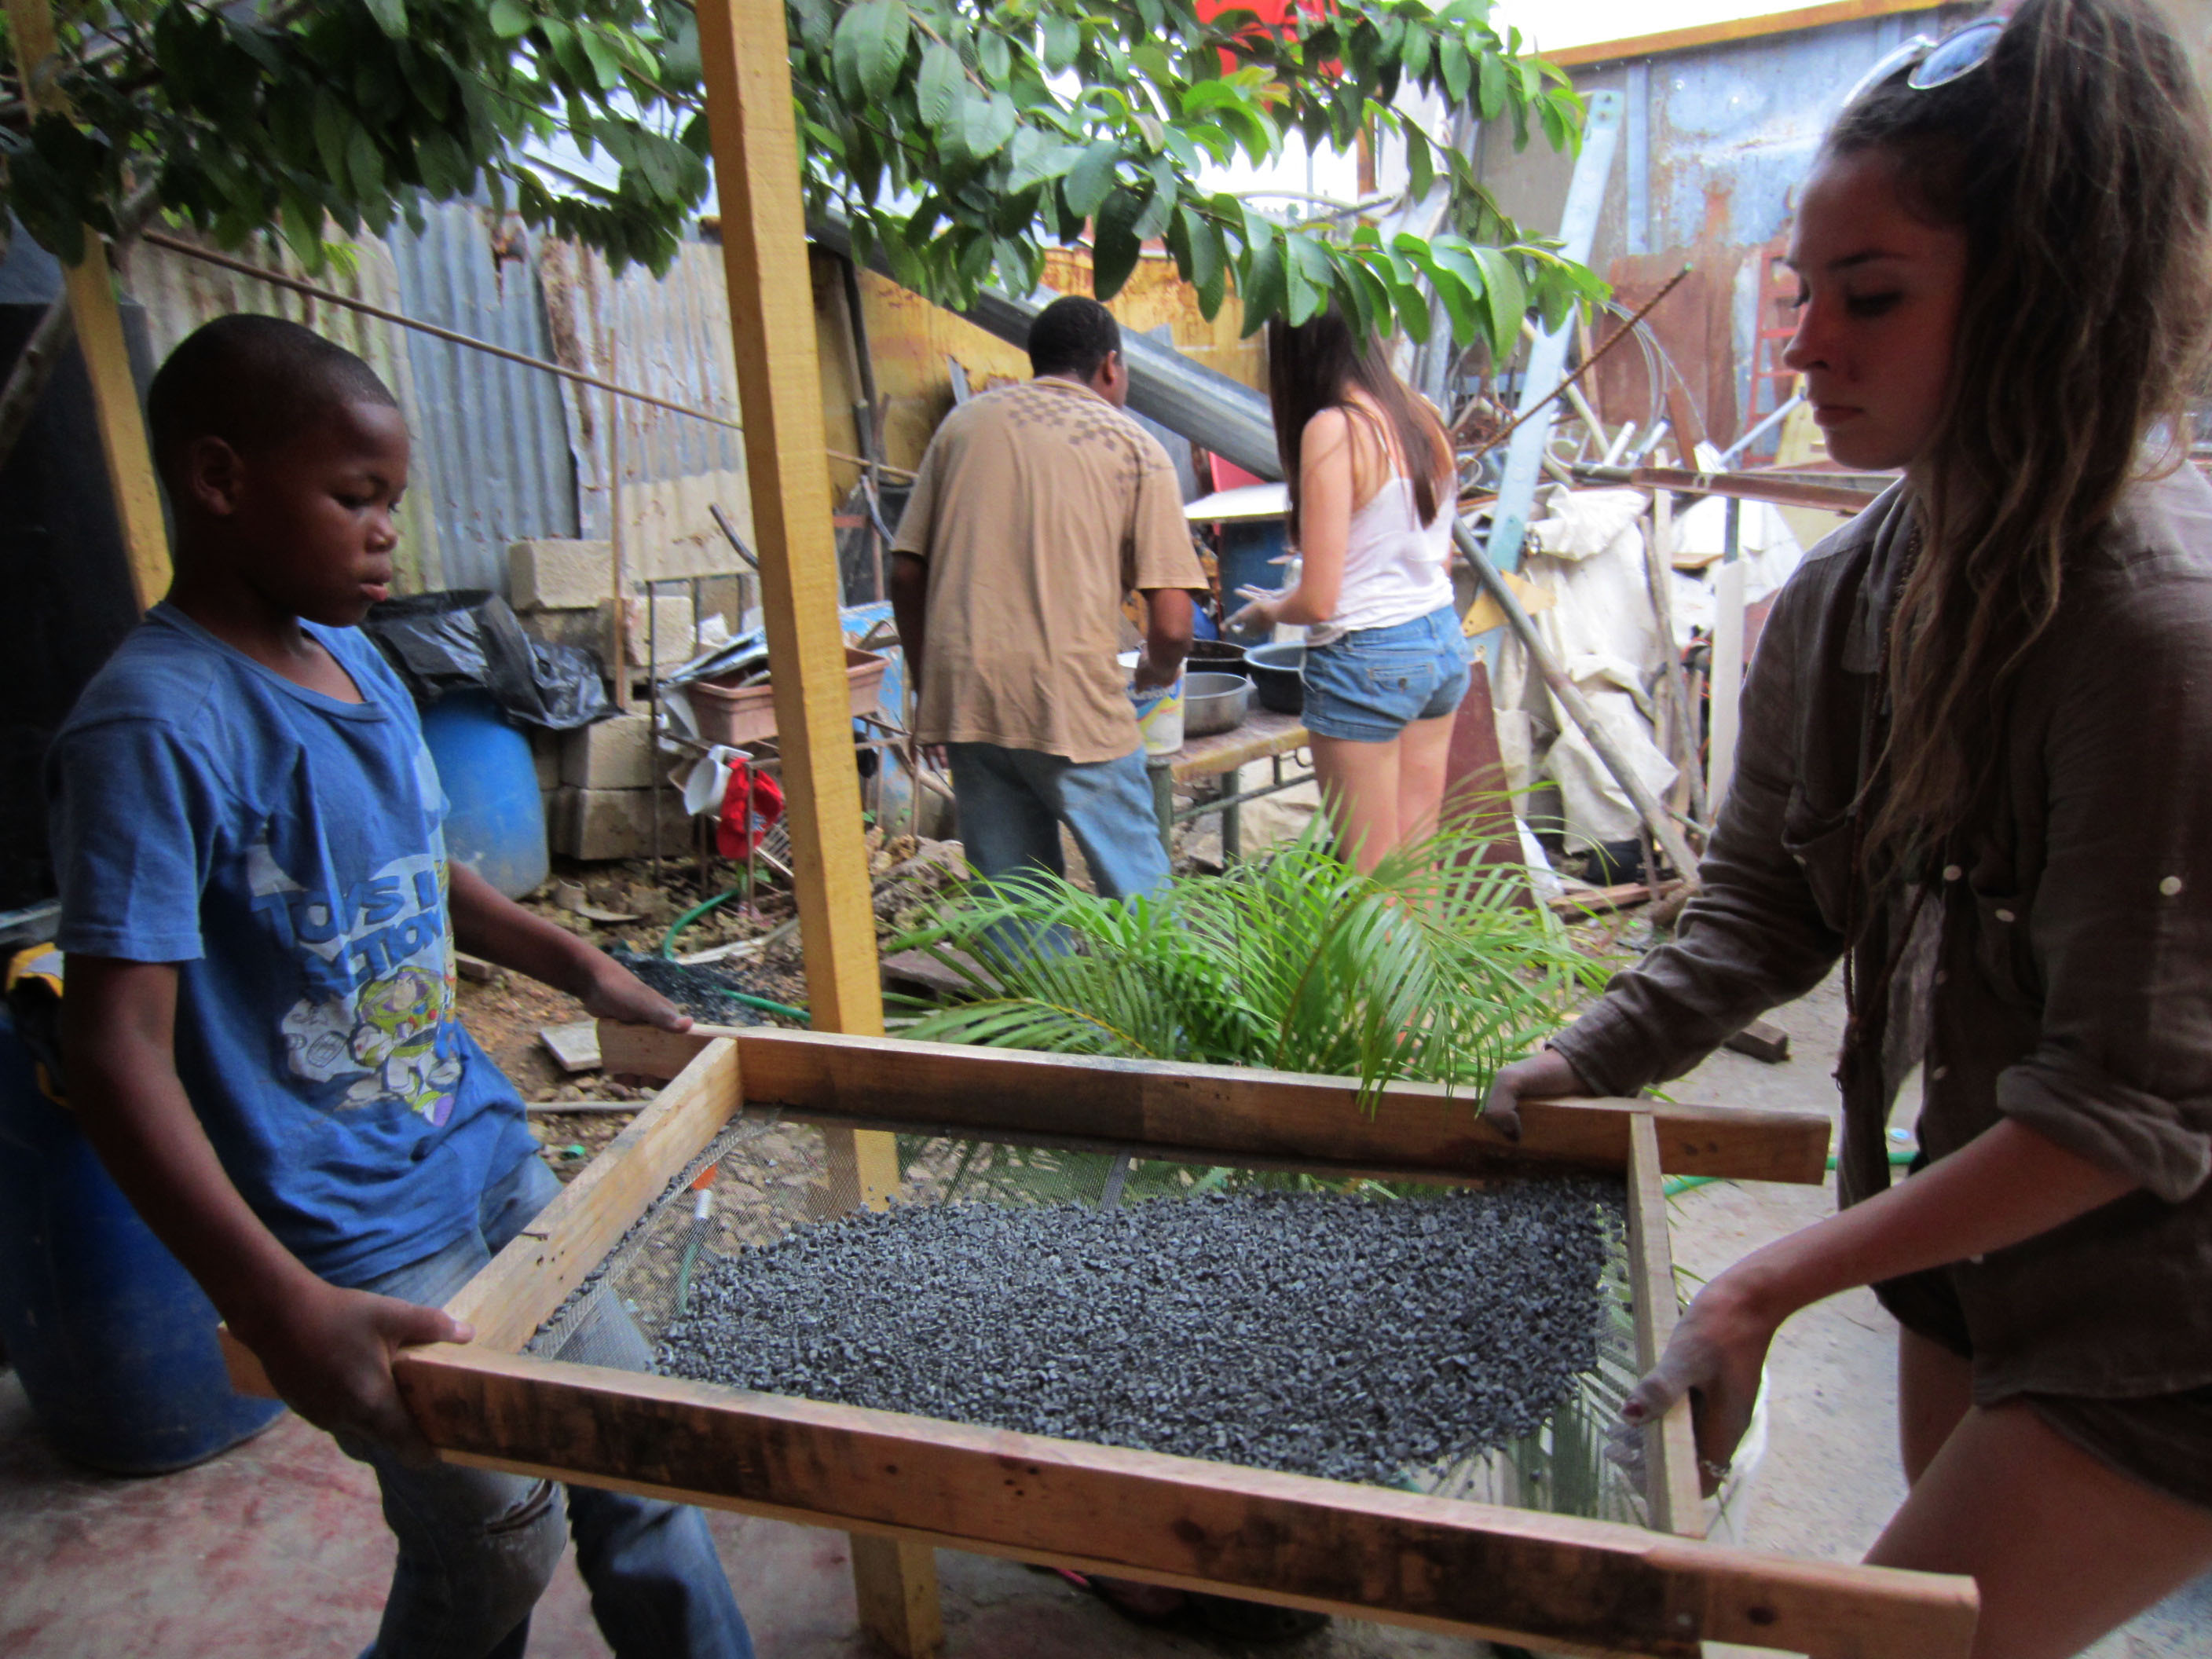
| 14:58, 10 June 2015 | SandSifter.jpg (file) |  |
849 KB | Plastering Day 1: Allison and Jose dumping the larger sand pellets that were not used in the plaster after sifting. 5 Junio, 2015. Botica Popular, Las Malvinas, Santo Domingo, Dominican Republic. Photo taken by me. | 1 |
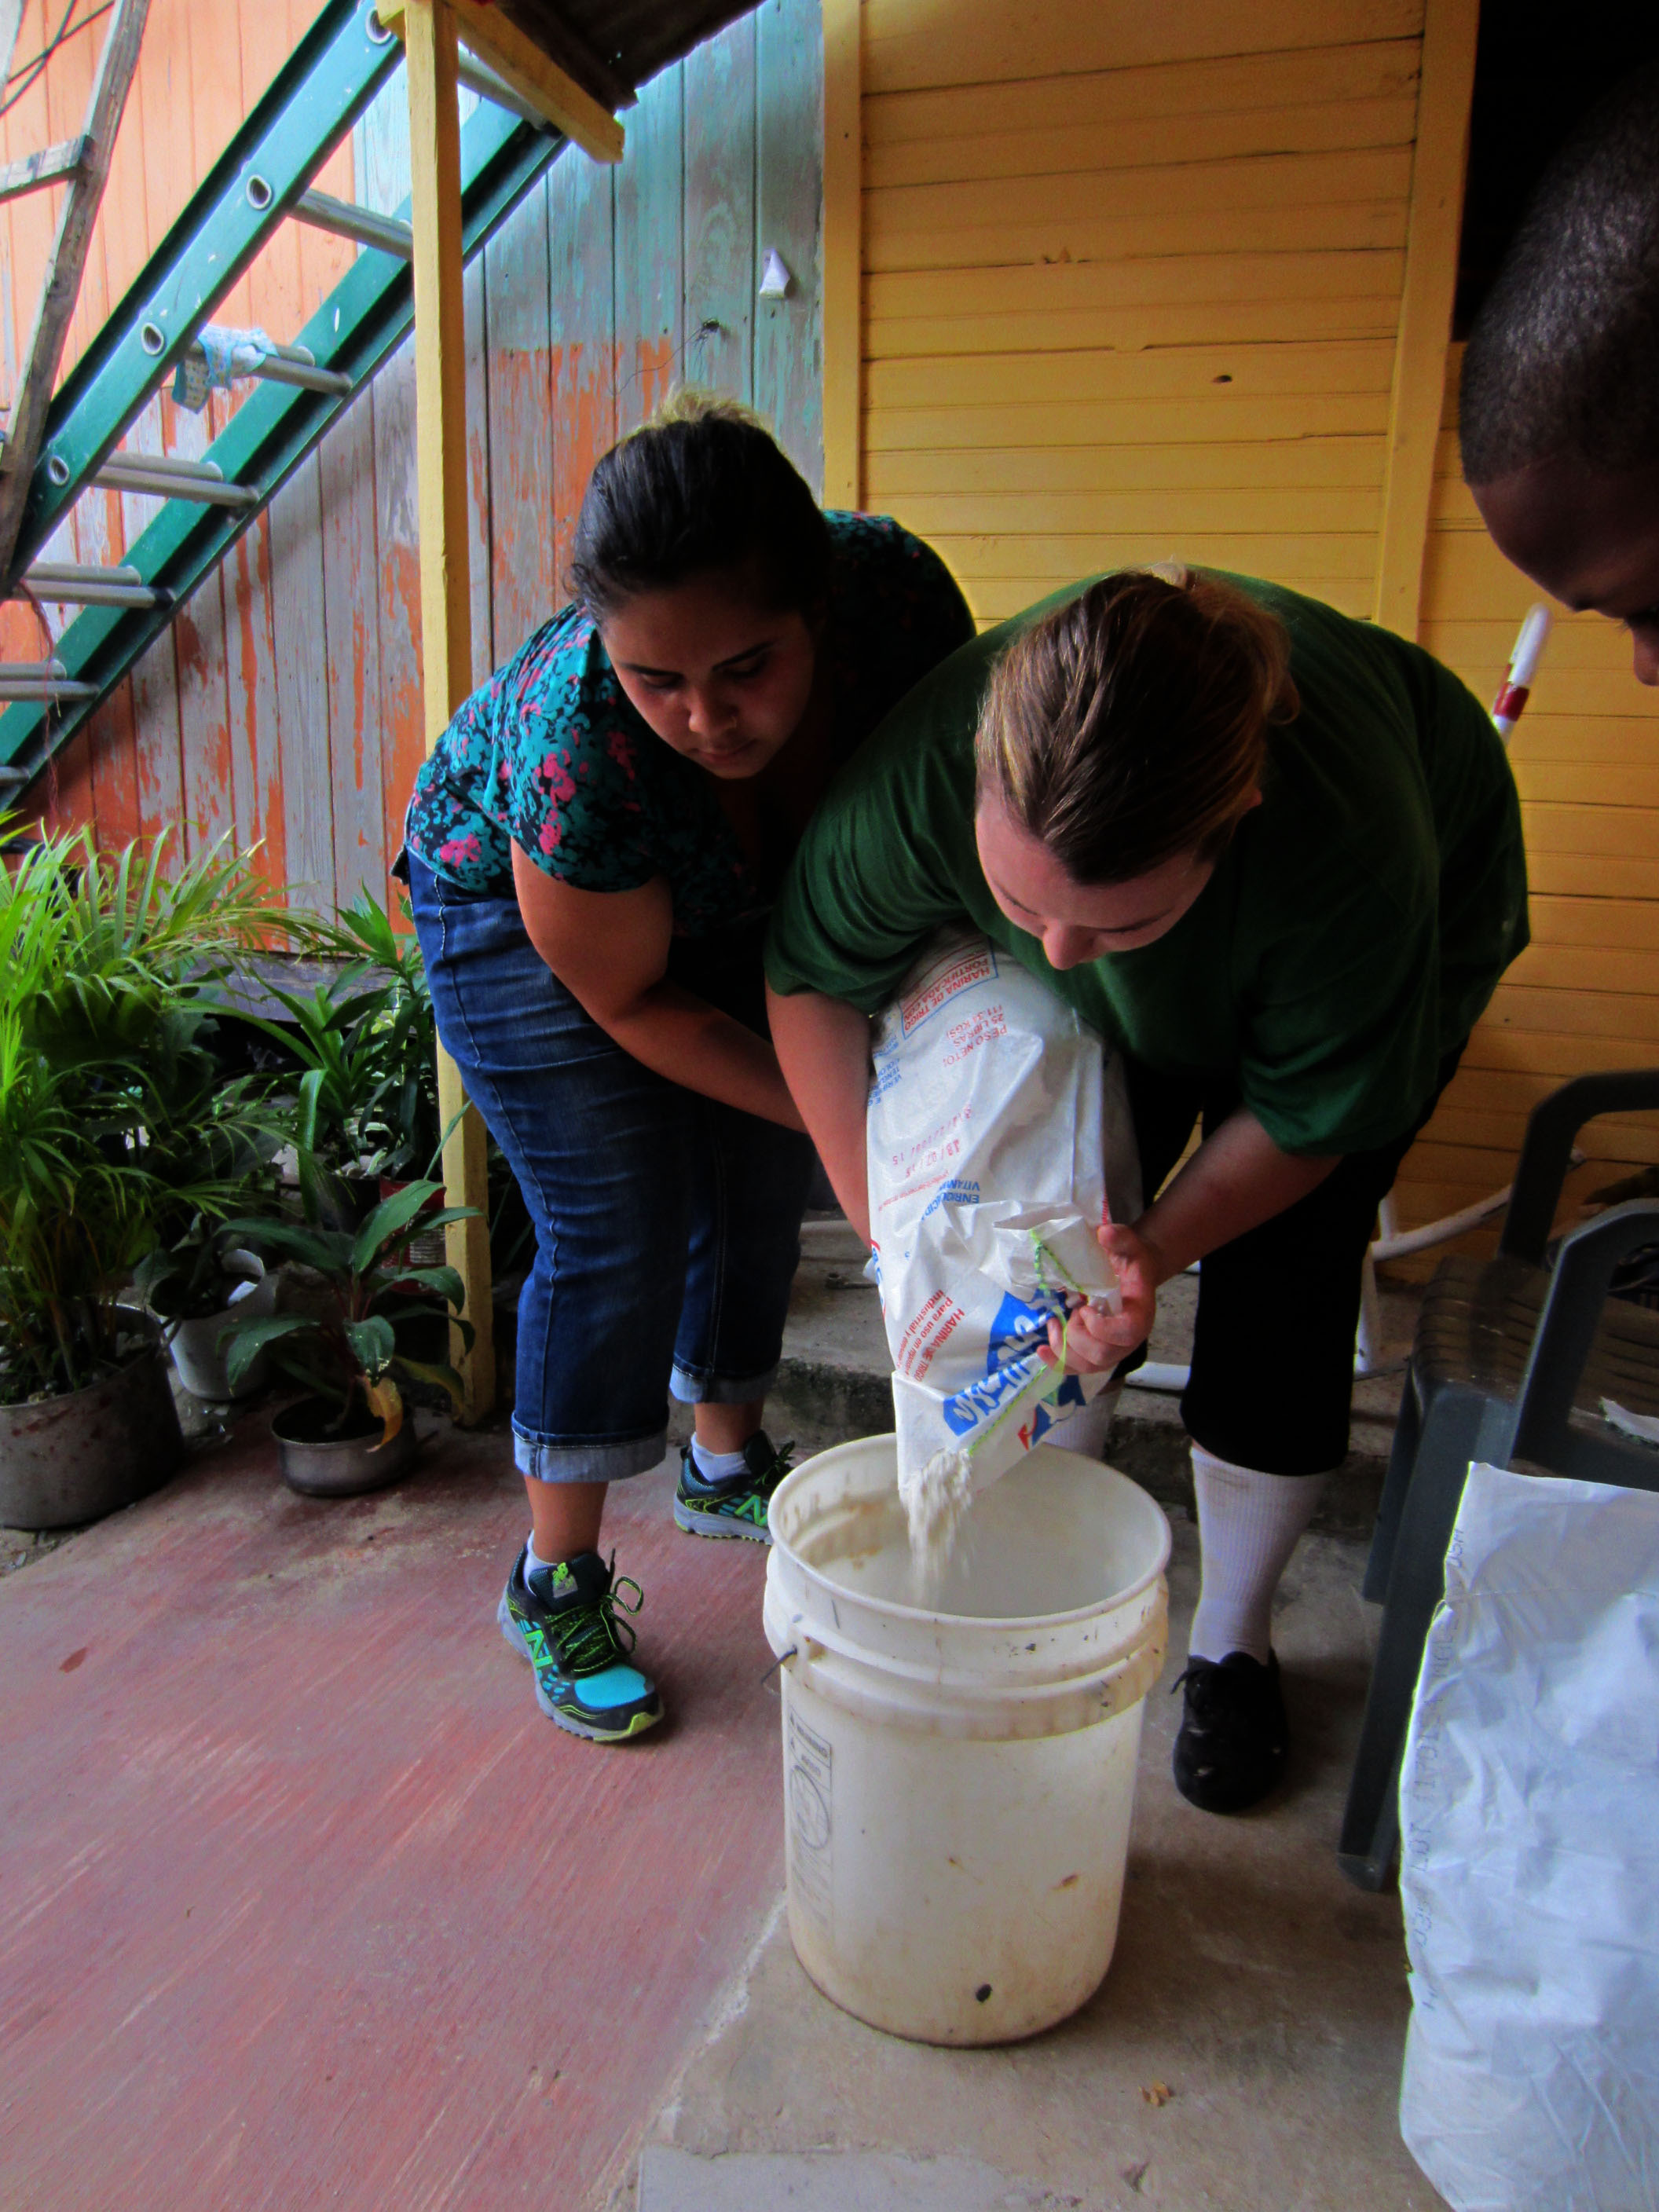
| 14:57, 10 June 2015 | PouringFlourLexiTanya.jpg (file) |  |
751 KB | Plastering Day 1: Teamwork by Tanya and Lexie pouring the flour into our working bucket at Martha's house. 5 Junio, 2015. Botica Popular, Las Malvinas, Santo Domingo, Dominican Republic. Photo taken by me. | 1 |
| 14:55, 10 June 2015 | WheatPaste.jpg (file) |  |
71 KB | Plastering Day 1: Wheat paste consistency before adding to sand. It was like porridge. We messed up the wheat paste here. We were supposed to add the flour to cold water and make it like a pancake batter consistency before adding it to boiling water. A... | 1 |
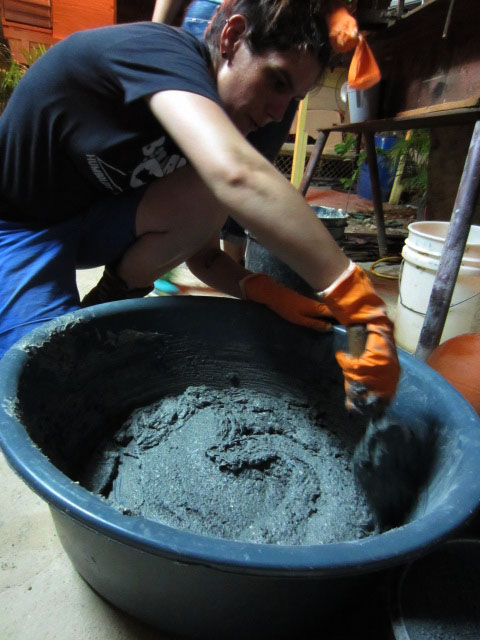
| 14:53, 10 June 2015 | PlasterNearFinished.jpg (file) |  |
99 KB | Plastering Day 1: Mixing the plaster. It is still a little too runny here, but we're almost there! This is hard muscle work! 5 Junio, 2015. Botica Popular, Las Malvinas, Santo Domingo, Dominican Republic. Photo taken by me. | 1 |
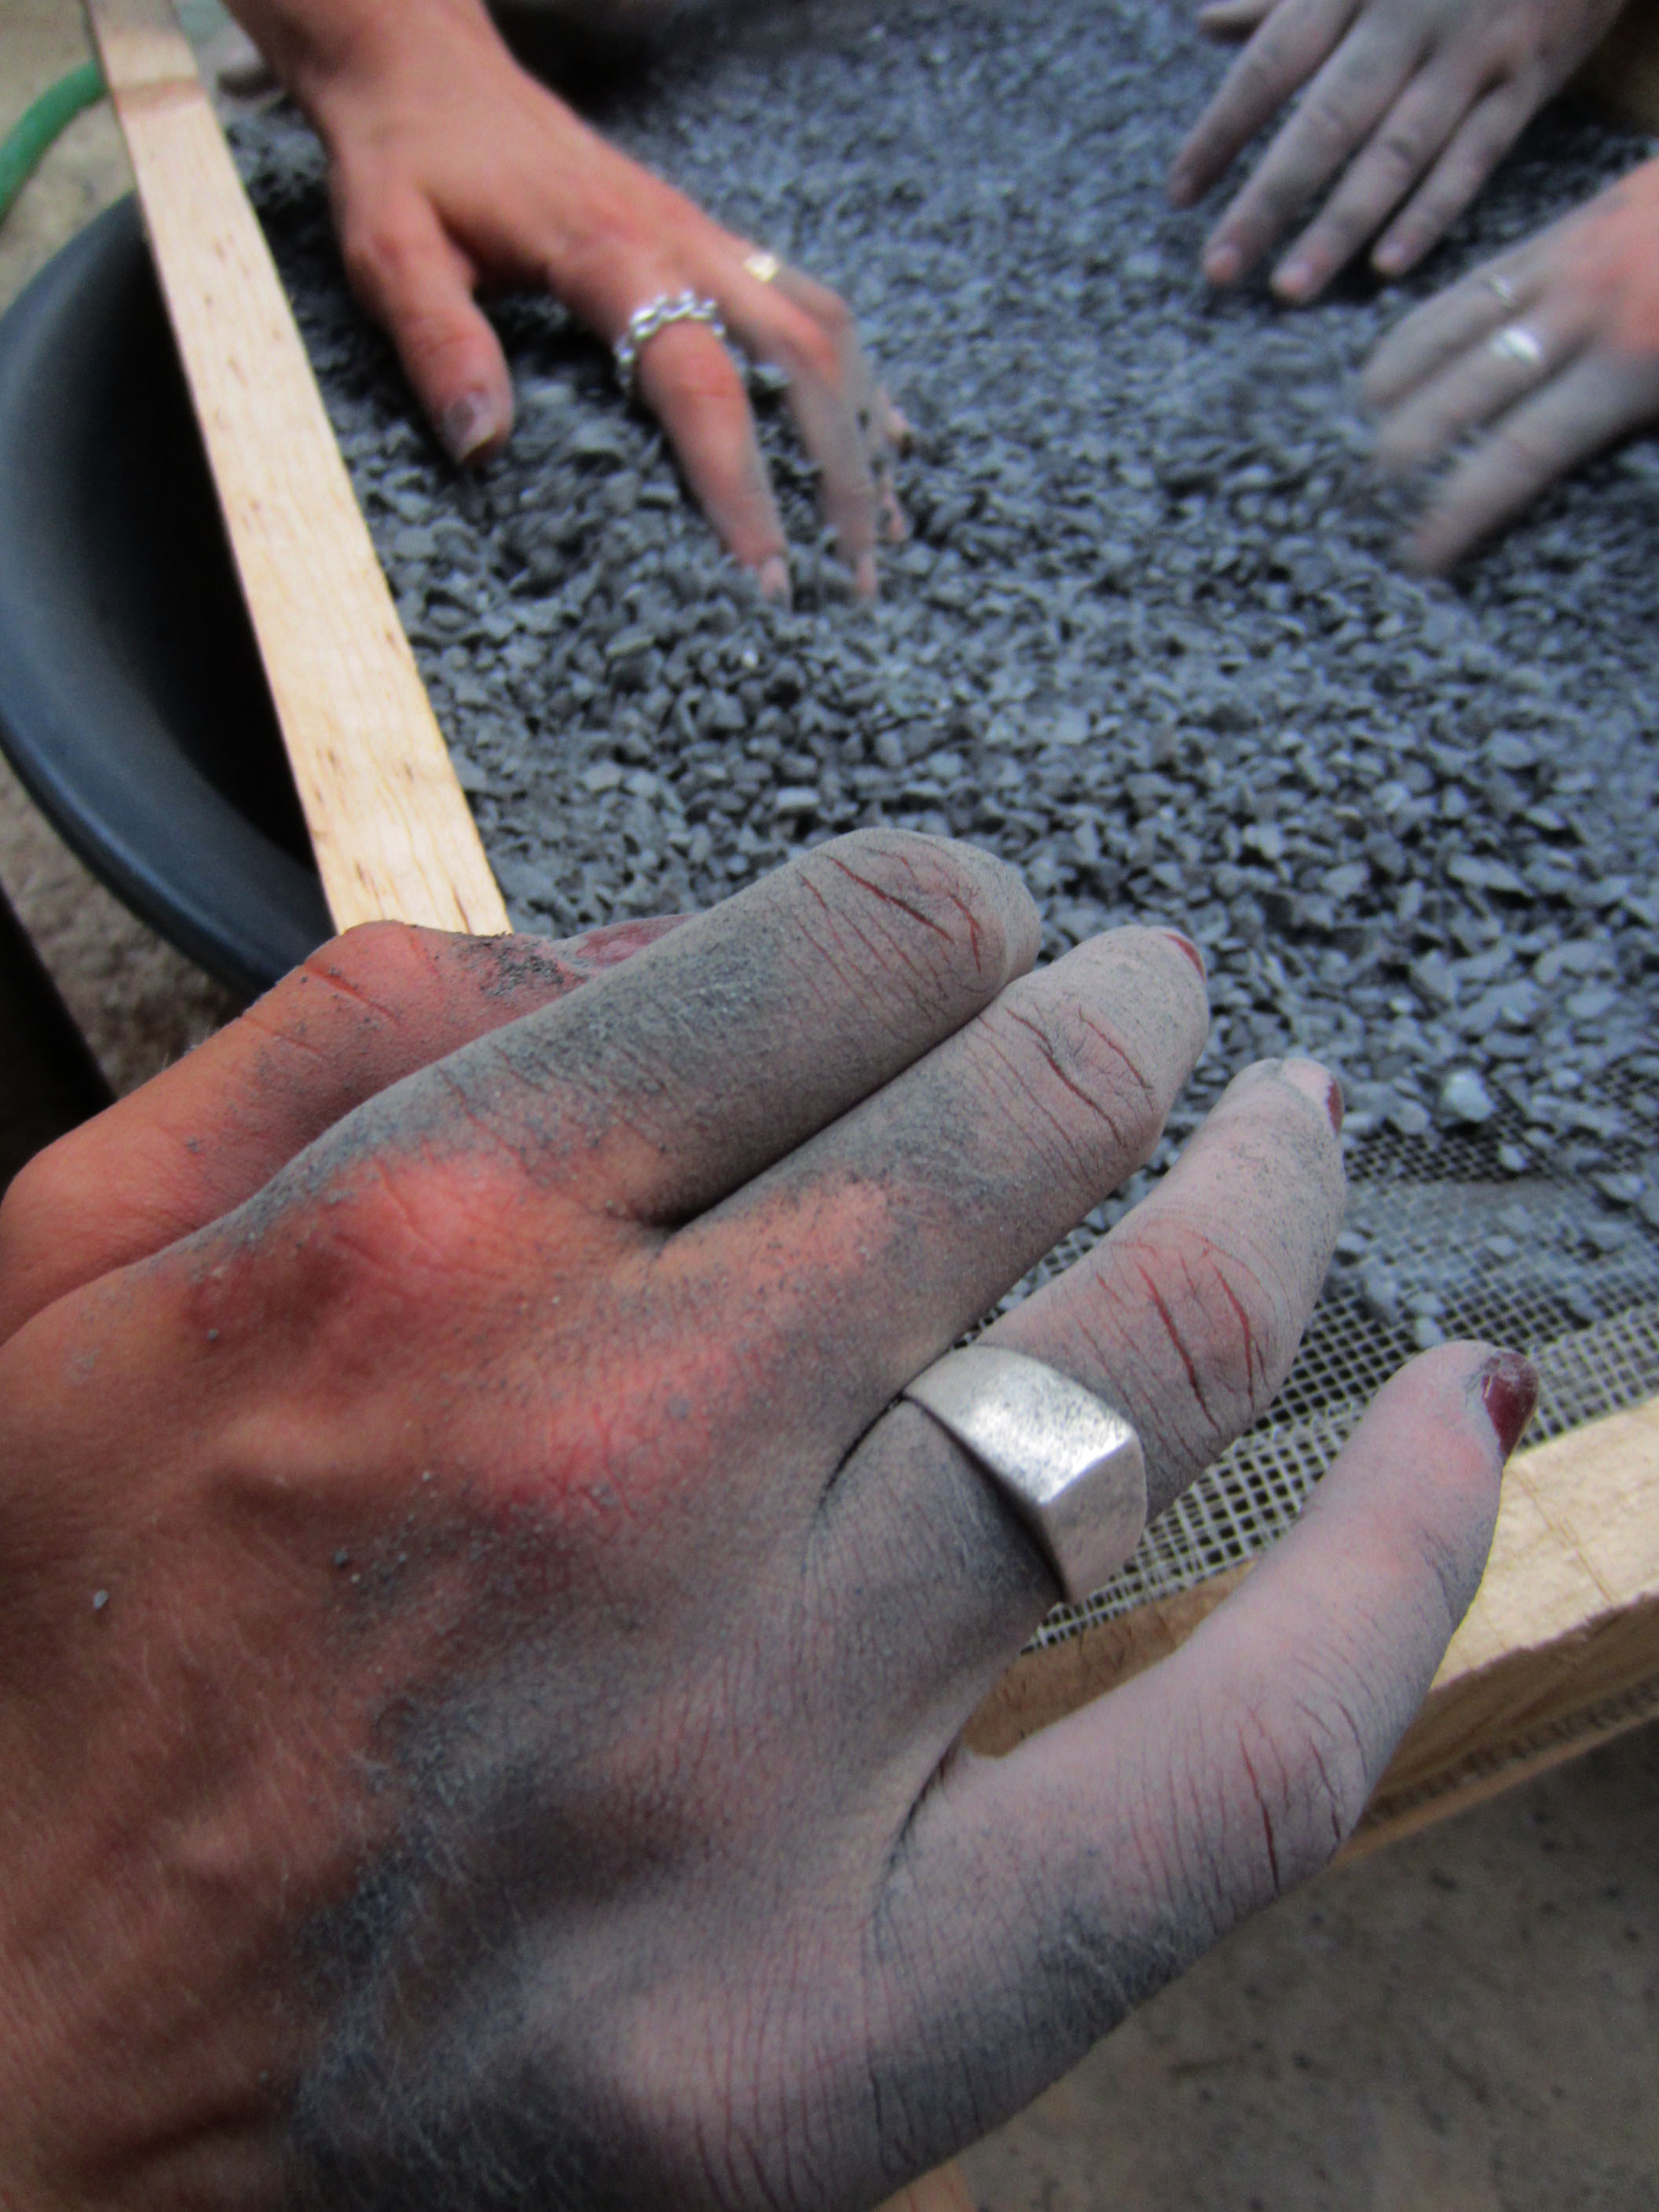
| 14:52, 10 June 2015 | SiftingSand.jpg (file) |  |
717 KB | Plastering Day 1: Sifting the dark colored sand acquired from Vasquez, the block factory owner. We should have sifted the sand twice. 5 Junio, 2015. Botica Popular, Las Malvinas, Santo Domingo, Dominican Republic. Photo taken by me. | 1 |
| 14:50, 10 June 2015 | PlasterMaterials.jpg (file) |  |
93 KB | Plastering Day 1: Wheat paste mixed with cal (lime) and caliche before adding sand. 5 Junio, 2015. Botica Popular, Las Malvinas, Santo Domingo, Dominican Republic. Photo taken by me. | 1 |
| 14:48, 10 June 2015 | SiftingSandHands.jpg (file) |  |
669 KB | Plastering Day 1: Sifting the dark colored sand that was acquired from Vasquez, the block factory owner. We found later that we should have sifted the sand a second time to get finer particles. A slightly smaller holed screen would have been nice as w... | 1 |
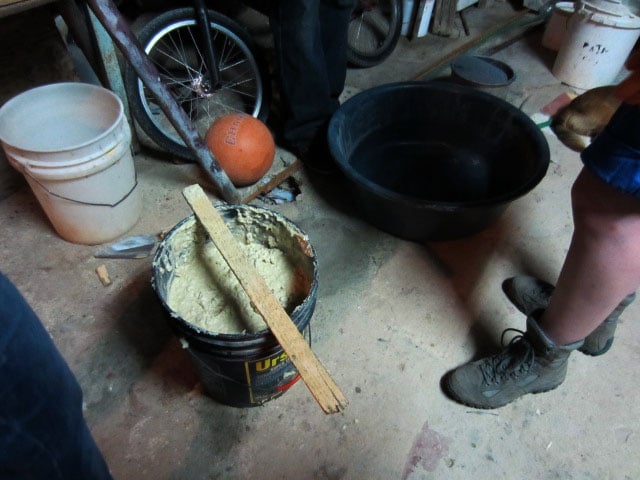
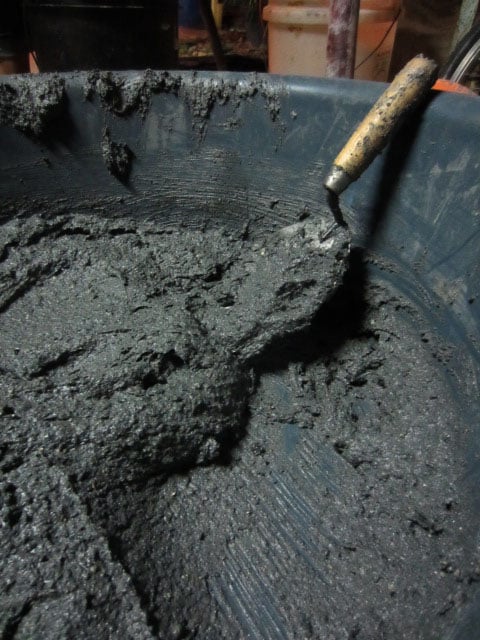
| 14:47, 10 June 2015 | PlasterFinished2.jpg (file) |  |
115 KB | Plastering Day 1: Finished plaster. Sand was added until consistency stuck together and held its form, but was still spreadable. 5 Junio, 2015. Botica Popular, Las Malvinas, Santo Domingo, Dominican Republic. Photo taken by me. | 1 |
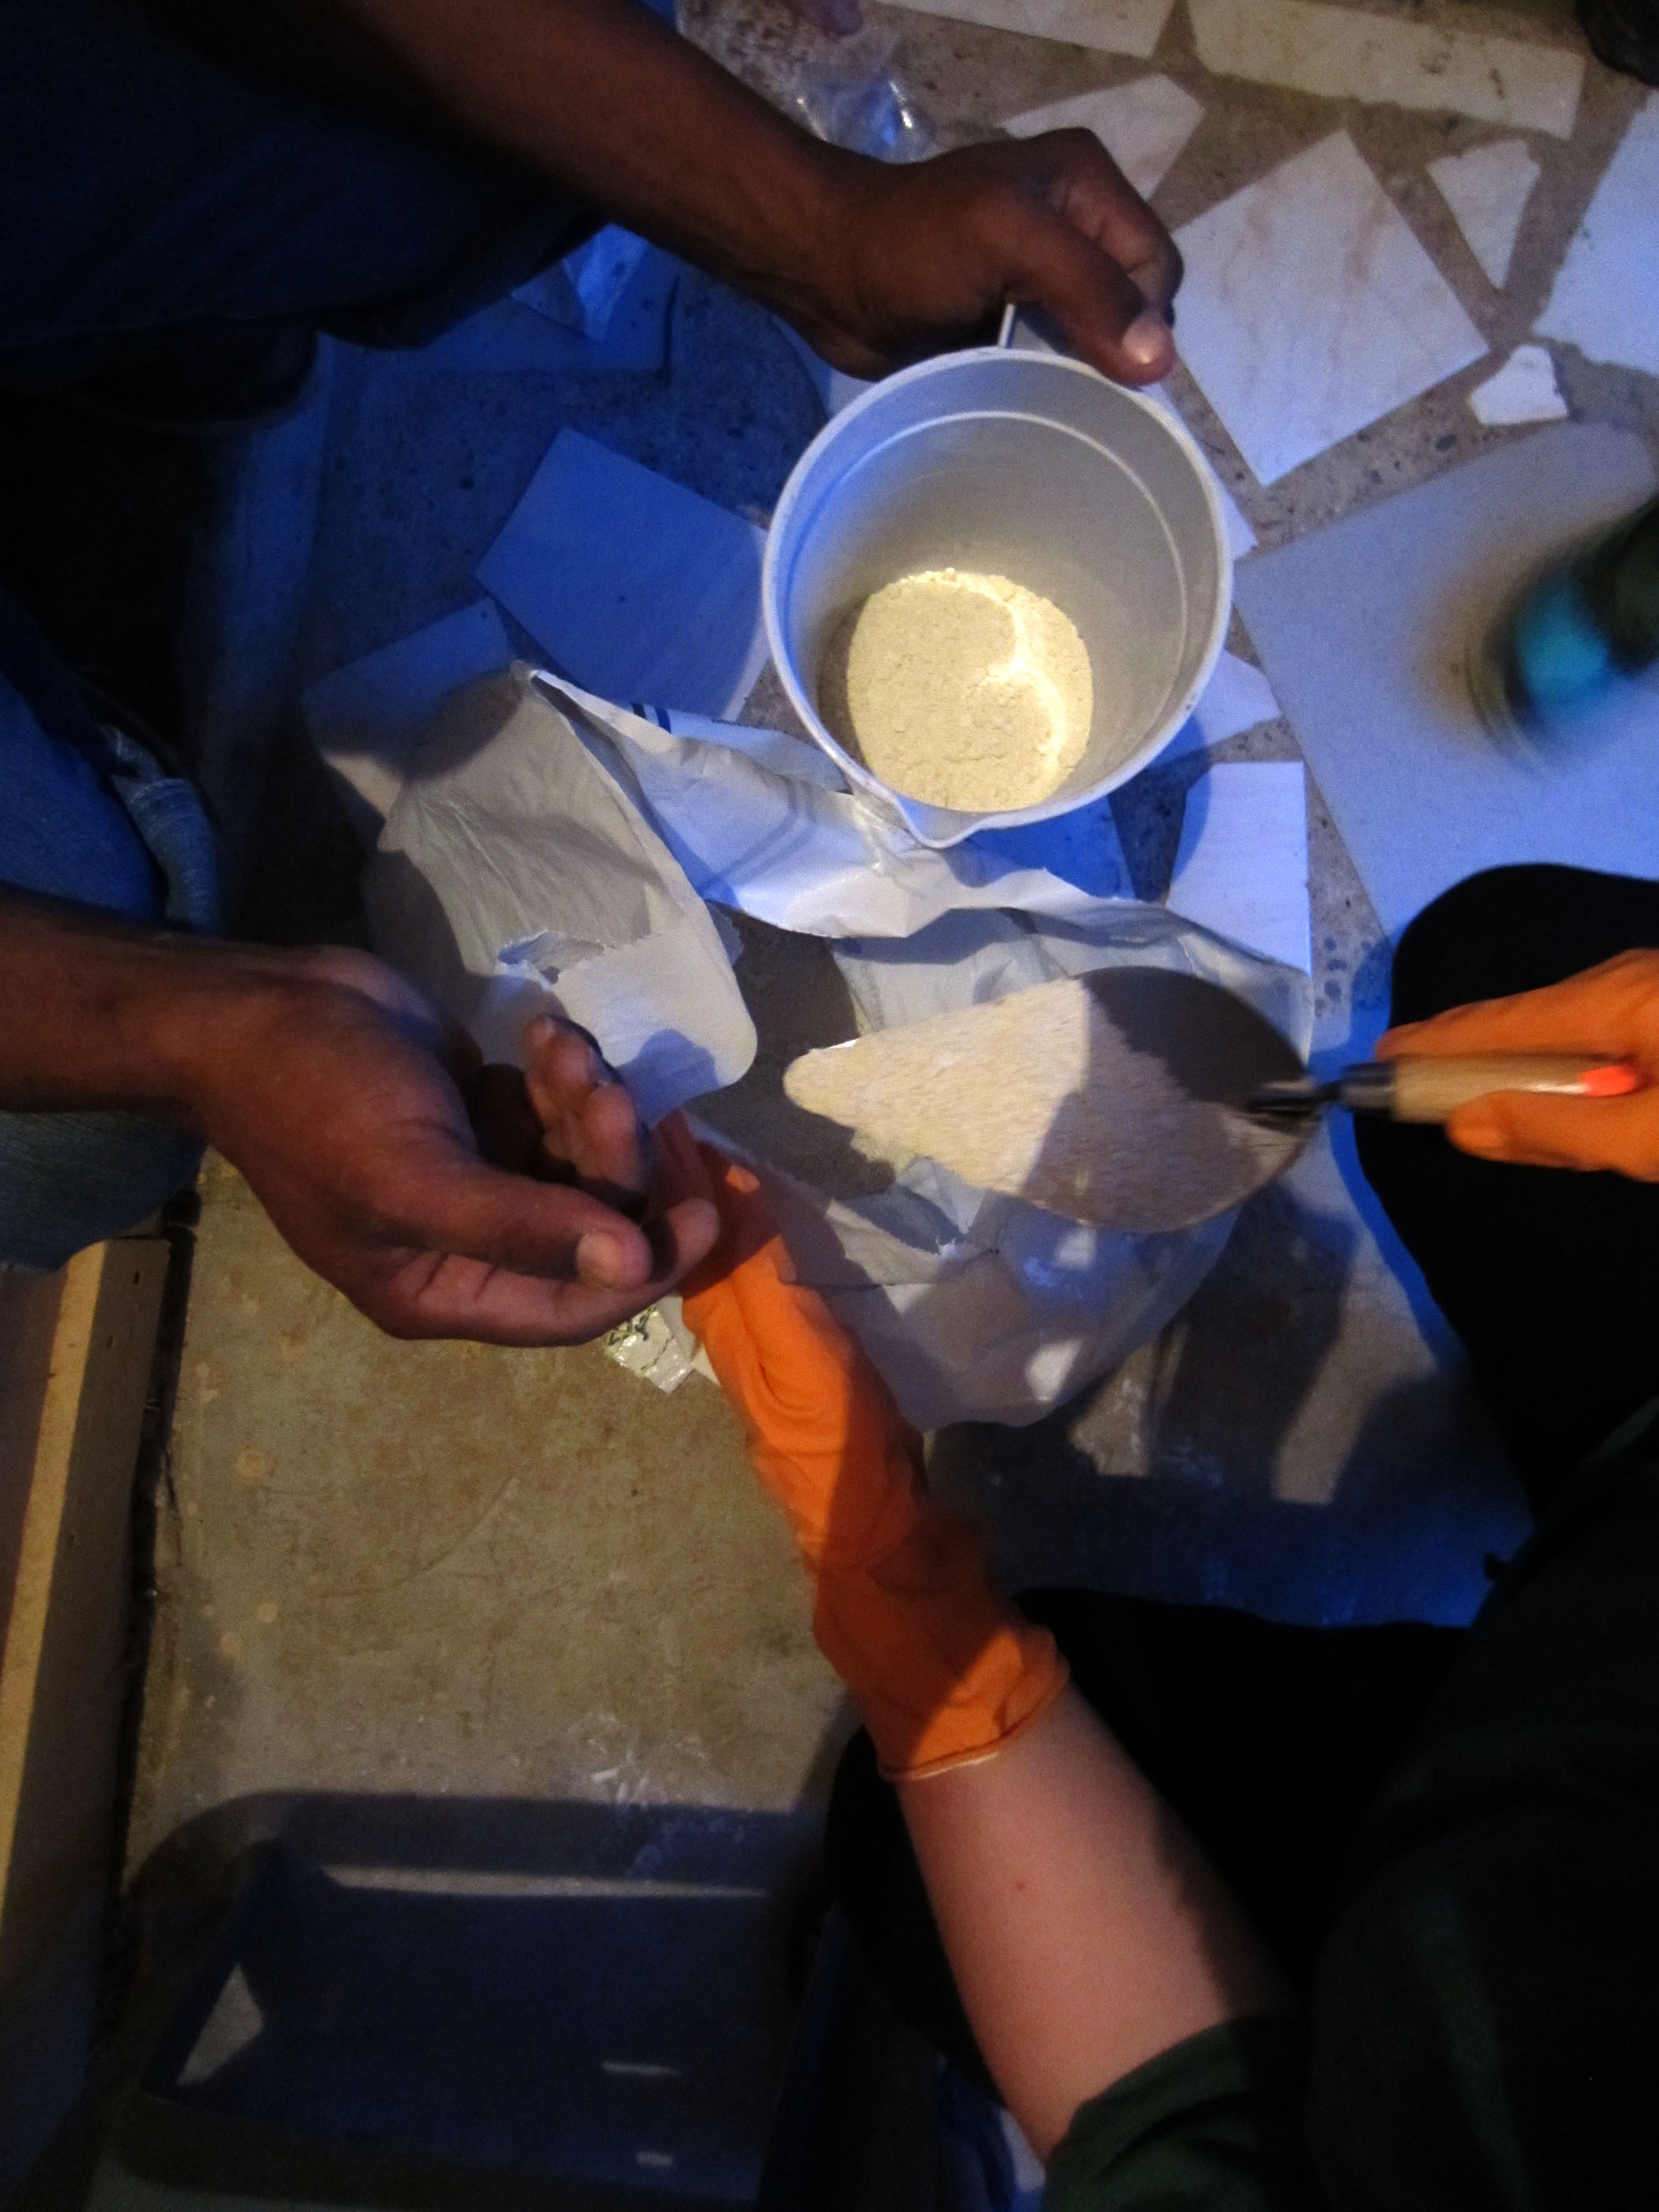
| 14:44, 10 June 2015 | MeasuringCal.jpg (file) |  |
589 KB | Plastering Day 1: Measuring the cal (lime) that is then added to water, then to the wheat paste and caliche. Sand is added last. June 5, 2014. Botica Popular, Las Malvinas, Santo Domingo, Dominican Republic. Photo taken by me. | 1 |
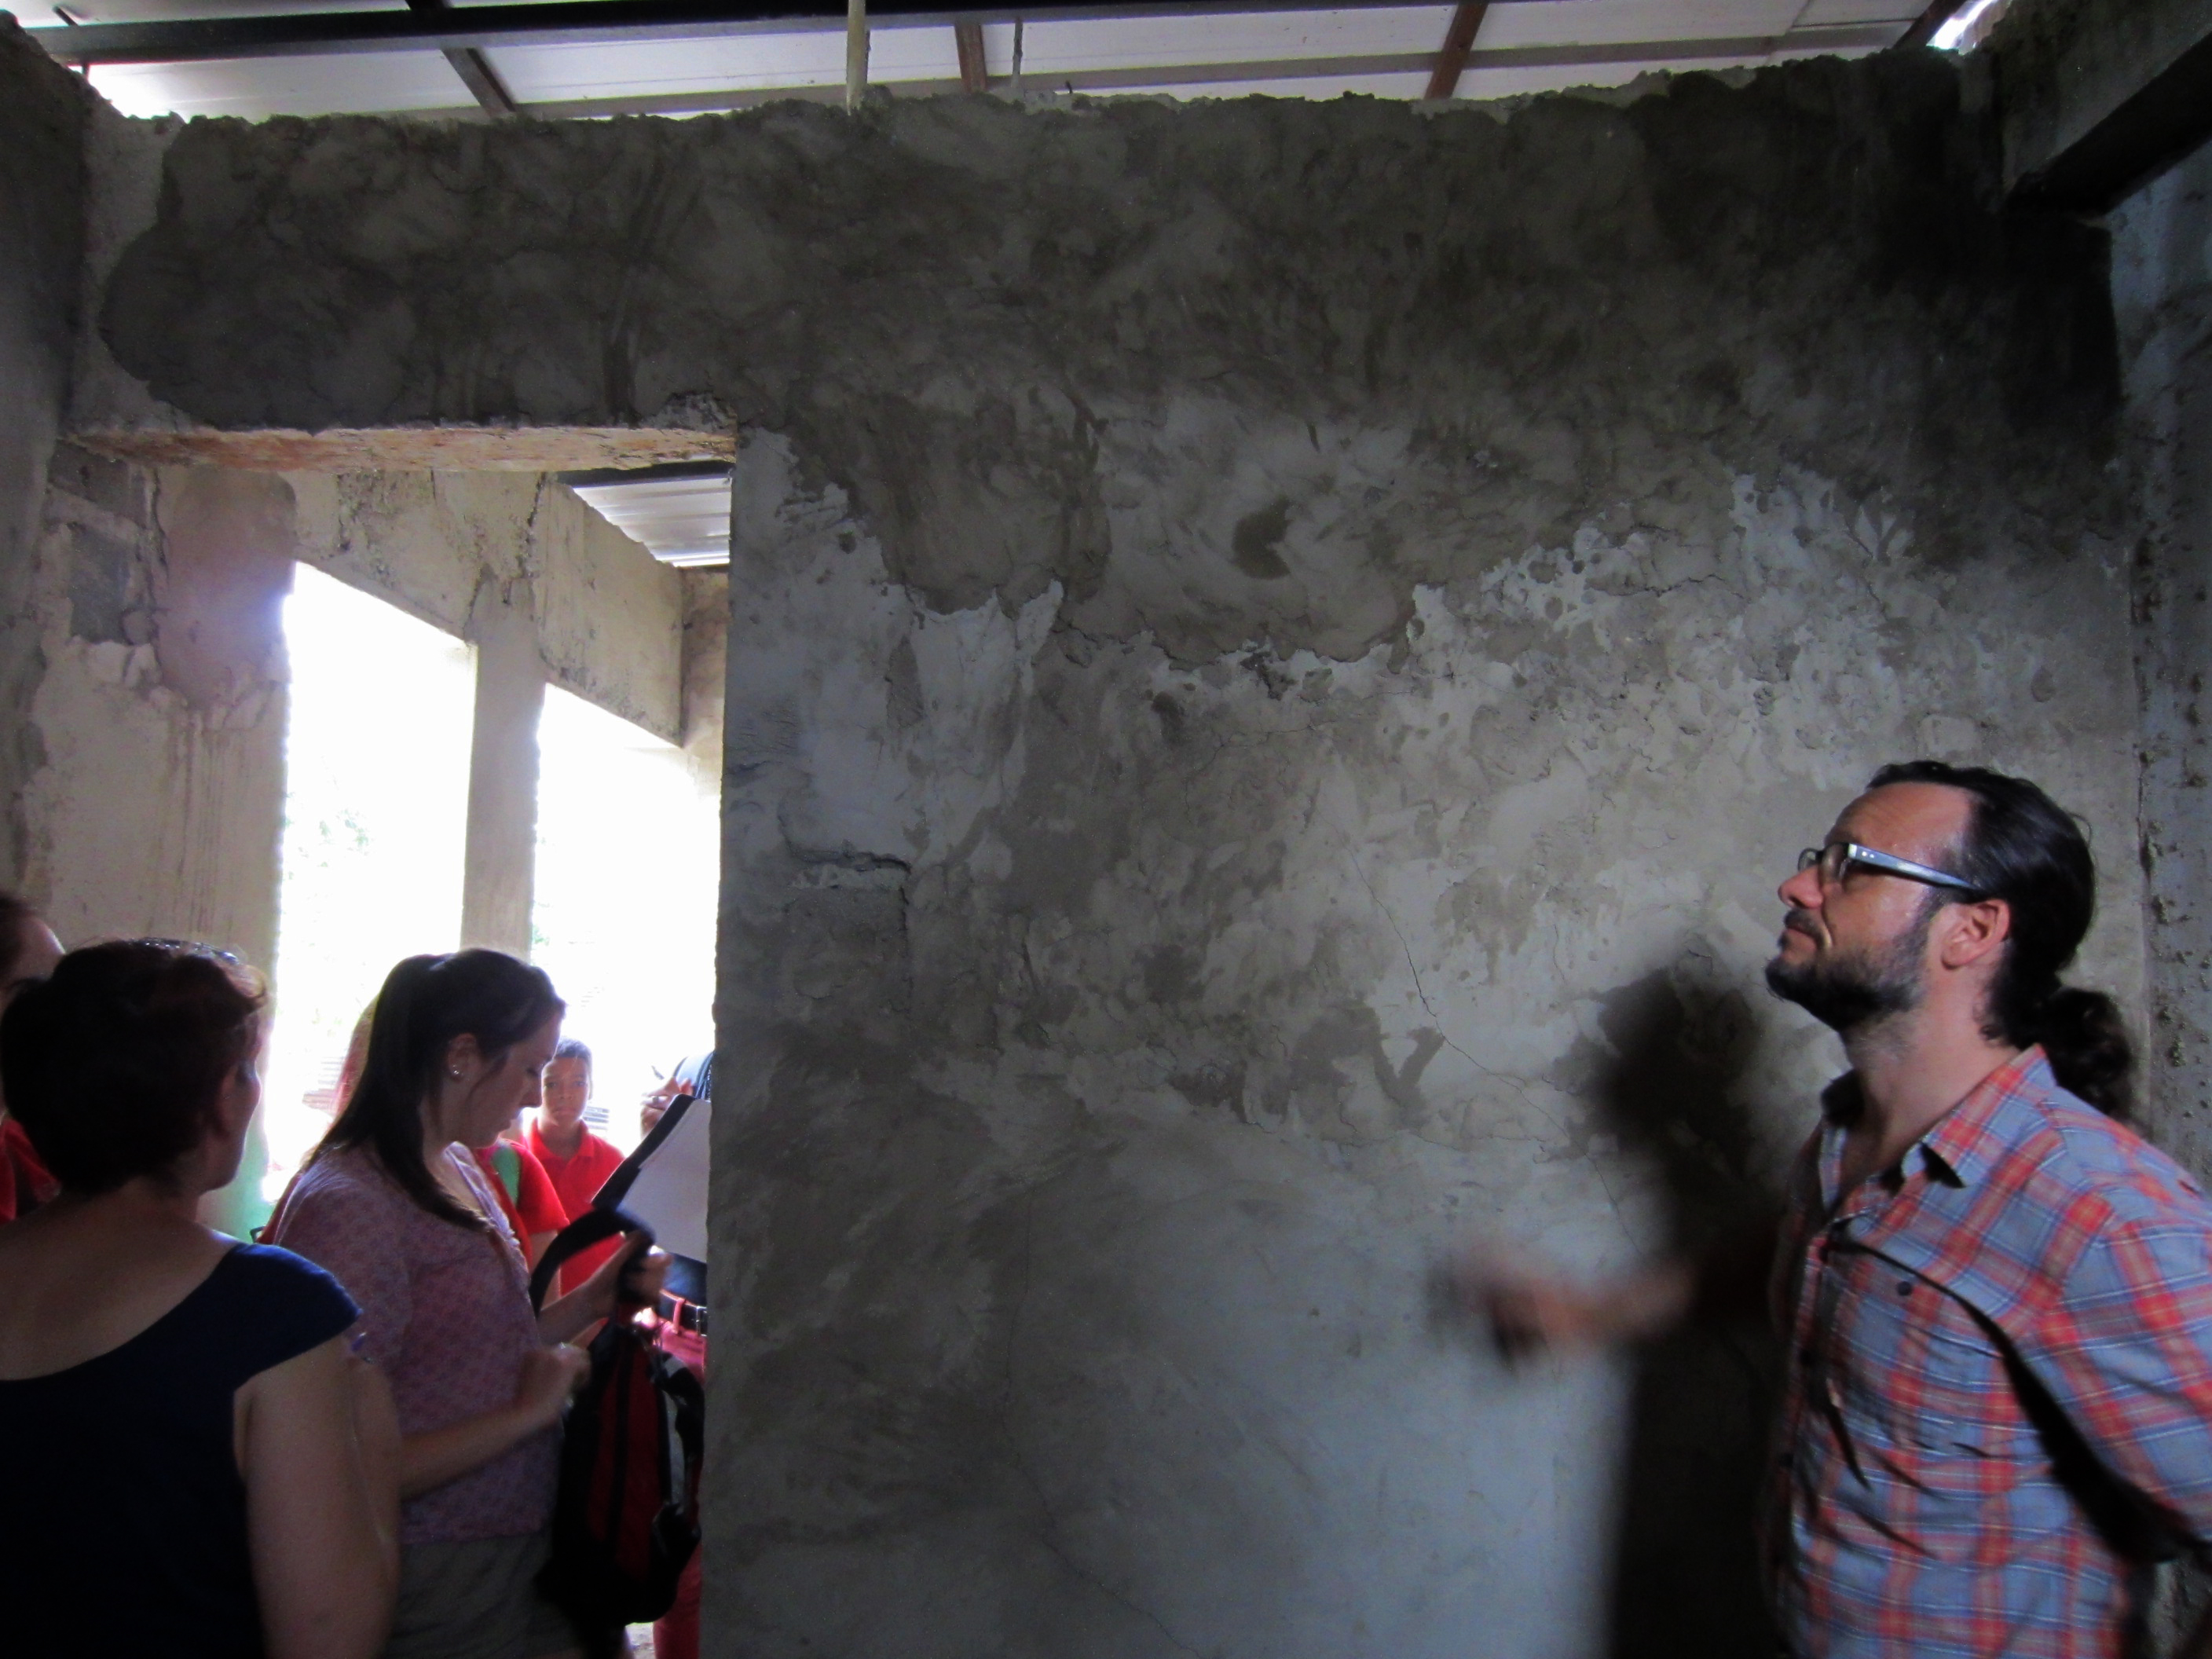
| 14:34, 10 June 2015 | EnLaBoticaLonny.jpg (file) |  |
2.16 MB | Lonny and students inside the Botica Popular, checking out walls to be plastered. This is the ecoladrillo wall (plastic bottles inside the wall). The plaster is extremely rough and uneven because when it was plastered last year, students/plasterers pus... | 1 |
| 14:27, 10 June 2015 | AddingWheatPasteToOtherIngredients.jpg (file) |  |
92 KB | Plaster Batch 1: Adding Wheat Paste to cal (lime) and caliche before adding sand. Photo taken by me. | 1 |
| 14:09, 10 June 2015 | MePlastering.jpg (file) |  |
243 KB | Learning how to plaster in the botica popular in Las Malvinas at night. We didn't have the goma (flat tool) to finish the product so it turned out cracked. The product was strong, so if it weren't for the missing tool, the product would have been what ... | 1 |
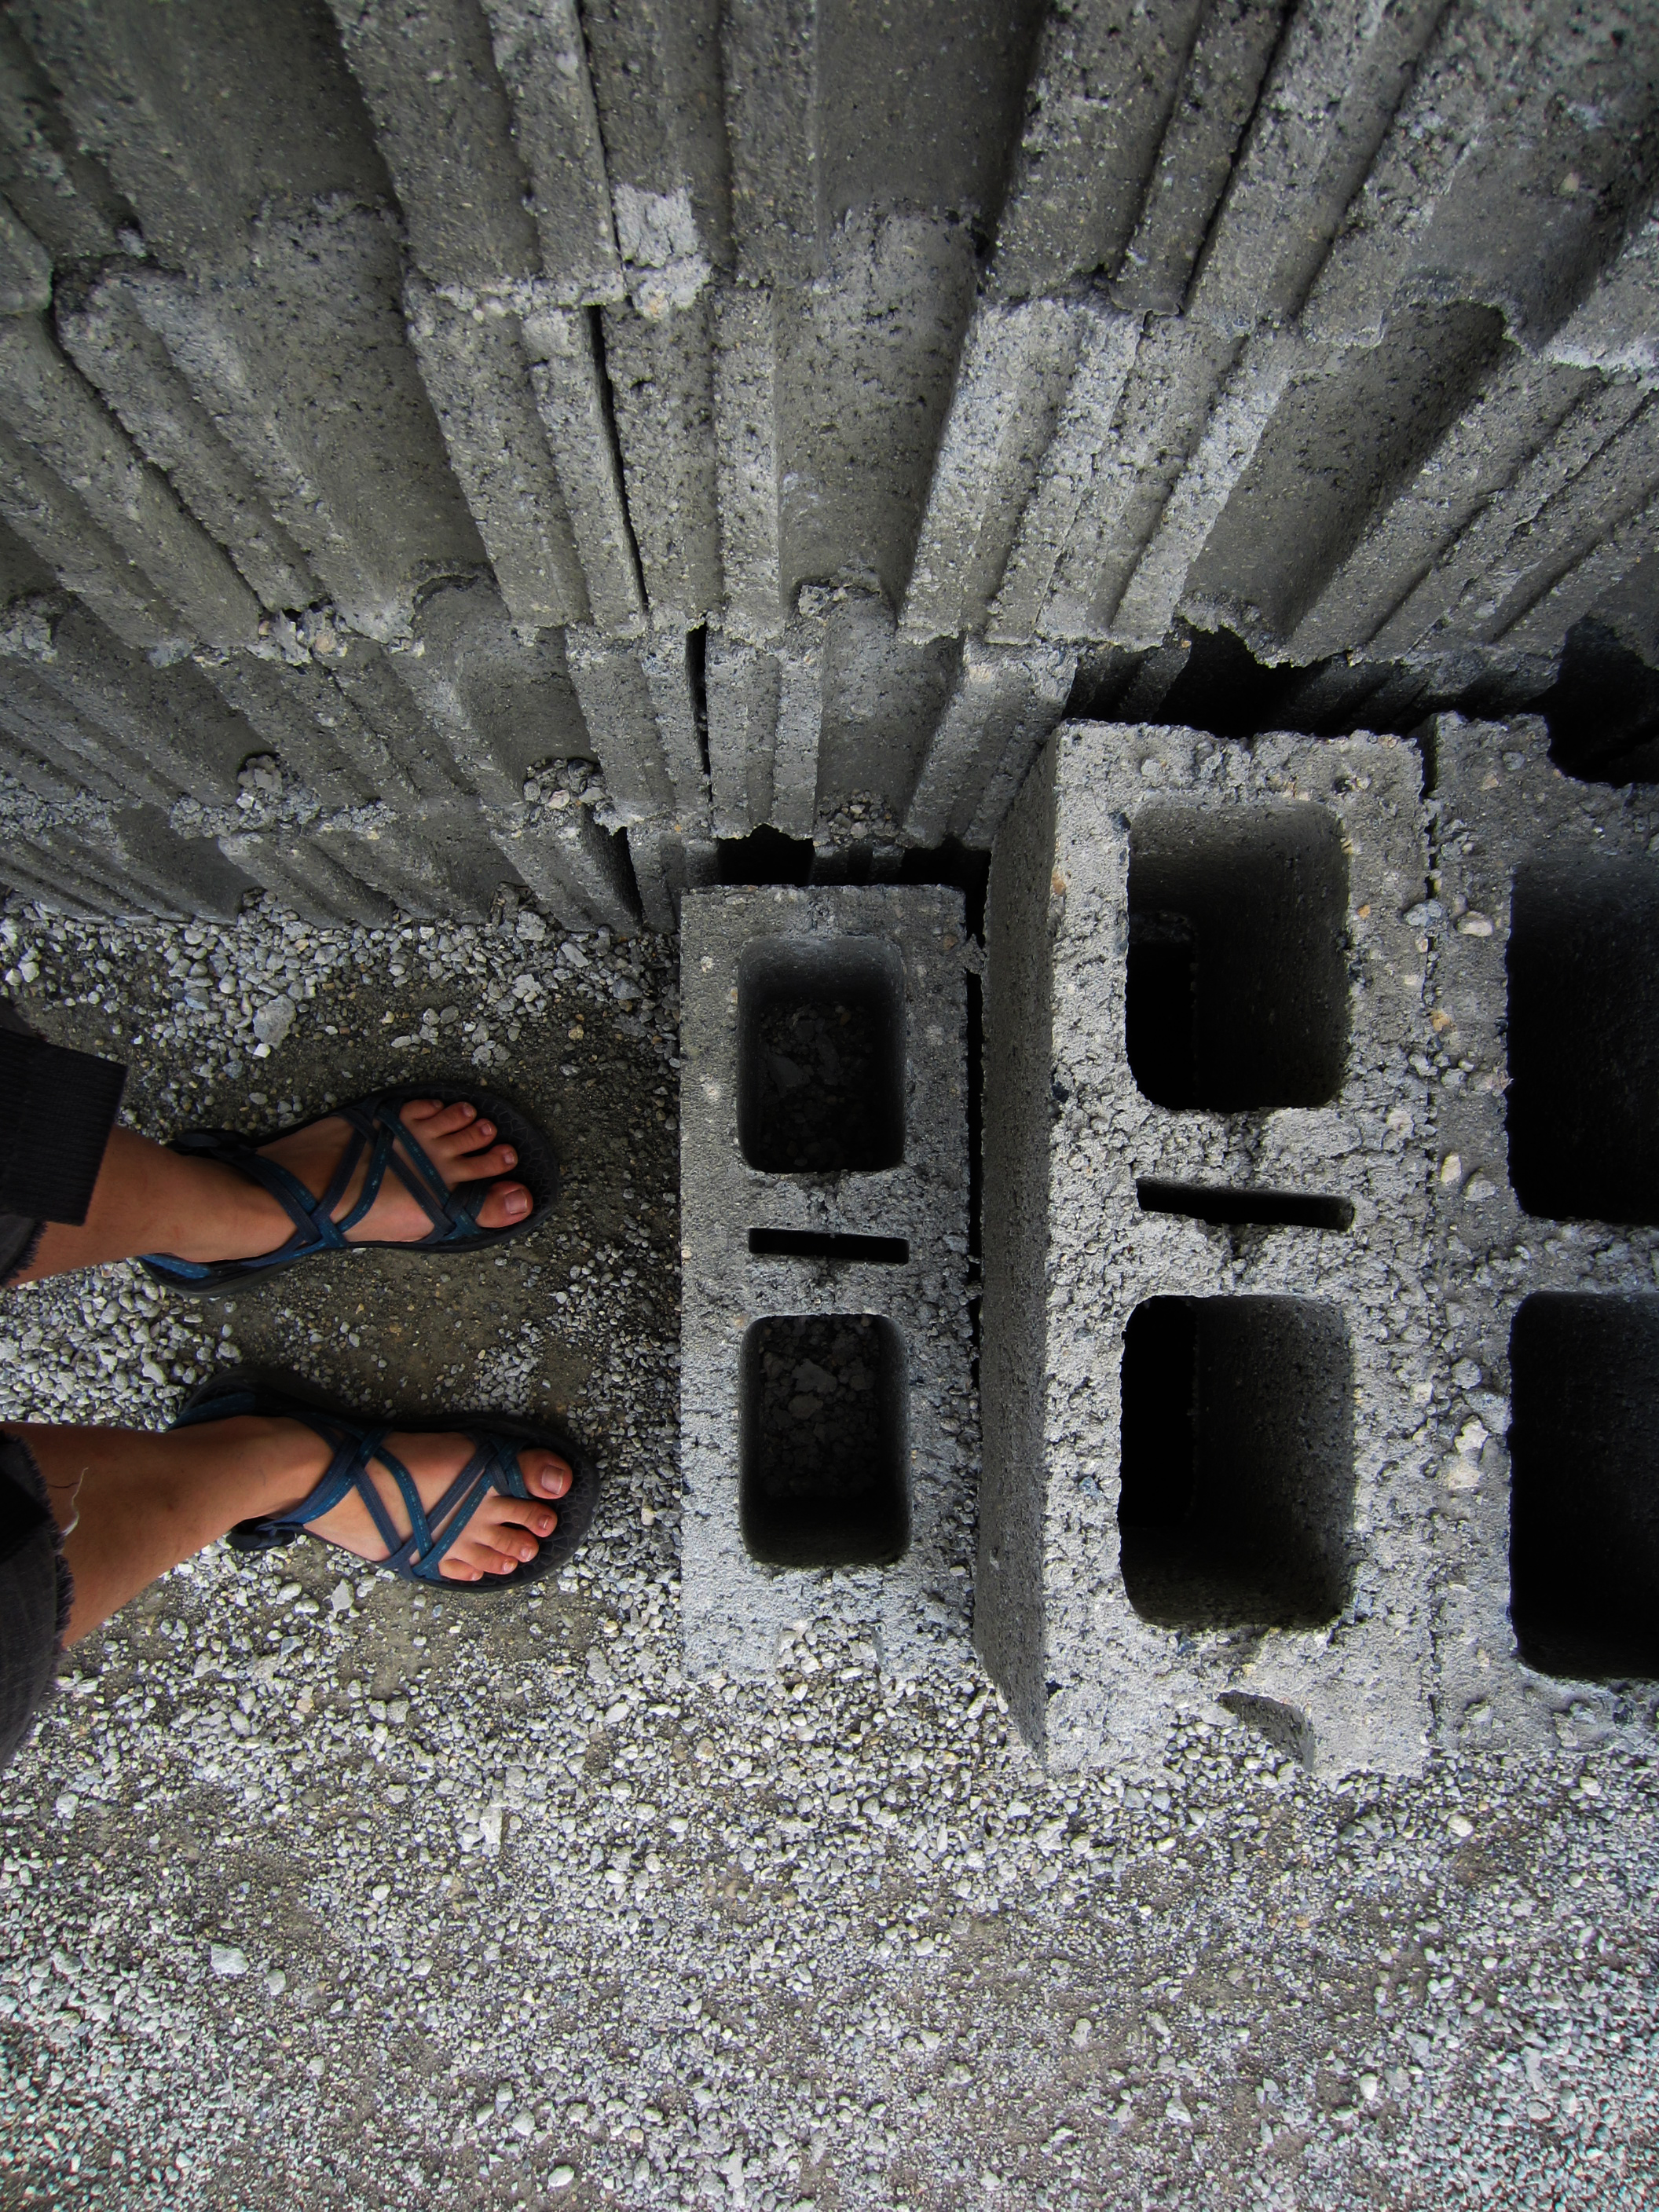
| 14:07, 10 June 2015 | DrilloMediano.jpg (file) |  |
4.52 MB | Los drillos. Medium sized blocks (6") at the factory. This is the size blocks that we will be creating. There are 4", 6", and 8" blocks. I took this photo. Chacos for scale. | 1 |
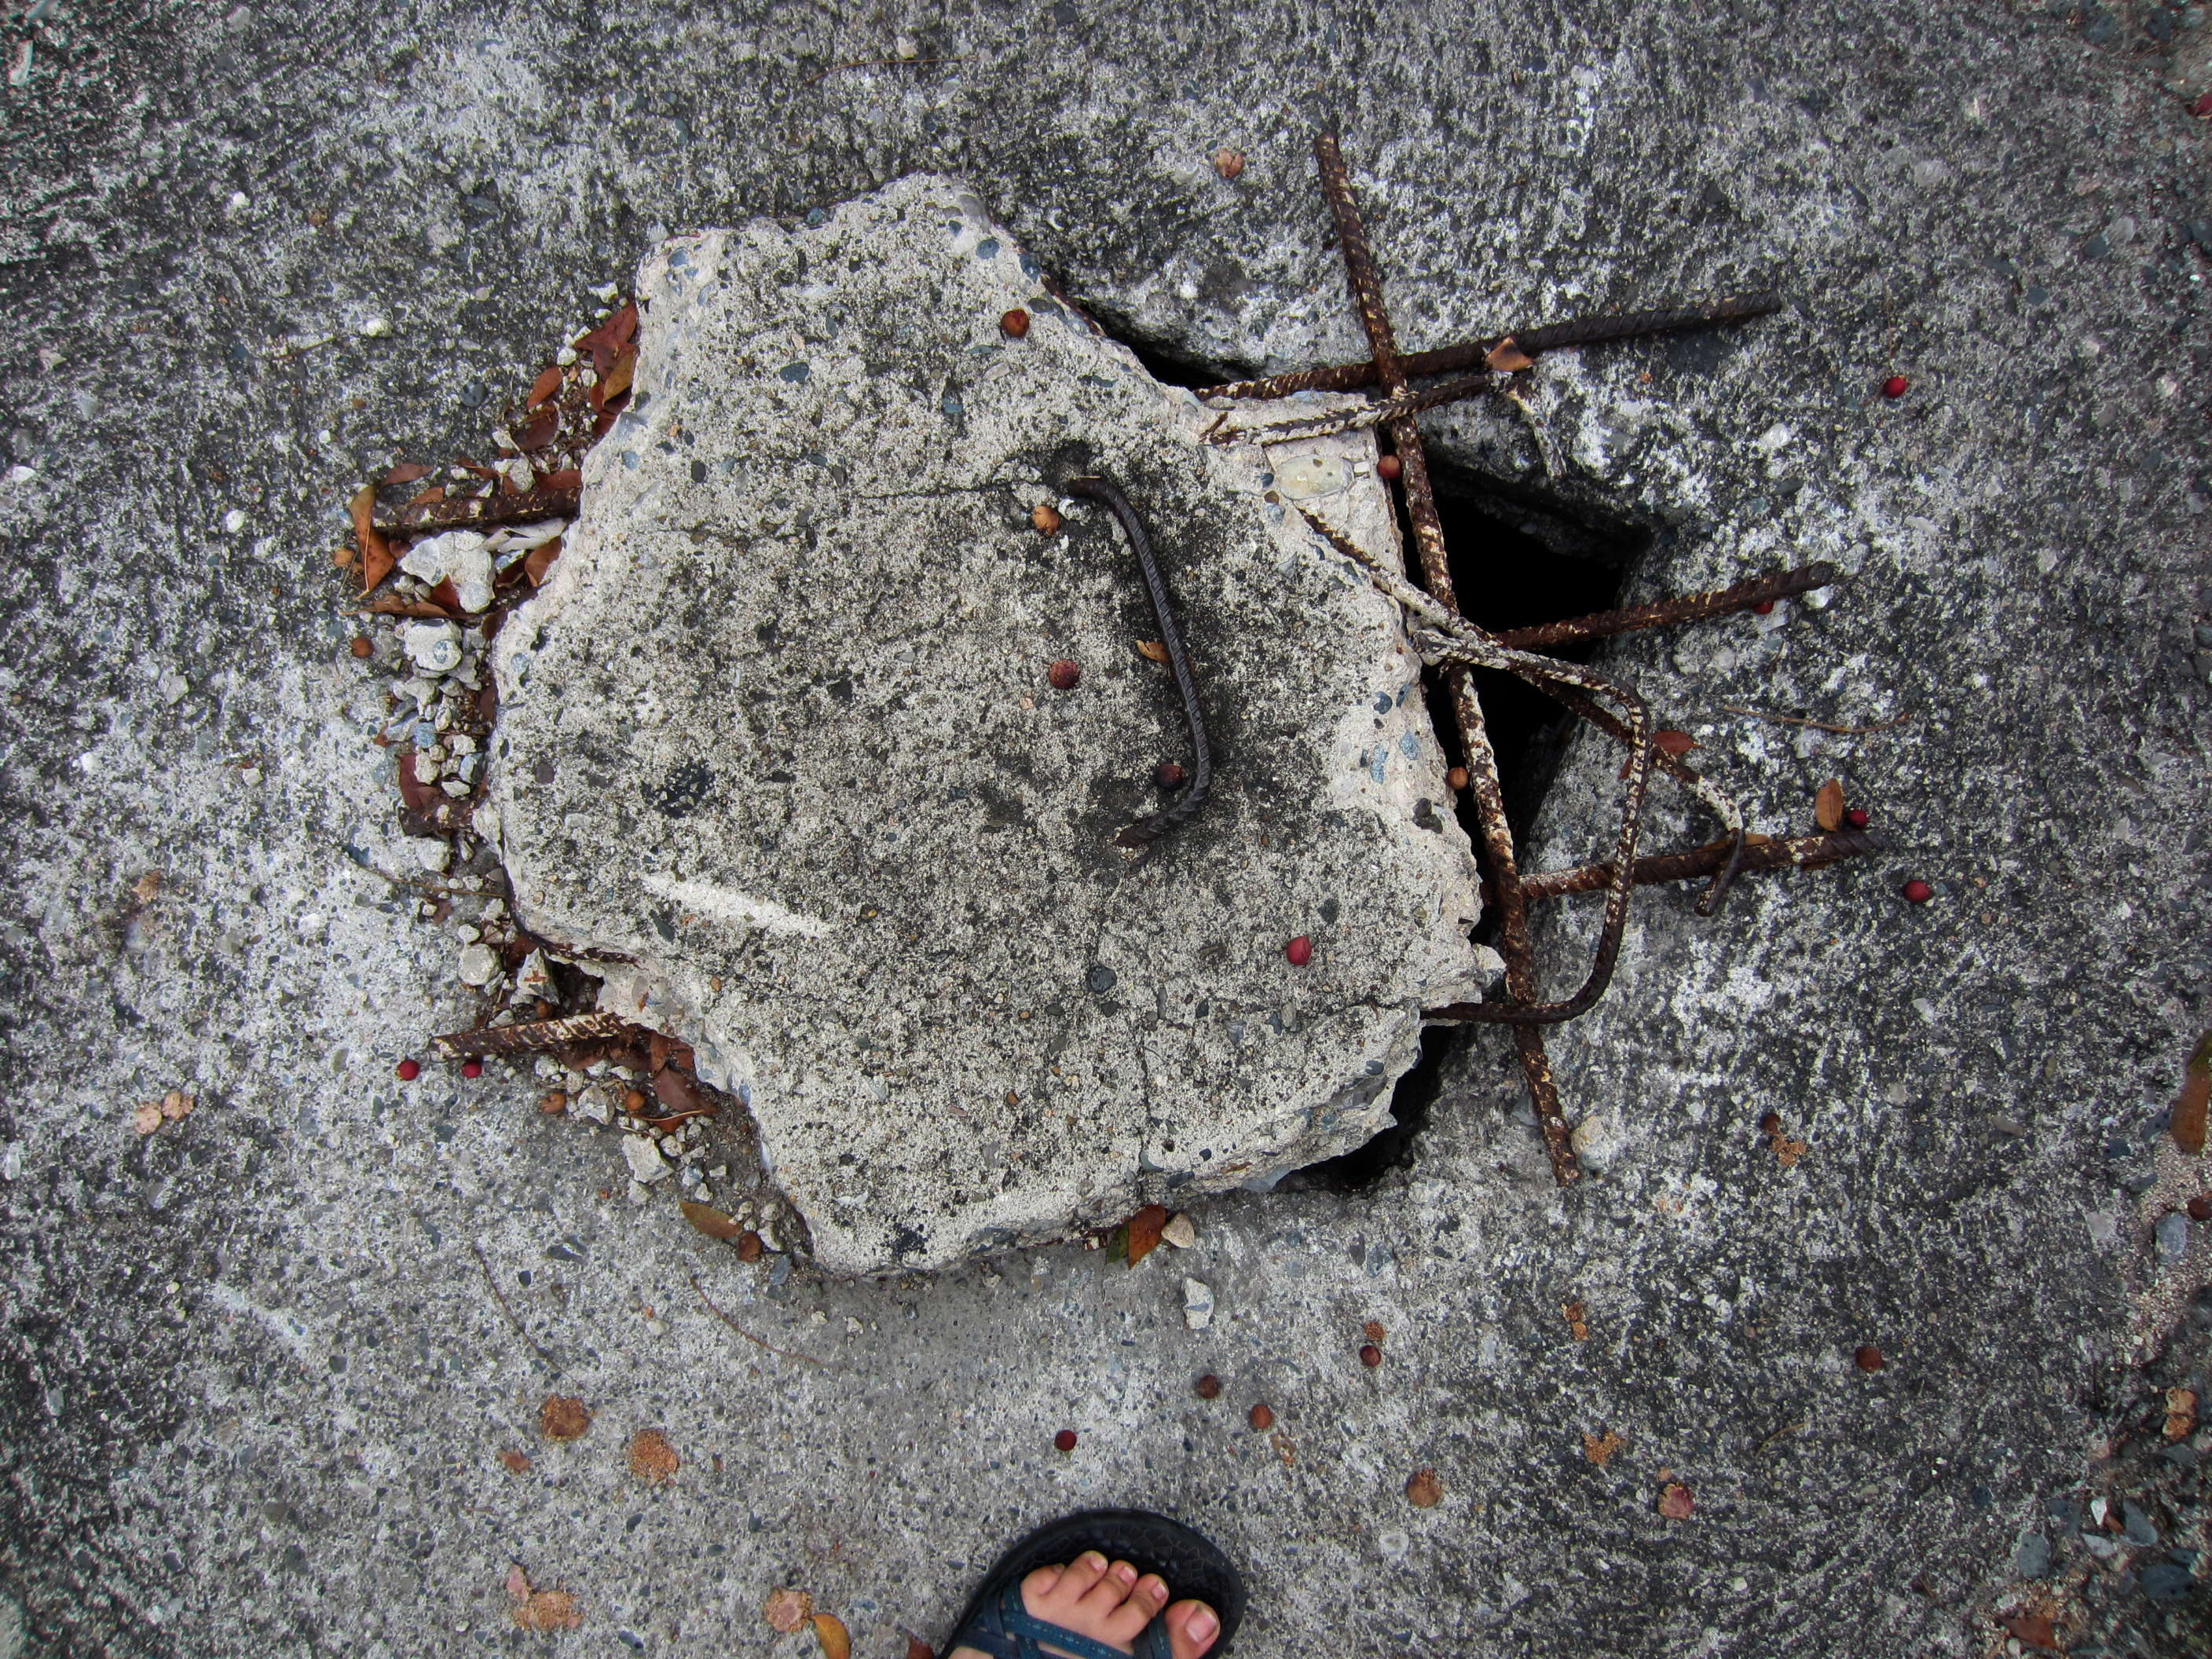
| 17:52, 27 May 2015 | StreetHoleCovering.jpeg (file) |  |
4.91 MB | Santo Domingo streets are ridden with holes from tree roots and other damage. The city will take rubble from other construction projects to cover these holes so people do not fall into them. I took this photo. | 1 |
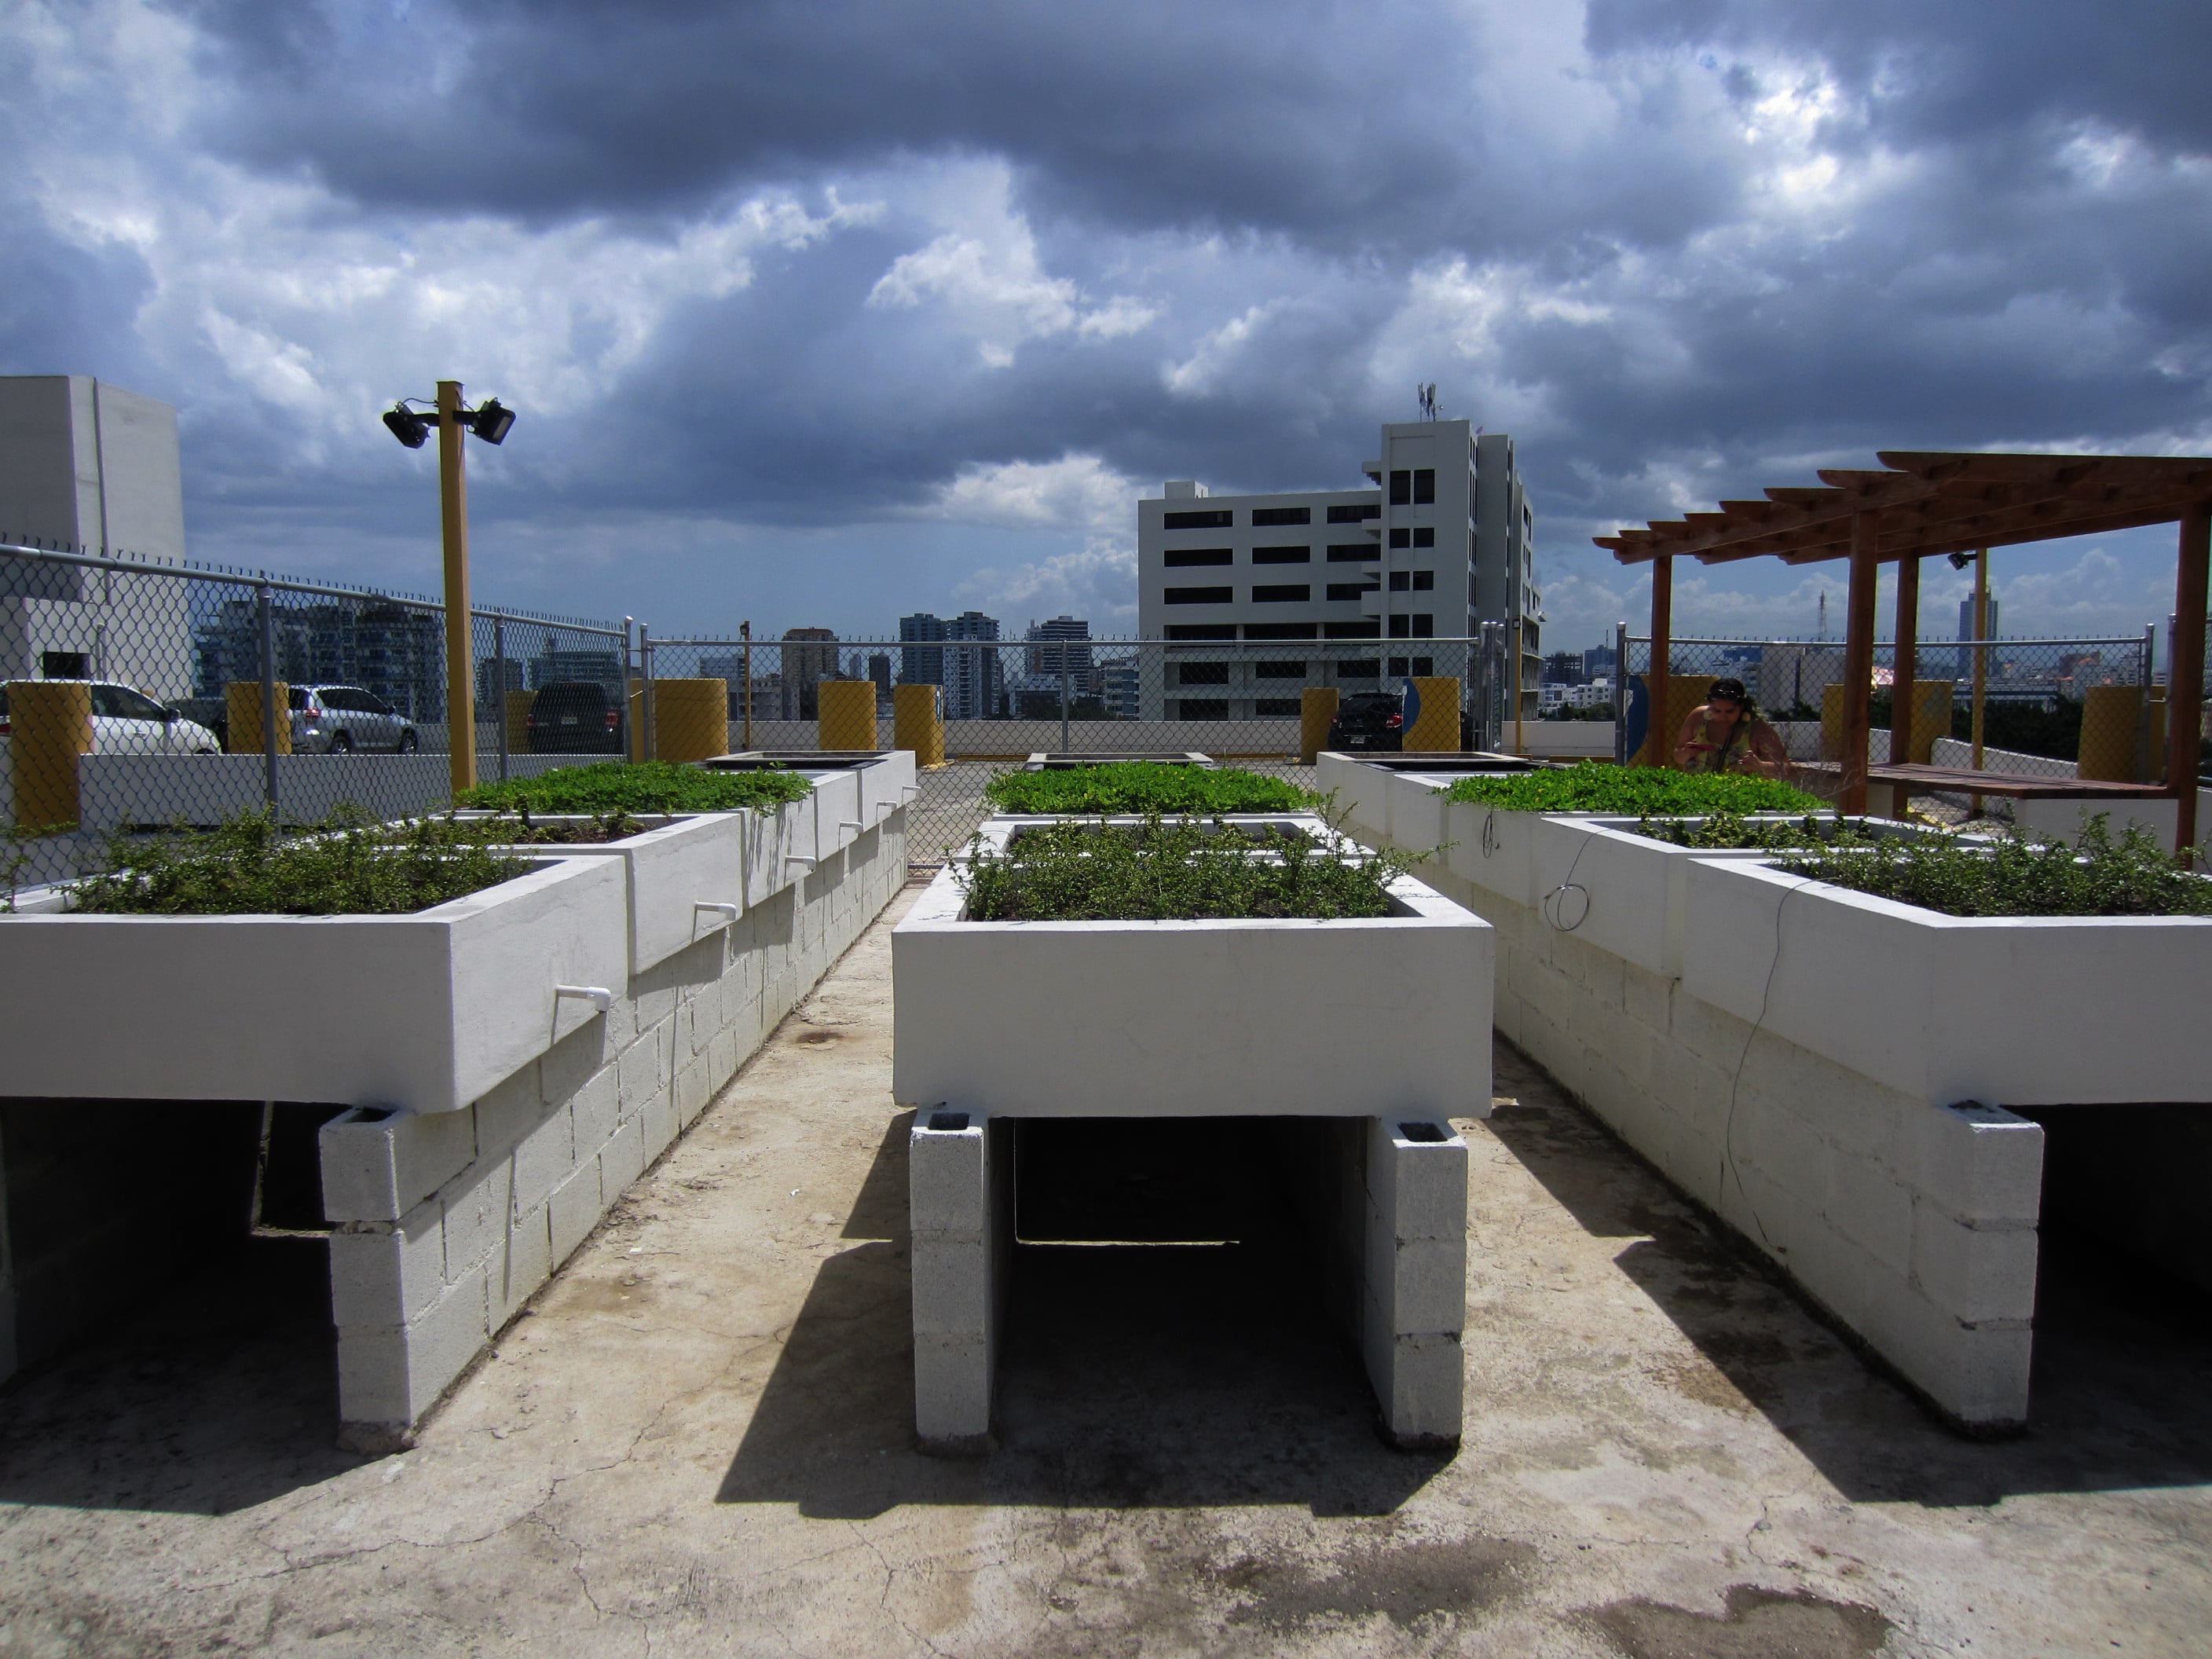
| 17:34, 27 May 2015 | UNIBERooftopGarden.jpeg (file) |  |
2.42 MB | Rooftop Garden on the top of the parking structure at UNIBE. Built this year. I took this photo. | 1 |
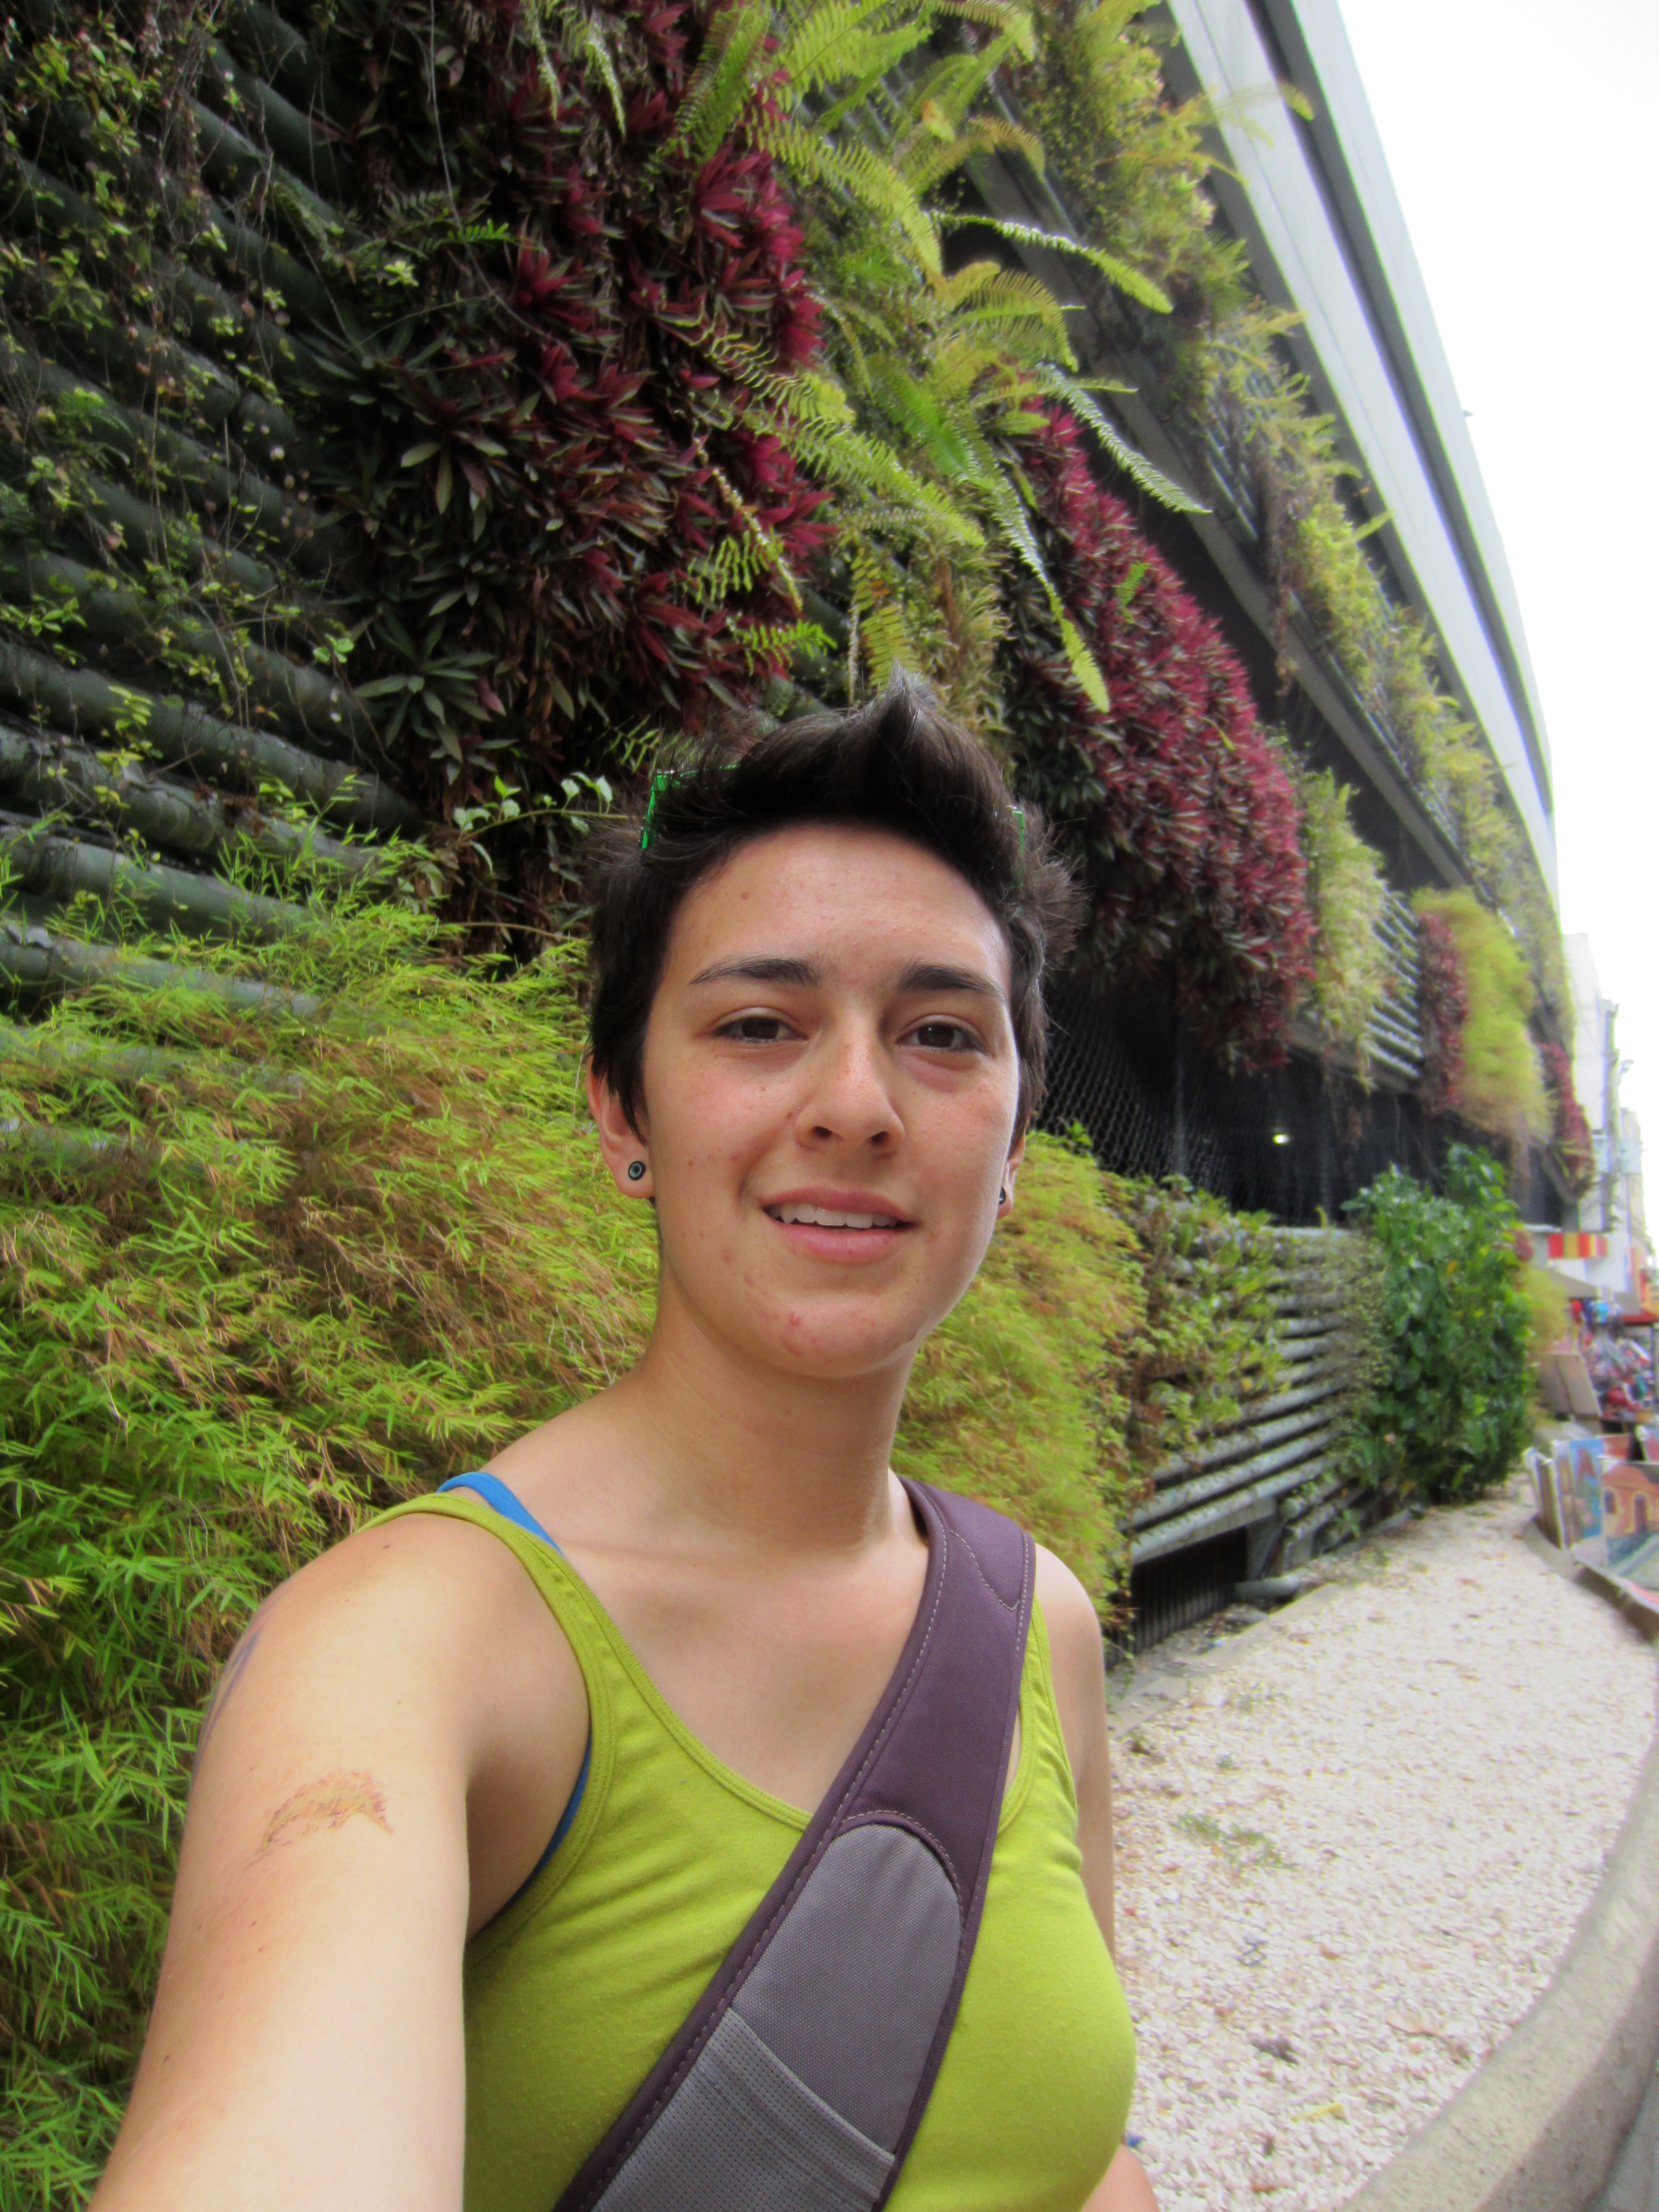
| 17:30, 26 May 2015 | VerticalGardenZonaColonial.jpeg (file) |  |
4.78 MB | Standing in front of the Vertical Garden in Zona Colonial. It looks like it was made using recycling pipes. | 1 |
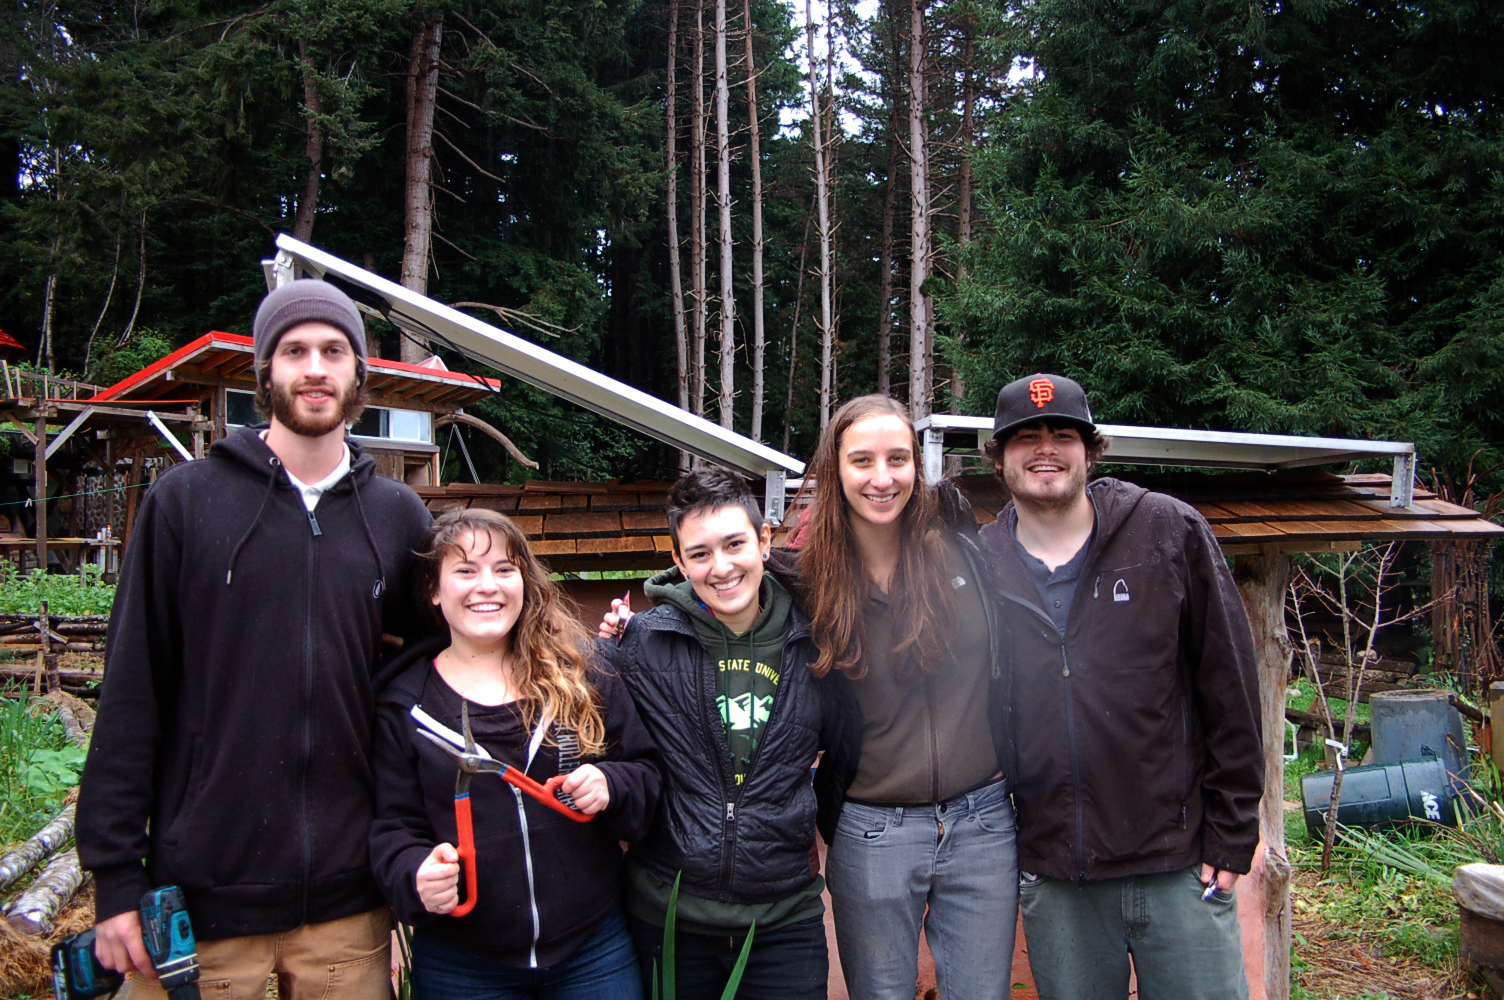
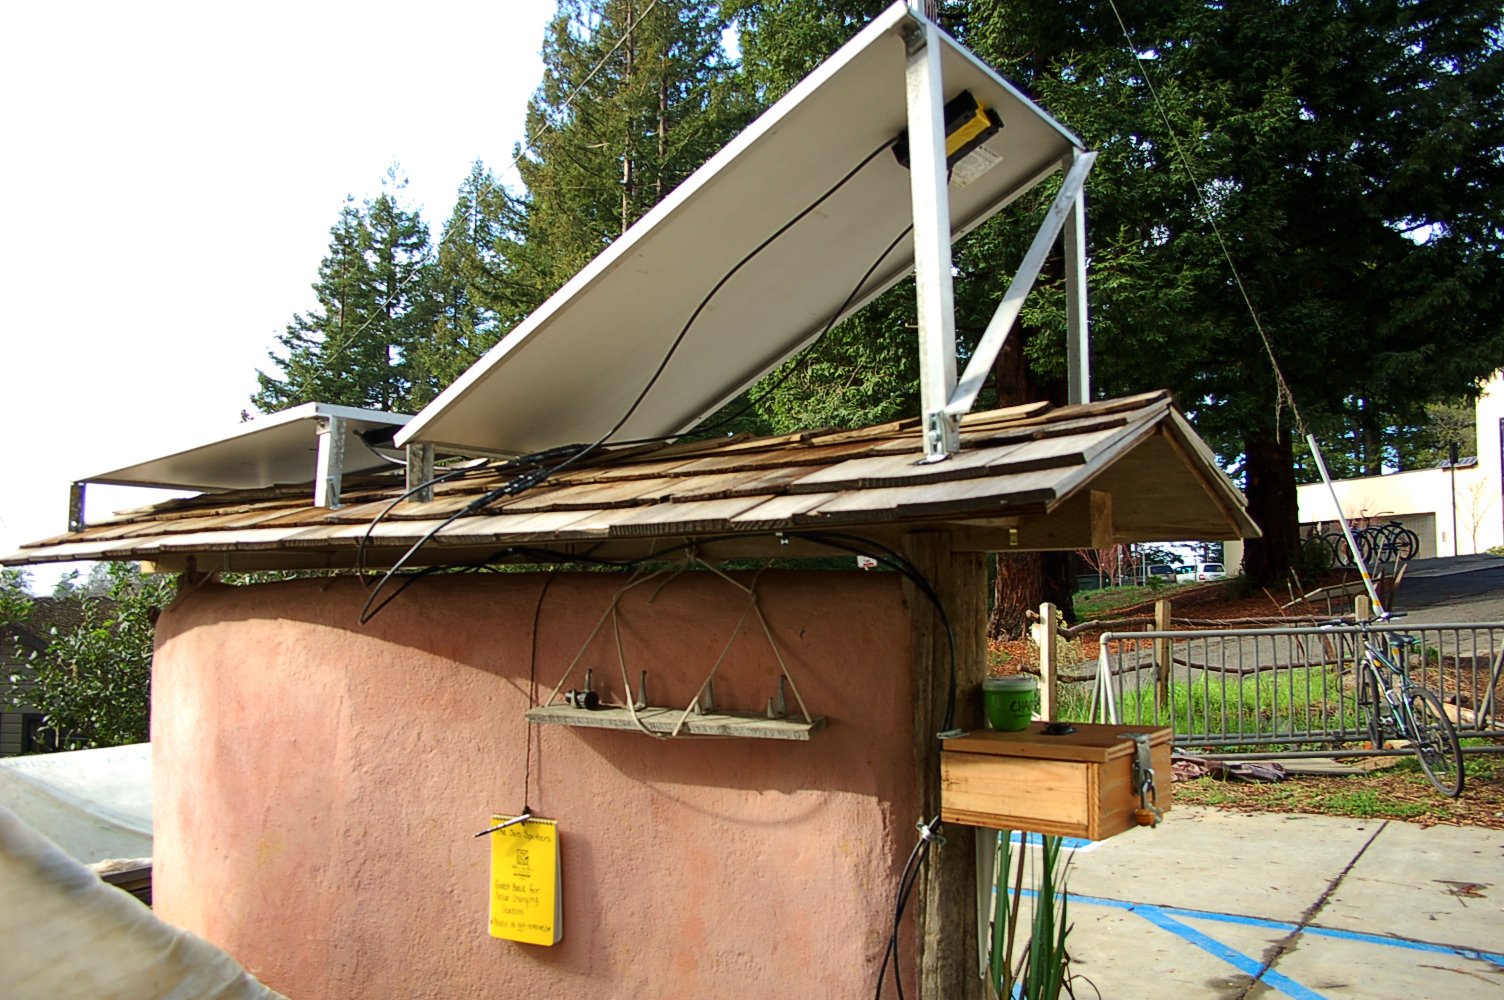
| 19:17, 24 January 2015 | TheSunSpotters.jpg (file) |  |
1.24 MB | The Sun Spotters, at your solar service. We did it! | 1 |
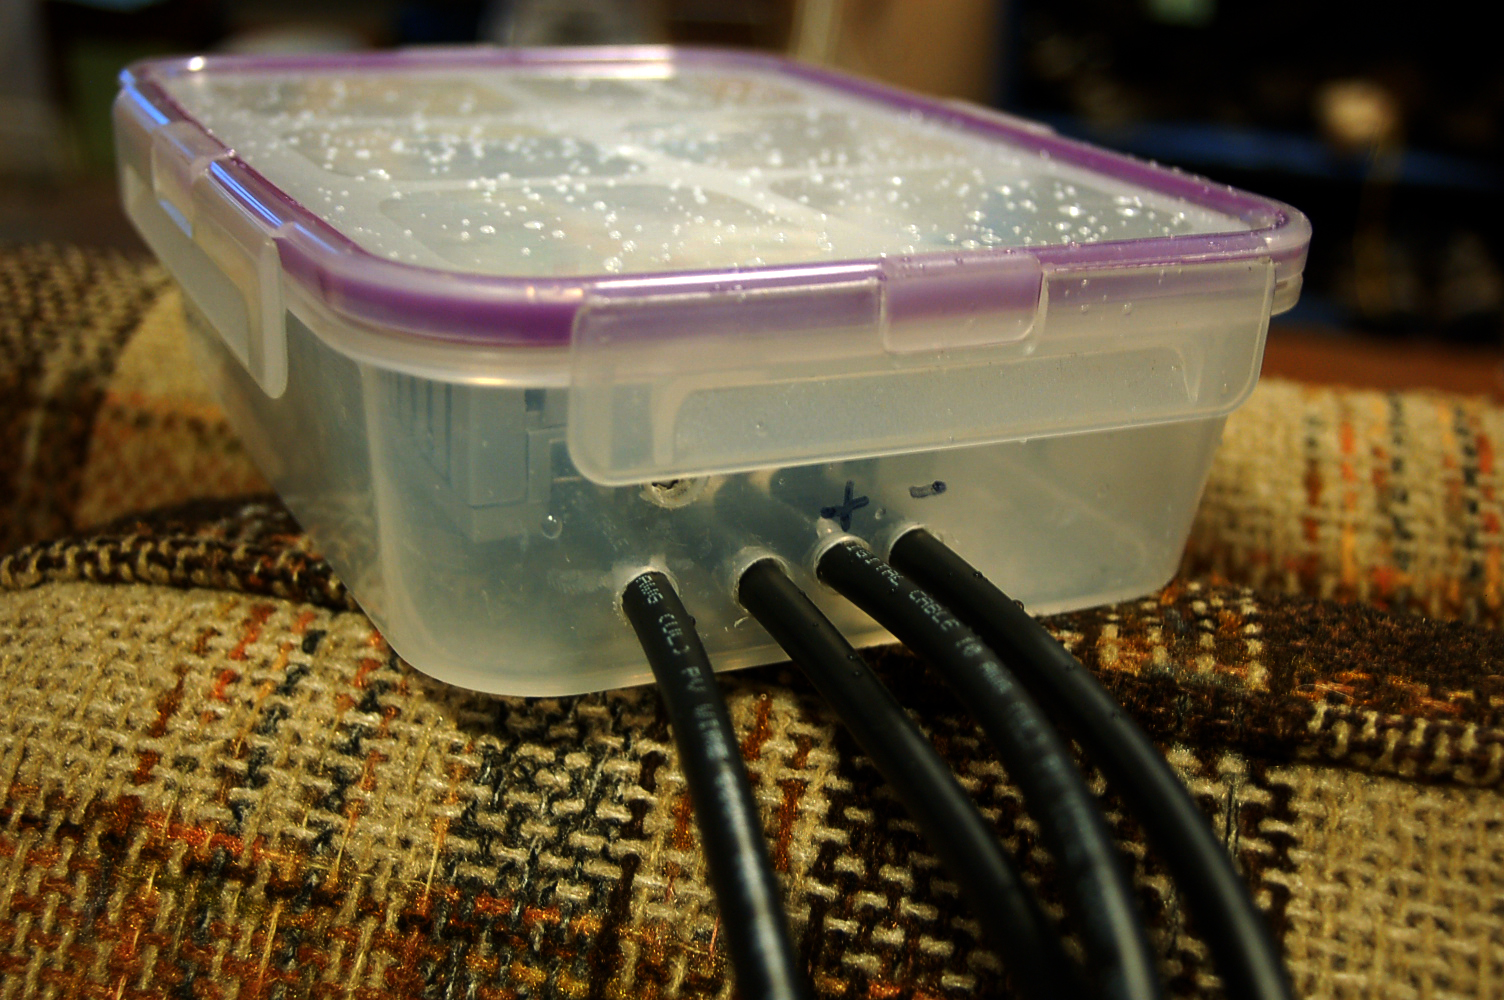
| 19:16, 24 January 2015 | Tupperware.jpg (file) |  |
1.1 MB | Tupperware containing charge controller with wires going inside. The wiring was fragile and easily came loose from its place in the charge controller, so once installed we had to be extremely careful. This made installation into the wooden charge contr... | 1 |
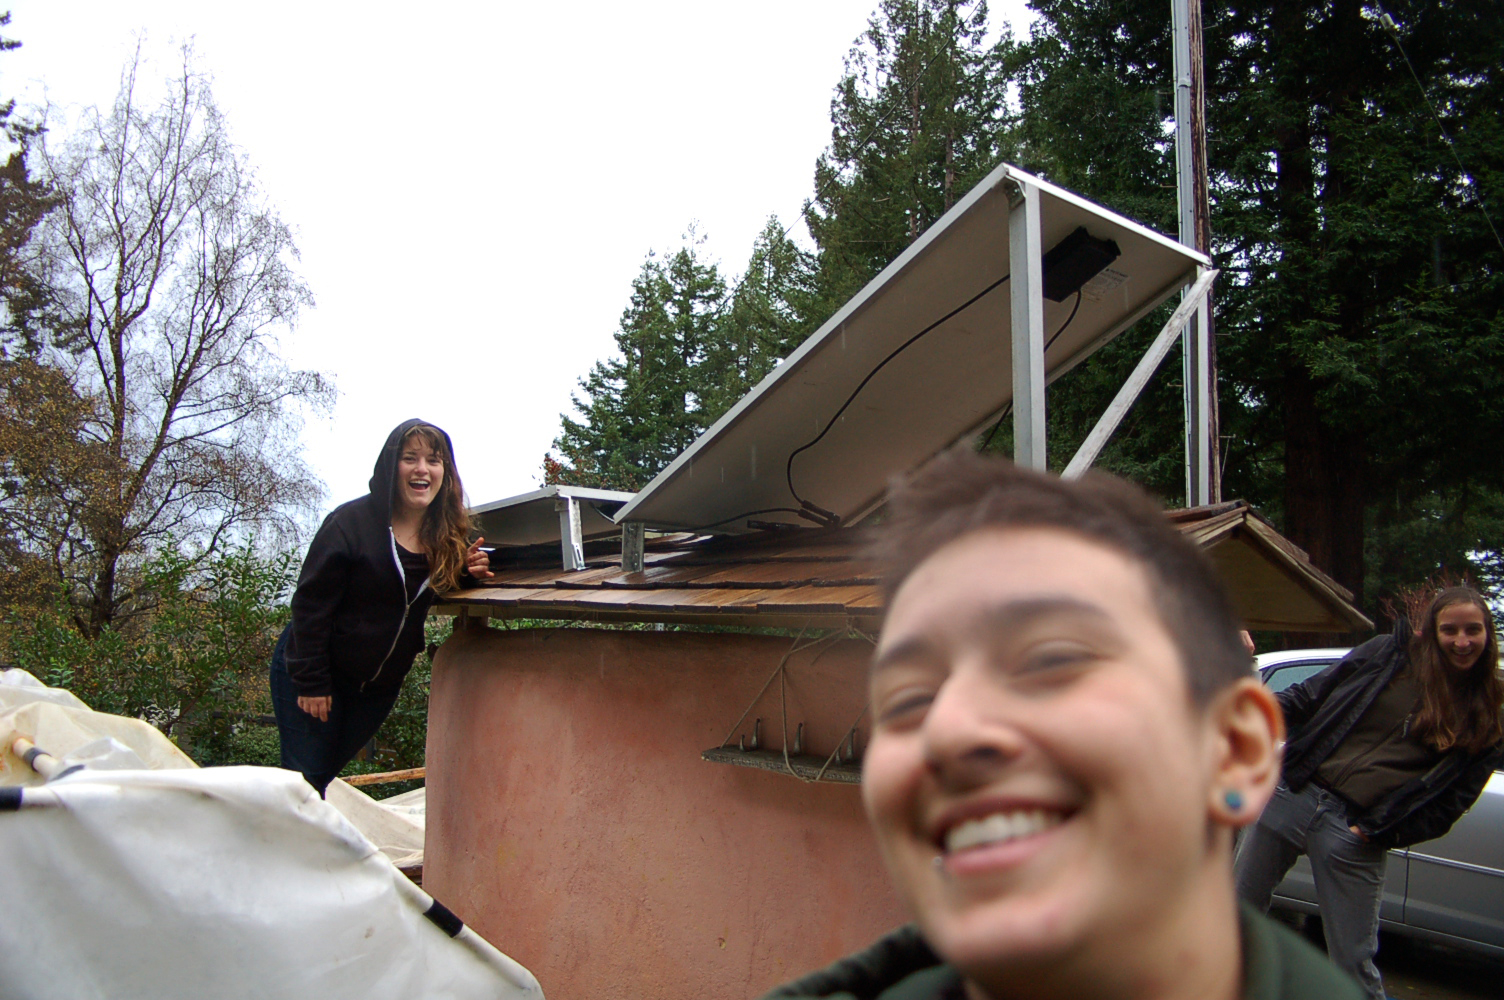
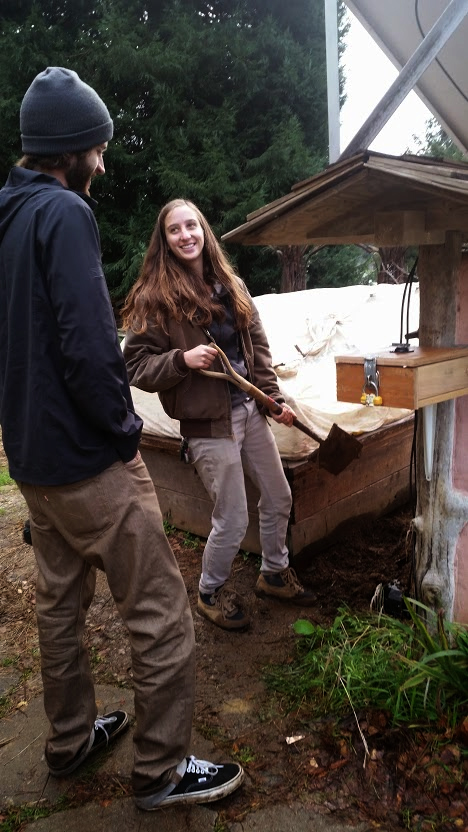
| 19:05, 24 January 2015 | SelfieAnnetteRachaelAnnika.jpg (file) |  |
1.07 MB | Panel Mounting Pride | 1 |
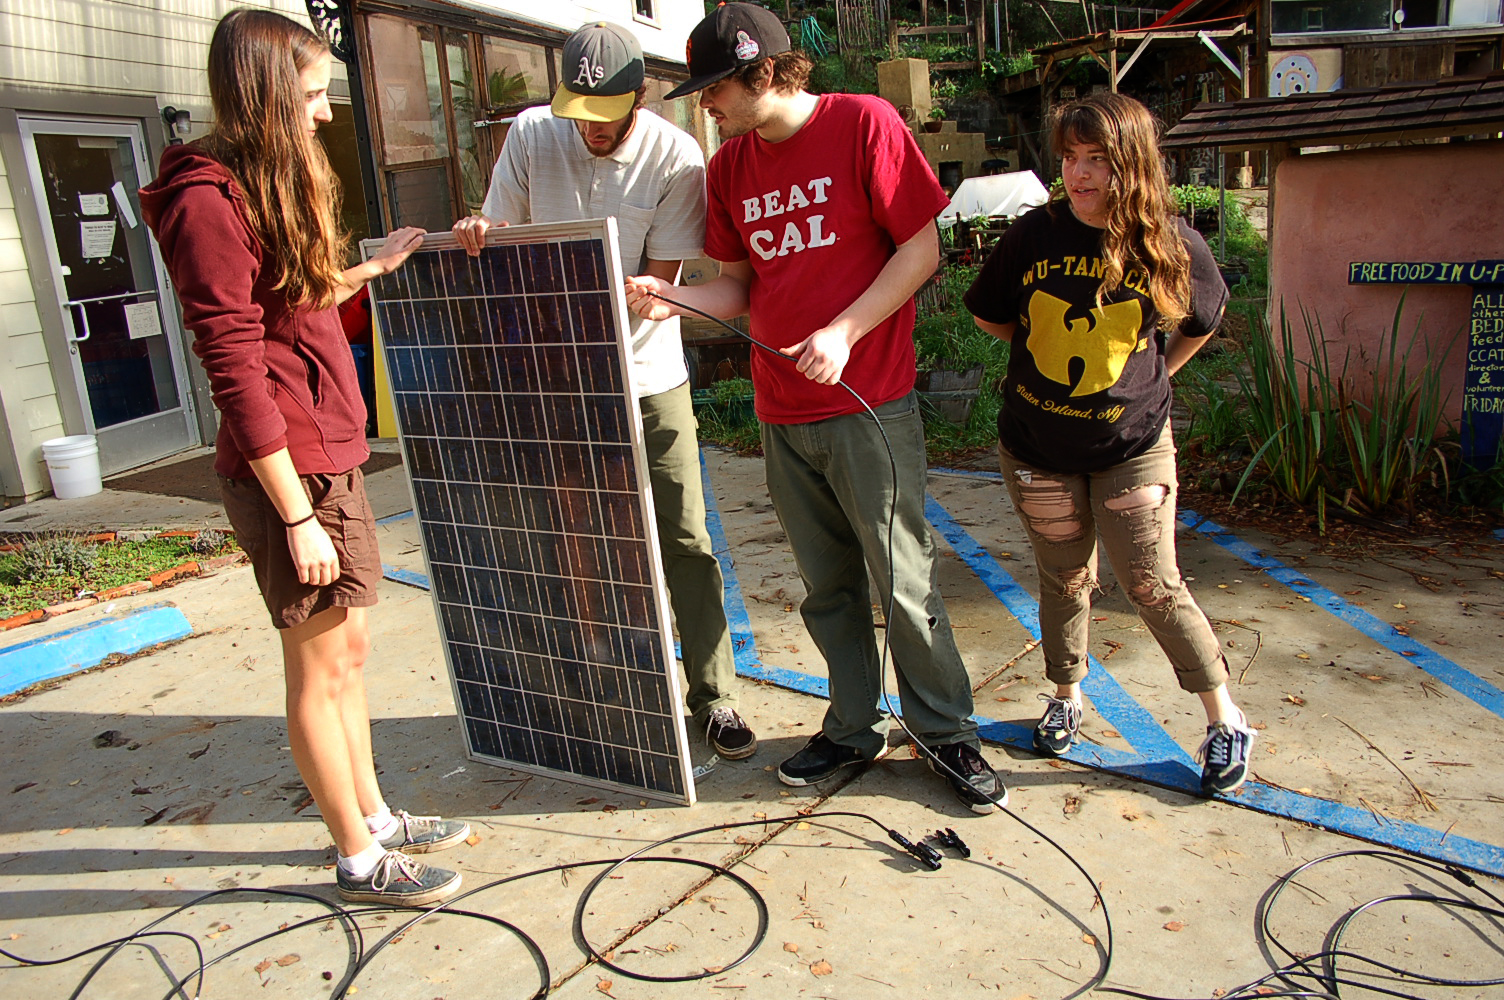
| 19:02, 24 January 2015 | SpottersWiringPanel.jpg (file) |  |
1.3 MB | Attempting to attach the wires to the panel. It didn't work without the MC4 connectors. | 1 |
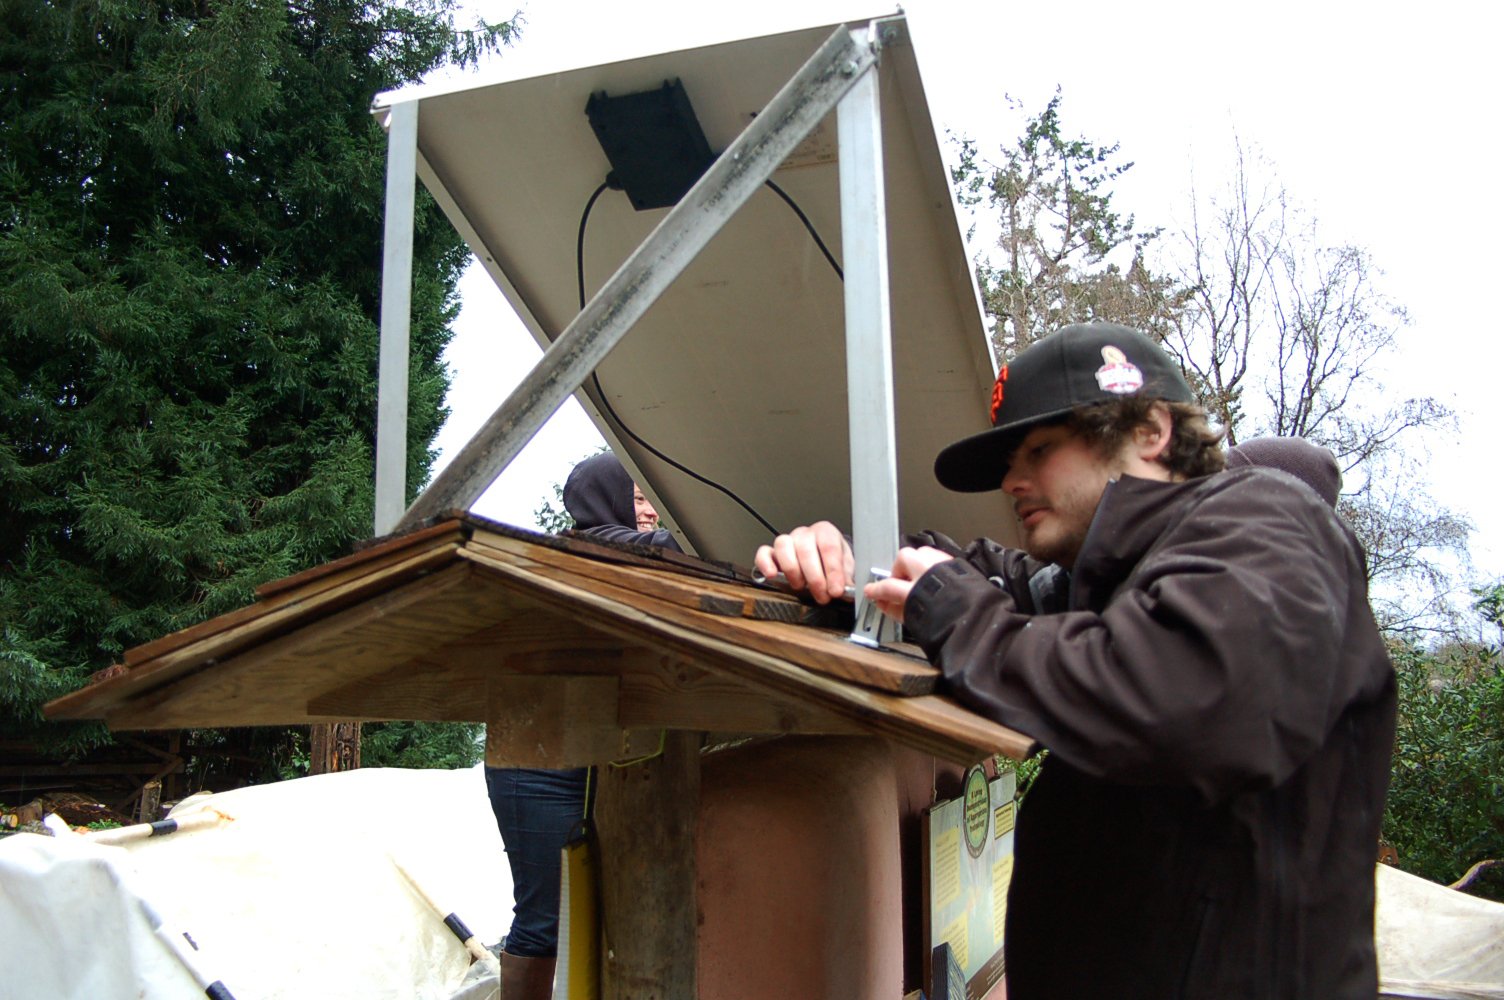
| 18:59, 24 January 2015 | KevinPanelScrewing.jpg (file) |  |
1.05 MB | Kevin Mounting panel to kiosk | 1 |
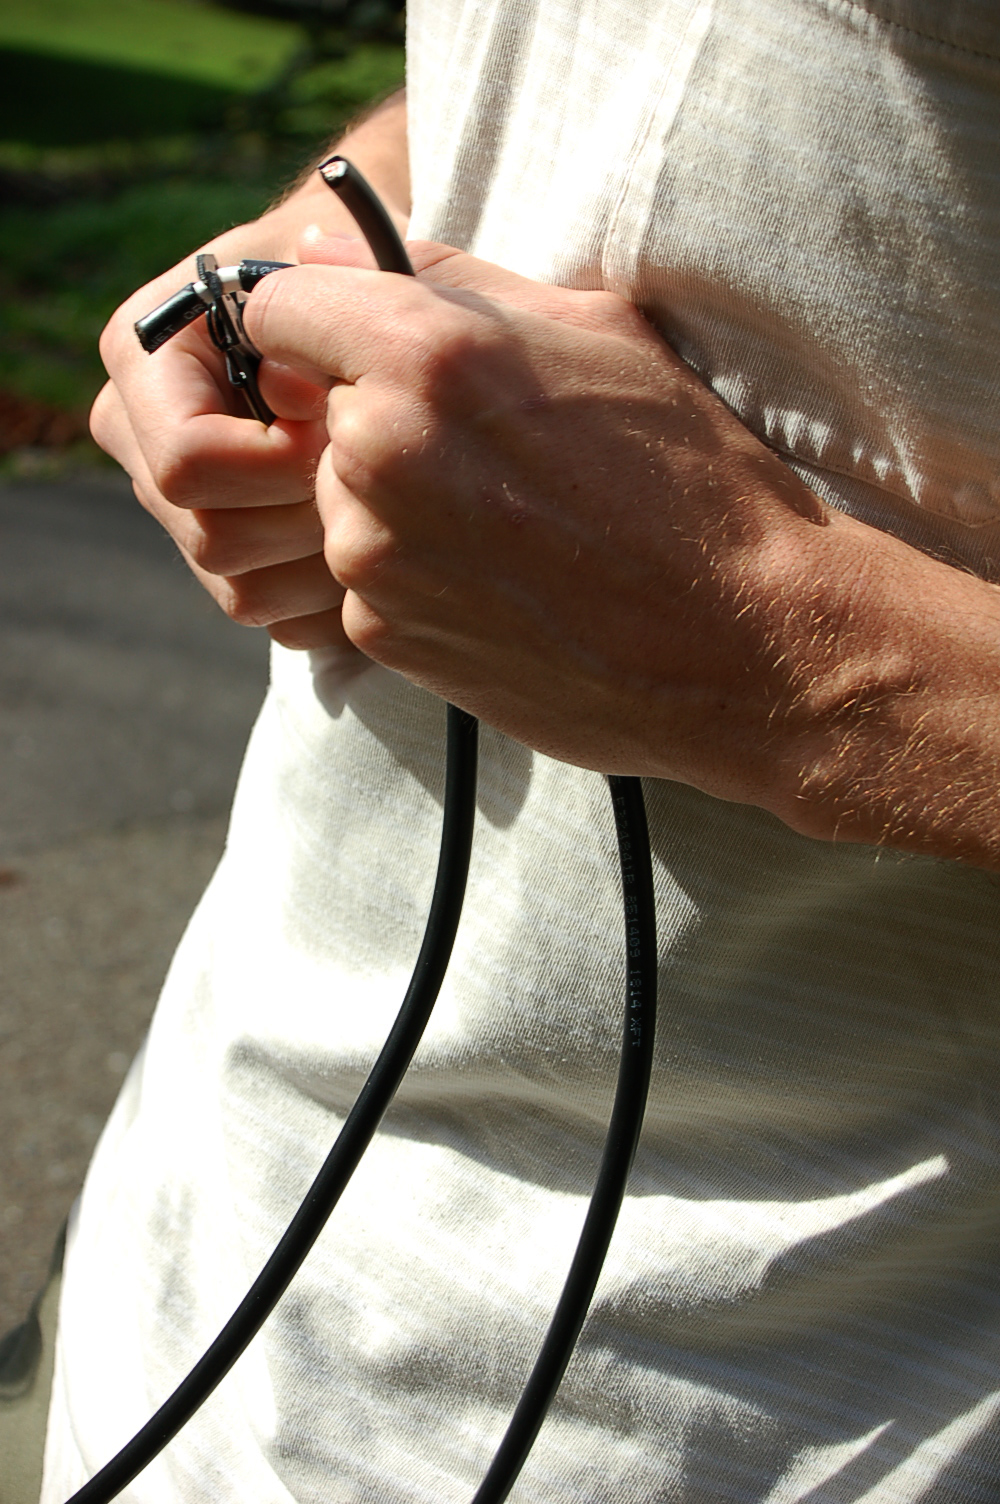
| 18:55, 24 January 2015 | PVCablesStripping.jpg (file) |  |
938 KB | Stripping the cables for installation | 1 |
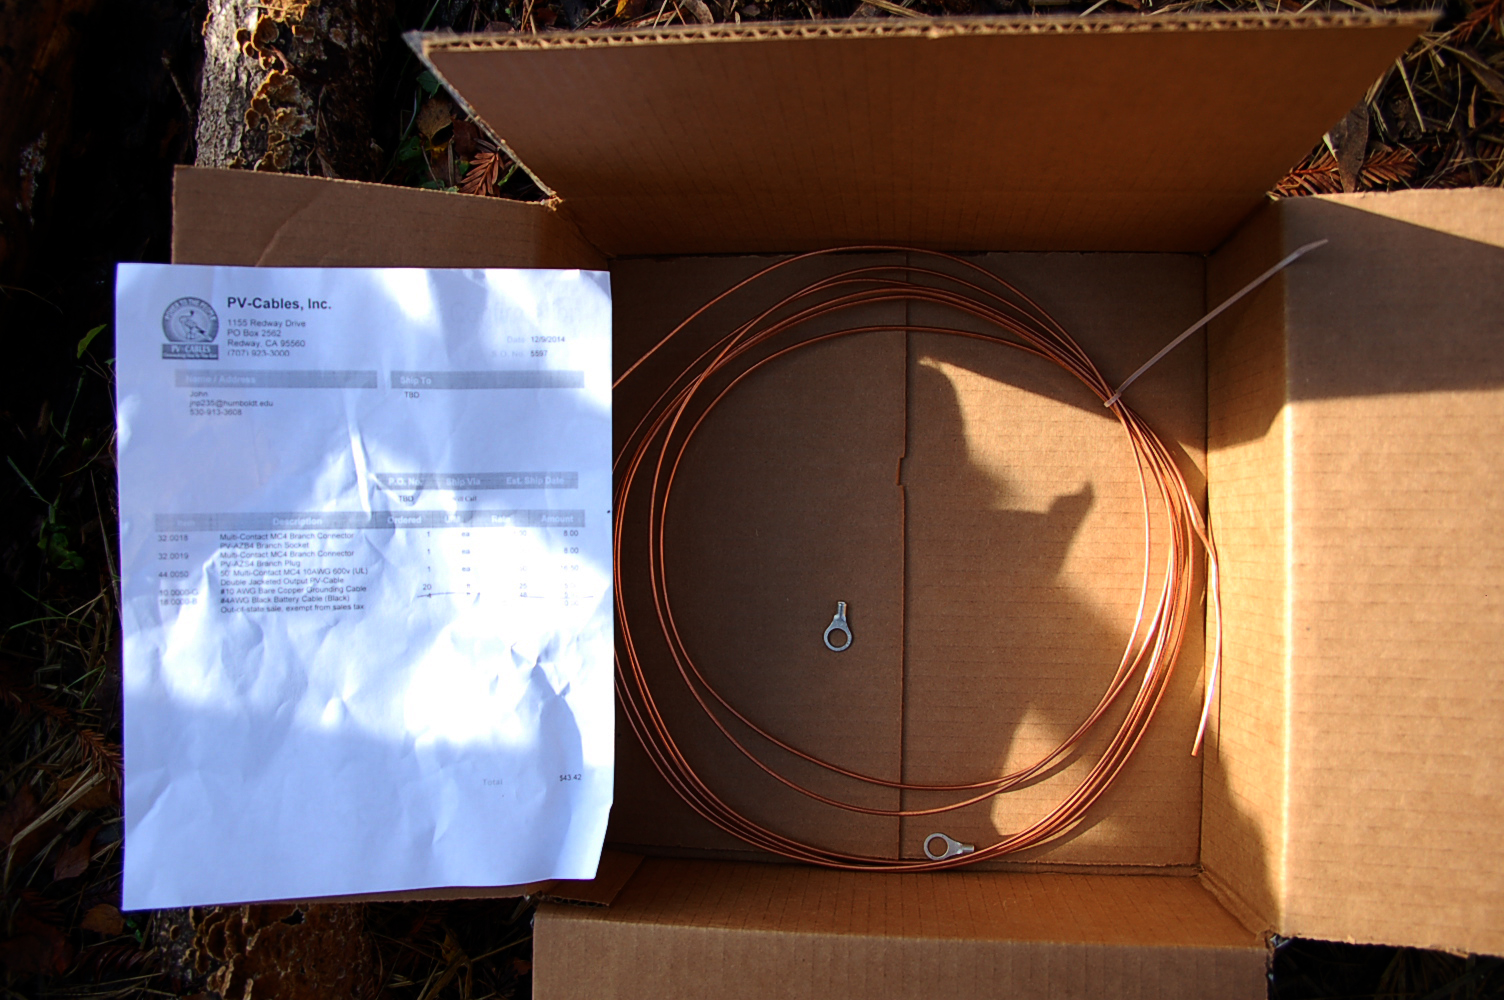
| 18:54, 24 January 2015 | PVCables.jpg (file) |  |
899 KB | Our PV Cables. The MC4 connectors were missing from the package which delayed the project by a week or so and resulted in a mission to find the appropriate connectors around town. We finally acquired them from Solar Roger who helped with connecting the... | 1 |
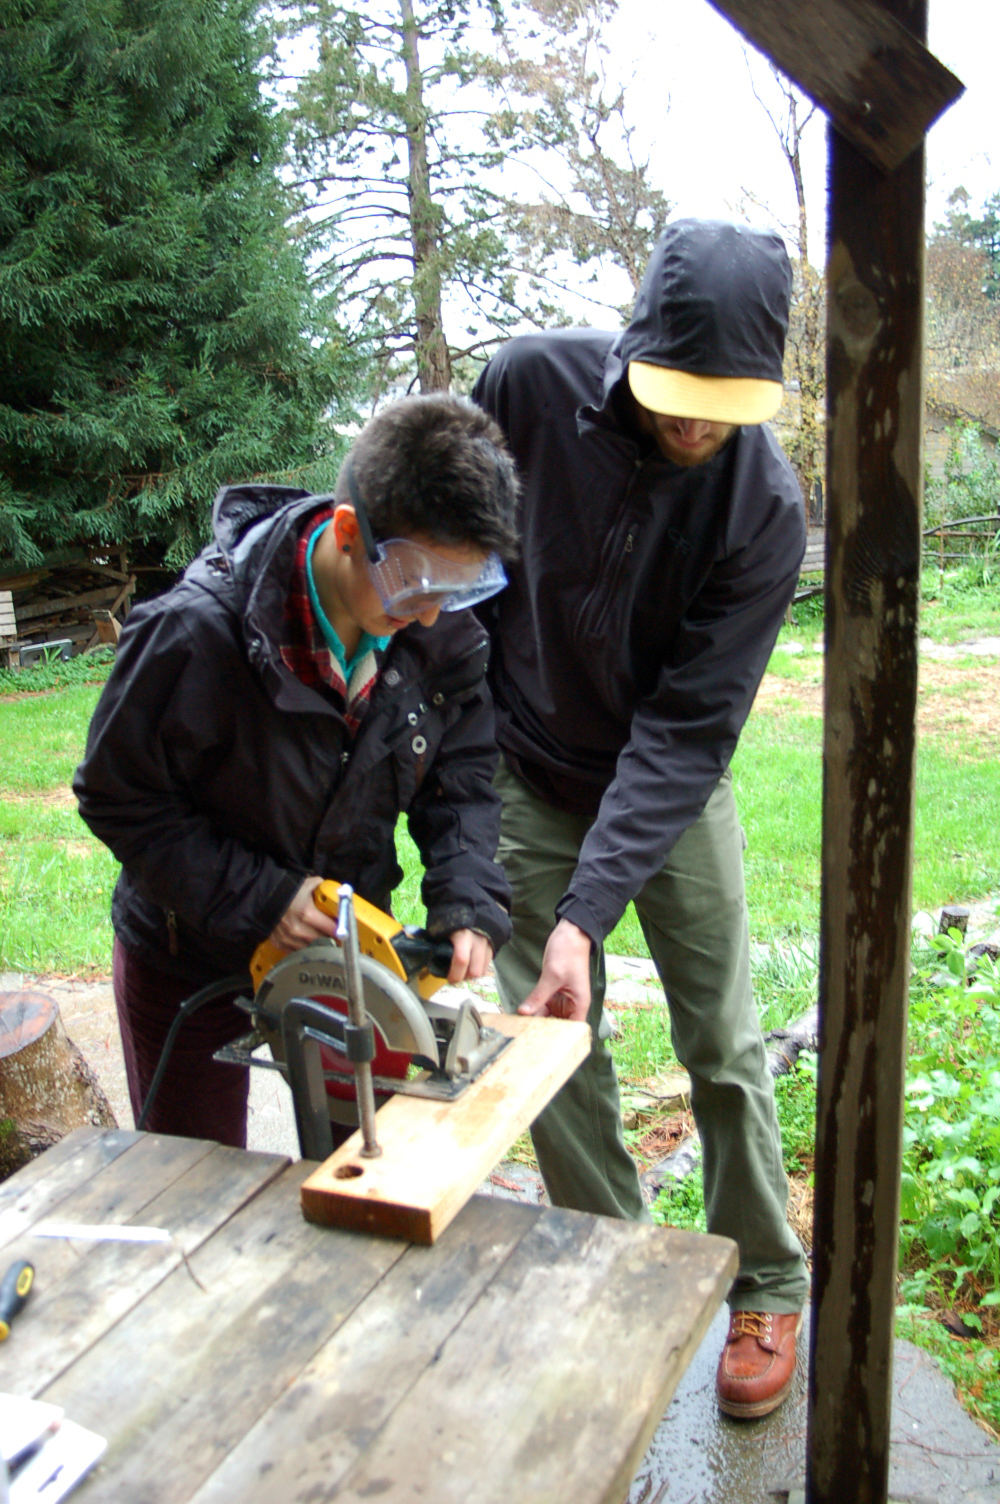
| 18:51, 24 January 2015 | KevinJohnCableCutting.jpg (file) |  |
1.15 MB | Teamwork in cutting the cables to the appropriate size. | 1 |
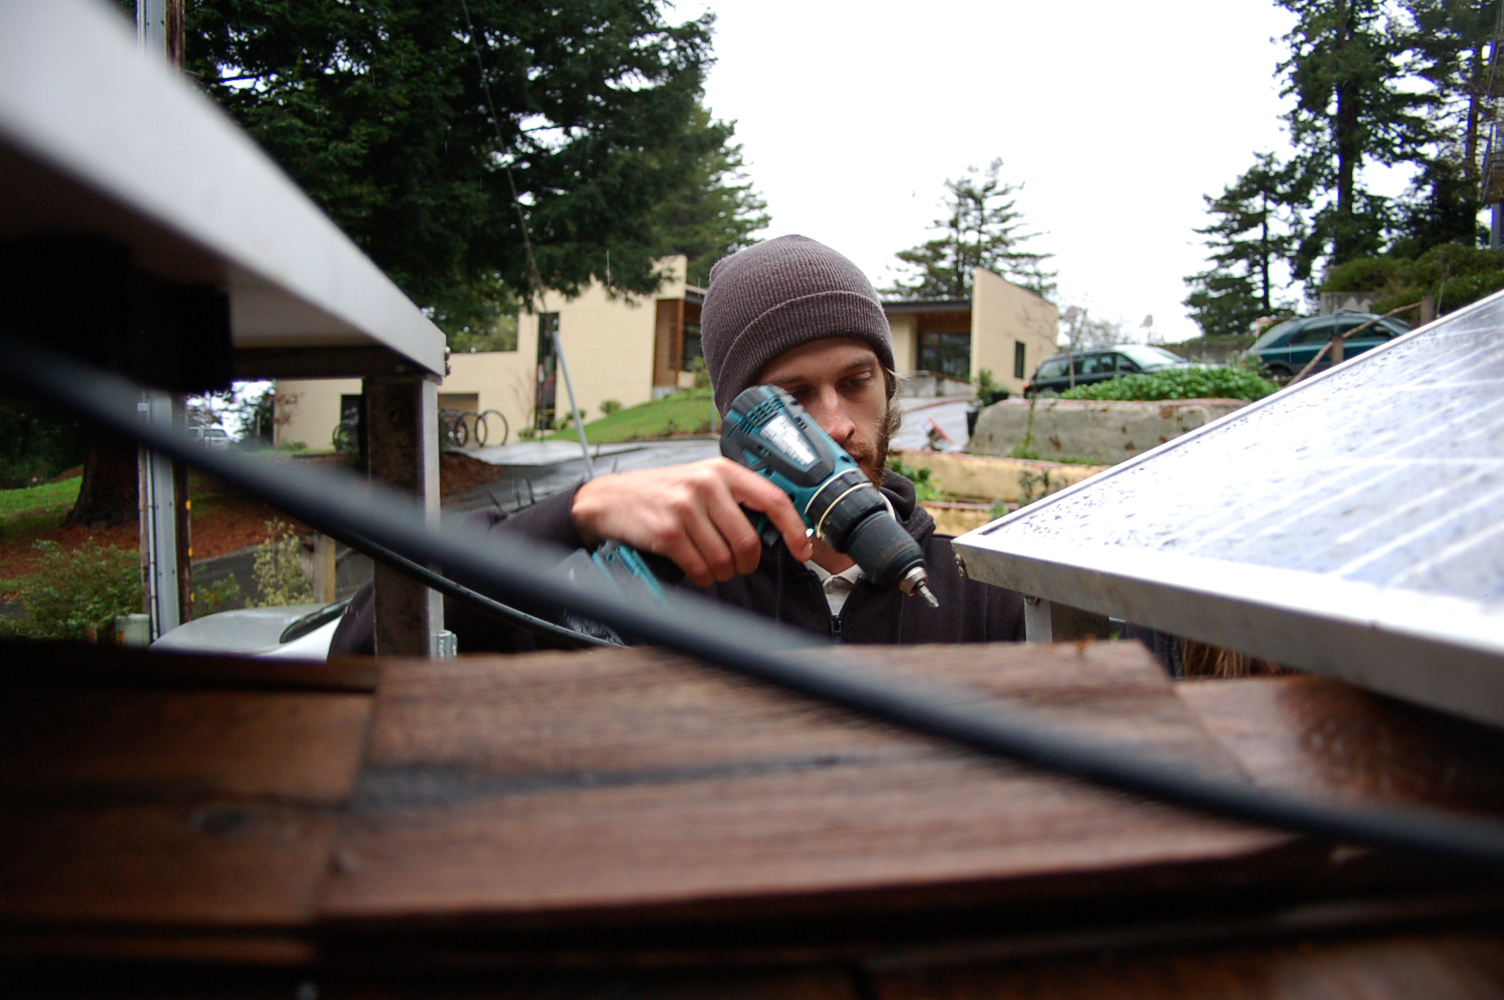
| 18:50, 24 January 2015 | JohnDrillingPanels.jpg (file) |  |
900 KB | John screwing in another panel. | 1 |
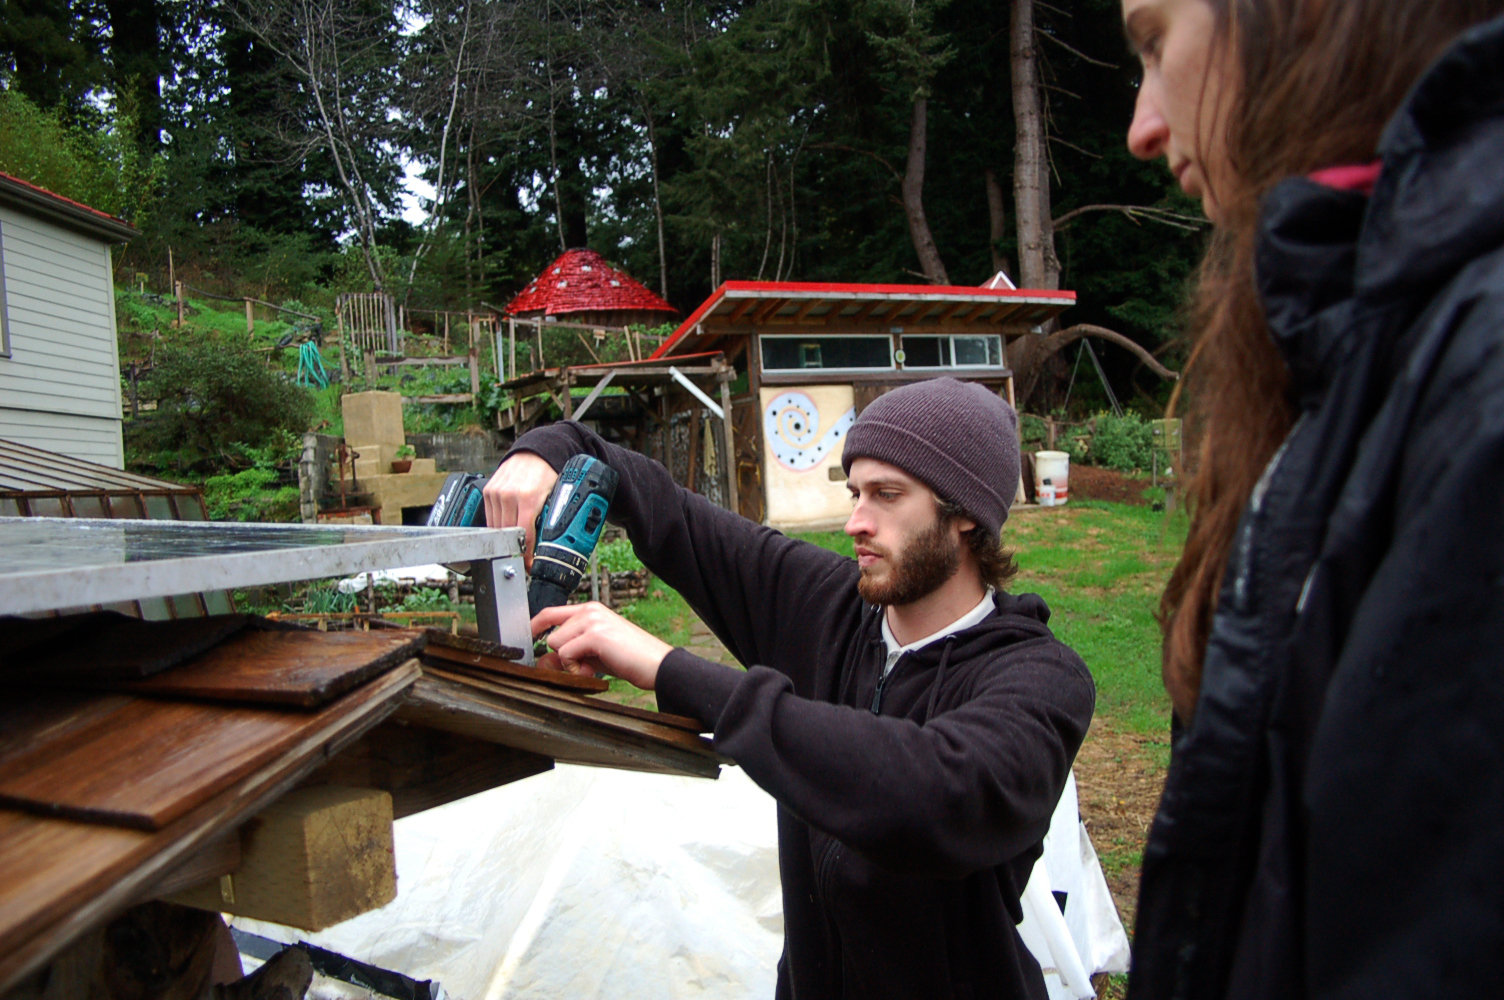
| 18:47, 24 January 2015 | JohnAnnikaScrewing.jpg (file) |  |
1.08 MB | Screwing the panels in place | 1 |
| 18:45, 24 January 2015 | JohnAnnikaBuryingBattery.jpg (file) |  |
309 KB | We decided to bury the battery which is a sealed battery in a protective case in order to deter theft. | 1 |
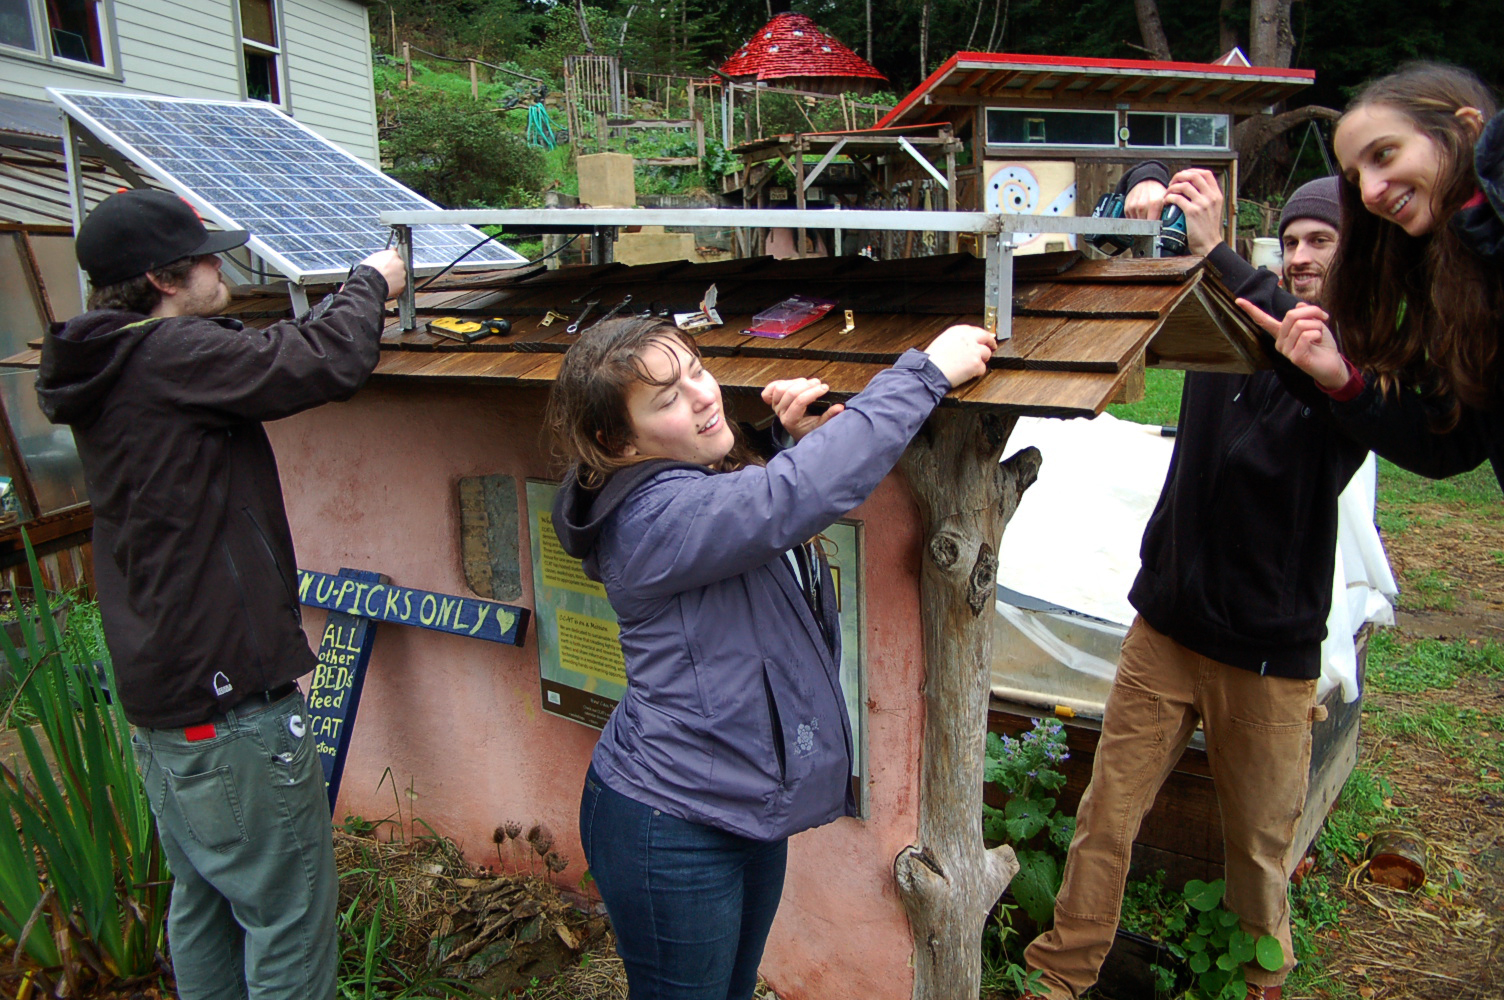
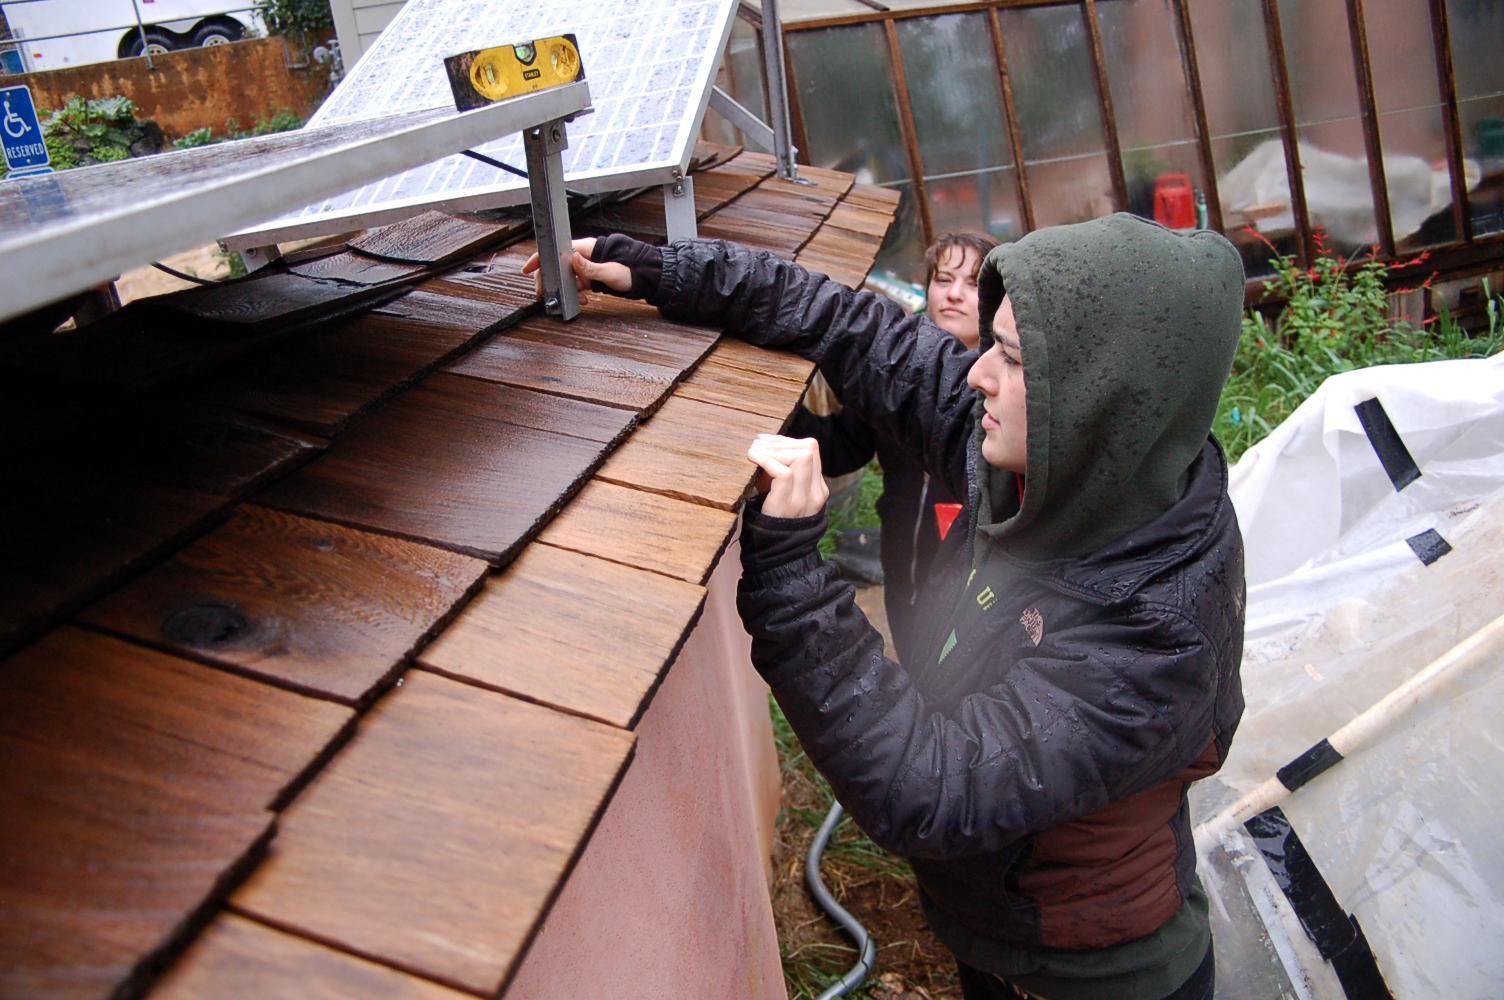
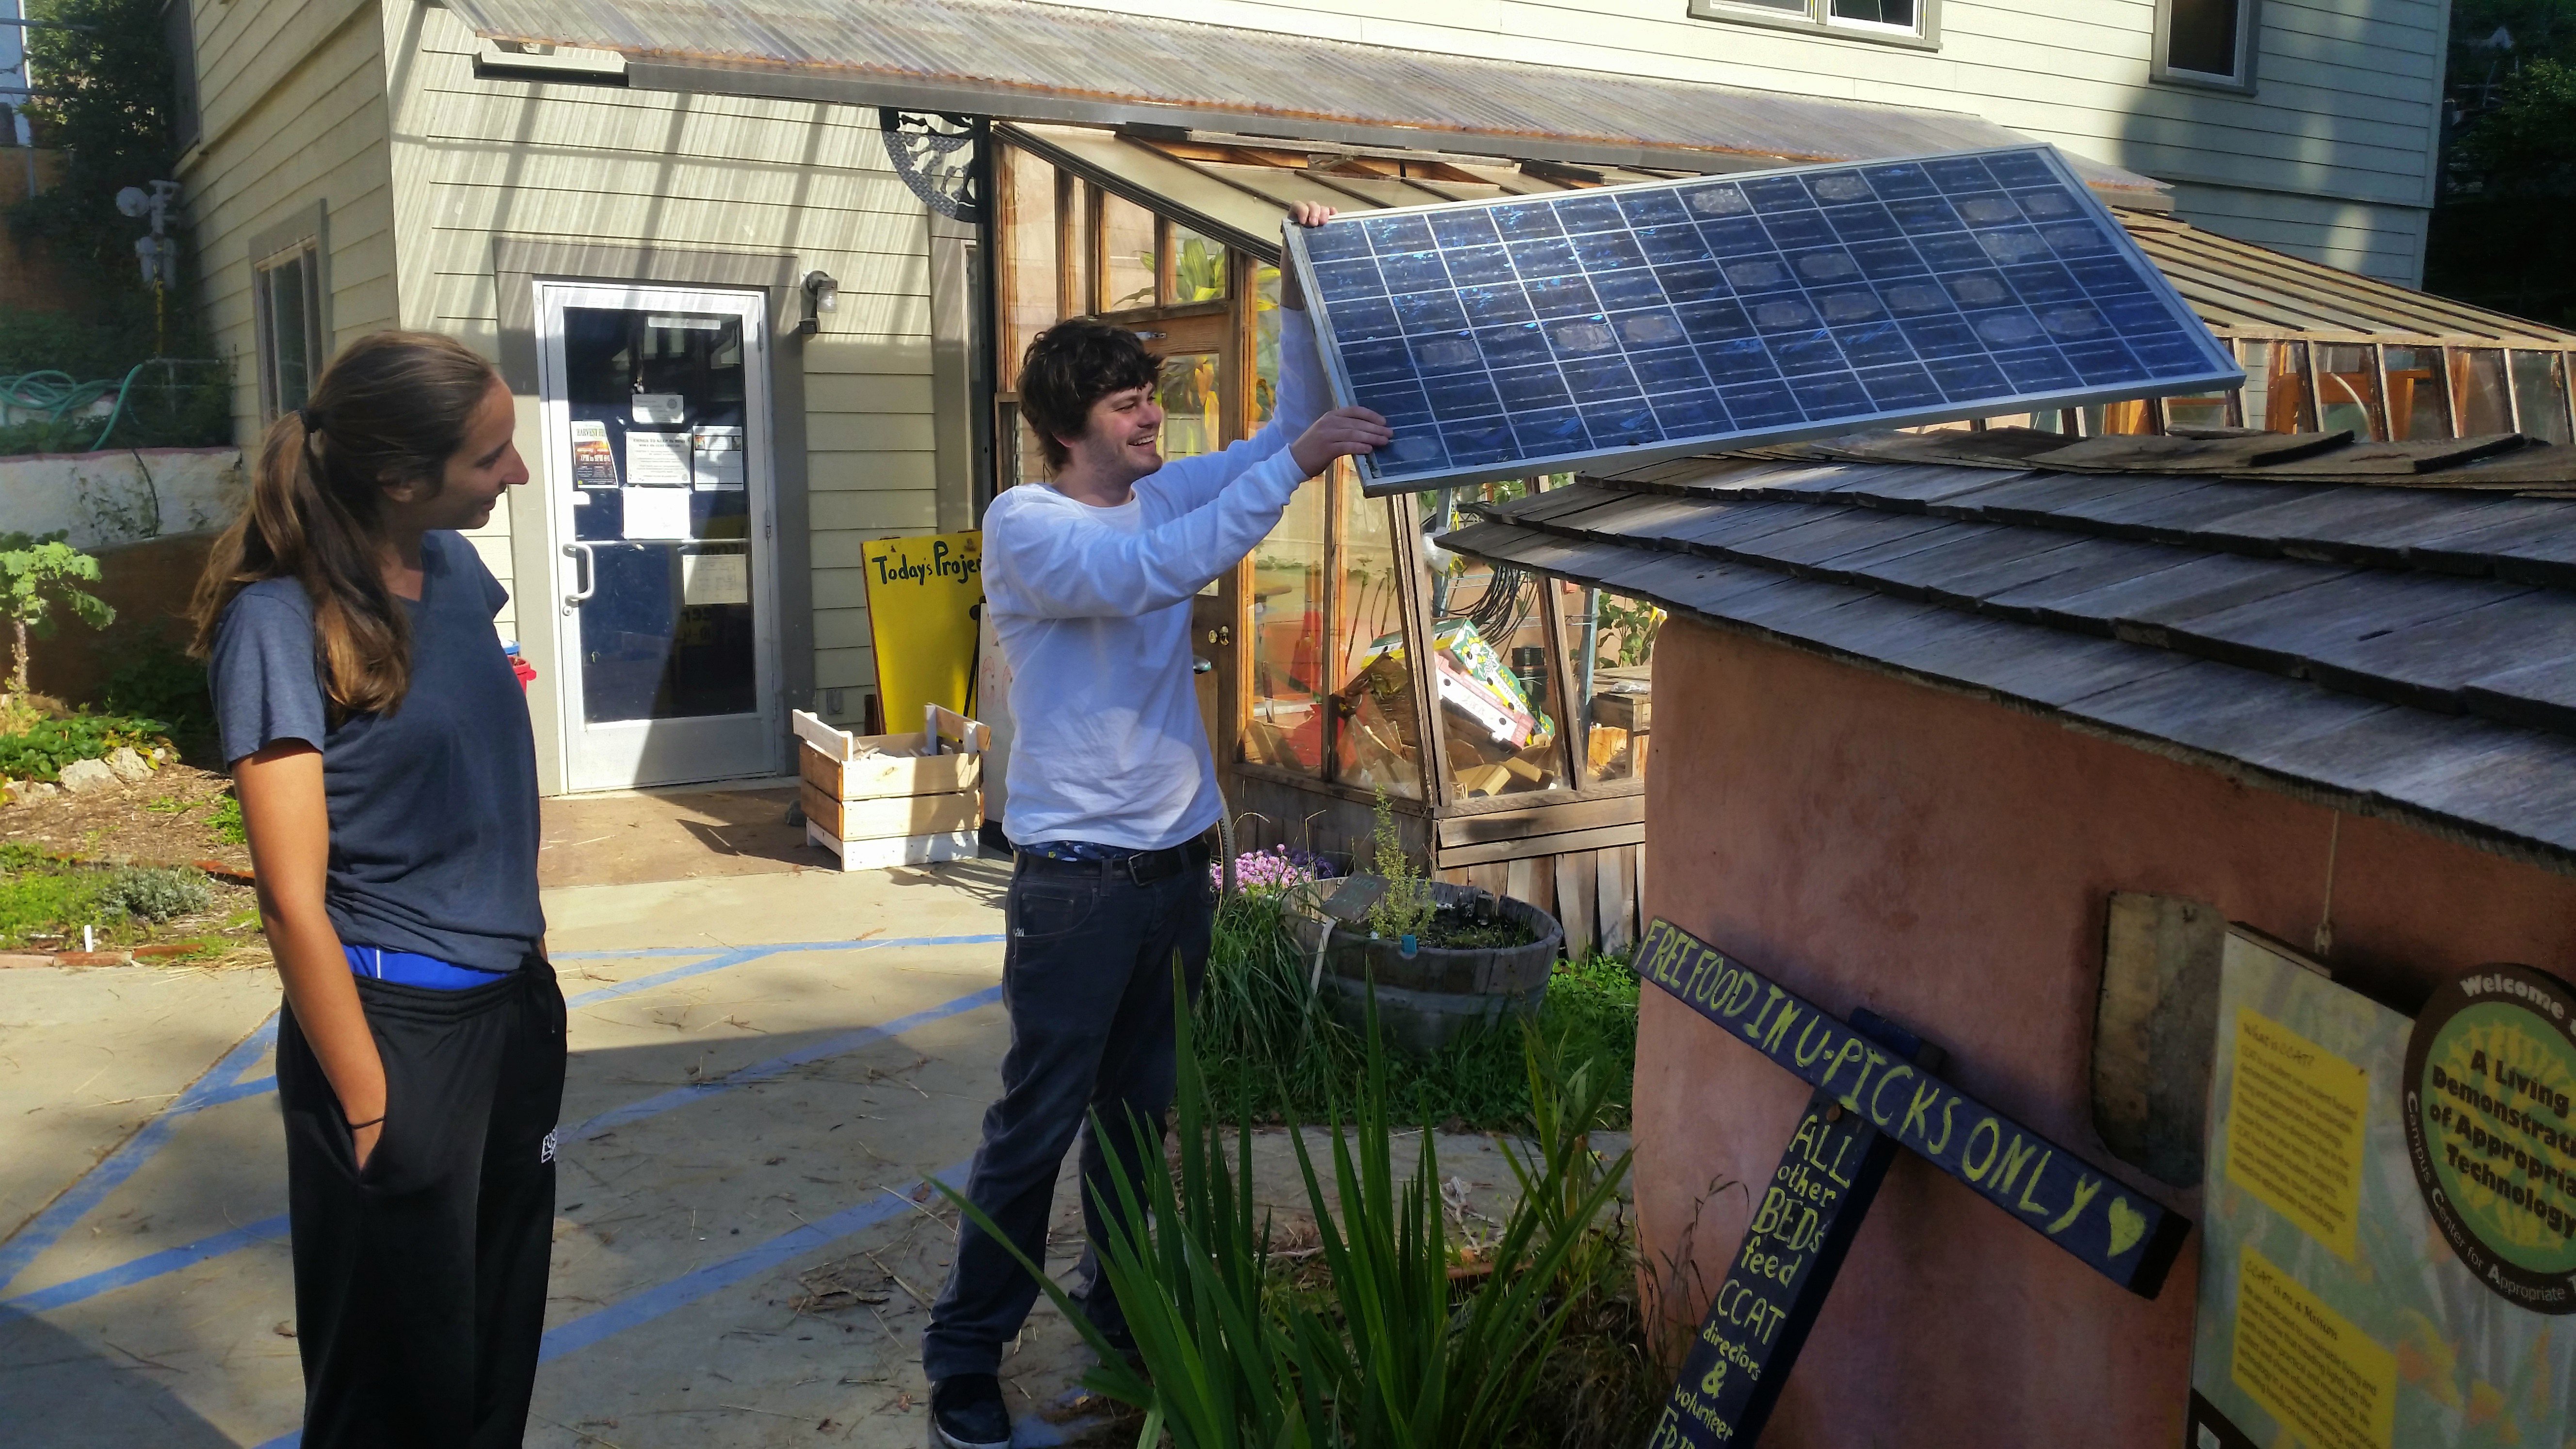
| 18:43, 24 January 2015 | FinalScrews.jpg (file) |  |
1.18 MB | Teamwork in mounting the panels. The job is almost complete! You'll notice the panels are at different angles so that the one in front does not shade the one in back. | 1 |
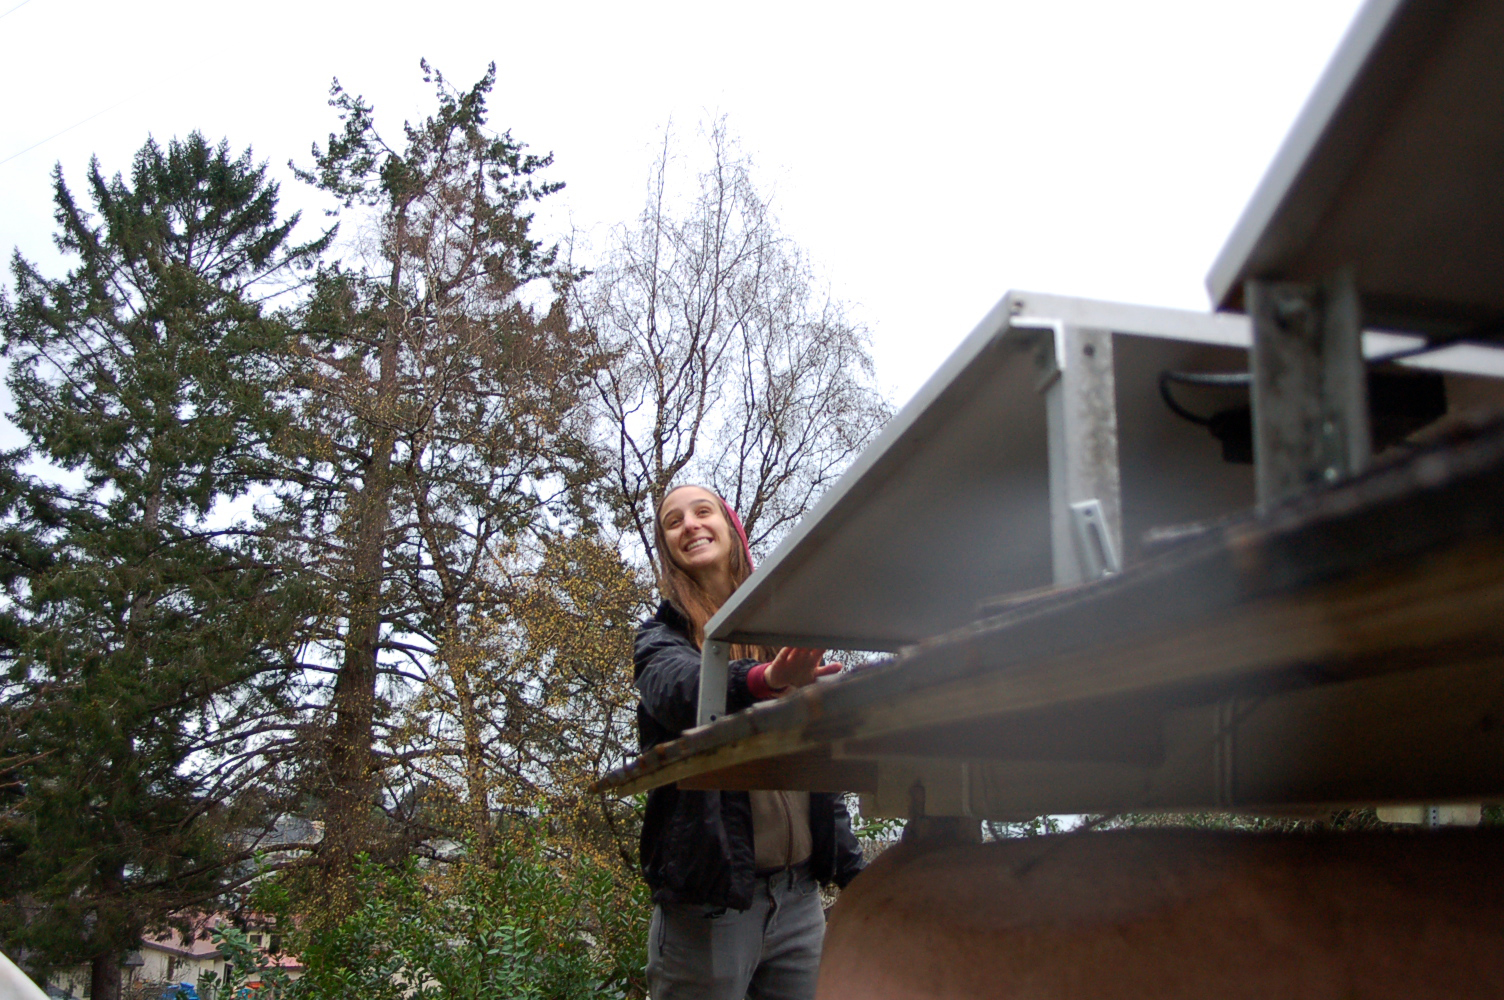
| 18:41, 24 January 2015 | AnnikaSolarKiosk.jpg (file) |  |
1.17 MB | Annika happily mounting the Panels. | 1 |
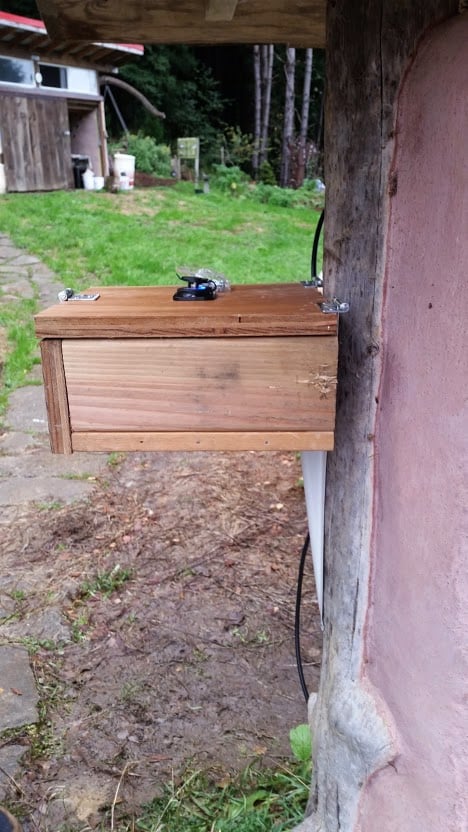
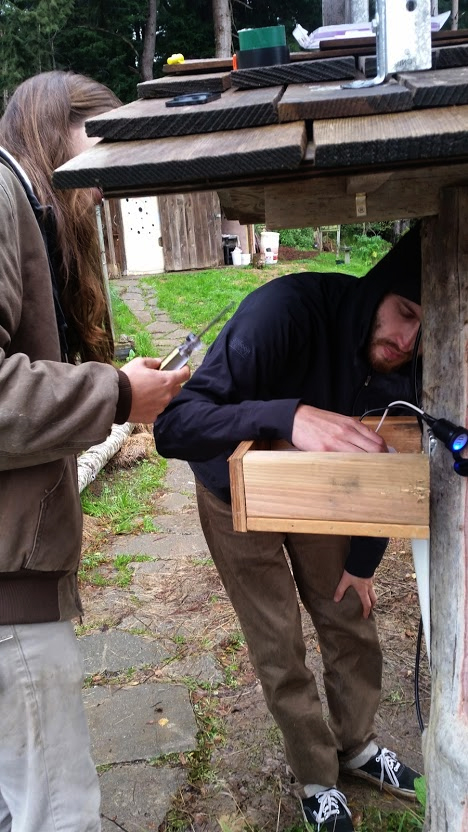
| 18:39, 24 January 2015 | ChargeControllerBox.jpg (file) |  |
291 KB | Fully Assembled Charge Controller Box. If the blue light is on, all of the wires all fully attached! If not, you've got to open up the charge controller box and reattach them. | 1 |
| 18:37, 24 January 2015 | AnnettebyMonique1.jpg (file) |  |
1.07 MB | Annette and Rachael measuring panel placement. | 1 |
| 18:35, 24 January 2015 | AnnikaJohnAdjustingWires.jpg (file) |  |
318 KB | Annika and John inserting the wires into the charge controller through the back of the Charge Controller Box. We then closed the lid and the USB chord (with the blue light) rests through a hole in the top of the box for people to charge their devices. | 1 |
| 18:32, 24 January 2015 | AnnetteHandSaw.jpg (file) |  |
1.21 MB | Annette and John cutting the mount for the Charge Controller Box. | 1 |
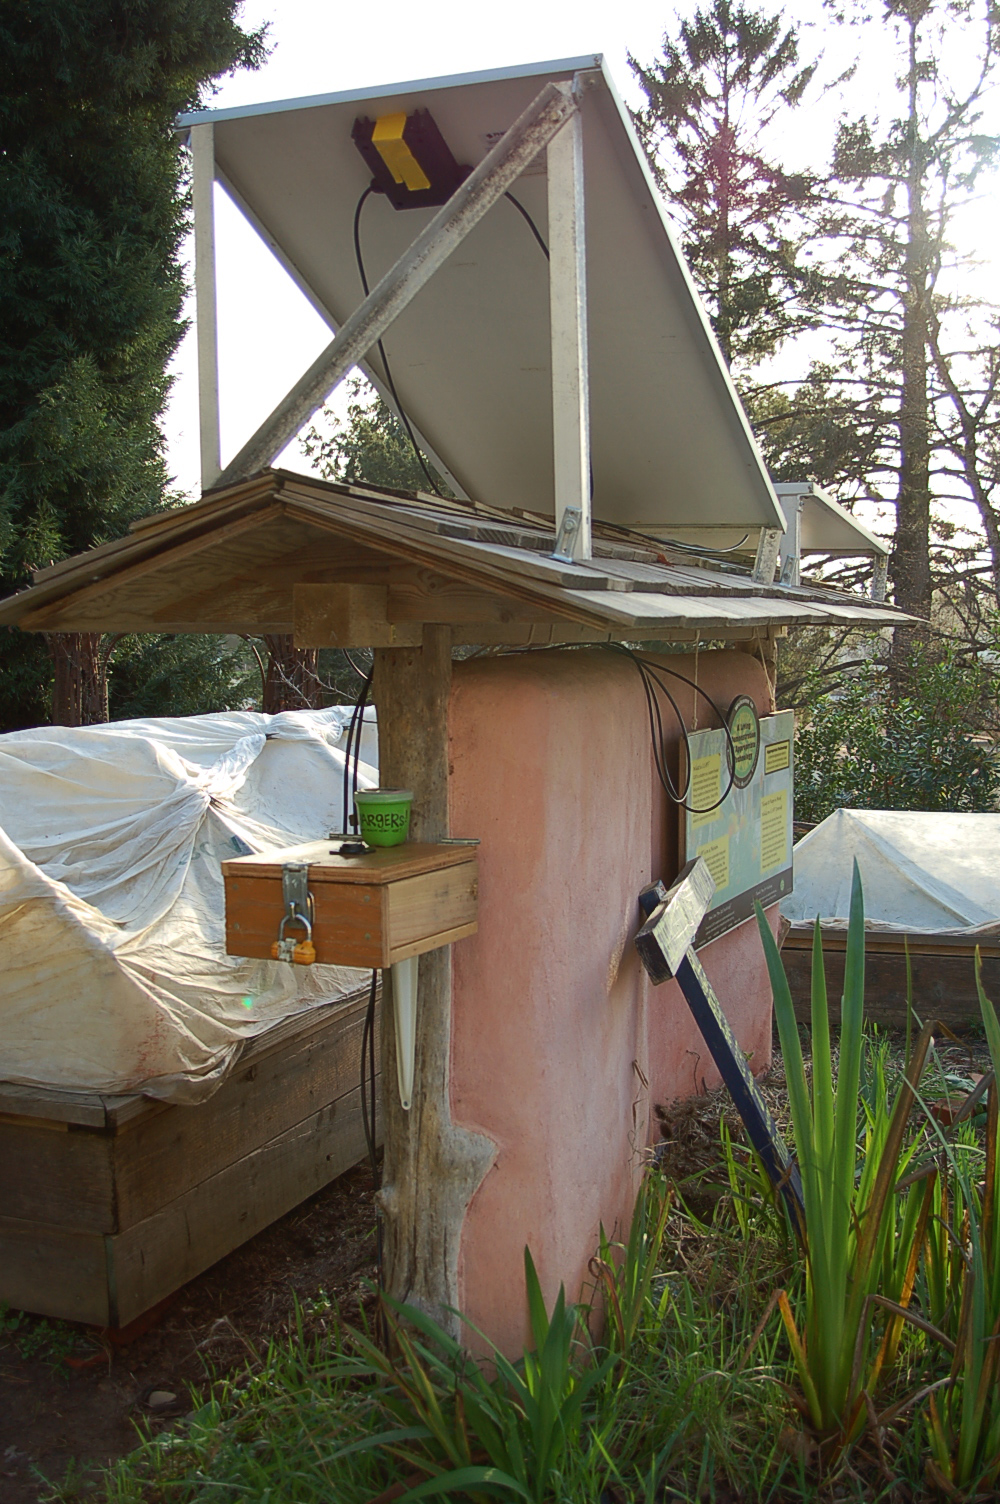
| 18:30, 24 January 2015 | ChargingStation.jpg (file) |  |
1.08 MB | CCAT Charging Station Charge Controller Box in front Green charger holder on top of Charge Controller Box | 1 |
| 18:27, 24 January 2015 | KevinSolarChargeStation.jpg (file) |  |
5.38 MB | Reverted to version as of 01:20, 2 December 2014 | 3 |
| 18:22, 24 January 2015 | ChargingStation3.jpg (file) |  |
1.1 MB | CCAT Solar Charging Station. Charge controller box in front. Device Holder. Sign-in notepad for user comments. | 1 |
| 07:34, 11 December 2014 | Annette's Hours.pdf (file) |  |
41 KB | Capstone Implementation Hours | 1 |
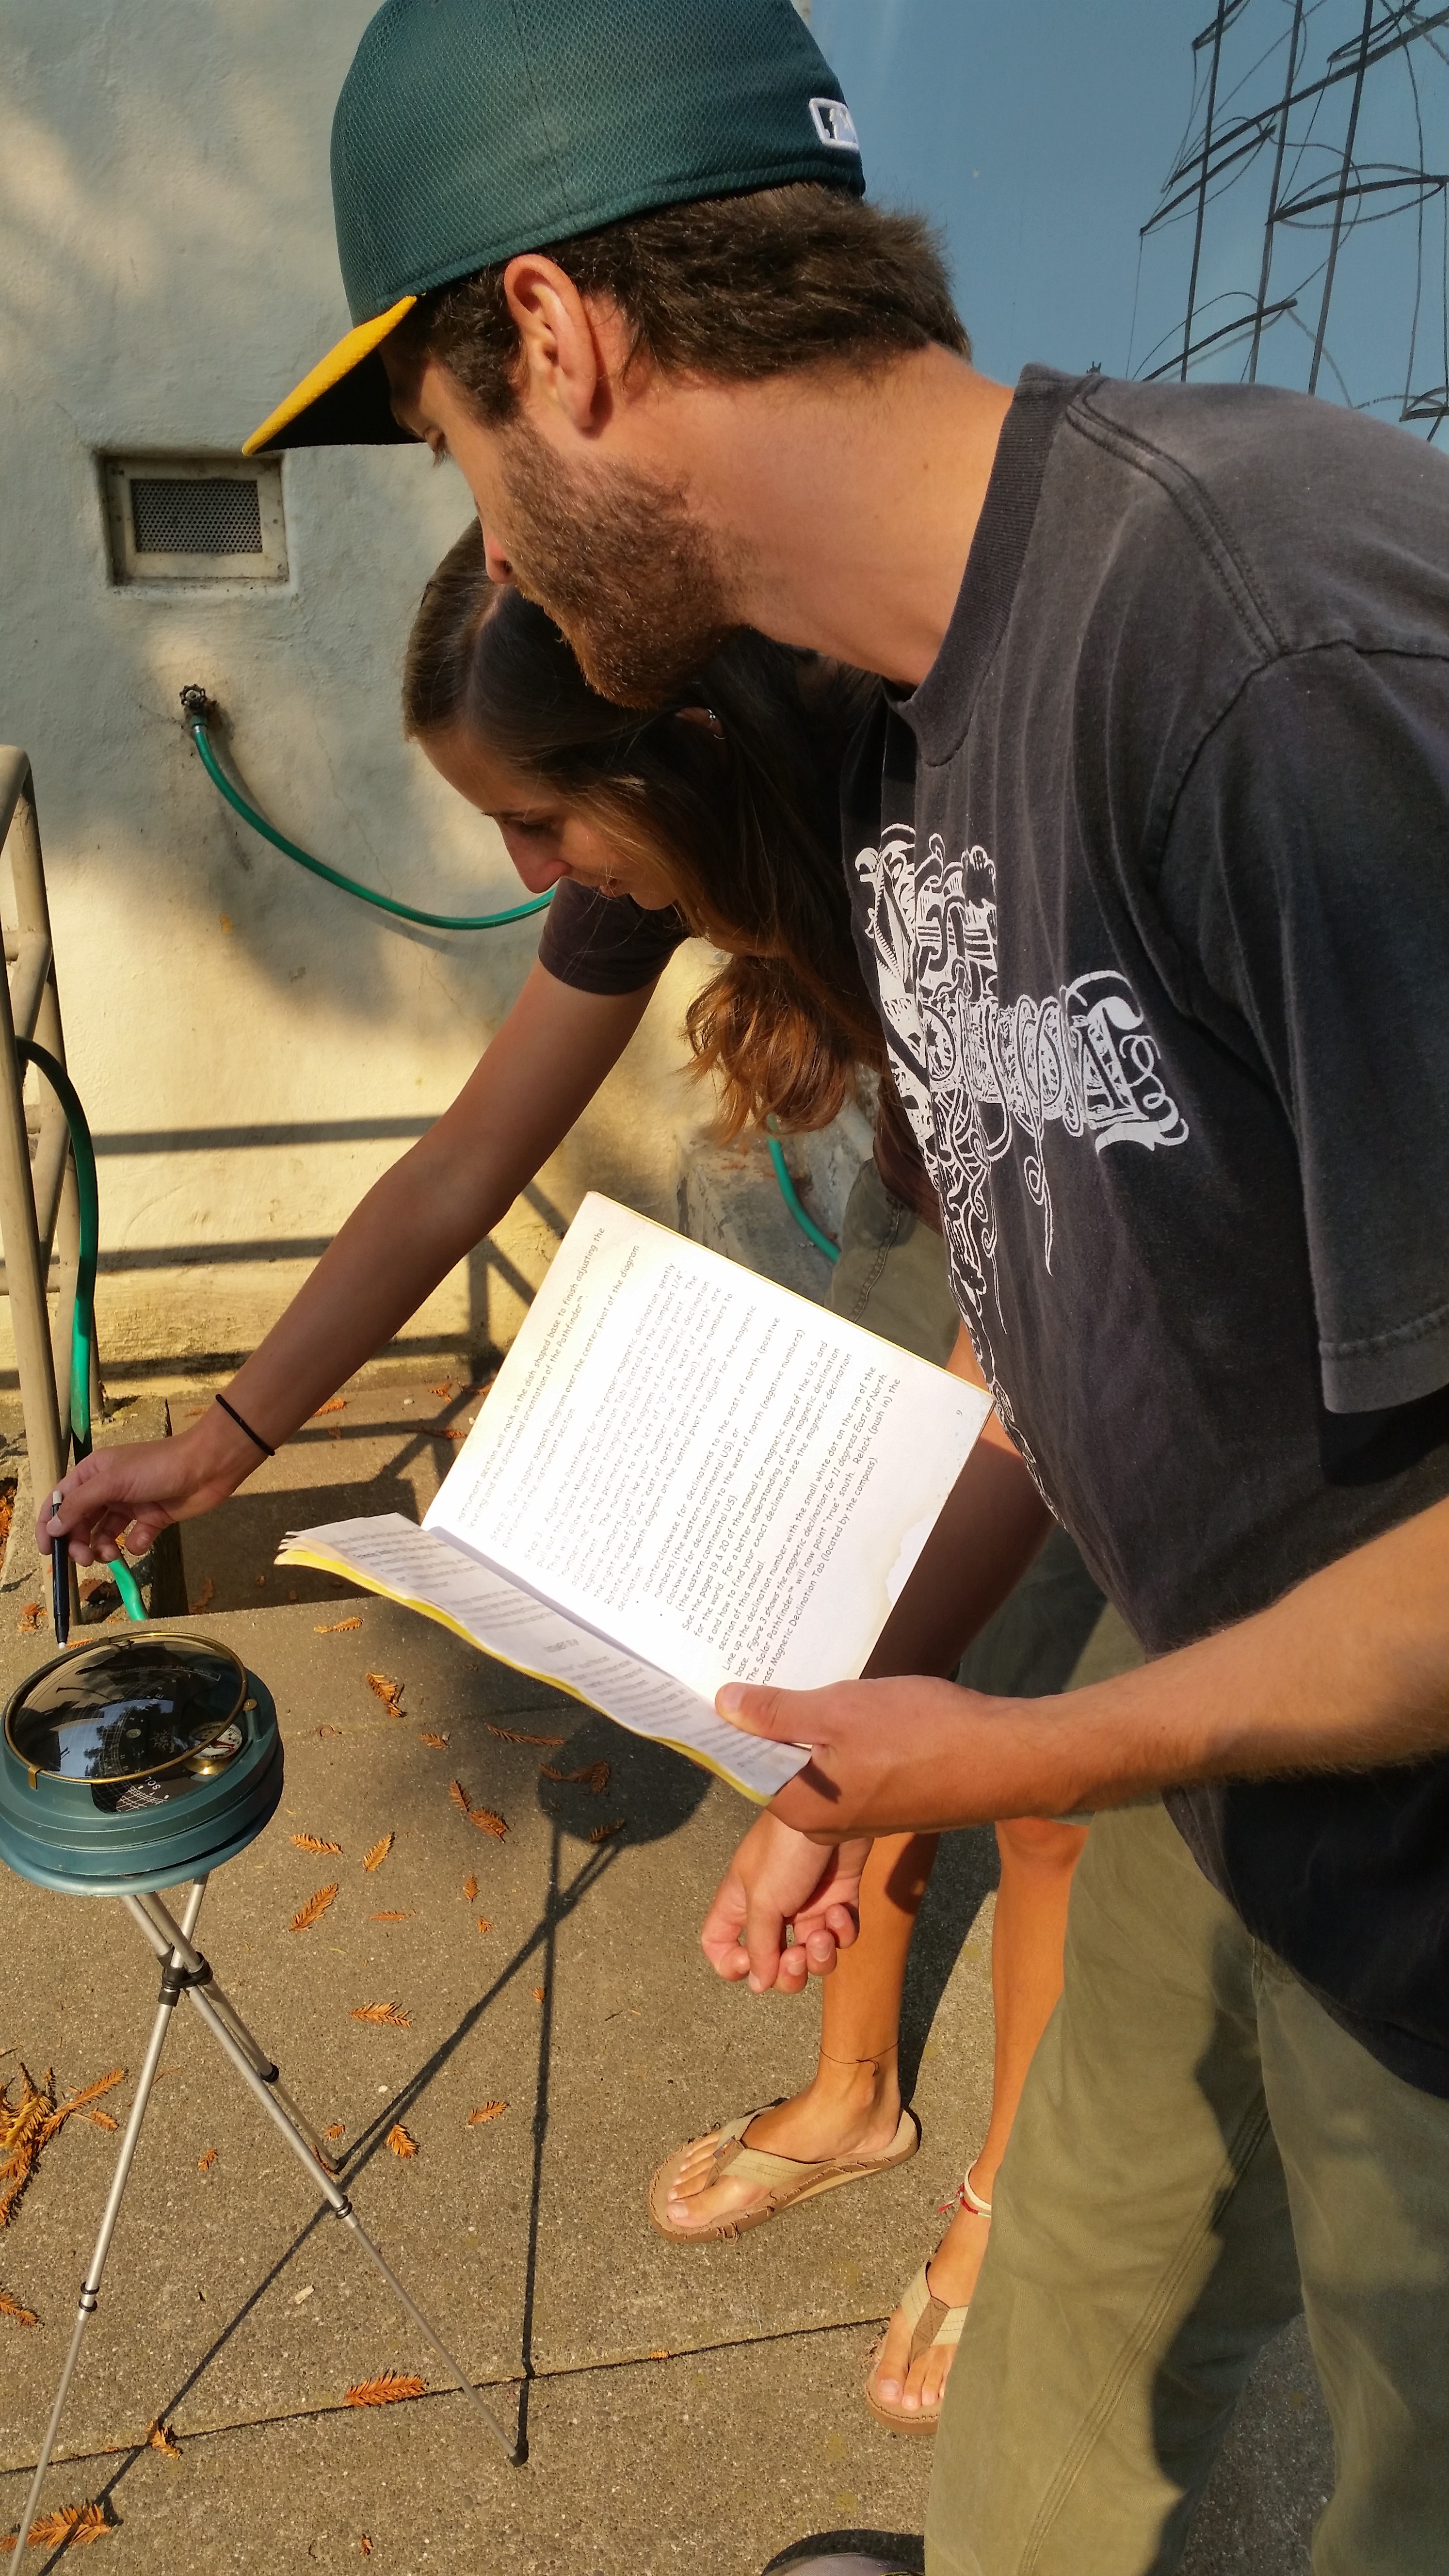
| 02:34, 2 December 2014 | SolarPathfinderbyBLC.jpg (file) |  |
3.06 MB | John and Annika figuring out the Solar Pathfinder for the first time. Our first test was near the Bicycle Learning Center which is located behind the Depot near the dorms. We determined this spot would not be agreeable to utilizing solar energy through... | 1 |