


Zane Middle School library mural

Abstract
The objective of this project was to design and construct a mural to be installed on the library circulation desk at Zane Middle School. This page will discuss the background and criteria the project group utilized to create their design and the prototyping conducted to finalize the product plans. Included are the directions to replicate a similar style mural and to maintain or replace it. There are details for Zane Middle School to hopefully create and install more murals themselves.
Background

Zane Middle School in Eureka, California has a library circulation desk that is fairly plain and empty. The school wanted an artistic piece that could be mounted to the front of this desk to bring an element of color and excitement into the space. Nancy Walsh, the Librarian at the school provided recommendations for the art itself while the team focused more of the research on creating a mural that was durable and safe. The team worked to design a secure low-profile panel that would act as the backing for the painting itself, while also finalizing the art that would be painted onto it.
Problem statement and criteria
The top priorities for this mural are the durability and safety since it is in a space where children will be leaning against frequently. Other criteria were set for ease in construction and maintenance as well as overall appearance.
| Criteria | Weight (out of 10) |
|---|---|
| Durability | 9 |
| Safety | 9 |
| Environmental Integrity | 7 |
| Portability | 6 |
| Aesthetics | 5 |
| Cost | 5 |
| Removability | 5 |
Description of final project
The final design is comprised of a wooden substrate, mounted by nuts and bolts, and painted with acrylic paint. The wood is 1/4" thick birch wood, which is thin enough to not protrude over the existing desk top. The acrylic will be painted over a primer and treated with a finish for both durability and cleanliness. There will be a nut and bolt in each corner of the mural, connecting the panel to the face of the desk.

Prototyping
- Gallery of Prototypes
-
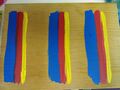 3 paint trials, one with no treatment, one with just sanding, and one with sanding and a finish (from left to right). Both sanding and finish created the cleanest paint look.
 -
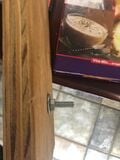 Nut and bolt attachment tested on scrap wood
 -
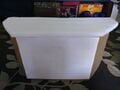 1:3 desk model to test mural size
 -
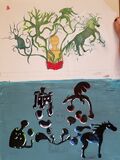 Draft of 2 possible style choices for the mural art
 -
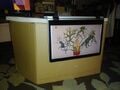 Tablet displaying chosen mural style mounted on model desk to observe sizing of components
 -
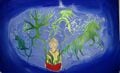 Second iteration of chosen style


Costs
| Quantity | Material | Source | Cost ($) | Total ($) |
|---|---|---|---|---|
| 1 | Plywood Panel | Home Depot | 27.42 | 27.42 |
| 1 | Primer | Home Depot | 11.98 | 11.98 |
| 4 | Nuts | Home Depot | 0.17 | 0.68 |
| 4 | Bolts | Home Depot | 0.57 | 2.28 |
| pkg of 24 | Washers | Home Depot | 0.15 | 3.56 |
| 1 | Glaze Finish | Donated | 0 | 0 |
| Paint Set | Acrylic Paint | Donated | 0 | 0 |
| Total Cost | $45.92 | |||
Testing Results
At this time the mural has not been tested in its full effect since the group has not been able to install it yet. The client expressed great satisfaction with the painting itself as it fit her desire for an inspirational reading-related theme. Many other individuals who have seen the painting also react positively to it and think it will fit perfectly in a library setting. Additionally, our client was in close contact while deciding materials and she agreed strongly with our choices to make it the most durable and safe. The mural will be installed at Zane in August 2020.
How to Build
Maintenance
This section will cover how to update the mural when the art would like to be replaced.
Schedule
- When desired
- Remove the mural
- Paint over the existing design
- Attach the mural
Instructions
The following instructions detail how to detach and reattach the panel.
| Task | Instructions |
|---|---|
| Detaching the Panel | With a wrench, unscrew all four nuts from the back of the bolts. Then, remove the bolts from their holes. |
| Reattaching the Panel | Line up the holes on the panel with the holes on the desk. Insert the bolts into the holes. Insert the washers onto the back of the bolts, then screw on the nuts with your fingers. Then, with a wrench, tighten the nuts. |
Troubleshooting
| Problem | Suggestion |
|---|---|
| Loose Nut | A wrench that fits snugly around the nut can be used to retighten the nut. |
| Warping of Plywood | Add more bolts to further secure the panel on the desk. |
Discussion and next steps
Due to the COVID-19 pandemic, only one panel was constructed. Originally, three panels were going to be constructed corresponding to the three sides of the desk. The "How To Build" section includes dimensions for the panels that would attach to the left and right faces of the desk. By referencing this section, panels for the remaining two sides of the desk can be constructed.
Suggestions for future changes
To promote student involvement, the mural panel was made to be easily removable. Therefore, Zane Middle School is encouraged to remove and update the art if they desire too. The process of attaching and reattaching the mural is covered in the "Maintenance" Section.