
Hexayurt project/Hexayurt playa
Available in other languages: /ar /de /es /fi /fr /ja /pt /ru
The Hexayurt Project won the Participate! Treehugger > Current.TV > Burning Man prize for eco-nifty Burning Man stuff. Never let it be said that weirdos can't get things done!
Scroll down to see why hexayurts are so fabulous, which one is best for you, and how to build one without standing around in the sun too long.
What is a Hexayurt
[edit | edit source]A hexayurt is a shelter designed for refugees and other people with a small housing budget. It's also for "recreational refugees" like Black Rock City residents, if built with rigid insulation.
Vinay Gupta invented the basic shape for classic hexayurts and a number of variations, and placed it in the Public Domain. This allows others to develop the original idea further. This wiki page, and associated pages, are the repository for hexayurt do-it-yourself building data, and primarily reference building techniques for the dusty desert environment of the Burning Man Arts Festival. If you're looking for plywood hexayurt information, see hexayurt.com. Other developments are here, also in the Public Domain.
The Hexayurt can be made from about $300 of materials from Home Depot, plus about $100-150 of mail-ordered tape (or a new method using vinyl, discussed later. Depending on the construction technique, it takes about 8 hours to prepare at home and 0.5-4 hours of assembly at your destination.
The Hexayurt is design is completely free, public domain. It's great for Burning Man. Anybody can use it, improvements are welcomed! This means you.
Become aware of hexayurts for refugees and disaster relief: Hexayurt Pentagon Presentation PDF - all about refugee use, including solar use, wood stoves, & water filters. The Hexayurt Mass Evacuation Plan - hexayurt use for evacuating cities in an American context.

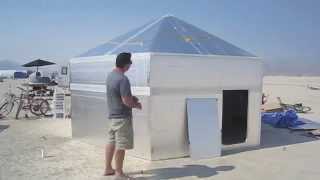
Above: Hexayurts at Burning Man 2010: two 8' hexayurts and a 6' hexayurt (back left). Notice they are very thoroughly staked down using tape-anchors, and sport a sturdy rounded door.
Why is this a good idea?
[edit | edit source]Millions and millions of people do not have proper housing. Designing like you give a damn can help.
Oh, you meant why for the Playa? That's simple. Hexayurts really enhance the Burning Man experience. You can sleep in during the morning heat. You have a warm place to party at 4AM. In short, it rocks. At 9AM a tent is an uninhabitable solar cooker, a hexayurt is blissfully cool and dark. The tape seals it from dust. And you did it yourself, without lugging an RV with air conditioning to the Playa. You built your own shelter with your own two hands. It's creative and very participatory. By building a hexayurt you're joining a community of engineers and creators who are helping to transform the planet.
Hexayurts aren't just for the playa, they're for the world.

Why is the Hexayurt cool and dust-free?
[edit | edit source]The Hexayurt is dust-free because, once it is securely staked down and taped to a tarp, it is basically air-tight.
The outside is silver, so it reflects away sunlight. You may want to bring some paint or other material to Burning Man to mat the surface if you are located in a position where the reflected light and heat is causing somebody a problem and you can't move. On top of that, the material itself is an insulator. Thermax has an R-value (insulation value) of 6.5 per inch, which is about the same as fiberglass. Between this and the reflective surface, very little heat enters a closed Hexayurt.
The ground is always at around 58F at a depth of six or more feet. If you shade an area for a day or two, the surface of the earth settles towards that temperature. So the floor of the Hexayurt gets cool, and stays cool, and tends to suck the heat out of the air inside making you feel cool. For maximum cooling, in the daytime, keep the floor of the Hexayurt free from insulating materials like blankets and cushions. For maximum warmth, at night, cover the floor of the Hexayurt with blankets.
Finally, the greatest trick on the playa is to take a little spray bottle (or, better still, a pump-up five-gallon garden sprayer!), close all the doors and windows, and spray high into the air in your yurt. The evaporation of the water rapidly cools the air of the Hexayurt. If you spray for a minute or two you can get shivering cold in the middle of the day. Also the air gets very humid, which is very nice. Then the air begins to warm up again as heat re-enters the space. So instead of being dry and hot, you are now damp and hot. This is worse. So you open a door or a window, and let out the warm, moist air, let in the warm, dry air, and then close the window and spray again. Usually, you have to do this every fifteen minutes or half an hour, and it takes about half a cup per cycle.
I've spent entire days sitting in the hexayurt doing this with friends, having people come in, sit down, drink some water, take their shoes off, cool down for a while and then go about their day. It's a really fun way of making a space to get to know people on the playa, and offering them something they need and enjoy.
A hexayurt at Burning Man is really good with a solar powered swamp cooler (it's been said it's better than an RV). See further down this page for details.
Classic Construction: This involves prepping panels at home (cutting some of the panels in half diagonally, and sealing all the raw edges of the panels with tape.) Then you cart the components to Burning Man and assemble them. Most of the Classic instructions and video include assembly in 3D by holding the pieces in midair to get them to their desired shape (this takes 4 people). There's a new way of assembling the pieces in 2D that will require 2 people for most of the process.
Semi-Folding Construction: Semi-folding hexayurts are perhaps the ideal design for Burning Man or any environment, because most of the prep is done at home. They are much easier to re-use because they are pre-fabricated in 4 pieces that accordion fold open. Initially they require the same amount of tape as in classic construction, but when you re-use your hexayurt, you'll need much less tape. You can make a semi-folding hexayurt two ways: with fancy tools and dust handling to miter the edges of the panels, or using Camp Danger Hinges. Mitering panel edges is messy and time consuming, but you get slightly better insulation.
Fully Folding Hexayurt: You can also build the hexayurt as a fully Folding Hexayurt. Few people choose this design. The Folding Hexayurt needs a table saw and precise angle cutting on the edges of boards, and is a large object to transport (8' x 12', six inches thick.) If you can swing that, you get a Hexayurt that goes up in 20 seconds plus the time it takes to stake it down. It's so fun to see it open and close, you might never live in it, but keep popping it open and closed as an art project. Just letting you know.

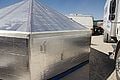
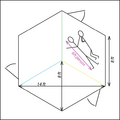
The 8 Foot Hexayurt aka 'H12': This is currently the most popular hexayurt (shown above, lower left.) The 8' Hexayurt has been ideal for Burning Man because it's a good size to transport, has 166 square feet inside, is short and not too vulnerable to high winds, and very easy to build. It has decent square footage that you can stand upright in, but the height of the entryway is 4'. Not bad compared to the average tent, but it's a limitation that has been improved upon in the taller hexayurts below. It is probably the simplest design, after the 6' hexayurt. There are very detailed instructions for building the 8' using the classic construction or as a semi-folding hexayurt. From the 8' Hexayurt instructions, you can probably learn to make any other hexayurt design shown on the side.
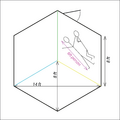
The Pentayurt aka H10: Previously a design considered for snow because of its steep roof. These gained some popularity at Burning Man 2011 because of the increased standing room and the smaller footprint in cramped camps with concerns about having enough space. More data to follow, here's an image (see bottom, right). Hexayurt project/Semifolding Pentayurt
The 6 Foot Hexayurts: The smaller Hexayurts have their niches, but they've lost popularity. The 6' Hexayurt is comparable to a small tent: good for one person, very cramped for two. The 6' Stretch Hexayurt is cozy for two, but provides little storage or room for people to socialize in your cool, dust-free place. These are easy to construct. They can also be made semi-folding, and plans are almost complete, see this great video for one person construction. The 6' stretch feels really big if you pop up the walls by an extra 2 feet, so you can stand in the whole yurt and have a full height door. A great solution for a camp that's cramped for space on the playa.
The H2 Pup-yurt aka Siestayurt: New as of 2012, the tiniest, simplest yurt. 2 panels form a pup-tent that's big enough for 1 person to sleep in. Ideal for efficient cooling and playa-naps.
The Square-a-Yurt aka H8: A few 4-sided yurts were seen at Burning Man 2011. Sometimes this was because there were not enough panels to make each household in a camp a separate hexayurt, so this solution was improvised. Photos and stories to follow.
H13 Hexayurt: A brilliant new variation of the 8' hexayurt is Hexayurt project/Hexayurt H13. This yurt design uses 13 panels instead of 12 (hence the name: H13), and raises one side of the hexayurt to 8 feet, allowing increased headroom and a good place for a door. It's a bit trickier than the standard 8' hexayurt because it is asymmetrical on one axis. This hexayurt is expected to be moderately stable in high winds, but it's second structural weakness is that a full height door cuts into the 'tape ring'. Be sure that you make a model of this hexayurt before you construct full-scale, and be sure that you have exceptional skills at tying down a structure. This can also be a semi-folding hexayurt using tape-hinges. here's a great picture. (H13 is a new design as of fall 2010).
H15 aka 10 Foot Hexayurt: Want a taller yurt? The 12' yurt (shown) is perhaps too tall for playa winds. The H13 is almost a perfect answer by just adding 1 more panel, but it's a trickier design. The simpler 8' hexayurt, or any other shapes, can have the wall height increased by 2 feet without waste of materials. This has taller walls, so thicker panels are recommended for stability in playa winds. You can also make this semi-folding.
H15 (10' tall hexayurt) versus H13? There's some debate about the practicality of the above "taller" hexayurts (H13 versus H15), mostly because they're new designs that haven't been tested multiple times in playa conditions. None were reported to blow down in 2011, but the winds were very mild. The 10' might have more stability than expected because it is symmetrical, doesn't have the protruding, high face of the H13, and is more reliable to tie down (especially with a rope halo, because the loads on the rope halo or tape anchors will be equal. Structures like H13, which are not symmetrical on all axes, are unpredictable. In general, the 10' is a conceptually simpler design to build. Structural engineers have been known to side with the 10' hexayurt over the H13. The H13 also lures one into building a human-sized door on the high 8' wall, however a door that size will cut into the tape tension ring that also creates stability in the hexayurt. At the end of the day, the common 8' hexayurt is still amazing because of its symmetry, low air drag (due to low height) and simple assembly.
12 Foot Hexayurt aka 'H18': The 12' Hexayurt is pushing the envelope on 1" Tuff-R rather further than is advisable for Playa use, the increased height is just not as aerodynamic in playa-force winds. Increased height requires thicker panels, and you'd better stake it down well. [1]
The Octayurt: This design created at GLAMCOCKS camp in 2012 can be built with only six 4'x8' panels, and comfortably sleeps two or three people.
Domes: Just to complicate matters, there's new 'Nearodesic Domes', in the hexayurt family. They are based on the 8'x4' standard building material size. These are challenging to build, uncertain in major playa winds, but apparently were made successfully at Burningman 2011. If you're building these, you should overbuild them, miter them, and tie them down very securely. Know what you're doing. Having one of these blow across your neighbors' camps would be BAD. Click for photos of the quaddome and tridome.
Octatipi: here's [another thought: http://www.youtube.com/watch?v=yYwHToAC3iY&feature=related]
(You can download Google SketchUp models of the basic Hexayurts.)
Building Basics
[edit | edit source]The basic 'classic' instructions for hexayurts are super simple. They vary depending on which shape and size of hexayurt you choose.
- Buy 4 (or better, 5) rolls of six-inch-wide bidirectional filament tape, like T.R.U. FIL-835B/D. More on tape here. Total cost: ~$150 shipped. (Or ~$180 for 5 rolls.)
- Buy 12 sheets of a suitable 4' x 8' building material, like Thermax, from your local building supply store. More on panels here. Total cost: $200 - $400, depending on the thickness of the panels.
- Using a craft knife, cut six of those sheets in half along the diagonal, three from right to left, three from left to right. Total labor: an hour.
- Tape the edges of each board to protect you and the playa from the raw material. Total labor: two or three hours, or far less with three people and practice.
- Tape the building together by forming the roof from the triangles, and the walls from the six boards you did not cut. Total labor: two or three people for about an hour, barring difficulties.
Hexayurt project/Camp danger Hexayurt hinge technique has full instructions for building the 8' hexayurt as a semi-folding yurt, plus shopping info and video. Also ideas for the H13 and the 10' yurt as semi-folding, hinged hexayurts.
Hexayurt project/Hexayurt playa checklist has detailed instructions for building an 8' hexayurt the "classic" way (without making the hexayurt semi-folding), a shopping list, and video clips of the process.

Look at the picture and go through the steps in your mind again. You get the boards and you get the tape. Then you cut some of the boards into triangles, and tape them together to make the roof, and then you tape the roof to the walls and you are done. You just built a Hexayurt. This is easy. You can do this. If we were working with index cards and sticky tape, you could make one right now on your desk. You know how this works now. You can do this. There are details you will get have to get right to make sure the building stands on the Playa but all playa projects have details, and we cover the details in detail on this page and in the videos.
How Long, How Many People?
[edit | edit source]How Long does Construction Take? Basically, it depends. Like the estimated amount of tape, assume that 'your mileage may vary.' Save a day for at-home construction, after you acquire most of your supplies. On-playa, timing depends on your chosen construction technique: semi-folding hexayurts need a day of work at home, but are easy to assemble on playa, probably an hour plus the time to stake it to the ground, or less. Classically constructed hexayurts just need a little prep at home, but the assembly process is difficult, requires 4-5 people, and has numerous pitfalls that can increase time spent. Ultimately it would help if you share your experience on our discussion page. Tell us the following:
- Which hexayurt you chose to make.
- Which construction technique: classic, semi-folding, fully folding.
- Your skills, use of power tools or hand tools, # of people to help.
How many people? At home, all the prep of the panels (no matter what technique you use) is best with pairs of people: 2, 4, or 6, because the panels are large and the tape sticks to everything. An 8' hexayurt can be prepared at home with just one person, but this is difficult and not recommended. On playa, you'll need two people for most of the work, but then it depends on your construction technique: "classic construction using the 3D strategy" requires 5+ people for about 45 minutes. "Classic construction using the 2D strategy" only uses two people for 45 minutes, and then about 5 people to lift the roof cone up. Semi-folding needs two people for about 30 minutes and 5+ people for the roof cone lift.
Transport: You'll need the ability to transport a stack of 4 foot by 8-foot panels from the hardware store to your home, and then to Burning Man.
Watch the videos
[edit | edit source]The step by step instructions for the classic construction and the semi-folding construction have videos linked in at various steps, which is probably the less confusing way to view.
We don't yet have a perfect start-to-finish video resource. We probably have the footage from which a pretty decent guide could be made, but I have no significant video skills. For example, here's the raw footage from Hexayurt showing us constructing a roof cone.
This is all in the public domain, so perhaps there will be a tutorial video cut from there. I may even take a crack at it myself. In the mean time, I'm going to refer you to the raw footage.
Start with the Roof Cone construction video above (recall that this is for the "classic construction" of a hexayurt, the semi folding yurts don't require this step). It's also better to download and watch full screen than in the little flash video window. It's really complete and very easy to understand. You'll have the principle down in the first five minutes. Unfortunately the camera person had to leave before we put the roof cone on the walls, but that's the easy part.
The rest of the videos are in the Additional Resources section at the end of this page.
Make a model
[edit | edit source]You can build a paper model really easily. Try 1' to 1" - cut 12 pieces of paper or card, 4" by 8". Cut six of them in half with scissors, three left to right, three right to left. Now tape together a roof cone that looks like the one in the pictures, and tape the walls under it. Surprisingly sturdy, isn't it?
If you want to try a bigger experiment, build Woody's Pup Hexayurt. This requires a trip to the hardware store. You buy a single sheet of Tuff-R type board, for about $15, and get a three foot tall model hexayurt. It's a really, really good way of understanding the process. You can also build a folding hexayurt at this scale.
Materials
[edit | edit source]The Panels
[edit | edit source]There are two great materials to make Hexayurt panels for Burning Man: either DOW insulation or Hexacomb:
The Dow Route
[edit | edit source]The first is a Dow insulation product. You can pick Thermax, Tuff-R, Super-Tuff-R or anything else they have at your supply store. They all work more-or-less the same, just some have a thicker, more protective foil surface. You want 1" or thicker. 1" is just fine. There are parallel products from other manufacturers. RMAX is the most common insulation board used at burning man-- the silver stuff that's tan in the middle.
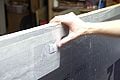
You can see from the video that the panels made of this stuff are very light, fairly strong, and easy to work with. Note that the edges of each panel are taped. Tuff-R/RMAX is dusty, nasty, and at no point to be cut on the playa for it is sacred to the gods of moop, shedding copious amounts of nearly playa colored crap all over the place. This is bad. It is also hairy with fiberglass, dozens of threads per inch of board. You can cut it with a craft knife, or you can cut it with a saw that has an excellent dust collector, but in either case, be aware and take care of your lungs. Gloves, N95 dust masks and goggles are recommended.
Anyway, for these reasons, you will see the edges are fully taped. No moop gets out, and no fiberglass makes your fingers itch on the playa after handling the boards. Take a look at them in the hardware store. They're not bad to work with, it's not evil stuff, it's just not cotton or wood. It's a technical product.
- Pro
- Cheap ($15 a sheet approx.) Easy to find. Easy to cut, easy to work with, insulating and robust. A perfect material for the job you want to do in the Black Rock Desert.
- Con
- It's basically polystyrene with fiberglass added, meaning you'll want a dust mask, and you'll want to wash your hands/arms after cutting it to avoid irritation.
Make no mistake, this stuff is environmentally questionable unless you treat it responsibly and reuse it many, many times.
Making a more reusable Hexayurt: Hexayurts could be cheaper. And again: this material isn't super eco-friendly, unless you re-use the hexayurt many times (or you put the insulation into a home that's being built). According to the eplaya discussion boards, there's a decent period of re-use on even the standard R-Max type boards. The less accessible improvement is Thermax HD. This is the same stuff, but it has a thicker layer of foil akin to a soda can. This stuff will last a good long time. It's more expensive per sheet and usually requires a special order, therefore you have to coordinate with another hexayurt builder to buy about 30 sheets and split them or something. Seriously consider this if you can be so organized.
Now, an aside here. Plastic is, when respected, capable of being a very environmentally friendly material. Tupperware, for instance, does a job that no non-plastic material I'm aware of can: it stores food in a robust, reliable, reusable and sanitary way. Glass breaks in your bag, a thermos is expensive and usually full of something already and is bulky and costs 20 times as much. Compare to a yoghurt container, used once and abandoned. Tupperware is a good use of plastic, as far as I can tell, because the plastic is saving resources every time it is used.
So if you're going down the insulation board path, be sure that you take good care of your Hexayurt, and use it for many years, or pass it on to somebody who will. You can also reuse the insulation board in home construction projects because the design specifically tries to keep the building materials relatively whole. This is the correct way to bury your Hexayurt - in the walls of a building, keeping other people (or yourself) warm and dry in a permanent dwelling.
The Hexacomb Route
[edit | edit source]Hexacomb is what the first hexayurt ever built was made out of. Hexacomb for the structure, and R+Heatshield as the insulating layer. R+Heatshield is about $0.25 a square foot and is completely lightproof and reflects away 97% of the heat of the sun. Very useful to cover tents and cars with.
Hexacomb cardboard is a miracle product. It's an inch or more thick and looks a bit like corrugated cardboard, but it is stronger and lighter because instead of little ridges, the interior is filled with hexagonal honeycomb cells. It looks like a bee hive inside. It can be recycled and, for playa use, burned (if you must!) Better to reuse it, of course.
It can, however, be tricky to find distributors for Hexacomb. I really like this material, but it's just not as easy to find as the Polyisocyanurate. My expectation, however, is that if and when we go to mass production of Hexayurts, it will be a hexacomb-based board we use to make them. Great stuff.
If you would like to really go the Green route this year, I would recommend getting together with other Burners and putting in a bulk order for Hexacomb cardboard. Please contact me if you are interested in doing this, and I will put you in touch with the supplier, or you can contact them directly.
It's more hassle, but it's the right thing to do.
Other Materials
[edit | edit source]There are a lot of other materials that we have not tested. The 6' and 6' Stretch Hexayurt designs are much more forgiving, so if you want to try Coroplast or Triplewall corrugated cardboard or something like that, consider a test run on one of them first. One material you should not use is plywood, or any other heavy building material. The strength-to-weight ratios of plywood does not work well with the Hexayurt design. It's too heavy. They could hurt somebody.
Improving Sturdiness
[edit | edit source]The pointy ends of the roof pieces are pretty fragile particularly when moving and setting up. Foot-long pieces of sheet rock corners (the light-weight metal angles, about an inch on each side) taped along the side near the point make them very sturdy and only add a bit of weight.
Similarly, pieces could be added to the corners of the square pieces to keep from denting the corners when moving.
Install both with duct or strapping tape before you tape the edges, then tap lightly with a mallet to make it flush. Then proceed with the edge taping.
The Tape
[edit | edit source]The other key material involved in constructing Hexayurts is tape. Specifically, 6" wide bidirectional filament tape. In English, that's a six inch wide tape with re-enforcing fiberglass strands running in both directions, so that it will not break or tear under almost any imaginable circumstance, including howling playa dust storms. It is amazing and very expensive. Other tapes have been tried-- they aren't great in playa conditions, and those who went off the beaten path regretted it. Some innovations are underway and we'll see what results come back. BTW: don't use duct tape at Burning Man, it just becomes gray goo. There have been some people who say a 'flashing' product called "Vycor" or bituthene tape will be indestructable, but it is opaque black, is even more expensive than the bi-directional tape, and is thusfar untested for hexayurts (if you've done it speak up on the talk page). Additionally, we've got a totally new option gluing strips of vinyl on to create hinges the same way the tape is used, see vinyl below.
The bilfilament tape does not last more than 1-2 weeks of playa heat and sun: it gets crusty and peels off. If you make any permanent hinge or connection with the bifilament tape, it's recommended that you cover it with a layer of foil tape to protect it from UV damage. The foil acts as shade. It's also shiny silver and looks pretty cool, and it should keep your hinges in perfect condition for years to come.
3M 8959 at 6" wide. This tape has also been found as T.R.U. FIL-835B/D, which is the same stuff. You will note that 3M does not give you the option to buy it in that width on their web site. See the playa checklist for even more about this specialty tape and where to find it.
3" tape is half the cost and has its uses on the hexayurt: many steps are perfect for 3" tape, and it's easier to work with than 6" tape. Using 3" tape means you need to be much more precise in the construction process, but is otherwise perfectly viable. You can also save tape and money this way: get a roll of 6" tape from the supplier above. Slit it in half the long way as it comes off the roll. Hold the roll and press a razor blade against it while a friend pulls one 3" wide strip off at a time.
Foil Tape: Time to use some foil tape! This stuff is fairly inexpensive and comes in a variety of widths, we recommend T.R.U. AF-20R it is also available more readily than bi filament tape. It's also very forgiving to work with and is designed to decrease fire risk. Foil tape is ideal for certain steps, but not all steps of construction:
- Foil tape to tape-seal the edges of the panels.
- Foil tape is NOT advised for making tape-hinges or for the connection of panels to each other, or the "tape ring." You need the bifilament tape for this because you rely upon the strength of the filaments and the stickiness of the tape.
- Foil tape is highly recommended to protect the permanent tape-hinges used for semi-folding hexayurts in the camp-danger style or mitered styles.
Foil tape is easy to find in 2" widths. 3" widths are a little easier to work with. For a 'standard' hexayurt roof (H12, H15, etc), you'll need to cover 114 feet of tape-hinges, but the tape hinges are 4 to 6 inches wide. So, remember it's 114 feet, multiplied based on the width of the foil tape (3" tape means 114x2. 2" tape means 114x3.)
The tape needs another layer of protection from the elements if you expect to leave the Hexayurt up for months or years. Foil tape is one good option. There may also be paints which are appropriate.
You can also see the Tape Spreadsheet in the additional resources section of this page. It explains why you need all this tape, and also how much tape you need for manufacture, and on each subsequent building use.
Vinyl instead of Tape for Tape-Hinges
[edit | edit source]This is a brand new idea (as of 2013), has been tested in fire, in the sun, etc, as well as at Burning Man 2013 and 2014. Vinyl is a great way to make the permanent hinges of the Camp-Danger type, and possibly for sealing the exposed edges of the panels (although foil tape is probably way simpler to use). Here's the whole explanation on vinyl, brought to you by Jacob Rodriguez.. We recommend this vinyl tape if you're interested in testing this new idea T.R.U. CVT-536
Building Options
[edit | edit source]Staking Down your Hexayurt
[edit | edit source]A hexayurt not properly tied down is a large, delicate kite, and it's your home blowing away. Just one panel blowing away and going for a bumpy ride could be disastrous. Generally, when tying anything down at Burning Man: overbuild it, meaning guy it down hard in several places. You'll never regret it. During building, stake the yurt to the ground before taping the it to the tarp, because a yurt blowing away is worse than a little extra dust getting in. There are two main techniques for tie-down, the rope halo or tape-anchors:
Tape Anchors vs Rope-Halo
- Tape Anchors: are prettier than a rope-halo because they are unnoticeable on the surface of the yurt. They are very strong, however they require a lot more of the expensive 6" tape (about 120", or 2/3rds of a 60 yard roll. That's $20 worth of tape). You also have to recreate your tape anchors each time you assemble the yurt because you are using the strength of the tape going up and over the roof peak; you cut them off and make new ones each time. They can fail occasionally in high winds. Tape anchor construction is discussed here: Hexayurt project/Hexayurt playa checklist#Assemble the Roof Cone
- Rope Halo: aka Rope Net, Rope Web, Hexayurt Macrame or "Hexayurt Bondage." Here's a nice picture: [2]. You make a circle out of rope-- big enough that it rests on the roof cone somewhere that you can reach it once your hexayurt is assembled. Fasten from the halo to your ground stakes with 6 other sections of rope. It's cheaper and faster, less pretty. Definitely have one available during on-playa assembly even if you're planning to use tape-anchors, in case of sudden winds. Now you can take the time to make everything equal lengths and pretty. You'll need some extra hands for this part.
Windows
[edit | edit source]Every hole you make is a place where heat comes in during the day. A single badly-placed window can turn a Hexayurt into a solar cooker, but no windows can also get hot! The smart plan is to keep the "plug" made by cutting out the window so it can be pushed back into the window to seal out the day, like a shutter. Cross ventilation is a must. Remember to tape all raw edges, and always seal any exposed raw panel material! You can cover windows with plastic, or bubble wrap (translucent like shower glass.) You can also leave them open. If you cut the windows as rectangles or very-slightly V-shaped rectangles, you can usually wedge the window piece back into the window at an angle and use it as a sun shade. This is a good solution. But if it's windy one day and you left a window open, so much for your dust-proofing. The cure for this is furnace filters, which are cheap, very effective, and can be taped over windows on the outside. You must put them on the outside, or when they fill with dust and you shake it off them, the dust falls inside your Hexayurt. Keep them on the exterior wall. Some people recommend a filter on each side of a window. Or just cut small portholes, about four or five inches round, and cover them up on the outside with the 6" tape. It's fairly translucent. I leave the inside sticky surface exposed to act as a dust magnet.
- Consider the location of your door (north facing is best), and the location of your windows in relationship to the prevailing winds on the playa; a cross-breeze is key in a hexayurt. (from Julie Danger): I have a window in every side of my yurt to catch a cross breeze on days that aren't too dusty. I use the "plugs" like shutters. I used to tape a cheap vent filter from homo depot to the window-- that way you get light, and heat, but no dust or wind. I cut my windows to a size and shape appropriate to the vent filters I first bought. Light hasn't been much of an issue lately but that's still a good option. Light can come in from the loose Camp-Danger hinges, depending on how you cover them with foil tape. I've also seen a heat proof window glass thingy put in a window on a yurt-- that was pretty sexy. For dust-free light I'm trying out a solar security light (see Harbor Freight.com), it turns on when you move into its space. I will cover it with colored filters so it's not obnoxious and cover its motion sensor when I want it dark indoors.
Doors
[edit | edit source](More info coming to this section.) Everything said about windows goes double for doors. The door is the one thing that really isn't perfect about the 6' or 8' Hexayurts, because the door can't be too big and the entry height is only 4'. Sorry. Try the H13 or the Mark II instead, they have taller entryways. Also see below for the BFD mod.
- The size of the door matters-- the bigger the hole you cut, the more structurally unstable the wall panel becomes. The door's panel often needs replacing after Burning Man. A good size is two feet wide, cut one foot from the end of a wall. Some people like a door that goes from the ground to about six inches from the top of the wall. If the door doesn't quite fit now, you can crush the door flap a little by banging it on the ground (really.)
- The wall panel will be more sturdy if you don't cut the door all the way to the ground-- you maintain the "shear strength" of the panel this way. Cut a portal into the material, 2-3 inches up from the ground. This is a very strong door, because it is not cut all the way to the ground. However, you then have a delicate piece of the panel exposed for people to trip on, step on, and crush. Screw two narrow bits of wood to either side, sandwiching the material in between to reinforce this section--that prevents injury to the panel from being stepped on-- it doesn't help with trippers. Some people have used even large pieces of plywood to sandwich their door panel in.
- Another way to increase strength is to have rounded corners on your door instead, as this one does.
- Use a 2" panel just for the door panel - the 2" thickness is much more rigid and durable.
- If a tape hinge is used, be sure to tape it on the inside of the jamb as well - this imparts much greater stability to the hinge.
- Where you make your hinge matters too. Definitely have the door swing outward, always. Hinging the door with tape from the top like a cat flap makes the door stay closed and keeps it very rainproof. This is not the most convenient or aesthetically pleasing door, and it's hard to prop open for air. A hinge from the side is less rainproof, and it's hard to guarantee that it will stay closed on its own, it needs a latch mechanism.
- Don't let your door be blown off: secure it from the outside and the inside with tape so that it cannot be ripped off the face of your yurt.
- Try not to interfere with the tension ring if you want a bigger door. Doing that has structural implications. Remember to orient the door on the North side, otherwise your yurt will be hotter than it has to be and more subject to winds.
- For the sake of convenience, design your door to open outward. This way it will not occupy room inside your dwelling.
- Consider mitering the edges of your door when you cut it out (cut it out on a diagonal angle). This way it will close easily and seal well when closed. If it's cut out like a plug that needs to be forced closed, you will put extra strain on that panel. You can easily do this with an adjustable length/break off blade box cutter knife.
- Some people have even weather stripped their doors with foams or other traditional materials.
- A serious consideration is a door that will stay closed, perhaps with a latch, but that can also be opened from inside and outside the hexayurt-- so that your midnight, mid-dust storm bathroom run will not disturb your hexayurt-mate. And, if they decide that they want to come outside, you have not locked them in.
- Door panels are often damaged during use, such that some clever folks have reinforced their doors by sandwiching them between plywood, as shown below. If you do this you can probably even add a traditional door knob, perhaps a lockable one.
- A very simple closure device can be constructed using two pieces of rope - two feet in length each. Drill a hole the diameter of the rope through the door and the frame 2 inches from the edge, tie a knot near the middle of each rope, thread each rope through each hole, and tie another knot on the opposite side flush with the panel. The ropes won't move in the panel, but you have about 10 inches on each side to tie the door shut. Mind your yurt mate with this option.
The Camp Danger Door has a mitered edge, is not cut all the way to the ground, and hinges from the side.
Camp Danger Door 2.1 (WhiteBuffalo)
The door, explained in part by this handy video. (DEAD LINK)

The Magnetic Door
[edit | edit source]- This door keeps itself closed using neodymium magnets. In the photo below you can see the two small, but powerful magnets which have been taped to the yurt wall.
- Note: The wall is upside down in the lefthand photo, which is why the kickboard is on top. The kickboard is important because it protects the foam along the door frame.
- To attract the door to the magnets, we attached a small metal plate we found at Home Depot.
- We think this is the best door solution because it is lightweight, packs completely flat, and is very easy to use.
-
 magnets on yurt wall
 -
 two plate design (not ideal)
 -
 one plate design (ideal)


- We experimented with combinations of 1 and 2 metal plates in horizontal & vertical configurations, but ultimately the single-plate vertical design was the best. It seems to put the least amount of stress on the door and is the easiest to open and close.
- We took great care in attaching the metal panels to the door. First, we put a layer of bi-directional filament tape to protect against tearing. We also used very large washers.

- We sanded down then taped over exposed screws to prevent them from digging into other panels during folded transport. A small piece of cardboard from the magnet packaging keeps the screw from poking through the tape.
-
 cut off ends of screws
 -
 cardboard & tape over screw ends


- The edge of the door is carefully beveled to strengthen it when closed and prevent it from opening into the yurt. This is the most challenging part of building the door!
- The edges of the door are covered in bi-directional filament tape in order to strengthen them.
-
 cutting the beveled door
 -
 unattached door
 -
 final
final -
 tape on door edge


- We divided our yurt into 3 bedrooms, with 3 separate doors, without compromising the yurt's structural integrity. In the photo you can see 2 of the 3 doors.
-
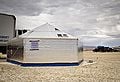 photo showing 2/3 doors
 -
 3 door illustration


- Tip: Don't forget to attach something to the inside of the door so that you can pull it shut from the inside.

- Tip: The door can be easily propped open by tucking it under one of the rope Halo leads that secure the yurt to the ground.
more photos of our yurt can be found here: Yurt!
The Anwar Door
[edit | edit source]
This is a hack. It's a hack because the pieces don't quite fit, but the tape deals with the one inch problems you will find. It works, and it does make for a much more open space inside, but it's much harder to build on the playa, and a little more vulnerable to wind. You will have to assemble this one all the way at least once or twice at home if you are going to get it right on the day.
The trick is this. If you cut down one of the isosceles triangles on the roof, and flip the two pieces vertically (using the seam where they are taped to the rest of the roof as a hinge) they mark out an equilateral triangle, 8' x 8' x 8' from the apex of the roof to two corners of the Hexayurt, with the whole triangle level with the apex. In short, you get a flat roof.
So you make an equilateral triangle for that hole. Now if you imagine this modified roof section on the 4' high wall, you see you have an 8' x 8' hole to fill. Two boards, preferably in the vertical orientation (for strength) fill it, and you now cut the door here.
In practice this is hard because there is no good way of taping the edge of the equilateral triangle to the now-vertical roof section. There's just no way to get at it that I know. And everything is off by the thickness of one board.
I mean, I'd love it if this worked. But it just doesn't. I think that in a high wind it's likely to be quite weak and it's a bear to put together. In short? Let's work on this one together and try and figure out a better way of doing it, or something equivalent. It's not ready for prime time, however convenient it appears.
If you're looking to make a hexayurt with a door that's big enough for an average adult, check out Other Shapes, Increased Height.
The BFD Mod
[edit | edit source]
What it is:
- Stretch hexayurt mod
- Adds Big Framed Door (BFD) with real hinges and velcro attachment
- Uses wall precompression with horizontal ratchet tie-downs
- Semi-folding design with beveled panels and cordura hinges enhanced with zippers and velcro minimizes use of disposable bdf tape
- Solo setup in under 1 hour in any weather
- Pictures
More details are at BFD mod page.
The rounded shade structure is called a Love Monkey Hut or Monkey Hut. It uses PVC pipe as ribs for a shade cover over the Hexayurt. More information can be found at: Monkey Hut Link
Rooms
[edit | edit source]This one is easy. From the corner of the Hexayurt to the center is eight feet. The wall is four feet high. The point of the roof is eight feet high. So a whole 4' x 8' sheet, laid on its side, from the corner to the center of the Hexayurt divides the space perfectly up to 4' in height. The remaining space above the wall is 8' long by 4' high at the point, in short, it is half of a 4' x 8' board. So for three extra boards, one of which is cut in half, you get the ability to divide the hexayurt internally into rooms, either 1/6th, 1/3rd or 1/2 of the hexayurt in size. You could even divide the hexayurt into six small bedrooms with their doors on the outside if you liked. It would be weird, but it would be fifty bucks each.
Curtain room dividers
[edit | edit source]We divided a yurt into 3 rooms using curtains. It worked great! We used EMT conduit tubes as curtain rods and queen-sized sheets as curtains. If you hang the curtain rods from the center, and secure them in 3 corners of the yurt, you get 3 perfect rooms. Each can sleep a couple. The best part is that you can slide the curtains open if you want to open up the space again. Clothes pins can be used to keep them closed in the center.
-
 layout and dimensions
 -
 curtain rods secured in the center
 -
 one room with curtains closed
 -
outside view of room with curtains closed
-
 how the curtain rod is secured to the corner


Accessories
[edit | edit source]Swamp Cooler
[edit | edit source]The combination of a Hexayurt plus a swamp cooler is unbeatable. You will need a good solar panel, or grid power, but the containment of the coolness and the moisture inside of the Hexayurt produces the most pleasant space I've ever experienced on the playa. It's totally unlike air conditioning, which is still very dry. It's more like... being in Florida rather than Nevada! You can make a rather functional swamp cooler with SOLAR powered materials. Here's instructions for building your own big one that is suitable for a camper, or Figjam's instructions for building a smaller one, which is perhaps adequate for a hexayurt given their inherent insulating properties. Here's Figjam's latest cooling monstrosity, which is considered the best size to properly cool something as large as the hexayurt. Scroll down to the images.
Quick product ideas for the swamp cooler: skip the little computer fans and go for the bigger better the Silverstone Air Penetrator, available from Harbor Freight, also a great place to get a 12 volt fountain pump.
Furniture
[edit | edit source]https://playatech.com/ has an incredible range of efficiently designed flat pack playa furniture. Each piece - a chair, shelves etc. - is cut from a sheets of 4' x 8' plywood (or other crush-proof materials - not hexayurt boards!) They slot together like puzzle pieces without bolts or screws. Just like the hexayurt, you just download the designs and make them yourself. Perfect for the playa, and the hexayurt plus furniture will pack down into a single 4' x 8' box in your truck or on your roof rack. We think it's an unbeatable combination.
Semi-Folding Option 1: Camp Danger Hexayurt/Hinge Technique
[edit | edit source]The Camp Danger hinge technique is a simple way to make tape-hinges that allow you to pre-fabricate any light-panel (rigid insulation) hexayurt as a semi-folding hexayurt. This page has step-by-step instructions of everything you need to do to create a semi-folding hexayurt with tape hinges. These instructions describe the technique for the popular 8' Hexayurt, but the hinge technique can be used for any other hexayurt shapes and sizes.
Semi-Folding Option 2: Partial Folding Hexayurt
[edit | edit source]Semi-folding hexayurts can be made either with just tape hinges, or by mitering the edges of the panels and then making tape hinges. Mitering the edges of the panels does slightly improve insulation, but it's messy and time consuming. No light will enter through the joints during the day. You will have slightly better insulation. If you want to miter the edges of the panels, read on:
The partial folding hexayurt ships in a 4'x8' stack, consisting of two half-roofs and two half-walls, to be sandwiched between light particle board and wrapped with your floor tarp for easy playabound transport. The only additional materials required are two 4x8 sheets of particle board (cheap, I used 1/2" I think), sawhorses or equivalent, a saw with a blade that can be angle-locked, some light spring clamps, scraps of cardboard, and maybe a small, accurate carpenter's square.
I didn't have access to nice shop equipment to cut the fitting angles along the panel edges, so I came up with a cleaner but more time-consuming method. Make guides for your razor/craft knifes by ripping edges of the particle boards with the saw that are angled to match the cuts from the edges of the panels: One at 30 deg down a long side for the wall tops, 30 again along the two short sides for the wall corners and roof bottoms, and then one at 15 deg down the other long side for the roof hypotenuse cuts.
Once guiding edges are ripped, secure a panel to the board with a few spring clamps, making sure to put small pieces of cardboard between the panel and the clamp to distribute the pressure and not impact the panel. When lined up properly, you'll be able to slowly work your way down a panel with your knife at the proper angle by holding the base of the blade along the guiding edge you ripped. You still have to pay attention, as the texture of the panel can mislead the blade increasingly as it loses its sharpness.
I only ripped guiding edges with one particle board, but if I were to do it again I would do it to both so I could put them on both sides of the panel and line up their angled edges with the square. That way the tip of the blade could run along the top guide edge just as the base does along the bottom, and probably not be as easily led astray. You'll need both boards to transport the taped and folded panels to the playa anyway so you might as well.
Make all of your cuts to get 12 equally sized roof and wall pieces each. Tape over all the cut edges and then tape together six of each wall and roof in the same manner as described elsewhere on this page. You want to end up with two 6-piece half-roofs that fold down and fit together as a 6 panel tall 4x8 stack, and two 6-piece half-walls that placed next to each other make another 6 panel tall 4x8 stack.
Setting up isn't as easy as unfolding from one huge piece like a complete folding hexayurt, but connecting the half-roofs (and adding tape anchors at each fold) and half-walls is considerably easier than taping together all 6 walls and roof panels. It's also pretty easy to break down (just cut the half roof/walls apart and refold) and store partial folding hexayurts. Mine is hiding out in a tiny storage space for the next few months in wait for its third Burn.
Here's a detailed construction guide PDF document that you can print out for this style of hexayurt.
The Folding Hexayurt
[edit | edit source]By "folding hexayurt," we mean fully folding, not "semi-folding." The Folding Hexayurt is a really serious piece of engineering. Looks exactly like a regular Hexayurt, but it folds flat. You basically just take it out of the truck, yank on the sides, and it pops out into a building. It's amazing. The drawbacks are: it ships in a 12' by 8' footprint, and you have to use very precise tools and wood-shop level dust handling systems to make one.
You can watch a clip us figuring out how to open the folding Hexayurt here. The raw footage of the entire folding hexayurt build process gets interesting about half way through.
We have only ever built one. You can see fairly full documentation of that process in the Video Resources at the bottom of this page.
I will be uploading some clips from that video and some notes on how to build one yourself soon.
The hard part about building a folding Hexayurt is the exactness that the building has to be cut with. You will need a table saw. If you cut the Dow materials with a table saw, it will put a lot of fiberglass dust into the air. So you need a table saw with a proper dust handling system, like you would find in a workshop. This is probably not something you should do in your garage.
Should you want to try it be very precise in cutting the dimensions of your unit. A quarter inch can make a significant difference to folding performance. Remember that the walls fold mid-way, so each wall board is now cut into two squares. Otherwise, just like a simple Hexayurt apart from the angles.
The angles are:
- 15 degrees on the hypotenuse of each roof panel.
- 30 degrees on the bottom edge of every roof panel.
- no angle cut on the 8' edge of each roof panel.
- 30 degrees on the top of every wall square.
- 30 degrees on the edges of the wall squares which meet at the corners of the hexayurt.
- no angle cut on the bottom or mid-wall side of each wall square panel.
Opening and closing can be tricky to get the hang of, as you will see in the video. Once you get the knack, however, it is fairly easy. One person pulls one corner of the folded package, a second person pulls the opposite corner (that is, diagonally on the other side of the folded package), and other people grab the sides and pull. It's pretty amazing, really.
You can also make the Hexayurt roof cone at home, leaving just one seam untaped, so that the entire roof cone concertinas down into a package the size of one roof triangle, 12 panels thick.
Global Impact
[edit | edit source]More than a billion people do not really have good housing. It's not that they do not want a good place to live but they often simply cannot find one they can afford. They do not have access to modern building materials, and local materials are often really unsuited for building. Europeans used to thatch their roofs and now we mostly use tiles and shingles because we prefer the results. We are probably not alone in this preference.
Everybody needs to be warm, dry and well-fed. If you go to Burning Man and the Hexayurt is a good shelter for you, consider helping us develop and test the Hexayurt until it is polished and ready to be made available globally. It's a free / open source project, and with your help perhaps it can become the Linux of housing.
Hexayurt Jokes and Really Important Slogans
[edit | edit source]If your hexa yurts, you're probably playing with it too much. Recovery from hexayurt addiction requires only a 6-step program. "Come on baby, make it yurt so good" "We're yurtin for certain" Whether you're a real refugee or a recreational refugee, you'll be in A World of Yurt Because everybody yurts....sometimes. Hexayurts aren't just for Burning Man, they're for the world <--- that one's not a joke! I wanna yurt! (yurt).. I wanna yurt! (yurt)... I want to yurt! (yurt).. I wanna yurt! (yurt) Yurt Happens
The Masochist Yurt said to the Sadist Yurt... "Yurt me, Yurt me", The Sadist Yurt replied, "No".
Additional Resources
[edit | edit source]Personal Technical Support
[edit | edit source]- The Hexayurt Google Group (direct sign up).
- hexayurt on irc.freenode.net
- hexayurt@gmail.com
- File:8 foot hexayurt worksheet.xls shows calculations for an 8 foot hexayurt, using either classic or semi-folding construction
- Hexayurt thread on Burning Man's ePlaya
Hexayurt Applications and the Big Picture
[edit | edit source]If you want to know more about:
- Our long term global vision - read The Unplugged.
- Evacuating Cities, like after a big earthquake - read The Hexayurt Mass Evacuation Plan. This was presented to the American Red Cross and highly praised. It's for real.
- Our Refugee and Slum Revolution - read Hexayurt Presentation PDF or Scribd (broken, rotated 90° can anybody fix?). This was presented at the Pentagon to a group of senior logistics officers to high praise. It is also for real.
- Hexayurt-style Distributed Infrastructure (like toilets, stoves and drinking water) - read the Hexayurt Presentation PDF
- Why all the military stuff? - read Military Hexayurts?
- Who we are? - read this interview with Vinay Gupta (inventor of the Hexayurt system) on The Sietch.
Raw Video Footage
[edit | edit source]I have no skill with video, but we have acquired a decent amount of raw video footage over the last year or so. All of this footage is in the public domain.
Hexayurt Roof Cone Construction
Folding Hexayurt Construction - gets interesting about half way through.
Interviews from Combined Endeavor - gives some context about what we are doing, and what the Department of Defense thinks about Burning Man.
Other Video
[edit | edit source]8' Hexayurt Walk Thru from 2008
Old, not very good, 8' Hexayurt construction video.
3D Models
[edit | edit source]Google SketchUp models of all the Hexayurts
Other Resources
[edit | edit source]Architecture For Humanity Our friends and allies.
Strong Angel III - the demonstration where the hexayurt was first introduced to the military.
History
[edit | edit source]Of course, like any good idea, it has some deep roots. The hexayurt is based on the work of Buckminster Fuller and Amory Lovins was designed around the conclusions of the Sustainable Settlements Charrette.
| Authors | Vinay Gupta, Juliedanger, Poppymouse, Chaynik |
|---|---|
| License | CC-BY-SA-3.0 |
| Cite as | Vinay Gupta, Juliedanger, Poppymouse, Chaynik (2007–2025). "Hexayurt project/Hexayurt playa". Appropedia. Retrieved June 12, 2026. |