Please leave comments using the talk page. The course runs until mid December 2026. It is currently notopen edit.
Cosmos in the Stacks is a particular list of projects from the Cal Poly Humboldt Library given to the students of Engineering 205 at Cal Poly Humboldt. One of the semester long projects was taken up by four mechanical engineering students in Spring 2025. A portable vacuum table to secure maps to a table was needed for the Library's special collections. They needed to digitize all of the maps they had in storage over the summer, and Multimedia Mechanics took the challenge.
The Portable Map Vacuum is a project for Cal Poly Humboldt's Special collections, located on the 3rd floor of the Cal Poly Humboldt Library. The goal of the table is to allow the members of Special Collections and any student volunteers to easily take photos of their map collection by flattening out their maps via suction from the table. They aim to do so in the Summer of 2025, and are requesting our help to do so.
We were motivated to do this assignment because it was more straight forward than the other cosmos in the stacks assignments that were more of educational and very open ended.
Problem statement
Black Box for the Project
The objective of this project is to create a method for the Cal Poly Humboldt Library to effectively and efficiently secure their maps for imaging and digitization.
Criteria
Unlike many of the other Cosmos in the Stacks projects the Vacuum table isn't meant to be informative piece and is instead meant to be a tool that is easy to use and won't need to be replaced any time soon.
Criteria
Description
Weight (1-10)
Cost
The total price for all materials used, which is not to exceed the maximum budget.
8
Strength
The strength of the suction of the project used to secure the maps in place.
10
Noise
The noise produced from the project while it is and is not in use.
6
Aesthetics
The look and feel of the project.
4
Ease of Use
The ability for students and staff members of Special Collections to use the device without difficulty or misunderstanding.
7
Longevity
The device will be used a lot in the summer so it must be long lasting and parts should be quick and easy to replace if something does go wrong or break.
8
Portability
The ability for the project to be transported around with as little difficulty as possible.
7
Scale Adaptability
The ability for the project to adapt to securing different sizes of maps properly.
7
These criteria were used in a Delphi Matrix to help the group come to a conclusion on which design to go with. The chosen solution was the inverse air hockey table.
The Delphi Matrix Used to Select the Solution
Prototyping
Our criteria led us to selecting an idea for an inverse air hockey table design for the table. This section will contain multiple parts of our prototyping process for this idea, from drawings, to cardboard, to CAD designs.
Prototype Gallery
Early Drawing of a Table Design
The first prototype of the vacuum table.
A Picture of the Second Prototype
A CADD Model of a Prototype for the Project
During our prototyping process, we learned of a couple critical problems we had to solve. One of these was the problem of vacuum pressure escaping the main chamber due to poor sealing. We then decided for the final product we would seal all of the major cracks in the assembly with Caulk, to prevent the leakage of vacuum.
A second issue we discovered when making the large scale prototype was that the larger material would warp in toward the center of the assembly. To solve this problem we needed to put supports in the table to hold up the peg board and prevent permanent bending damage.
Final product
The inverse air hockey design holds the maps flat to the table from the suction through the holes on the top face of the table. The suction is created from a shop vacuum attached to the side of the table through an adapter. The table's face is 4'x4' to accommodate for large maps, and is 2" deep to allow the vacuum to have a chamber to connect to in order to suck the air through the holes. It also features handles on its side to allow for portability.
Construction began with coating the purchased 4'x4' sheets of pegboard and plywood in a polycrylic finish. This is done to limit Volatile Organic Compounds (VOCs) from emitting from the materials, which can damage the maps. Between each coat, we waited at least 2 hours for the clear coat to set. Then, the pieces were sanded, and the process was repeated. We did this process 3 times. While this was happening, two of the 1" x 6" x 4' oak boards are split into two 1" x 2" x 4' boards to make 4 boards total. These are later used as the sides of the table. Two of these boards are then shortened by 1" on each end to accommodate for the width of the other sides, allowing them to make a perfect 4'x4' box. One board is then engraved with the names of the group, as requested by the client. After this, the side boards are all coated with the polycrylic finish once, in the same process as used before. Another side board then has a hole drilled into in, allowing for the 3D printed vacuum adapter to be fitted into. 9 2" tall pieces are cut from the excess oak and are glued down to the inside face of the plywood for supports inside of the box. Once this is all done, the sides are put together to create the 4'x4' square shape, with the pegboard screwed on top and the plywood screwed on bottom. The excess wood from the other oak board is then cut and fashioned into handles, attached by screws on either side. Finally, all of the cracks are sealed with caulk to limit air leakage. The holes in the pegboard are too big for the vacuum, so they are covered with tape and smaller holes are poked into that tape where the bigger holes used to be. This allows for better suction. A fabric sheet is then placed over top and secured to the table to cover the tape and provide safety for the maps.
The vacuum connected to the table via the 3d printed adapter.3d printed adapter in table.
Video instructions
Something to add when product is finished.
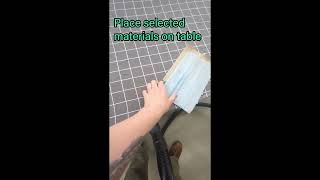
How to make Map Vacuum Table.
The video details how to set up and use the table.
Operation of the table is simple, and has few steps for use.
1
Attach vacuum to the table adapter.
Ensure that the vacuum is connected to the table through the vacuum hose adapter on the side of the table.
2
Plug in Vacuum
Plug the vacuum into a nearby, availible outlet.
3
Turn on Vacuum
Turn on the vacuum connected to the table.
4
Place Map on Top of Table
Finally, you place your desired map on top of the table, where it will be held down by the suction.
Maintenance
The maintenance of the map vacuum table is fairly simple. There is little happening with the table itself, as most of the moving parts are within the connected vacuum. Ensuring the vacuum is clean and properly stored will help with the longevity of the system. Safe handling of the table itself will also assist in keeping it in good conditions.
Handle the table with care
Store the vacuum properly
Maintenance schedule
This is the schedule for the map vacuum table.
Daily
Check vacuum is snug in the adapter
Move table to the desired location
Weekly
Ensure vacuum is empty
a weekly task
Monthly
Reseal any cracks with caulk
Yearly
Ensure table has no major air leakage
Check on tape to ensure it does not need to be changed out
Every 5 or so years
If clear finish becomes too old, reapply new coat to outside areas, and wait a day before using
Conclusion
Testing results
The project works as intended and secures maps flat to the table surface for digitization.
Discussion
The Multimedia Mechanics are satisfied with the results we have gotten so far, and are looking forward to seeing how Special Collections enjoys their new toy for map digitization.
Lessons learned
The main lessons learned had to deal with the process of researching. Finding materials that align with antique map safety can be difficult within a smaller price range. Finding a way to get the holes in the table was a problem too, so research leading us to pegboard, a material with holes in it already, really sped up the process.
Next steps
Because of the tape on the table being able to degrade over time, it may need to be changed out as time passes. In the meantime, the team will be thinking of new, longer lasting ways to choke the holes down on the pegboard.
Troubleshooting
This is a list of potential problems with ways to fix them.
Problem
Suggestion
Cracked caulk
Reseal with new caulk
Insufficient suction
Cover up unused holes with map safe material
Air leak
Seal with caulk
Tape Degredation
Replace with new tape and poke new holes
Team
Members of the Spring 2025 Semester Group, The Multimedia Mechanics: