Fundamental skill practice: Perform PDA Ligation[edit | edit source]
Review the video below as many times as needed, before making your first attempt to ligate the PDA using the molded simulated PDA.
Annotation of the video:
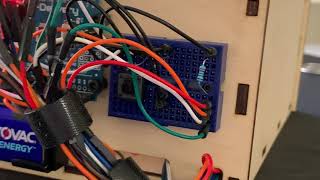
00:10 Overview of the surgical instruments needed to practice with the PDA Training Box
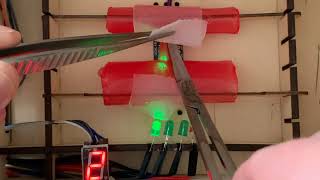
00:22 View from the phone App over the sensor, LED and digital score
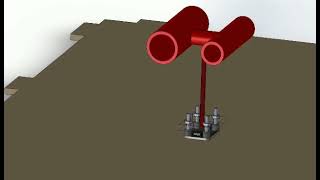
00:25 Positioning the physical model of the PDA with the pleura attached
01:00 Pressing the reset/initiation button to start the training
01:23 Physical model in place and position (distance) in zero. Ready to initiate the practice
01:40 Beginning of the dissection between the parietal pleura and the aorta. Use forceps (Debakey) and scissors (Metzenbaum)
05:05 Showing where the PDA is, and where the dissection must continue
06:55 PDA and part of the Aorta free of parietal pleura
07:07 First silk traction stich in the pleura (Silk 3-0)
07:50 Second silk traction stich in the pleura (Silk 3-0)
08:34 Reset of the sensor (new zero level with tractions in place) to start ligation
08:45 Going around the PDA with a right angle to position the first silk tie (Silk 2-0)
09:20 Going around the PDA with a right angle to position the second silk tie (Silk 2-0)
09:50 Tightening the first knot on the aortic end of the PDA (4-5 knots)
10:40 Tightening the first knot on the pulmonary end of the PDA (4-5 knots)
11:45 Procedure completed (see next video on how to end the training and obtain the total score).
00:15 Once the training is completed, press the "final score" button on the side of the box
00:30 Obtain the final score from the LED digit display. (The score from 0-9: maximum score is 9)
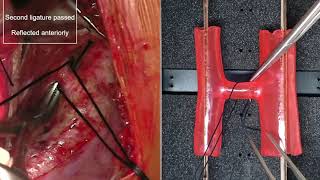
The following is simulated training side by side with the surgery.
Initial self-assessment using sensor feedback[edit | edit source]
Review the video below to understand the role of distance (promixity) sensors in providing real-time feedback on the displacement of the tissue and hence forces applied to the tissue model during surgery.