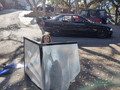
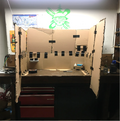
The purpose of this project is to create a protective barrier for the indoor lab. In hopes the protective barrier would put the students and teachers of six rivers charter school one step closer to going back to school. Due to Covid-19 the Cal Poly Humboldt class, Engineering 215 - Introduction to Design, instructed by Lonny Grafman was given the job of creating ways to protect students from spreading Covid-19 when in person school is back in session.
In the fall of 2020, the idea of going back to school of spring 2021 was under much controversy within six rivers charter school. Some wanted to go back to school and risk spreading covid-19 while others wanted to be safe and continue online. Engr205 wanted to send the students back to school while also mitigating the risk of spreading covid-19. The indoor lab barrier was one of the needed protection methods in order for kids to go back to safety. Other projects included; Outdoor lab tables that promoted social distancing, Teacher protective stations, and a mobile protection station for theater class.
The Delphi Matrix proposed that the indoor lab protective barrier design Team REMS came up with would prove to be the optimal solution to the problem statement according to weight distribution. All Criteria: Covid-19 safety (CDC guidelines), instructor interaction, replicability, cost, aesthetics, and student collaboration were considered.
| Criteria | Weight (0-10 |
|---|---|
| Covid-19 Safety (CDC guidlines) | 10 |
| Instructor Interaction | 9 |
| Replicability | 8 |
| Cost | 8 |
| Aesthetics | 7 |
| Student Collaboration | 6 |
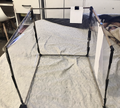
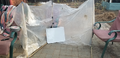
The final project was created after going over safety guidelines, How covid-19 spreads, how teachers will interact with their students, and the learning environment for students. Multiple trial structures were built. All of the material was available on amazon so it is able to be ordered from the safety of your home. This structure is a 3 sided barrier with a base of 36'' by 36'' by 27''. Each side has a sheet of vinyl that protects the student. Photos and descriptions. Use gallery (https://www.appropedia.org/Help:Images#Galleries (Links to an external site.)).
Include a how to use and maintain section. See the how to template below.
| QTY | Material | Source | Cost ($) | Total ($) |
|---|---|---|---|---|
| 5 | L-bracket | Amazon | 13.10 | 65.5 |
| 4 | L-Bracket | Amazon | 9.70 | 38.8 |
| 1 | double sided tape | AceHardware | 8 | |
| nuts and bolts | 8 of each | Ace Hardware | 13.44 | 13.44 |
| 1 | vinyl | Marine vinyl | 45 | 45 |
The barrier holds up well. There is no need for the structure to be clamped to the table. Doing so would be for extra precaution. The barrier is made to be able to withstand chemicals that are used in the chemistry lab. It will not be affected by low heat nor the cold. It is made out of non permeable material. The angle bracket aluminum frame is very strong. This allows for long term use. Each joint has a bolt with a lock tight nut to avoid loosening over time.
Measure and cut four 27" pieces of 1.5"x1.5" aluminum angle. These will be the upright corner pillars. Measure and cut one 36" piece of the 1.5"x1.5" aluminum angle. This will become the front bottom frame piece. They will be referred to as the "wide" aluminum angles in the following procedure. 4. Also cut five 36" pieces of the 0.75"x0.75" aluminum angle which will become the remaining pieces of the frame. These will be called the "thin" aluminum angles in the following procedure.
Begin assembly of the left panel. Gather one 27" wide aluminum angle and two 36" thin angles and set them on the working surface. Set the wide angle on the surface with one lip pointing up. Line up the ends of the thin aluminum with the ends of the wide aluminum. Mark a spot to drill where both angles will be drilled through.
Begin assembly of the front panel. Gather two 27" wide aluminum angles, one 36" wide angle, and one 36" thin angle. Align one 27" wide angle with the bottom of the 36" wide angle. Mark a spot to drill where it will go through both pieces. Remove and drill the first piece. Realign and mark through the hole you just drilled. Drill through the second piece. Repeat for the other side of the panel.
Introduce this maintenance section.
This is when to maintain what.
| Problem | Suggestion |
|---|---|
| Wobbly frame | Check for loose bolts |
| Loose bolts | Tighten bolts |
| Falling vinyl | Replace double sidedtape |
If a cheaper frame is desired would could be used. The method of building would be very similar.
| License | CC-BY-SA-4.0 |
|---|---|
| Cite as | Kevin Stof, Javier Ramos-Cool (2020–2024). "Team REMS". Appropedia. Retrieved October 3, 2026. |