| Authors | Riley Baker Orion Knowler Nelson Botzler-Washington Oscar Hudson |
|---|---|
| Location | Arcata, California, United States |
| Environment | Indoor makerspace |
| Status | Deployed |
| Made | Yes |
| Replicated | Yes |
| Cost | USD 85.00 |
| Uses | education, science |
| Authors | Riley Baker Orion Knowler Nelson Botzler-Washington Oscar Hudson |
|---|---|
| Location | Arcata, California, United States |
| Environment | Indoor makerspace |
| Status | Deployed |
| Made | Yes |
| Replicated | Yes |
| Cost | USD 85.00 |
| Uses | education, science |
This project was built to improve the 3d printing filament storage at the Cal Poly Humboldt makerspace. The previous storage made the filament inefficient to find, and did not keep the filament sufficiently dry, leading to failed prints. This new storage was built by undergraduate engineering students, Orion Knowler, Nelson Botzler-Washington, Riley Baker and Oscar Hudson, to more effectively store Cal Poly Humboldt's filament.
The objective of this project was to create 3d printing filament storage for the Cal Poly Humboldt makerspace. The previous filament storage was unorganized, inefficient to find rolls, and did not keep the filament dry enough to prevent print failures.
We created criteria and weighted them from one to ten alongside our client, the makerspace correspondent.
| Criteria | Description | Weight (1-10) |
|---|---|---|
| safety | safe to use | 10 |
| Storage capacity | able to store 36-40 rolls of filament | 9 |
| easily identifiable | spend no more than a few seconds to find the filament roll needed | 9 |
| easily maintainable | no more work spent on maintenance than the average makerspace machine or appliance | 7 |
| energy efficient | plug into a regular 120 v outlet and use a comparable amount of energy, or less, to other machines or appliances in the makerspace | 7.5 |
| keep filament usable | Stay below the maximum humidity and temperature | 10 |
Prototypes and testing
The prototype phase of the project revolved around trying to figure out how the dry storage would look. Three prototypes where built:


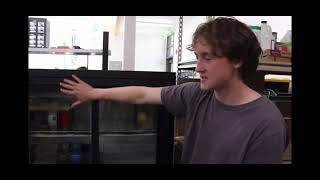
The Final Product is a repurposed soda fridge with modified racks and a dehumidifier. There is enough room to hold 36-40 rolls of filament and the glass door in the front makes them easily identifiable. The image on the left is the complete product with the installed dehumidifier. The racks are not included in that image due to wanting to show the empty space the fridge has. The image on the right shows how the filament will be stored in the fridge. The racks make sure the filaments are stable and easy to grab.

Our first step in constructing this project was purchasing a used fridge. The fridge we chose was a used coca cola model with glass sliding doors for easily identifiable contents. We used the fridge as the body for our filament storage, because it sealed well and already fully insulated. We removed the fridges shelving and cleaned the entire fridge thoroughly. We re used the metal bars of the fridges original shelving, by removing the excess metal brackets with an angle grinder. We used a dremel to smooth the angle grinder cuts and remove anything sharp. Then, we added foam on the edge to soften it. We purchased a briidea de humidifier to install inside the fridge. We installed the de humidifier by running its wires through the bottom of the fridge and connecting it to the fridges power supply, where the cooling system as originally plugged in. This way, the fridge can be plugged into a regular 120-volt outlet with the original cord, but instead of running its cooling system, the dehumidifier runs. We mounted the dehumidifier controls onto the side of the wall and the actual dehumidifier into the bottom corner. Finally we reinstalled the shelving.


A good way to display a process is by making a video explaining your process. See Template:Video for information on how to add and annotate videos.
There were only two purchases made. One for the Fridge and a dehumidifier. The overall cost was 85 dollars.
| Item | Amount | Cost per unit | Total |
|---|---|---|---|
| Fridge | 1 | USD 50.00 | USD 50.00 |
| Dehumidifier | 1 | USD 35.00 | USD 35.00 |
| Grand total | Project cost::USD 85 | ||
This is how to operate. It should have a brief introduction. You might want to show images or videos with step-by-step instructions when needed.
Open the door and press the on button below the screen on the display device.
Click the up or down arrow located next to the power button until the set point in the upper right of the display screen shows your desired humidity level.
This is the maintenance section and it covers everything needed to keep the storage system operational.
Describe the testing results.
Discuss the testing results.
Discuss lessons were learned during this project and what you would do different next time.
This project could be decorated with Cal Poly Humboldt logos and the racks could be re painted to make this more aesthetically pleasing.
| Problem | Suggestion |
|---|---|
| Example issue | Example solution or suggestion |
| Does not turn on | Make sure it is plugged in |
| Freon leak | Like any used fridge, a freon leak can be a possibility. If you hear hissing or notice anything out of the ordinary, call an expert to deal with it, as freon can be a dangerous chemical |
Introduce team and semester in the following format:
| Authors | Nelson Botzler-Washington |
|---|---|
| License | CC-BY-SA-4.0 |
| Organizations | Cal Poly Humboldt |
| Cite as | Nelson Botzler-Washington (2025–2026). "Swetman Makerspace 3D filament dry storage". Appropedia. Retrieved October 3, 2026. |