| Type | Water testing system |
|---|---|
| Authors | Bas Wijnen G. C. Anzalone Joshua M. Pearce |
| Location | Michigan, USA |
| Status | Designed Modelled Prototyped Verified |
| Verified by | MOST |
| Manufacturing files | https://github.com/mtu-most/colorimeter |
|---|---|
| Hardware license | CERN-OHL-S |
| Certifications | Start OSHWA certification |

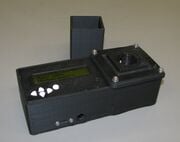
This project details an open source water testing platform derived from the open-source colorimeter, which is made from open source electronics and 3-D printable components. This is part of a larger project to reduce the cost of scientific equipment using open-source hardware.[1][2]Bas Wijnen, G. C. Anzalone and Joshua M. Pearce, Open-source mobile water quality testing platform. Journal of Water, Sanitation and Hygiene for Development, 4(3) pp. 532–537 (2014). doi:10.2166/washdev.2014.137 open access
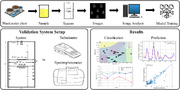
The developing world remains plagued by lack of access to safe drinking water. Although many low-cost methods have been developed to treat contaminated water, low-cost methods for water-quality testing are necessary to determine if these appropriate technologies are needed, effective, and reliable. This paper provides a methodology for the design, development, and technical validation of a low-cost, open-source (OS) water testing platform. A case study is presented where the platform is developed to provide both the colorimetry for biochemical oxygen demand/chemical oxygen demand and nephelometry to measure turbidity using method ISO 7027. This approach resulted in equipment that is as accurate, but costs between 7.5 and 15 times less than current commercially available tools. It is concluded that OS hardware development is a promising solution for the equipment necessary to perform water quality measurements in both developed and developing regions.
BOD; COD; nephelometry; open-source hardware; turbidity; water testing
The device's firmware: https://github.com/mtu-most/colorimeter
For the most up to date - see the github page: https://github.com/mtu-most/colorimeter
For 3D printing use:
For editing use:
For any libraries - again go to github for the MOST SCAD libraries.
Solder the components of the AdaFruit shield and LCD following the tutorial on Adafruit's website. Test if all is correct with the LCD by running the AdaFruit code on the same tutorial page.
Connect the two LEDs, the LCD and the sensors to the Arduino Fio as shown in the schematic. Upload the firmware code to the Arduino and test whether everything is working correct. Important: to compile the firmware, you need the LcdMenu and DuplexFrequencyCounter libraries from another repository.
In case you experience extensive warping (layers coming apart from each other), you can try to print the case in two parts, using separate models: the test vault with the sensors on the one hand, and the box for the LCD with the Arduino Fio, on the other hand.
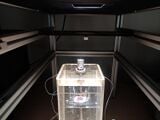
When putting in the box, cut 3 PCBs the size of 200x350mm and solder each LED on a PCB with the encoder sensor looking at it (so each PCB will have a LED and a reference encoder). The final third encoder sensor goes on a PCB of its own. The following images show the layout inside the box:
When finished, you can close the box with screws and put the printed buttons in place.
The two tests are COD and Nephalometry. The menu offers the following options (listed in the order they are normally used):
COD
Nephalometry
The Calibrate function returns "Calibration Read | More time needed" until five values are read, and "Calibration Read | Error: number after calibration was finished.
There are many aspects of water quality. COD and nephalometry are only two measurements of specific properties. Depending on the context which you are working and the questions you are trying to answer, these two measurements may or may not be enough!
| Authors | Joshua M. Pearce |
|---|---|
| License | CC-BY-SA-3.0 |
| Organizations | MOST, MTU |
| Cite as | Joshua M. Pearce (2014–2026). "Open-source mobile water quality testing platform". Appropedia. Retrieved October 3, 2026. |