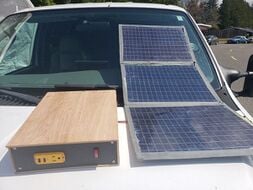
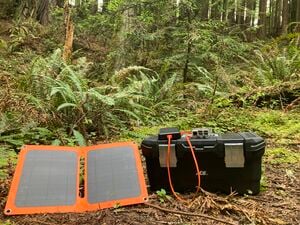
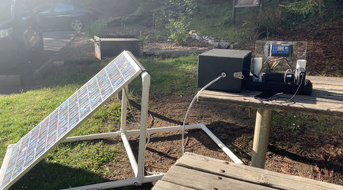
Here you will find information on how a site analysis should be carried out in order determine the best location for it, as well as how the sizing should be done.
When the sun hits the earth at a particular time and place, it is called INSOLATION. Insolation can be described as power density, and is expressed as watts per meter squared (W/m2) and, in PV, is often presented as average daily values per month. We receive 1,000 W/m2 when we have 100% full sun insolation. (Pratt & Schaeffer 56).
When analyzing a site to install a PV system, it is important to know which month has the lowest and highest rates of insolation, or the lowest and highest average amount of sun that particular site will receive in that month. This information will be important when you are trying to determine the tilt angle of your PV array. The best angle for solar panels is the one which best optimises sunlight exposure for a particular location.[1] Considering all of the months that you will be utilizing your pv operation, it is best to know the daily insolation, or average hours per day of full sun, for the worst weather month of the year. The insolation data will allow you to find an angle that is most appropriate, allowing your panel to sit at an angle that will provide the highest potential for power to your system.
In other words, determine which month has the least amount of sun on average. This is the month that you want to use if you are building a system that will be used year-round. (if you are only going to be using it for summer or winter, find month with least sun during months that you will use the system.)
PV Array Location
Sun/Clouds: It is important to estimate the sun availability and cloud cover. Sometimes you can obtain this information on the web if it is a large enough town.
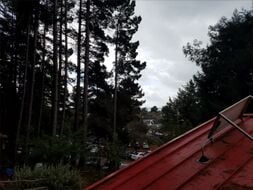
Shade: You want to choose a location that is on or near the place where you loads will be. The MOST IMPORTANT thing to consider when choosing a location for your Array is shading obstacles. Shade covering just one PV cell can reduce the current dramatically. A small amount of shade covering the panel can reduce the panel performance by 80%. As a general rule, the array should be free of shade (during each month in use) from 9am to 3pm. This is the optimum timeframe a panel has to receive light and is called the Solar Window.
Peak Sun Hours
Peak sun hours are the number of hours during one day when full sun is available.
Solar Noon
Solar noon refers to the time during the day when the sun is the highest in the sky; it is the moment when the sun is the strongest. To find Solar Noon, calculate the length of the day from sunrise to sunset and divide by two.
Sizing a PV system
To size your system requires seven main steps (remember, safety first):
Determine your energy use - you can do this by collecting a year's worth of electric bills and adding up the energy (measured in kilo watt hours kW-hrs) used. Another way to do this is to do a plug load analysis of all of your electric devices:
Determine the solar insolation in your region and more specifically location of the pv panel to determine kW-hrs/kW installed of PV. This is done with your latitude or distance from the equator. Divide your energy use by the available solar insolation found to get your number of maximum installed Watts. Then, design a pv system that meets your electrical power needs given the parameters of the available insolation (Keep in mind that solar insolation varies seasonally and daily).
Lets say you are average. The average annual electricity use per household is 10,654 kW-hrs/year (Energy Information Administration, 2005).
From the solar resource map go here or here. If we assume you live in Kingston you can expect at least 1200 kW-hrs/kW (more if you are using thin film PV).
10,654/1200 = 8.9 kW. This is actually a pretty big system -- which shows you just how wasteful most people are with energy.
Example 2
Calculating number of panels:
First, determine average daily building load (Edaily). Electrical utilities generally report energy use in kilowatt hours (kWh) per time. For this calculation, convert to watthours per day (Wh/day). For example, if it is known that a building used 9,125kWh in the last 365 days, Edaily can be calculated as follows:
Determine solar energy available for site location (Full Sun). PVWATTS will provide an average daily insolation value. For example, Arcata, CA is 4.29kWh/m2/day. However, hours per day is more useful. To convert simply divide by peak irradiance of the sun (1kW/m2).
What is the panel wattage? How about 240W. PPV = 240W
What is the expected balance of systems or AC to DC derate factor. How about nbos = .77. PVWATTS can also help with this.
Using Edaily, Full Sun, PPV and nbos - number of panels (NPV) can be solved by using this general equation: For example scenario,
Likewise, calculating the space required for a PV system would utilize the equation: A= PVmax/(nPV*full sun (1000 W/m2)). Using this equation, a 3,000 watt system with a PV efficiency of 20% would yield a required space of 15 m2.
Solar cells are thin squares, discs, or films of semiconducting material which generate voltage and current when exposed to sunlight.[2]
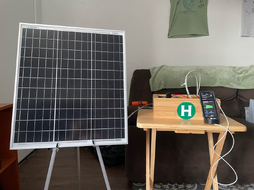
Panel or module
Panel
Configuration of PV cells laminated between a clear superstrate (glazing) and an encapsulating substrate. [clarificationneeded]
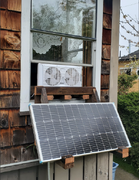
A Photovoltaic panel can be directly wired to a DC Load if the load is needed only when there is sun, and the load is not sensitive to large voltage fluctuations.
Examples include:
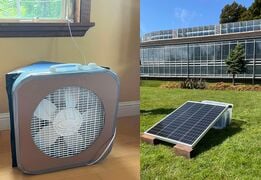
A greenhouse fan - this is a load that will serve to cool down the greenhouse during the day. The more direct sunlight there is, the more the load will be working and compensating for the heat within the greenhouse.
A waterpump - this is a load that does not need to be operational at specific times, and hence, is only operating when there is enough sunlight to power the pump.
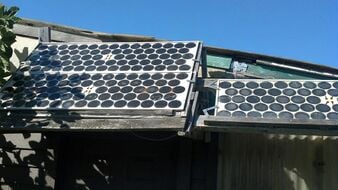
Array
One or more panels wired together at a specific voltage.
12 V, 40 Ah lead-acid car battery (if you have a free photo of a deep-cycle lead-acid battery, please add it!)
A deep-cycle lead-acid battery (DCLA battery) is designed to be regularly deeply discharged using most of its capacity. In contrast, starter batteries (e.g. most automotive batteries) are designed to deliver short, high current burst for cranking the engine, and to be frequently discharged of only a very small part of their capacity. While a DCLA battery can be used as a starting battery, the lower "cranking amps" imply that an over-sized battery may need to be used.
It is a type of battery (Direct Current electrical energy storage device) that can be discharged to a large fraction of capacity many times without damaging the battery.
Batteries are required for any system that needs some sort of storage capacity. If you will be using your system at times when there may not be sunlight available, a battery will store the energy from the PV array in order to power the loads at a later time.
Purpose/Importance
Batteries allow you to store energy directly from the energy generated by the PV Array.
Batteries store DC energy and allow you to utilize the energy during the night, when there is not a sufficient amount of sunlight, or when there is a blackout (if you are connected to the grid).
Batteries are an extremely important power supply for critical electrical loads that consistently require usage. If you are wishing to power a load only during the day, a battery may not be required, i.e. to power a fan on sunny days inside of a greenhouse. Utility grid-connected pv systems do not require the use of batteries, though they can be used as an emergency backup power supply.
Days of Autonomy
Autonomy refers to the number of days a battery system will provide a given load without being recharged by the pv array or another source.
General weather conditions determine the number of "no sun" days, which is a large variable when determining autonomy.
The general range of autonomy is as follows:
2 to 3 days for non-essential uses or systems with a back-up power supply.
5 to 7 for critical loads with no other power source.
Battery Capacity (AH)
Batteries are rated by amp-hour (AH) capacity. The capacity is referring to how much energy that particular battery is capable of storing. The capacity of the battery needs to be capable of supplying energy to the load. It is necessary to factor in the days of autonomy in order to determine how much storage capacity is required of your battery. The AH will tell you how many amps you can pull from the battery in one hour.
If more storage capacity is required for the pv system than one battery is capable of supplying, batteries can be wired in parallel to add additional storage capacity. Higher voltages are obtained through series wiring.
Initially, the battery capacity should be slightly larger than is required by the load because the batteries will lose capacity as they age. But if you greatly oversize the battery bank, it may remain at a state of partial charge during periods of reduced insolation - ultimately shortening the battery life. Determine the battery based on the size of your load.
The AH capacity will be listed on the battery.
Rate and Depth of Discharge
A battery is charging when energy is being put in and discharging when energy is being taken out. One cycle is considered one charge-discharge sequence, which often occurs over a period of one day.
The rate at which the battery is discharged directly affects it capacity. The faster the discharge, the lower the capacity. The slower the discharge, the larger the capacity.
The discharge rate refers to period of time at which the battery discharge was tested. For a battery rated at C/20, the discharge C (in Ah) was reached after 20 hours of discharge. For instance a 220 Ah battery, rated at 220Ah/20 would be discharged for 20 hours at 11 amps continuously.
Depth of Discharge (DOD) refers to how much capacity can be withdrawn from a battery. Most PV system batteries are designed for regular discharges of 40 to 80 percent. Battery life is directly related to how deep the battery is cycled; the shallower the cycle, the longer the life span.
Environmental Conditions and Battery Sizing
It may be unreasonable to size a battery system that would be capable of providing power during extreme weather conditions, such as three to four weeks without sun. Hence, it may be a better option to size the system according to the average number of cloudy days or to create a design with a hybrid approach adding in a generator or a wind turbine.
Battery capacity decreases at lower temperatures while battery life increases.
When sizing a battery, you can compensate for the effects of temperature by using a battery temperature multiplier. Multiply the battery capacity needed by the battery temperature multiplier.
Charge controller
Charge controller
Regulates battery voltage and controls the charging rate, or the state of charge, for batteries.
Purpose/importance
The charge controller functions as a voltage regulator. The main function of a controller is to prevent the battery from being overcharged by the pv array.
The charge controller is capable of sensing a battery´s current state of voltage. When a battery is fully charged, the controller will either stop or slow down the amount of current flowing into the battery from the pv array.
Charge controllers come in different sizes and must match the pv system voltage.
The controller must also be able to handle the maximum pv array current flowing through the controller at any given moment.
Voltage regulator
Voltage regulator
Purpose/importance
The Voltage Regulator prevents the pv panel from overcharging the battery by regulating the voltage to always be below a certain limit. The battery will specify that it cannot continue to accept current past a certain charge. The voltage regulator lowers the current as it reaches closer to this limit in order to lessen the amount of current charging the battery.
Low voltage disconnect
Low voltage disconnect (LVD)
Purpose/Importance
A Low Voltage Disconnect prevents the battery from discharging too deeply.
(LVD) is a feature that can disconnect DC loads from the battery so that is does not discharge to the point of damage.
If batteries are being discharged to a low level, a controller can shut off the current flowing from the battery to the DC load.
The LVD must be capable of handling the maximum amperage, or load current.
Lights or Buzzers on a controller can be used for critical DC loads instead of the LVD. This is important for appliances such as refrigerators that must not be cut off from a power supply without proper warning.
Inverter
Inverter
Changes direct current (DC) to alternating current (AC).[3] To power any AC Loads, the current must be converted via an inverter.
Purpose/Importance
Photovoltaic modules generate only DC power. Batteries can store only DC power. An inverter is used as a "bridge" which converts DC electricity into AC electricity.
AC is easier to transport over long distances, this is an important component for many pv systems.
AC appliances have become the conventional modern electrical standard, inverters are necessary to power any type of AC load.
Watts Output
This indicates how many watts the inverter can supply during standard operation.
Choose an inverter that can handle the system´s peak AC load requirements.
Voltage Input or Battery Voltage
This indicates the DC input voltage that the inverter requires to run - usually 12, 24, or 48 volts.
The inverter input voltage must match the nominal pv system voltage.
Load
Any electrical component within a circuit that draws power from that circuit.
Most loads can be turned on and off, such as a light bulb or a refrigerator.
Loads are either AC or DC.
Meter
Meter
A gauge that allows you to see from where you are pulling your power, and how much power is being drawn from the loads.
Purpose/Importance
A meter acts as a gauge that informs you of where you are pulling your power from, and how much power is being drawn at any given moment.
Volt Meter
Battery Voltage (state of charge)
Panel Voltage, Current, Power and Total Energy produced over a certain period
Load Power and Total Energy used over a certain period
Overcurrent Protection
Fuses and circuit breakers are the two types of overcurrent protection. When a current exceeds a circuit breaker or fuse´s rated amperage, the circuit opens and stops all current flow. When a fuse has "blown," it must be replaced while a circuit breaker must be reset.
Fuses
Fuses consist of a wire or metal strip that will burn through when a predetermined maximum current passes through the fuse, which opens up the circuit to protect wires from damaging.
Operating too many loads at once or faulty wiring will cause a fuse failure, which protects the wires and systems from damaging by integrating overcurrent protection into the system.
Circuit Breakers
Circuit Breakers, unlike fuses, do not need to be replaced. When the current exceeds a circuit breaker´s rated amperage, the circuit opens and stops the current flow.
Disconnects
A switch gear used to connect or disconnect components of a PV system for safety or when maintanace is needed. Every component in the system must be capable of disconnecting from all sources of power. Disconnects can be switched fuses or circuit breakers.
Grounding
To ground a wire means to connect to the earth or to some conducting body that serves as the earth.
Grounding limits voltages due to lightning, line surges or unintentional contact with higher voltage lines.
Grounding stabilizes voltages.
Grounding equipment provides some protection from shock.
Generator
Generator
A Generator is an optional alternative source to a power supply for those needing extra assurance that there will be power available to their system in times of need.
Generators may be AC or DC.
The diagram above shows how an AC generator can be wired through the inverter to supply DC power to the battery and DC loads. There are only specific inverters that are capable of operating in this way.
DC generators can be directly wired to through the charge controller to supply the entire system.
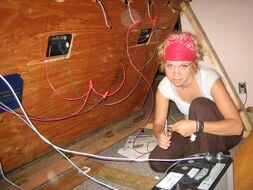
Wiring
Color Coding
Color Coding of Wire
DC Wiring
120 AC Wiring
Red = Positive
Black = Hot
Black = Negative
White = Neutral
Green or Copper = Ground
Wire Size
Ampacity: The current carrying ability of a wire. Hence, the larger the wire, the more capacity it has to carry current.
Voltage Drop: The loss of voltage due to a wire´s resistance and length.
Wire sizing must be based on the maximum current through the length of the wiring.
Solar Array Wired in Parallel versus Series
Parallel Wiring
Photovoltaic system wired in parallel
Wiring solar panels in parallel is when you connect all the positive wires or terminals of the solar panels together, and all of the negative wires together. Parallel wiring is used most in households.
Wiring solar panels in series is when you connect the positive wire or terminal of the first solar panel to the negative wire of the next one, and so on for as many panels you have.
The following table can be useful to think about when deciding whether to wire in parallel or series
↑ For mono-crystalline cells: if the specifications are not to be found on the panel, it is safe to assume each cell is equal to 0.45 volts. Also, the current can be assumed to be 0.22 Amps per square inch.