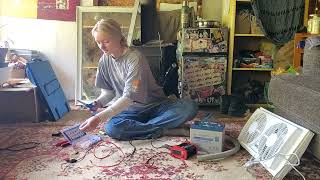
The Mahana PV Window Fan is a solar ventilation system intended to provide air conditioning to those without reliable access to electricity in high heat regions. The project was designed and built by student group Solinary, comprised of Lily Cohen, Lucille Larson, and Hope Sakho, in association with California Polytechnic University at Humboldt as part of the course Engineering 215 - Introduction to Design. The paramount goal of this project is to remain accessible, universal, and replicable in design while providing an effective alternative to plug-in window fans.
Background
All around the world, people use window fans to stay cool as a form of air conditioning. Window fans are AC powered appliances, relying on power from the grid to supply them with electricity. It is a fact that electricity can be expensive and power outages are often occurrences, especially during high heat events, when air conditioning is most essential.
Our team conducted multiple interviews in order to gain understanding of usage conditions and formulate criteria for our design. One subject spoke to how they acquired their fans based on whatever was accessible and available, another said that they would build a solar fan if only they had the resources. Multiple interview subjects shared that they liked to run their fans at night. These factors influences the criteria and therein the design of our system.
Problem statement
The objective of this project is to design an effective photovoltaic alternative to plug-in window fans that remains accessible, universal and replicable.
The following are criteria which our chosen solution targets, principles by which the project is to be judged against that dictate the variable elements of the design.
Criteria:
Criteria
Constraints
Weight (1-10)
Replicability
Easy enough to copy that anyone can make for their home.
9
Efficiency
Meeting or exceeding 1300 rotations per minute (RPM). (Crompton 2020)
8
Adaptability
Should be a simple enough design to be able to replace components with materials users have on hand.
7
Sustainability
Uses efficient (20% or above) solar panels and will not need replacing within 3 years. Also uses materials found around the home rather than buying new materials.
7
Cost
Must be less than products of similar quality on the market ($350).
7
Durability
Can withstand harsh weather conditions, either high heat or rain. Also lasts at least 3 years for a good return on investment (ROI).
5
Safety
Must inform the user of any potential safety risks in instructions (especially when it comes to the battery).
5
Prototyping
This prototyping section describes the thought process by which the Solinary team followed to get to multiple possible options for the final product. First is the Brainstorming process, where variations of features and ideas are put into a table to create a variety of solutions. Second are the alternative solutions that were come up with by the team to find the best one that will be used to complete this project. Ultimately though, the solution selected by the customer will depend on where they live and how efficient it is to collect solar energy from inside vs. outside the home.
The various alternative solutions and how they scored for each criterion of the project. For more details on the alternative solutions themselves, look below. The dark green titles are the solutions we ended up combining.
In a sit-down session, the team was overwhelmed with ideas and thought of categorizing them and taking a strategic "mix and match" approach to formulating our alternative solution ideas. We created a table with the categories: mounting, panel type, hardware location, hardware type and battery. From there we thought of which options made sense with which, for example, if someone lived in an apartment building and certain outdoor hardware panel mounting options weren't feasible. This is where synthesizing our ideas to form more complete solutions really came in - solutions that would meet each of our design criteria and specifications.
Alternative Solutions
The Mahana Puai Conditioner (The design we went with)- The Mahana Puai Conditioner solution, meaning 'strong sun conditioner', draws mounting inspiration from the design of a pull-up bar and features a panel mounted on a DIY triangular wood platform which latches inside the window, and like the Air Pleconditioner - a lithium-ion battery, inverter and charge controller. If the panel requires additional wiring, solderless connections and thus copper wires are used so as to avoid electrolysis with aluminum conductors and zinc-plated crimp sleeves. This design, as can be seen in the picture below, caters to those who do not have access to ample building tools, like a soldering iron - such as may be the case in Teahupo'o, Tahiti, where the name is from and where one of the interviewees for the project is located. These wires are transferred to the fan in similar 'window-pass-through system' (though they remain outdoors) via a segment of universal outdoor garden hosing, which is resistant to degradation from UV and other elements, and connected to a lithium-ion battery and inverter mounted to the beam beneath the panel in a weather-proof box. The charge controller is mounted just inside the window below the fan, so as to readily display the battery's voltage. This design remains feasible to users who reside in ground-level homes and multi-story apartment buildings alike because the platform is within arm's reach out the window. Lithium batteries are higher in cost, but also in capacity, depth of discharge, lifespan and efficiency, allowing us to use and store more solar power simultaneously. This design requires minimal tools, resources and clambering, meeting the criteria and considerations that it be adaptable, universal, durable, sustainable and easily replicable
The Air Pleconditioner - The air pleconditioner is a play on the plecostomus suction fish. This solution includes the implementation of the monocrystalline silicon panel attached directly to the window via a series of heavy duty suction cups, as can be seen in the picture below, so as to provide additional shade into the building. This design necessitates the use of a lightweight panel to minimize strain on window mountings, such as an 18x27 inch flexible panel weighing 2.4 lb supported by eight suction cups, each of which have a load capacity of 10 ounces, thus supporting the panel with ample leeway by a factor of two. Suction cups are evenly spaced throughout edges of the panel, fastened with M8 screws through mounting eyelets which either come inherently in each corner of the panel or are fashioned through cutting/drilling and installation of eight eyelet grommets (about $0.80) for reinforcement. If the panel requires additional wiring, solderless connections and thus copper wires will be used so as to avoid electrolysis with aluminum conductors and zinc-plated crimp sleeves. These wires will be transferred through the window in a window-pass-through system via a segment of universal outdoor irrigation hosing, which is resistant to degradation from UV and other elements, and connected to a lithium-ion battery mounted on a shelf just below the fan with the inverter, which can be hidden inside a box of the user's choosing. The charge controller will be mounted just above the shelf on the wall, so as to readily display the battery's voltage. Lithium batteries are higher in cost, but also in capacity, depth of discharge, lifespan and efficiency, allowing us to use and store more solar power simultaneously but spend less on a flexible panel.
The da Vinci Ventilator- The da Vinci Ventilator alternative solution features the universal, minimalist approach of a cable-suspended solar panel the user can install from the comfort of their window. The design includes the use of solderless connections and thus copper conductors, which can be carried into the inside of the window in a window-pass-through-system via a segment of universal outdoor irrigation hosing, which is resistant to degradation from UV and other elements. The panel and fan are connected to the battery, inverter and charge controller, which are mounted to the ground inside the window in a succinct, discrete box. A lead-acid battery is utilized in this design - while they are inferior to lithium batteries in capacity and depth of discharge, they maximize our potential to keep the cost low and their lifespan can be preserved if they are used correctly, e.g. not exceeding the depth of discharge. A lower cost battery allows for a larger, more costly solar panel. This approach, named for the painting-like suspension of the module, caters to those who live in high-up apartment buildings but also benefits those who do not have access to ample tools for assembly, mounting and weatherproofing - meeting the criteria that it is low cost, adaptable, durable, sustainable, and easily replicable.
The deep cycle battery (we ended up using this as part of our solution) - The deep cycle battery solution is having the product use a deep-cycle lead-acid battery instead of a regular lead-acid car battery. Car batteries are meant for providing quick jolts of power that do not run for a long period of time. If we use one to store solar power, the life of the battery will be greatly reduced as it is not meant to store and provide power at a slow pace. A deep- cycle battery will do just that, deep cycle batteries consist of tall, thick and fewer metal plates compared to the short, thin ones in car batteries. This build allows for power to be stored for a long period of time without reducing the battery life as well as provide slow and steady jolts of power to run for longer periods.
Voltage Regulator - The voltage regulator is the idea to consider using a voltage regulator instead of a battery. Voltage regulators are most commonly used to prevent batteries and electronics from over charging. However in this design instead of regulating power for a battery a voltage regulator would regulate the unstable energy being produced by the panel in order for it to go straight to the fan without a battery. This would allow for consistent safe use so long as there is enough energy being produced. A voltage regulator would cut cost as they usually are below $10 and weight of the product making the building process much easier for consumers.
Max Efficiency Platform - The maximum efficiency platform is a solid platform that can be made by scrap material (wood or sturdy hard plastic) to hold the solar panel at its ideal angle to collect the most energy based on where one is on the planet. For the northern hemisphere that would be to face south at a 30 to 45 degree angle. If the building isn't facing south but rather west or east, you would want to prioritize the time of day at which you will be able to collect the most sun. During the morning and early afternoon hours an eastern facing panel would be ideal but for late afternoon and evening hours you will want your panel to face west as the sun starts to set in that direction. For the southern hemisphere, then one would want to face the panel north instead. The same rules would apply for west and east facing windows. The platform, as can be seen in the image below, will be held up by an angled sturdy cord with the wall and joints connected to the platform and the wall to allow for the platform to fold up when done using. The platform will ideally sit above the window or next to it to get the maximum sunlight. The wiring for the solar can then be placed in a garden hose material and mesh on the ends to protect animals and bugs from entering the home. This solution would fit the criteria because it would allow for maximum efficiency of the solar panel, is accessible to all that have a window, and it uses fairly minimal materials for the mount system.
The Good Ole Portable and Long Lasting - The good ole portable and long lasting solution is created by placing a back panel stand for the panel to collect energy from any location in case the house space is not available. This solution, demonstrated in the picture below, allows anyone to charge the battery where there is sun access. The long lasting feature takes the CO2 levels of the room you are trying to ventilate. If the CO2 levels meet a certain threshold then the fan will turn on. This will allow the fan battery backup to last longer and to make sure a room is meeting ventilation standards. These features won't allow you to use the fan unless you are outside. The CO2 reader will also increase the cost a bit but these features will allow people with very little space to get the ventilation and cooling they need.
Final product
Annotated Diagram of PV Window Fan
The Mahana PV Window Fan design features a solar module, rack/mount, charge controller, battery, inverter, fuses, laundry hose segment, and window fan. Smaller components of the design include wires, heat shrink, solderless butt connectors, loop end wire terminals, and inline fuse housings. Not pertinent to the electrical design of the system is the solar rack, which we fashioned entirely our of scrap wood. The figure to the right shows a detailed diagram of the design with dimensions.
The panel is mounted on a wooden solar rack, constructed of recycled palettes or scrap wood, hung out the window by three horizontal planks which extend to support a shelf rack inside and under the sill for the components. These components, the battery and inverter, are housed in the rack under a hinged wooden flap. Outside, the module rack is trademarked by two supportive thirty-sixty-ninety degree triangles and the inside component shelf features two forty-five degree triangle supports, all screwed into one unit with many three-inch steel screws. There is a space above the window sill between the front and back of the rack (see Figure 5.1) which has multiple implications on the effect of the design. If the user's fan is large, this serves as further protection of the fan from falling, if the user's fan is small, that may necessitate the user place a filler object below the fan, to prevent the inhibition of airflow.
Wiring Diagram for PV Window Fan
Wires from the panel connect directly to the 10 amp pulse-width modulation charge controller, mounted on the inside wall-flush side of the rack. See Construction for connection order to charge controller as this does matter. Also on the rack shelf is the 12V deep cycle lead acid battery, connected to the charge controller via a positive and negative wire which meet the battery terminals by loop end wire terminals. On the positive wire is a 20 amp fuse encased in an inline fuse housing, joined by solderless butt connectors. Also connected to the battery is the 200 watt inverter, on the same side of the terminals as the charge controller. A wiring diagram detailing the operative wiring of the system can be found to the right. The fan plugs directly into the inverter. All connections are encased in heat shrink for added safety. Wires pass through a gap between the rack and the fan inside a segment of laundry hose, or whatever the user has access to that would serve as both an ultraviolet- and weatherproofing pass through facet, protecting the wires from the elements.
Construction
1. Purchasing the window fan (if necessary) and sizing the system - In order to have the best user experience, it is important to see how many watts the window fan you own or have purchased uses. This can be done by the product specs or by measuring with a power meter. For this project the maximum watt usage from the fan was 56 watts at the highest setting. Once this is figured out we can find what size solar panel and battery is needed to help the fan run.
Size the solar panels according to energy consumption
Size the inverter according to the solar panel system power rating
Size the battery bank according to how many hours you need it to run i.e. autonomy
With this specific scenario, the fan needed to run about 8 hours without any sunlight so people can use it throughout the night. In order to have enough power produced we ended up buying a 100 W solar panel to be able to run the fan and charge the battery. In this case we got a battery that was 12 V and 35 Ah to keep enough energy to maintain the 8 hrs of autonomy. Different window fans may need different components but the standard window fan should maintain a model similar to this.
2. Purchasing the panel, the battery, the charge controller, and inverter - Now that we know the size of the battery and panel we still need to consider what kind of battery to buy. When deciding what to purchase know that you want to find the best price for the wattage that will fit the system. The next step would be to decide what kind of battery you buy. A standard lead acid battery is relatively cheaper than the lithium ion but the life span is proportional to it's price. The lead acid battery is expected to last about 3 years with constant use, while the lithium ion will last around 7 years. When buying your battery also make sure that your charge controller is compatible with whichever battery you purchase because some controllers won't work with lead acid batteries.
3. Start designing the window platform that will fit your window - The first step is to find the exact measurements for the window sill is to find the width, depth and the space underneath to see if a panel can fit. Make sure when you design your platform that you angle the solar panel between 45 and 30 degrees to optimize the amount of energy generated. Make sure to create a counter platform to hold the battery in place with the panel. Any wood building material should be covered with a wood seal to ensure that any water it comes into contact with it doesn't ultimately destroy it. We ended up using scrap wood and it worked well. Create with your measurements in mind.
4. Start constructing the platform - Now that the design is ready, it's time to use the materials you can collected to put together your design. Make sure to buy plenty of nails to ensure the platform is structurally sound. The solinary team ended up borrowing power tools from friends and colleagues to build the final prototype and would suggest others to do the same if possible. Make sure to wear safety glasses when around running power tools.
5. Connect the electrical components - When starting to connect these electrical components it is important to make sure that we connect to the charge controller in the right order in order to not blow a fuse. The battery goes first to maintain good current, then the panel to maintain that current, and finally the load to use the current. It is important that the inverter be connected to the battery, so in this case there isn't any direct load being connected to the charge controller. Make sure to safely cut and strip wires from the panel and connect it to other wires and connectors if necessary. Also make sure not to be cutting or stripping wires while connected to the battery or you may be in for a shock. Any fan you have will directly plug into the inverter. In addition, positive wires always go to the positive terminals and the negative wires go to the negative terminals. When setting up the wiring, make sure it is long enough to get into the house. All wires need to be protected from the outdoor elements. In our prototype we use an old hose, but any thermal insulator protector will work. Make sure when you loop the end terminals of the charge controller and the inverter to put it one the same side of the battery terminal.
6. Set up the display in the window - Once the mount is done and the panel connections are put in place, you can start to display your panel outside and see if the prototype works. It is recommended that once you display the fan and its mount that you keep all the electrical components inside the house in a dark cool box. This will prevent access to the battery which can cause shocks if manevered inappropriately or to keep it out of hands of children. It is also advised to screw the charge controller into the wall so you can see how full the battery is charged and to make sure that energy is being collected by the panel. When displaying the fan make sure to set a book down first underneath since the mount has some wood covering it initially if you don't do so. You can also place material usually used to be door sweeps to cover any openings at the bottom of the fan to prevent bugs from entering your home.
Constructing the Final Product with Team Solinary
Video instructions
Below is a video of Solinary team's own Lucille Larson assembling the solar window fan for others to be able to replicate.
All costs for the project were payed with the support of the Appropedia foundation and Solinary team investment. Some of the items were found around the home and were therefore free. The Solinary team recommends you find a friend with wood shop tools if you don't have any on hand, to make this a more affordable project.
Item
Amount
Costperunit
Total
100 W 12 V Solar Panel (Renogy)
1
USD108.49
USD108.49
Sunpow 10 A Charge Controller — Charge controller compatible with lead acid battery
1
USD10.00
USD10.00
Beyond Breeze 9" Twin Window Fan (Amazon)
1
USD38.09
USD38.09
Power Sonic 12V 35Ah Solar Battery (Amazon)
1
USD91.02
USD91.02
200 W NDDI Power 12V DC to 110 V AC inverter
1
USD27.11
USD27.11
Wire and Connectors
4
USD1.25
USD5.00
Nails for mount
50
USD0.42
USD21.00
Wood planks for mount (scrap wood pallets)
2
USD0.00
USD0.00
Old watering hose or washing machine hose (to transport wires from outside to inside the home)
1
USD0.00
USD0.00
Tools needed to build mount such as saws, drills, and sanders (borrowed from colleague)
The set up and operation of the Mahana PV fan is fairly simple. Though it is advised that two people set up the structure together as the mount, panel, and battery are heavy materials that could cause injury or break if not handled carefully. The steps are as follows...
1
Careful place the mount in between the window with battery box on the inside and panel mount on the outside. Set the solar panel onto the mount then carefully transfer the wire connected battery and invertor through the window. Set up battery and invertor in the battery box. Make sure the wiring that connects the panel, battery and invertor are safely and correctly connect through the window.
2
After that the mount, panel, battery and invertor are set up correct it is then time to place the window fan in the window seal between the panel and the battery box. Have the fan hold up the window. Turn on invertor (Make sure green light is on) and plug in window fan to the invertor. Once done, turn on fan to your preferred setting and enjoy.
Maintenance
The Mahana PV fan is a low maintenance sustainable product.
Any user of the fan familiar with its anatomy can perform this maintenance.
Maintenance schedule
This is when to maintain various components of the solar fan.
Daily
Leave the fan off for at least two sunny hours in the morning
Monthly
Check all connections to battery, inverter and charge controller
Every 3-5 years
Replace battery
Conclusion
Testing results
Testing the Battery Life
Primary testing took place proceeding initial assembly of the electrical components of the system. The first test to be conducted consisted of the timing of how long the fan would run on pure battery power, to full depth of discharge, with no additional energy input from the panel. The battery was sized to run in this capacity for eight hours. It should be noted that for this initial test the battery may not have been thoroughly charged, however, despite this fact it ran the fan for seven and a half hours, leaving the battery discharged at a voltage of 11.7 volts.
Charging with no load
With no load on the 12V 30 amp-hour battery, it took approximately 2 hours to charge in the sun. We encountered a problem, however, which involved the voltage of the battery dropping by an entire volt when the panel was no longer under exposure. For testing purposes, we switched to a 12V 10 amp-hour battery to conduct the remainder of our tests after trying a different charge controller to remedy the issue to no avail. This battery takes ____ hours to reach full charge in the sunlight.
Charging the Battery While Running the Fan
With the original 30 amp-hour battery, the ran would remain running all day when turned on with the battery at low charge. Even when the battery was in a charged state, however, the fan would shut off when the panel was no longer under exposure. After resetting and trying a new charge controller we reached the conclusion that our battery is faulty. With the new 10 amp-hour battery, it would run the fan in the sun _______ when loaded with an initial full charge.
Discussion
Despite resetting and replacing the charge controller, the issue persisted during our testing phase. Other problems we encountered included long periods of rain during which we could not leave the system outside, as we did not always have access to the window we used to design it. we reached the conclusion that our battery was faulty, or perhaps was left at a low discharge for too long and was damaged as this can happen with lead-acid batteries.
Such a problem could have been foreshadowed, being that the criteria of our design dictated that it be low cost and ultra-accessible. We opted for this battery because it was the least expensive out of the deep cycle batteries we considered, and since we had to size the solar module at 100 watts in order run the fan while charging the battery enough to run through the night, we deemed it fitting with our criteria to opt for a more modest battery. The other ultra-accessible elements of the system did work out well, like the laundry hose to pass the wires through the window, for example. We couldn't use duct tubing because it would get too hot, and PVC is hard to cut without proper tools. Garden hoses and laundry hoses for washing machines are ideal but whatever the replicator has access to that is flexible and protective is suitable for this purpose.
Lessons learned
Next time, we would use a Lithium-Ion or Lithium-Iron Phosphate battery because they rank higher in efficiency, capacity, depth of discharge and reliability. We opted for a more modest battery in order to remain low cost and ultra-accessible but have reached the conclusion that investing in a more efficient battery could increase the integrity of the design and make it charge faster, run longer, and last longer.
Next steps
Some ideas of what we'd like improve on, expand on, or do next include:
Test the efficacy of the system with a Lithium-Ion battery
Seal the wood of the solar rack to weatherproof and preserve it
Consider the edges of the window where the fan won't meet the panes because of the rack, where bugs can come in
Troubleshooting
This is only how to troubleshoot basic operation. For complex issues, the solution might just say something like contact ________. It should be a table in this format:
Problem
Suggestion
Does not turn on
Make sure inverter is flipped to "on"
Still does not turn on
Look at charge controller display. If voltage is shown, check connection to inverter.
Not turning on, no voltage shown on charge controller display
Check connection to battery (middle two ports). If disconnected:
With a screwdriver, unscrew the ports on the left to disconnect the panel.
Reconnect the battery.
Reconnect the panel.
The charge controller may be damaged if this happens. If no voltage shows, replace charge controller.
Battery not charging in sun
Charge controller may not be of correct variety. If you have a lead-acid battery, make sure it is lead-acid compatible.