Fiona Roper (talk | contribs) |
Sophivorus (talk | contribs) m (Text replacement - "| affiliations = " to "| organizations = ") |
||
| (93 intermediate revisions by 13 users not shown) | |||
| Line 1: | Line 1: | ||
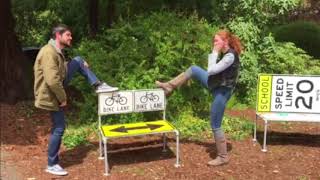
[[File:Upcycledbenches.JPG|thumb|Final Up-cycled benches constructed for Zane Middle School.]] | |||
== | {{Project data | ||
| status = Deployed | |||
| authors = Team FMLD, User:Fiona Roper, User:Alb26, User:Lyarbrou, User:Tjc406 | |||
| cost = USD 546.56 | |||
}} | |||
{{Device data}} | |||
The purpose of this project is to create up-cycled benches used for sitting purposes, campus beautification, and for educating both students and faculty about the recyclable use of material waste in the community. While many options were considered for building the benches, street signs and a metal frame were decided upon for aesthetic reasons and that they would be up-cycled. The resulting benches are made of galvanized steel plumbing pipes and up-cycled street signs. The benches are comfortable, functional, and educational. | |||
== Background == | == Background == | ||
Catherine L. Zane Middle School in Eureka, CA, is the client entity for the up-cycled benches. The | |||
school focuses on science, math, engineering, art, and technology and is made up of 600 | |||
students, grades six through eight, of varying backgrounds. Our client representative is Trevor | |||
Hammons. | |||
== Problem Statement and Criteria == | |||
Team FMLD's objective is to create upcycled benches used for educating both students and faculty about the recyclable use of material waste in the community, campus beautification, and for sitting purposes. | |||
{| class="wikitable" | |||
! Criteria | |||
! Weight | |||
|- | |||
| Safety | |||
| 10 | |||
|- | |||
| Durability | |||
| 9 | |||
|- | |||
| Cost | |||
| 7 | |||
|- | |||
| Aesthetics | |||
| 7 | |||
|- | |||
| Level of upcycle | |||
| 6 | |||
|} | |||
== Description of Final Project == | |||
The final design for the Up-cycled Benches consist of aluminum street signs attached to a metal frame. The main materials used were selected to demonstrate re-purposing of materials through "up-cycling". | |||
The metal frame for both benches was made from ¾" galvanized plumbing pipe. Custom cut pipes fit the length and width of the street signs. The pipes were connected using "T" and "90 degree" connectors and flanges the middle bars that make up the seat of the benches. | |||
In the case of the middle bars, each side was tightened only half way because there cannot be a closed loop unless special connectors or backwards threading is used. To improve the strength of the bench and the half tightened bars, each joint is welded on either side as depicted in Figure 5 below. The signs are attached in multiple ways. The attachments can be seen in Figure 4 below. The signs that make up the seats are attached using pipe straps for the back two bars of the frame and bolted through the pipe on the front bar. The seat signs are recessed to create a smoother edge for the user to hang their legs over. The signs that make up the back of the bench are bolted through the pipe frame in multiple spots instead of using pipe straps. | |||
<gallery> | |||
| Image:Side by side.jpg| Figure 1: Both finished benches side by side. | |||
| Image:No Parking bench.jpg| Figure 2: Finished No Parking bench. | |||
| Image:Bike Bench Fin.jpg| Figure 3: Finished Bike Lane bench. | |||
| Image:Underside bench.jpg| Figure 4: Underside of one of the benches showing the various attachment methods used. | |||
| Image:T joint.jpg| Figure 5: Welded T joint sprayed with Cold Galvanizing Compound to prevent rust. | |||
</gallery> | |||
===Prototyping=== | === Prototyping === | ||
Figure 6 shows our first prototype. This prototype helped us to figure out the layout of the signs and that the Bike Lane signs needed to be raised to create a more comfortable back support. Figure 7 shows a small scale of the Bike Lane Bench. This prototype helped us to roughly figure out how the frame of the bench would fit with the signs. Figure 8 is an AutoCAD drawing of one of the benches. This prototype contained the actual dimensions of the pipes we would be using. Figure 9 shows our last prototype before building. This prototype was originally supposed to be the beginning of the final product but in building we learned that when making a closed loop with piping, a special connector or backwards threads are needed. This lead us to our decision to weld the joints. | |||
<gallery> | |||
| Image:Proto 1.jpg| Figure 6: First prototype of Bike Lane bench. | |||
| Image:Bike Bench pro.jpg| Figure 7: Small scale prototype of Bike Lane bench. | |||
| Image:FMLDbenchesACAD.jpg| Figure 8: AutoCAD of bench including dimensions. | |||
| Image:Lauren pipe.jpg| Figure 9: Lauren Yarbrough prototyping how the pipes and joints fit together for the bench frame. | |||
</gallery> | |||
=== Costs === | === Costs === | ||
{| class="wikitable | |||
! Quantity | The itemized summary of costs to construct the bench are listed below. | ||
{| class="wikitable" | |||
! Quantity | |||
! Material | |||
! Cost ($) | |||
! Retail Total ($) | |||
! Team FMLD Total ($) | |||
|- | |- | ||
| 3 || | | 22 | ||
| | | Custom cut 3/4" galvanized pipe | ||
| | | 166.25 | ||
|- | | 166.25 | ||
| 1 || | | 166.25 | ||
| | |- | ||
| | | 10 | ||
|-class="sortbottom" | | 3/4"x 1 1/2" galvanized nipple | ||
| 1.39 | |||
| 13.90 | |||
| 13.90 | |||
|- | |||
| 10 | |||
| 3/4"x 6" galvanized nipple | |||
| 2.79 | |||
| 27.90 | |||
| 27.90 | |||
|- | |||
| 20 | |||
| 3/4" Ts | |||
| 3.89 | |||
| 77.80 | |||
| 77.80 | |||
|- | |||
| 8 | |||
| 3/4" 90s | |||
| 2.29 | |||
| 18.32 | |||
| 18.32 | |||
|- | |||
| 8 | |||
| 3/4" Flanges | |||
| 6.99 | |||
| 55.92 | |||
| 55.92 | |||
|- | |||
| 8 | |||
| Street Signs | |||
| 38.75 | |||
| 38.75 | |||
| 38.75 | |||
|- | |||
| 1 | |||
| Cold Galvanizing Compound Spray | |||
| 8.47 | |||
| 8.47 | |||
| 0.00 | |||
|- | |||
| 3 | |||
| Pipe Strap (Packs of 10) | |||
| 1.49 | |||
| 4.47 | |||
| 0.00 | |||
|- | |||
| 2 | |||
| Drill bit | |||
| 4.99 | |||
| 9.98 | |||
| 0.00 | |||
|- | |||
| 60 | |||
| Various screws (stainless) | |||
| Varied | |||
| 54.94 | |||
| 0.00 | |||
|- | |||
| 65 | |||
| Various nuts (stainless) | |||
| Varied | |||
| 27.64 | |||
| 0.00 | |||
|- | |||
| 130 | |||
| Various washers (stainless) | |||
| Varied | |||
| 7.02 | |||
| 0.00 | |||
|- class="sortbottom" | |||
! colspan="4"|Retail Total (with tax) | |||
! $546.56 | |||
|- class="sortbottom" | |||
! colspan="4"|Team FMLD Total | |||
! $400.00 | |||
|} | |} | ||
==Testing Results== | == Testing Results == | ||
The larger upcycled bench can support 600 lbs and the smaller can support 400lbs. Both products can withstand prolonged use by middle schooler students. | |||
== How to Build == | |||
== | {{Step | ||
| number = 1 | |||
| text = Measure the desired dimensions. | |||
}} | |||
{{Step | |||
| number = 2 | |||
| text = Cut the right amount of pipe to reach desired dimensions. Remember to include the width of the | |||
}} | |||
=== | {{Step | ||
| number = 3 | |||
| text = Thread the ends of the pipe so that it fits inside the T-joints and elbows. | |||
}} | |||
{{Step | |||
| number = 4 | |||
| text = Screw in pipes to their respective joints. Note: Our team found that completing one side of the of the frame, then screwing in the pipes that connect both sides works the best, as you will back out the pipe and screw it into the other side of the frame. | |||
}} | |||
{{Step | |||
| number = 5 | |||
| text = Weld the space between the joint and the pipe to secure it. This will make the bench even more sturdy. | |||
}} | |||
{{Step | |||
| number = 6 | |||
| text = Drill holes in the signs where the screws will connect the signs to the bench and where the pipe straps will fasten the signs to the bench. | |||
}} | |||
{{Step | |||
| number = 8 | |||
| text = Grind the remaining amount of screw as close to the washer as possible. The purpose of this step is to get rid of the unwanted screw that could catch on people, items, or clothing. | |||
}} | |||
{{Step | |||
| number = 9 | |||
| text = Spray Galvanizing Compound onto the welds, nuts, and washers to prevent rusting. | |||
}} | |||
== Maintenance == | |||
The final design requires minimal maintenance. Cold galvanizing compound spray will need to be applied to the welded joints every 2 years to prevent rusting. | |||
=== Schedule === | |||
;Every 2 years | |||
* Welded joints must be sprayed with cold galvanizing compound spray to prevent rusting. | |||
== Usage == | |||
Below is a video about the intended use of the benches: | |||
}} | {{Video|https://youtu.be/2GGRJaijBGE}} | ||
== | == Poster == | ||
Below is the poster that Team FMLD created. | |||
[[File:FMLD Poster.jpg|thumb|none]] | |||
== Suggestions for Future Changes == | |||
In the future, using recycled pipe would increase the level of up-cycle of the benches. Another change to the benches could be using couplers so no welding is required because welding galvanized pipe is dangerous and strips the galvanized coating from the metal. | |||
== | {{Page data | ||
| part-of = Engr205 Introduction to Design | |||
| keywords = Upcycling, Furniture, Fabrication, Metal Working | |||
| organizations = Zane Middle School, Cal Poly Humboldt | |||
| sdg = SDG11 Sustainable cities and communities | |||
}} | |||
[[Category: | [[Category:Upcycling]] | ||
[[Category:Furniture]] | |||
[[Category:Fabrication]] | |||
Latest revision as of 16:54, 28 February 2024

The purpose of this project is to create up-cycled benches used for sitting purposes, campus beautification, and for educating both students and faculty about the recyclable use of material waste in the community. While many options were considered for building the benches, street signs and a metal frame were decided upon for aesthetic reasons and that they would be up-cycled. The resulting benches are made of galvanized steel plumbing pipes and up-cycled street signs. The benches are comfortable, functional, and educational.
Background[edit | edit source]
Catherine L. Zane Middle School in Eureka, CA, is the client entity for the up-cycled benches. The school focuses on science, math, engineering, art, and technology and is made up of 600 students, grades six through eight, of varying backgrounds. Our client representative is Trevor Hammons.
Problem Statement and Criteria[edit | edit source]
Team FMLD's objective is to create upcycled benches used for educating both students and faculty about the recyclable use of material waste in the community, campus beautification, and for sitting purposes.
| Criteria | Weight |
|---|---|
| Safety | 10 |
| Durability | 9 |
| Cost | 7 |
| Aesthetics | 7 |
| Level of upcycle | 6 |
Description of Final Project[edit | edit source]
The final design for the Up-cycled Benches consist of aluminum street signs attached to a metal frame. The main materials used were selected to demonstrate re-purposing of materials through "up-cycling". The metal frame for both benches was made from ¾" galvanized plumbing pipe. Custom cut pipes fit the length and width of the street signs. The pipes were connected using "T" and "90 degree" connectors and flanges the middle bars that make up the seat of the benches.
In the case of the middle bars, each side was tightened only half way because there cannot be a closed loop unless special connectors or backwards threading is used. To improve the strength of the bench and the half tightened bars, each joint is welded on either side as depicted in Figure 5 below. The signs are attached in multiple ways. The attachments can be seen in Figure 4 below. The signs that make up the seats are attached using pipe straps for the back two bars of the frame and bolted through the pipe on the front bar. The seat signs are recessed to create a smoother edge for the user to hang their legs over. The signs that make up the back of the bench are bolted through the pipe frame in multiple spots instead of using pipe straps.
Prototyping[edit | edit source]
Figure 6 shows our first prototype. This prototype helped us to figure out the layout of the signs and that the Bike Lane signs needed to be raised to create a more comfortable back support. Figure 7 shows a small scale of the Bike Lane Bench. This prototype helped us to roughly figure out how the frame of the bench would fit with the signs. Figure 8 is an AutoCAD drawing of one of the benches. This prototype contained the actual dimensions of the pipes we would be using. Figure 9 shows our last prototype before building. This prototype was originally supposed to be the beginning of the final product but in building we learned that when making a closed loop with piping, a special connector or backwards threads are needed. This lead us to our decision to weld the joints.
Costs[edit | edit source]
The itemized summary of costs to construct the bench are listed below.
| Quantity | Material | Cost ($) | Retail Total ($) | Team FMLD Total ($) |
|---|---|---|---|---|
| 22 | Custom cut 3/4" galvanized pipe | 166.25 | 166.25 | 166.25 |
| 10 | 3/4"x 1 1/2" galvanized nipple | 1.39 | 13.90 | 13.90 |
| 10 | 3/4"x 6" galvanized nipple | 2.79 | 27.90 | 27.90 |
| 20 | 3/4" Ts | 3.89 | 77.80 | 77.80 |
| 8 | 3/4" 90s | 2.29 | 18.32 | 18.32 |
| 8 | 3/4" Flanges | 6.99 | 55.92 | 55.92 |
| 8 | Street Signs | 38.75 | 38.75 | 38.75 |
| 1 | Cold Galvanizing Compound Spray | 8.47 | 8.47 | 0.00 |
| 3 | Pipe Strap (Packs of 10) | 1.49 | 4.47 | 0.00 |
| 2 | Drill bit | 4.99 | 9.98 | 0.00 |
| 60 | Various screws (stainless) | Varied | 54.94 | 0.00 |
| 65 | Various nuts (stainless) | Varied | 27.64 | 0.00 |
| 130 | Various washers (stainless) | Varied | 7.02 | 0.00 |
| Retail Total (with tax) | $546.56 | |||
| Team FMLD Total | $400.00 | |||
Testing Results[edit | edit source]
The larger upcycled bench can support 600 lbs and the smaller can support 400lbs. Both products can withstand prolonged use by middle schooler students.
How to Build[edit | edit source]
Measure the desired dimensions.
Cut the right amount of pipe to reach desired dimensions. Remember to include the width of the
Thread the ends of the pipe so that it fits inside the T-joints and elbows.
Screw in pipes to their respective joints. Note: Our team found that completing one side of the of the frame, then screwing in the pipes that connect both sides works the best, as you will back out the pipe and screw it into the other side of the frame.
Weld the space between the joint and the pipe to secure it. This will make the bench even more sturdy.
Drill holes in the signs where the screws will connect the signs to the bench and where the pipe straps will fasten the signs to the bench.
Grind the remaining amount of screw as close to the washer as possible. The purpose of this step is to get rid of the unwanted screw that could catch on people, items, or clothing.
Spray Galvanizing Compound onto the welds, nuts, and washers to prevent rusting.
Maintenance[edit | edit source]
The final design requires minimal maintenance. Cold galvanizing compound spray will need to be applied to the welded joints every 2 years to prevent rusting.
Schedule[edit | edit source]
- Every 2 years
- Welded joints must be sprayed with cold galvanizing compound spray to prevent rusting.
Usage[edit | edit source]
Below is a video about the intended use of the benches:
Poster[edit | edit source]
Below is the poster that Team FMLD created.

Suggestions for Future Changes[edit | edit source]
In the future, using recycled pipe would increase the level of up-cycle of the benches. Another change to the benches could be using couplers so no welding is required because welding galvanized pipe is dangerous and strips the galvanized coating from the metal.