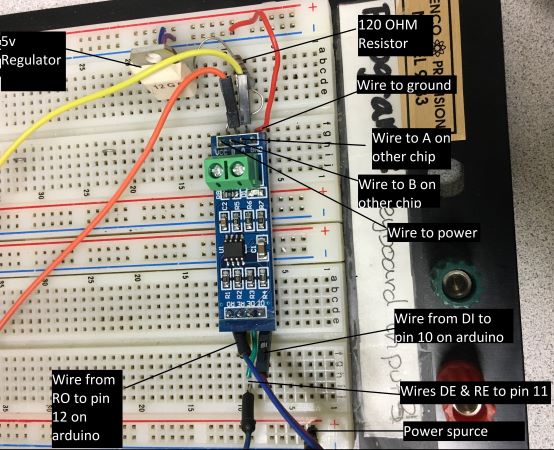
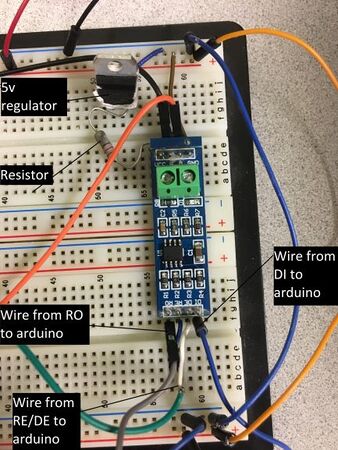
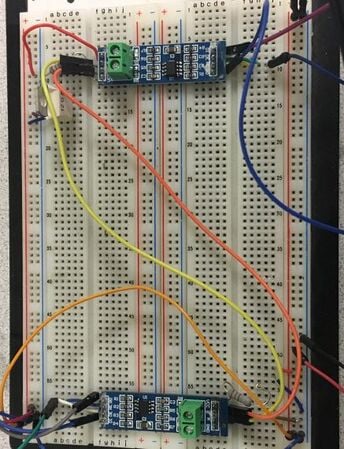
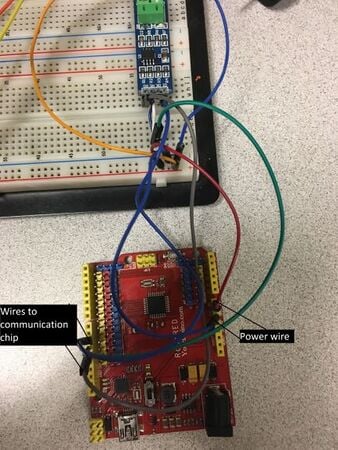
The RS485 communication chip is a chip we use for land to ROV communication. Overtime, however, the chip can stop working. There is a fairly simple way to check if it is a communication chip issue or something else that is causing the problem.
List of Materials[edit | edit source]
- Bread Board x1
- Jumper Wires(As many as possible)
- RS485 communication chip x2
- Arduino x2
- PC x1
- 5v regulator x2
- Power source x1
- 120 OHM Resistor x2
- USB to Mini USB Cord x1
Bread board setup[edit | edit source]
Wire Plug In Places:
- RO: Pin 12
- RE/DE: Pin 11
- DI: Pin 10
- Wire going from A to A and B to B on both chips|
- Regulator set up: Far left:Input(high power)|Middle:Ground|Right:Output|
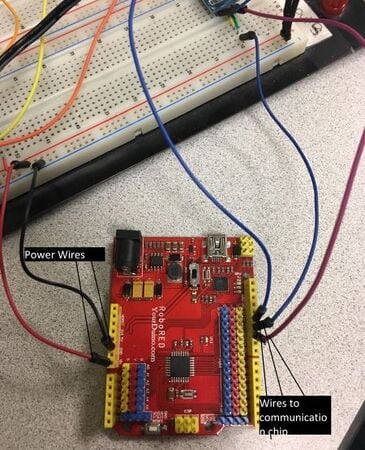
Arduino Setup[edit | edit source]
We need 2 arduinos, TX and RX| TX is the transmitting code and RX is the receiving code
Arduino to bread board
Arduino code[edit | edit source]
- Go to the SOAR drive
- Find code RS485blink_ROV_Philip_TX and RS485blink_ROV_Philip_RX in arduino Code, test, test vault
- Use the USB cord and download RS485blink_ROV_Philip_TX into arduino labeled TX and RS485blink_ROV_Philip_RX in to arduino labeled RX
- Keep arduinos plugged in, arduino TX should have a light that flashes a random amount of times and RX shouldn't do anything
- Upload the soft easy transfer onto code
TX Code [1]
RX Code [2]
Final Steps[edit | edit source]
Plug everything in and turn on the power. If everything is set up the TX arduino should blink and after a very short delay the RX arduino should do the same blinks as the TX. If it does not blink either one of your chips is bad or something is hooked up incorrectly.
