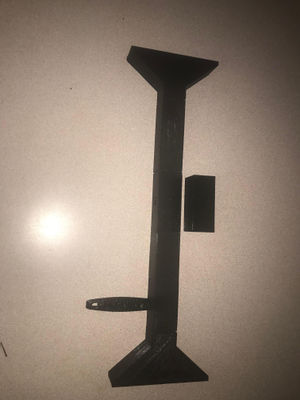
This segmented design is able to account for the variations in stud width (Metal Stud = 1.375 in., Wood 2x4 = 1.5 in.) and stud-center to stud-center distances (12 in., 16 in., 19.2 in., 24 in.) that are commonly used while framing. This tool is intended to make the process of wall framing easier and more time efficient.
Framing the walls of a building can be very time consuming as it requires the worker to be very meticulous in their measurements in order to insure that the plywood that makes up the wall fits properly against the wall frame. To make this process easier, I have come up with a spacer that a user would place in between a fastened stud and an unfastened stud in order to properly position the unfastened stud before it is attached to the frame. This segmented design is able to account for the variations in stud width (Metal Stud = 1.375 in., Wood 2x4 = 1.5 in.) and stud-center to stud-center distances (12 in., 16 in., 19.2 in., 24 in.) that are commonly used while framing. This tool is intended to make the process of wall framing easier and more time efficient.
Bill of Materials[edit | edit source]
The components that make up this design are:
- End Piece: File:SpacerEnd.scad
- 2 in. Center Piece: File:CenterPiece(2in).scad
- 3.2 in Center Piece: File:CenterPiece(3.2in).scad
- 2x4 Adapter: File:2x4Adapter.scad
- Metal Stud Adapter: File:MetalStudAdapter.scad
- Handle: File:SpacerHandle.scad
- All STL files: https://www.thingiverse.com/thing:3263664
Part Combinations[edit | edit source]
Parts Required for 2x4 Framing:
- 12 in. Stud-Center to Stud-Center
- 2x4 Adapter (1)
- End Piece (2)
- 2 in. Center Piece (2)
- 16 in. Stud-Center to Stud-Center
- 2x4 Adapter (1)
- End Piece (2)
- 2 in. Connector (4)
- 19.2 in. Stud-Center to Stud-Center
- 2x4 Adapter (1)
- End Piece (2)
- 2 in. Center Piece (6)
- 3.2 in. Center Piece (1)
- 24 in. Stud-Center to Stud-Center
- 2x4 Adapter (1)
- End Piece (2)
- 2 in. Center Piece (10)
Parts Required for Metal Stud Framing:
- 12 in. Stud-Center to Stud-Center
- Metal Stud Adapter (1)
- End Piece (2)
- 2 in. Center Piece (2)
- 16 in. Stud-Center to Stud-Center
- Metal Stud Adapter (1)
- End Piece (2)
- 2 in. Connector (4)
- 19.2 in. Stud-Center to Stud-Center
- Metal Stud Adapter (1)
- End Piece (2)
- 2 in. Center Piece (6)
- 3.2 in. Center Piece (1)
- 24 in. Stud-Center to Stud-Center
- Metal Stud Adapter (1)
- End Piece (2)
- 2 in. Center Piece (10)
Tools needed[edit | edit source]
- MOST Delta RepRap or similar RepRap 3-D printer
- Knife
- Water-Soluble Glue stick
- Water
Technical Specifications and Assembly Instructions[edit | edit source]
- Refer to the above section, "Part Combinations," to see the required quantity of each part based upon the desired framing dimension and material
- Apply water-soluble glue to the print bed where part will be printed
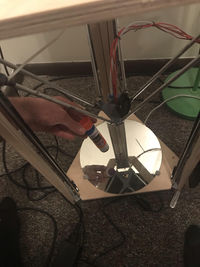
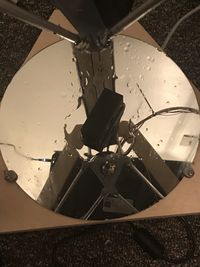
- Print the desired parts with broadest, completely flat faces adhered to print bed. There should not be any holes or connecting pieces in contact with the bed
- Put water on bed around the print to help dissolve the glue and remove the prints from the print bed
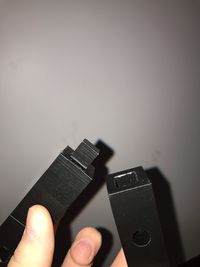
- Insert the square pegs of the center pieces into the square slots of adjacent center pieces to form a linear structure. The order of the center pieces does not matter just as long as you printed the correct material adapter and number/size of center pieces. There should only be one material adapter in use at a time and the linear structure of center connectors should have a female connection at both ends
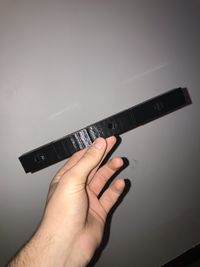
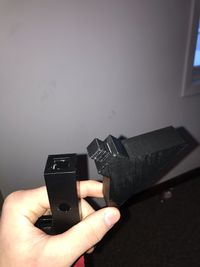
- Insert male connecting end of end pieces into female connection ends of the center piece structure
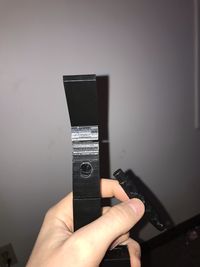
- Insert the cylindrical end of the handle into desired cylindrical hole of center pieces. Each center piece will have a hole in its center, it is up to you to pick which hole you prefer
Print Time Estimate:
- End Piece: 52 minutes, 21 gram
- 2 in. Center Piece: 33 minutes, 12 gram
- 3.2 in Center Piece: 47 minutes, 18 gram
- 2x4 Adapter: 39 minutes, 14 gram
- Metal Stud Adapter: 40 minutes, 15 gram
- Handle: 15 minutes, 4 grams
Assembly Time Estimate: 2 minutes
Common Problems and Solutions[edit | edit source]
- The linear structure of center pieces not ending in two female ends
- The way to negate this issue is to only use one material adapter. Using either zero or two material adapters will result in the linear center piece structure ending in 1 male and 1 female end
- Using the wrong material adapter
- The slightly longer adapter is used for the metal studs, the slightly shorter adapter is used for 2x4's
Cost savings[edit | edit source]
There is no real commercial equivalent to this tool. This link is to a multi-tool that can be used to frame at 16 in. centers. However, the tool in this link is not adjustable and not intended primarily for wall framing.
Printing Cost:
- End Piece: $0.47
- 2 in. Center Piece: $0.27
- 3.2 in Center Piece: $0.40
- 2x4 Adapter: $0.32
- Metal Stud Adapter: $0.34
- Handle: $0.09
Savings:
- 12 in: $1.80, 94%
- 16 in: $2.34, 92.2%
- 19.2: $3.28, 89.1%
- 24 in: $3.96, 86.8%
Benefited Internet Communities[edit | edit source]
- Name and add links to at least 5 using single brackets around [url name]
- Construction Workers [1]
- Home Builders [2]
- Foreign Aid Workers [3]
- Natural Disaster Relief [4]
- Emergency Relief [5]
- Community Service [6]
References[edit | edit source]
- Hunker, What is the Distance Between Wall Studs Available: https://www.hunker.com/12266809/what-is-the-distance-between-wall-studs