Abstract
This project is taking a step away from what may be considered the norm.The wheel is normally defined as a circular body that rotates about an axis, and when daily examples of this are made more absolute and apparent, a solidifying complacent approach to questioning may be inherited. To solve this we the Alpha Team as instructed by the Spring 2016 ENGR 215 class bring a demonstration of square wheels. This demonstration which was one of many alternatives was deemed the most appropriate by scoring the highest rating given a set criteria. This very same demonstration can be explained using visual and mathematical concepts and although a thorough academic explanation requires deep knowledge of mathematics, a simple visual model can be expressed while using basic trigonometry and geometry. Additionally, square wheels provide a powerful display of creativity and innovative thought process.The purpose of this project is to create a square wheel presentation that will be displayed at Zane Middle School during the 2016 school year with many to follow. This project is to demonstrate out of the box thinking for the students, while showing that there is more than just one way in viewing the world. The project will also be a collaboration of mathematical formulas and equations, providing the science behind this way of abstract thinking.
Background
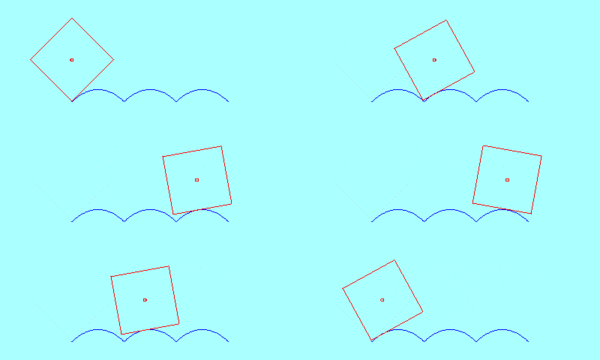
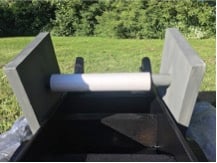
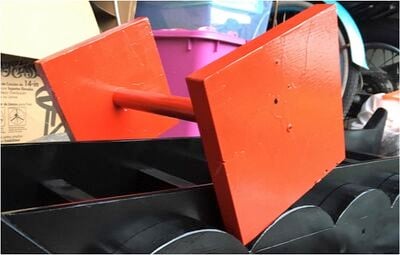
The square wheel, instead of having a traditional circular shape, has been modified to the shape of a square. A square wheel can roll smoothly on a track consisting of evenly shaped inverted catenary curves. A catenary is the curve that is formed when a rope or chain is seen hanging loosely between two supported positions. There is a design similar to this method in the San Francisco Exploratorium. Our finished project will consist of one axle with two square wheels on it, and each side of the square will be as long as the length of the catenary curved track. The idea is that when pushing the axle of the square tires collinear with the track, the tires will roll over the curves. The materials for this demonstration can be made up of virtually anything, such as cardboard, wood, plastic, or plexiglass. For the demonstration made for Zane Middle School, the designers used plywood, as shown in figure one above. The performance of square wheels can be explained using mathematical concepts. Although a thorough explanation requires deep knowledge of mathematics, a simple model or demonstration can be explained using basic trigonometry and geometry. Additionally, square wheels provide a powerful display of creativity and innovative thought process..
Problem Statement and criteria
| Criteria | Weight | Description |
|---|---|---|
| Safety | 10 | Must be designed to withstand years of middle school children. Finished project must be safe for a wide age range. |
| Cost | 9 | Entire design must cost an estimate cost of $100 if not less. |
| Portability | 8 | The presentation must be able to transport from Arcata to Eureka and Fortuna, considering its size, shape, and weight, and the required size has been set by the client (2 inches by 2 inches by 3 inches). |
| Aesthetically Pleasing | 6 | Design must look professional. |
| Educational Value | 5 | Design must provide visitors with an educational experience. |
| Construction Time | 7 | The final design must be built and assembled in the available time set by the class curriculum. |
Description of final project
The name of the final design is "The Mono-Wheel." This design, created for Zane Middle School, meets all of the criteria and material needs for both the designers and client. This design is different from the others because it has the most potential for a lasting life with the lowest amount of maintenance. Additionally, this design provides a more hands-on, interactive participation for the students at Zane Middle School while remaining one of the safest options. The full display is made up of two separate yet identical tracks, with corresponding wheels that will stand parallel to each other. This design will provide more opportunities for students to interact with the display, while also giving them the option to race the two wheels against each other.
The wheeled component in this project consists of two square wheels and an axle. The wheels are 8- inches on each side (as requested by the client), and the thickness is ¾ inches. In the center of these square wheels is a wooden axel with a plastic PVC pipe incasing the axel. This allows the axel to spin freely as the user rolls the wheels along the catenary shaped track. The wheels and axel mechanism are bound together using 3-inch wood screws.
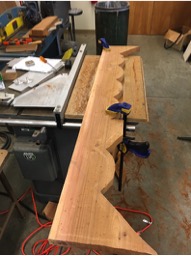
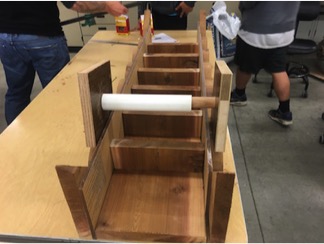
The track is made from cedar lumber purchased at the local lumberyard. The track system for the wheels to roll over consists of 2 parallel tracks (one for each wheel), a guiding track on the inside of the wheels to keep the wheels on the track, a base board to attach all components together, and wooden cross members for support (like train tracks). The dimensions of the catenaries were printed on a piece of paper and traced onto the cedar wood before cutting it. The 45-degree angles were traced using a protractor and rulers. We used 3-inch screws to join everything together. The finished design is coated with paint so it is resistant to weathering and mold. The criteria to fit the demonstration on top of a 5-foot table was requested by the client. The overall design is about 30 to 40 pounds and requires that two people carry it.
Video
Maintainance
The maintenance for this design is relatively simple, since the whole project is made from wood that will be coated with a wood finish for an extra layer of protection. This project can be stored anywhere and still maintain its lifespan use. We will also be providing an extra set of wheels in case of any devastating damage over the years that will already be fully assembled making this design virtually maintenance free for the client.
The team will provide an extra axel for the client, in case one breaks, as well as leftover spray paint. The track will need to get dusted and cleaned whenever dirty, and the paint may need to be reapplied from time to time. The design is robust and should not need much extra or unique care.
Costs
| Material | Price | Quantity |
|---|---|---|
| 2"X12"X12' | $50.00 | 1 |
| Axle | Recycled Material (Donated) | 1 |
| Screws | Donated | 20 |
| PVC Pipe | Donated | 1 |
| Paint | $15.00 | 1 |
| Total | $65.00 | 24 |
Possible Alternative Materials
Team Alpha choose to use wood for the track and wheels, and plexiglass for the guided track system.

How to make your own
Materials Needed:
- One 2"X12"x20' (1)
- Wooden Dowel (1)
- PVC Pipe (1)
- 3" Wood Screws
- Paint
- Plexi Glass wood (1/2 thick) approximately 9 feet needed
How to Build:
Step 1: Build wheel and axel: Make two 8-inch squares out of wood (use a board that is between 3/4” and 1” thick). Attach 12” wooden dowel perpendicular to the wood but perfectly in the center of the square to act as an axel. Next, attach to one of the squares with a 3” screw. Slip PVC pipe (at least 1” in length) over the dowel, make sure there is room between wooden dowel and the PVC pipe so wooden axel can rotate within the PVC pipe. Lastly attach second 8” square with a screw to the other end of that mechanism
Step 2: Trace out track: Use geometry section to calculate the height, length, and thickness of catenaries. Once you know the size of wheel, you can determine the size of catenaries and start building the track. Print and cut out catenary shape on computer. Once the Catenaries (or Arc) is cut out you can start tracing it on to the 2”x12”x4.5’. Measure a straight line 5” from the bottom of the wood (this 5” line the where all the angles and arcs sit on top). Next draw a 45-degree line from on the top corners through the 5” line. Once your line is straight you can start tracing around the piece of paper with your arcs on it. Start the Arcs at the point where your 45-degree line intersects with the 5” line you made to insure everything straight. After you made your desired number of arcs draw another 45-degree line, opposite from the first one that was made. Repeat this whole process on a second piece of wood.
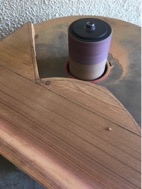
Step 3: Cut out Track: Use a jig saw to take of any extra pieces of wood to make sanding the arcs easier. Use a random orbital sander to sand and cut out arcs. We found out it is easier to sand it into perfection opposed to cutting it because a sander is more lenient towards mistakes and a sander will make the curves smooth which will make the wheels roll easier. Make sure to get as close to the traced line as possible without sanding over the line. Once both pieces of track are cut out you are ready to put everything together.
Step 4: Assemble Track: Using another 2”x12”x4.5’ for your baseboard sandwich the guide track in between the baseboard and outer track. Do this for the other side too. After use a big clamp to clamp everything together. From there start drilling 3” screws into all tracks eventually screwing together all wooden pieces
Step 5: Attach Support Pieces: Cut out 6-12” pieces of wood to screw in between the tracks adding further stabilization and durability.
Step 6: Finishing and Paint: Once everything is attached together you can sand out any imperfections or sharp edges so nobody gets splintered or cut. Next, paint track and wheels however way you want. The paint will add years to the project, also cover any imperfections.
Team Members

References
1. http://www.instructables.com/id/Square-Wheel/
2. “History, Travel, Arts, Science, People, Places | Smithsonian.” (n.d.). History, Travel, Arts, Science, People, Places | Smithsonian, <http://www.smithsonianmag.com/science-nature/a-salute-to-the-wheel-31805121>
3. Basalla, G. (1995). The evolution of technology: George Basalla. Cambridge University Press, Cambridge.
4. “Square Wheels.” (2012). Discovery, <http://www.discovery.com/tv-shows/mythbusters/videos/square-wheels/>
