Abstract[edit | edit source]
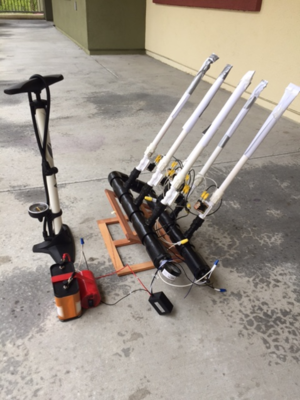
The purpose of this project is to create a system to launch multiple paper rockets at once using air pressure. Zane Middle School teacher, Mr. Pinkerton was previously using a commercial Ultra Stomp Rocket bladder to fire off paper rockets one at a time. Triple B built and designed a system that fires at least six rockets at varying degrees of inclination. Triple B built undertook this project because of Engeneering 215 Intro to Design, a course at Cal Poly Humboldt instructed by Lonny Grafman.
Problem statement and criteria[edit | edit source]
Mr. Pinkerton, a science teacher at Zane Middle School, has used a simple "stomp-launcher" to propel single paper rockets in his past classes. While the "stomp-launcher" has proved to be easy to use, it has presented a problem with consistency and durability. When the students stomp on the bladder, each student applies a different force, so the velocity of the rocket is significantly different from student to student. Eventually the bladder wears out due to students stomping on it. Our project sets out to create a more consistent and durable system that propels multiple paper rockets at one time. Below is the criteria we are holding our project to.
| Criteria | ▲ ▼ |
Weight | ▲ ▼ |
Definition |
|---|---|---|---|---|
| Consistency | 6 | 10 | 9 | Repeats the same results when propelled at the same conditions. |
| Safety | 0 | 10 | 8 | Does not cause any bodily harm to users or observers of the system. |
| Durability | 4 | 8 | 7 | Components maintain structural integrity throughout the products lifespan. |
| Effectiveness | 2 | 8 | 6 | Minimal amount of work in produces the desired amount of work out. |
| Compactibility | 5 | 7 | 5 | Ability to be taken apart and stored. |
| Ease of Use | 3 | 7 | 4 | Middle school students are able to comprehend and use the product. |
| Reparablity | 1 | 6 | 3 | Price of individual components and ease of replacing those components. |
| Adjustability | 9 | 5 | 2 | Ability to manipulate launch conditions. |
| Attractiveness | 7 | 4 | 1 | Appeal to middle school students. |
| Aesthetics | 8 | 3 | 0 | Product looks professional. |
Description of final project[edit | edit source]
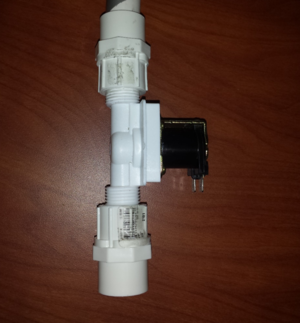
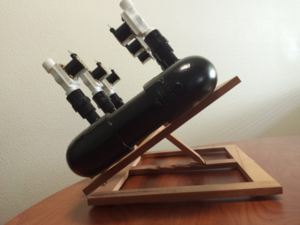
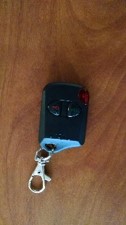
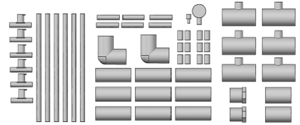
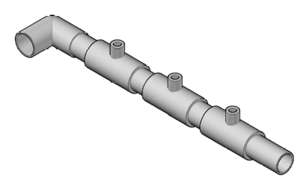
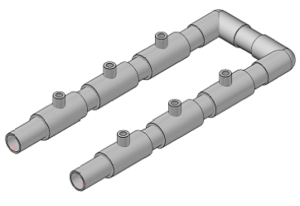
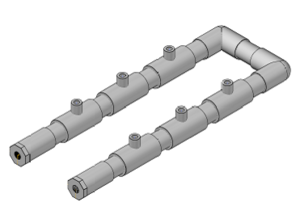
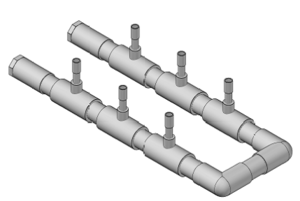
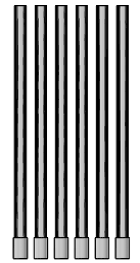
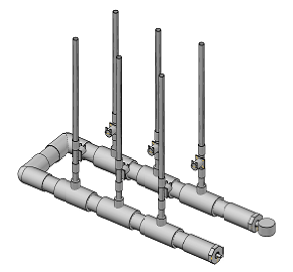
The Main Chamber rocket launcher design, illustrated in the table below, is made out of two different sized PVC tubing, six solenoid valves, a Schrader valve, wood stand, buckle straps, and a bicycle pump. Nine sections of one and a half inch diameter PVC tubing cut to four inches long are combined with six tee reducer joints and two ninety degree elbows to form the bent pressure chamber that the design gets its name from. All of the PVC pieces are glued into place. Additionally there are six sections of half inch diameter PVC tubing cut to three inches placed in the top part of the tee reducer joints. The six solenoid valves are then attached to the half inch PVC with an adapter. Screwed onto the end of the each of the valves is a section of half inch diameter PVC tubing cut to one foot with an adapter glued onto the end. The two ends of the bent pressure chamber are sealed with one coupling with female plug that adapts to a Schrader valve and another that adapts to a one-hundred P.S.I. pressure gauge. The pressure chamber is pressurized with the bicycle pump to the desired P.S.I. and then the button is pushed to open all of the valves releasing the pressure and launching the rockets. Finally, this entire system is angled and supported by a wood frame that is attached to the top of the pressure chamber. This wood frame adjusts the launch angle by placing a adjustable piece of the frame to the desired angle.
Costs[edit | edit source]
The cost for the items purchased that were used for testing and implementation. They are placed as name of items, prices, quantity, and subtotal. Additionally, it is totaled at the bottom and displays the price of the project costs.
| Item | ▲ ▼ |
Price | ▲ ▼ |
Quantity | ▲ ▼ |
Subtotal | ▲ ▼ |
|---|---|---|---|---|---|---|---|
| 1/2" PVC End Cap | 33 | $2.93 | 11 | 1 | 1 | $2.93 | 1 |
| 1 foot Sch 40. 1-1/2" PVC Pipe | 35 | $0.99 | 6 | 3 | 27 | $2.97 | 4 |
| 1 foot Sch 40. 2" PVC Pipe | 34 | $1.15 | 7 | 3 | 28 | $3.45 | 6 |
| 1/2" Threaded to Non-threaded adapter | 32 | $0.69 | 4 | 12 | 34 | $8.28 | 23 |
| 12 Gauge Wire per foot | 31 | $0.59 | 3 | 20 | 35 | $11.80 | 28 |
| 12 Volt Lantern Battery | 30 | $13.99 | 32 | 1 | 2 | $13.99 | 30 |
| 12 Volt Universal Remote Kit | 29 | $17.98 | 33 | 1 | 3 | $17.98 | 31 |
| 14 Gauge Wire per foot | 28 | $0.49 | 1 | 10 | 33 | $4.90 | 11 |
| 6 Amp Fuse | 27 | $4.99 | 17 | 1 | 4 | $4.99 | 12 |
| 9 Volt Battery Clip | 26 | $4.99 | 18 | 1 | 5 | $4.99 | 13 |
| Alligator Clips | 25 | $2.99 | 12 | 1 | 6 | $2.99 | 5 |
| Bike Pump | 24 | $26.99 | 35 | 1 | 7 | $26.9 | 34 |
| Double A Battery Holder | 23 | $5.79 | 19 | 1 | 8 | $5.79 | 14 |
| Electric Tape | 22 | $3.59 | 14 | 2 | 25 | $7.18 | 19 |
| Gravitech Push Button | 21 | $6.00 | 21 | 1 | 9 | $6.00 | 16 |
| Holding Frame | 20 | $10.96 | 29 | 1 | 10 | $10.96 | 26 |
| In-line Fuse Holder | 19 | $3.59 | 15 | 1 | 11 | $3.59 | 7 |
| Long Nose Pliers | 18 | $11.69 | 30 | 1 | 12 | $11.69 | 27 |
| Painters Abrasive | 17 | $1.34 | 8 | 1 | 13 | $1.34 | 3 |
| Piece to Holding Frame | 16 | $8.68 | 27 | 1 | 14 | $8.68 | 24 |
| Plugs for T-Shaped Adapter | 15 | $0.79 | 5 | 6 | 30 | $4.74 | 10 |
| Pressure Gauge (100 PSI) | 14 | $12.99 | 31 | 1 | 15 | $12.99 | 29 |
| Presta Valve (2-Pack) | 13 | $19.99 | 34 | 1 | 16 | $19.99 | 32 |
| PVC Elbow Connectors 1-1/2" | 12 | $1.99 | 9 | 2 | 26 | $3.98 | 8 |
| PVC Glue | 11 | $8.99 | 28 | 1 | 17 | $8.99 | 25 |
| PVC Primer | 10 | $7.99 | 25 | 1 | 18 | $7.99 | 21 |
| Schraeder Valve | 9 | $6.99 | 22 | 1 | 19 | $6.99 | 18 |
| Schraeder Valve Adapter | 8 | $0.50 | 2 | 1 | 20 | $0.50 | 2 |
| Screw-on Wire Connectors | 7 | $7.19 | 24 | 1 | 21 | $7.19 | 20 |
| Solenoid 1/2" Pressure Release Valve | 6 | $6.99 | 23 | 6 | 31 | $41.94 | 35 |
| Switch Rocker | 5 | $7.99 | 26 | 1 | 22 | $7.99 | 22 |
| Teflon Tape | 4 | $5.99 | 20 | 1 | 23 | $5.99 | 15 |
| T-shaped PVC Adapter 1/2" | 3 | $3.49 | 13 | 6 | 32 | $20.94 | 33 |
| Velcro Pads | 2 | $3.99 | 16 | 1 | 24 | $3.99 | 9 |
| Yellow Wire Connector Pack | 1 | $2.29 | 10 | 3 | 29 | $6.87 | 17 |
| Total: | $322.57 | ||||||
Testing Results[edit | edit source]
The system successfully launched all six paper rockets at every launch angle. However, the stand was getting a bit shaky anytime we tried to fire at higher pressure than 100 p.s.i. For that reason we are suggesting that no one operate the system past 100 p.s.i. Also, all of the rockets went less than 10 feet below 10 p.s.i. therefore it is rather pointless to use the device at anything less than 10 p.s.i.
How to build[edit | edit source]
Discussion[edit | edit source]
The multiple rocket launcher kit was made to interact with children at Zane Middle School for educational value and safety. During testing, the paper rockets design is crucial to achieve maximum amount of distance per launch. The design was made with low cost valves and PVC to maintain low cost maintenance. One of the criteria that was not met to the desired degree was consistency. This is due to the design requiring a steady amount of ampere to set of all the valves. Without a battery to deliver the amount ampere needed, the rockets will not launch consistency and simultaneously. Also, the higher the pressure, the higher amount of ampere required to trigger the valves. If the pressure is kept below 50 psi, the rocket will launch more effectively.


