-
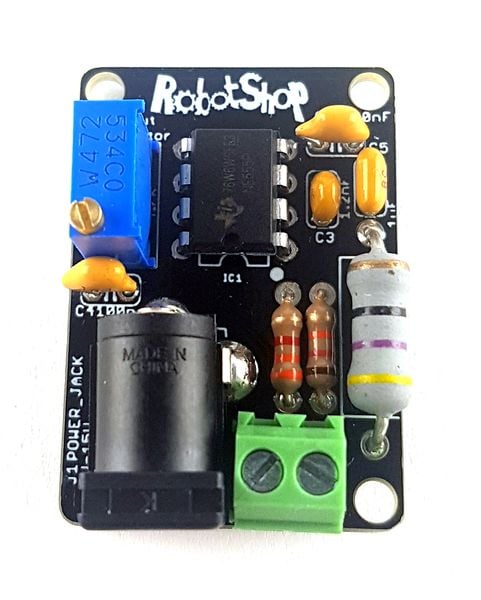
Fig 1: Wire Generator Circuit
-
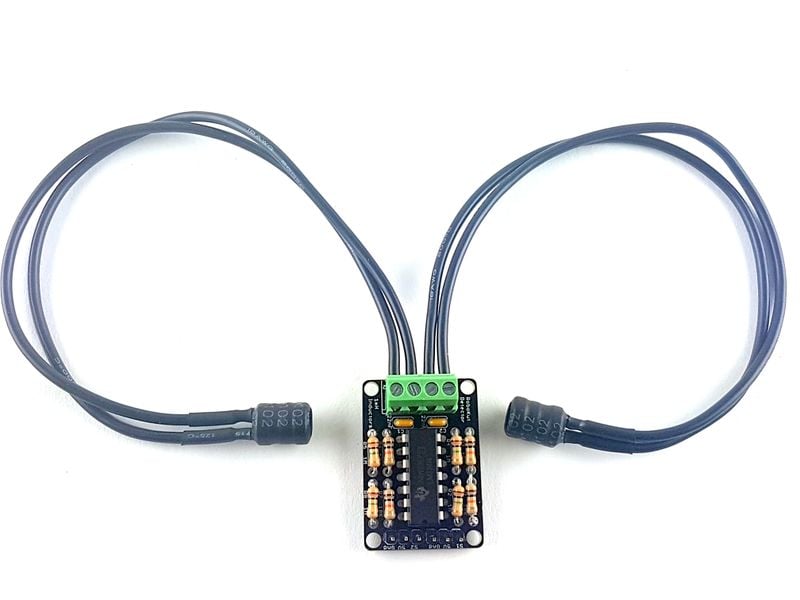
Fig 2: Sensor Circuit


Introduction[edit | edit source]
This is the wire following system for OSHE Growbot. It consists of two circuits, a perimeter wire generator circuit, and an LC sensor circuit. The perimeter wire generator will induce a frequency, between 32 and 43 Hz, onto a perimeter wire. This perimeter wire is 100' of 22 guage wire, laid out in the path the Growbot will take around the garden. The LC has two inductors that can detect the signal going through the perimeter wire. There will be one inductor on either side of the wire, sensing when it gets close. Because Raspberry Pi's do not have anolog input, an ADC must be used. All supplies and code can be found below. The perimeter wire generator circuit will be located in the Growbot housing unit. The sensor circuit will be on the Growbot. This system works with the Odrive motors to control the Growbot.
For specifics of these circuits: [Robot Shop]
Files and Bill of Materials[edit | edit source]
File for 3D prints available at [ <add link> OSF] Files for Raspberry Pi python code available at Github.
Schematics[edit | edit source]


- ---
Figure 1 (Left): Wire Generator Schematic Figure 2 (Right): Sensor Schematic
Extra Supplies[edit | edit source]
Tools and consumables in addition to those listed in the BOM.
Tools[edit | edit source]
- Soldering iron
- Wire stripper and cutters
- 3D printer
Consumables[edit | edit source]
- Solder
- Zip ties
- Super glue
- 20AWG cable for inductors
- 100' of 22 gauge multi-strand wire for perimeter
Before You Begin[edit | edit source]
Review the process below and collect all of the tools and consumables you need to begin the build. The list of tools above is not necessarily exhaustive. Assembly and Wiring are the steps after you solder the components to the PCB and printed EndsAndPins and TWO WireHolder.
Software to download and install[edit | edit source]
- Raspberry Pi needs Python3-pip: [RaspPi]
- Enable I2C on Raspberry Pi: [Adafruit]
- Raspberry Pi to ADC set up: [Adafruit]
Assembly and Wiring[edit | edit source]
Mechanics[edit | edit source]
- ---
- Attach BotEnd to aluminum extrusion with a ??m screw and ??.
- Place WireHolder in BotEnd and secure with Pin or a ??m screw and bolt
- Place SensorEnd in WireHolder and secure with Pin or a ??m screw and bolt
- Put the inductor in the slot of the SensorEnd, with a dab of superglue
- Ziptie the wire in the small slots on the WireHolder
Wiring[edit | edit source]

- ---
- Raspberry Pi to ADS shown above
- Analog outputs from Sensor Circuit go to A0 and A1 on the ADS
- Sensor circuit needs a 5V power source
- Perimeter wire generator circuit needs a 12V power source
Testing[edit | edit source]
- Initial testing of sensors use autoTest.py
- Collect Min and Max values and replace them in appropriate location inn autoTest.py
- Odrive motors are ready to test
Notes[edit | edit source]
- Make sure your inductor sensor leads are long enough before you cut
- Test the code before you glue the inductors or zip tie the wire
- Additional Procedures can be found here.
| Description | Count |
|---|---|
| Generator PCB | 1 |
| Sensor PCB | 1 |
| ADS1115 ADC | 1 |
| 3.3 kΩ Resistor | 1 |
| 12 kΩ Resistor | 1 |
| 47 Ω Resistor | 1 |
| 10 kΩ Resistor | 4 |
| 1 MΩ Resistor | 4 |
| 4.7 kΩ Potentiometer | 1 |
| 12 kΩ Resistor | 1 |
| 100 nF Capacitor | 2 |
| 1.2 nF Capacitor | 1 |
| 1 uF Capacitor | 1 |
| 22 nF Capacitor | 2 |
| 1 mH Inductor | 2 |
| LM324N Amplifier | 1 |
| NE555 Timer | 1 |
| 2.1x5.5mm barrel connector | 1 |
| 2 positions terminal connector | 3 |
| 3 positions right angle pin header | 2 |
| ~1 meter 20AWG cable (for the inductors) | 1 |
| ~100' 22 gauge multi-strand wire (for the following wire) | 1 |
| Authors | Erica Umlor |
|---|---|
| License | CC-BY-SA-4.0 |
| Language | English (en) |
| Translations | German, French |
| Related | 2 subpages, 5 pages link here |
| Impact | 500 page views |
| Created | April 26, 2020 by Zach Arnold |
| Modified | March 19, 2022 by Irene Delgado |
| Cite as | Erica Umlor (2020–2022). "Wire Following System". Appropedia. Retrieved April 25, 2024. |
| API queries | basic, semantic, html, files, more |