No edit summary |
No edit summary |
||
| Line 18: | Line 18: | ||
[[File:lasersar1.jpg]] | [[File:lasersar1.jpg]] | ||
'''Now''' | '''Now'''<br /> | ||
[[File:Lasersaur2.1.jpg]] | [[File:Lasersaur2.1.jpg]]<br /> | ||
[[File:Lasersaur3.1.jpg]] | [[File:Lasersaur3.1.jpg]]<br /> | ||
[[File:Lasersaur4.1.jpg]] | [[File:Lasersaur4.1.jpg]]<br /> | ||
'''What's Left'''<br /> | '''What's Left'''<br /> | ||
To this date (4/20/2015) the Lasersaur is at 85% completion; every component is wired any ready to go. Currently the only issue is with the Beaglebone mircrocontroller and is our only set back to actually turning on the system. A nitrogen tank or air compressor used for "air assist" is also needed because of charred pieces and fumes created when cutting different materials. There is also air tubing placed at each mirror and lens in attempt to blow away dust particles to increase longevity of these pieces. If the dust were to ignite due to the laser it would surely cause that lens or mirror to be damaged. The nitrogen tank/air compressor will not be needed right away until we ensure that; all carts move correctly, all limit switches are placed correctly and we actually turn the laser on. Once the Beaglebone is setup and working with the driverboard troubleshooting the system will be the only thing left in order to complete the project. | To this date (4/20/2015) the Lasersaur is at 85% completion; every component is wired any ready to go. Currently the only issue is with the Beaglebone mircrocontroller and is our only set back to actually turning on the system. A nitrogen tank or air compressor used for "air assist" is also needed because of charred pieces and fumes created when cutting different materials. There is also air tubing placed at each mirror and lens in attempt to blow away dust particles to increase longevity of these pieces. If the dust were to ignite due to the laser it would surely cause that lens or mirror to be damaged. The nitrogen tank/air compressor will not be needed right away until we ensure that; all carts move correctly, all limit switches are placed correctly and we actually turn the laser on. Once the Beaglebone is setup and working with the driverboard troubleshooting the system will be the only thing left in order to complete the project. | ||
Revision as of 00:05, 22 April 2015
About Me
I am a 4th year Electrical Engineering student at Michigan Tech University and a member of the Open Source Hardware Enterprise.
Lasersaur
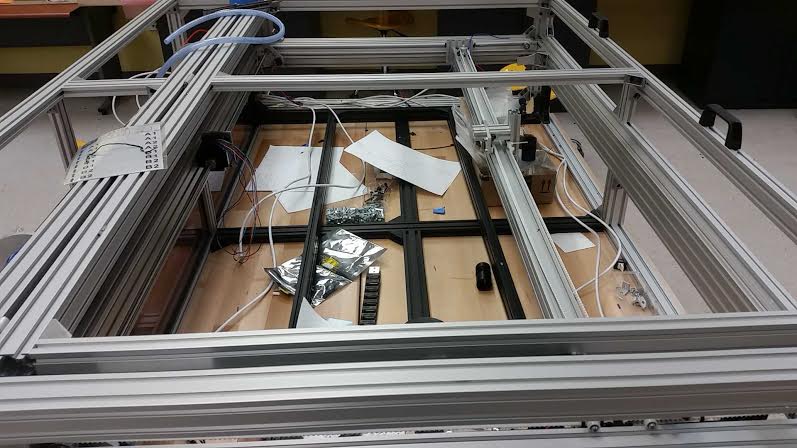
This semester I worked on an opensource laser cutter/etcher know as the Lasersaur. All of the documents on setting up the lasersaur's hardware and software can be found at there website. Our goal with the Lasersaur in the Open Source Hardware Enterprise is to have a functioning laser cutter available to other enterprises, senior design teams, and students who are building something. It was left off from last semester as a frame with motor and carts attached. Our version of the Lasersaur was a little from each Build of Materials (BOM) version 12.11 and up; the reason for this being it was not our original project. The main difficulties we ran into were the parts, because some were lost in translation that had days to weeks order time.
Completed This Semester
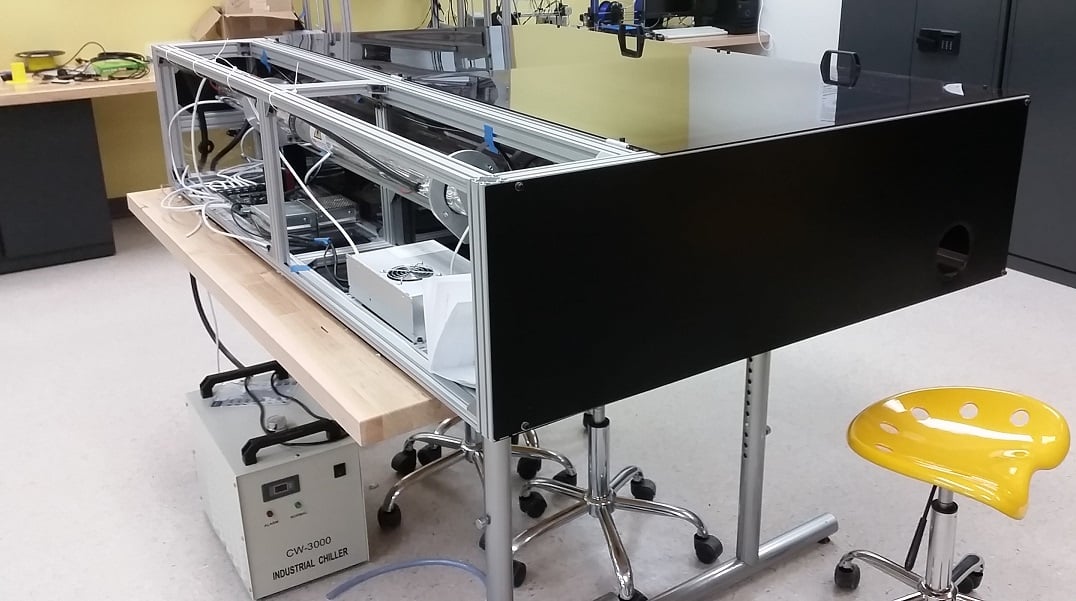
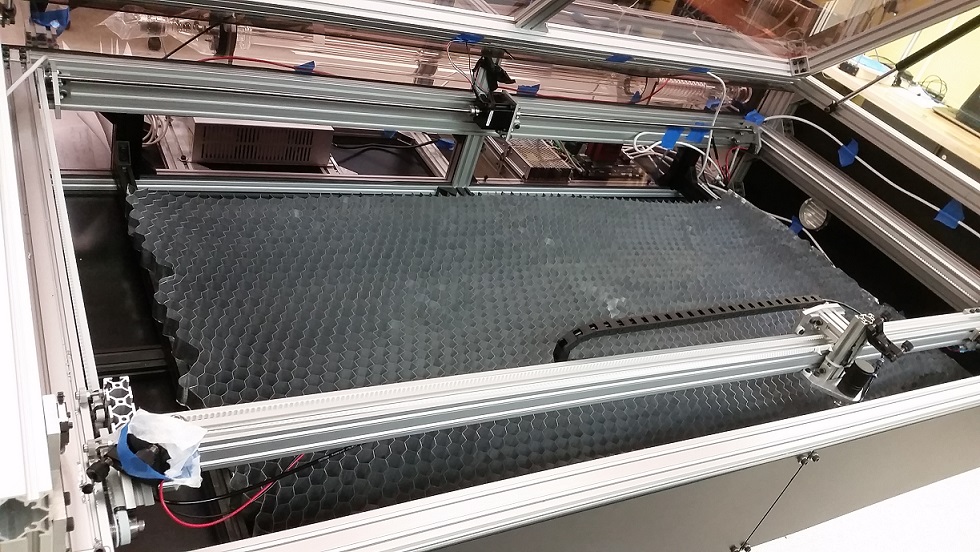
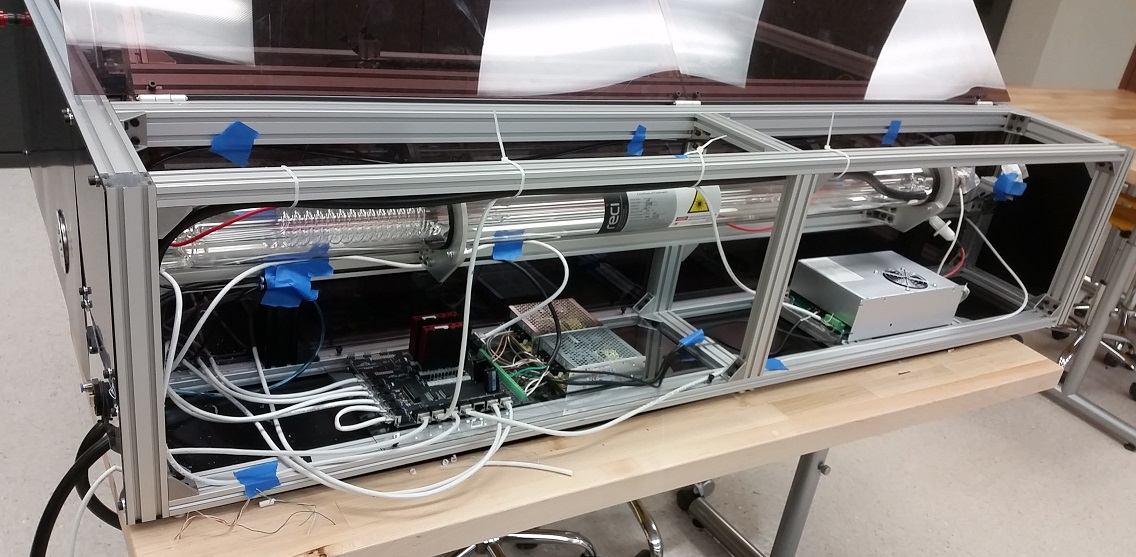
Being an electrical engineer my task was to wire and cofigure the system including: the X and Y axis motors, limit, door, emergency stop switches, the laser, exhaust, air assist, and water chiller.
The Lasersaur uses a driverboard to interface with all of these inputs and outputs and uses screw terminals mainly for voltage supplies along with cat5e terminals for signaling of motors, switches, and air assist by way of software. Inputs/Outputs that were also wired include the 120 volt power supply (PSU), 24 volt PSU, 5 volt PSU, along with cat5e patch cable for the rest of the electrical components.
Attached to the driverboard allowing us to interface with the system is a Beaglebone which has an Ubuntu version developed by the Lasersaur group that allows the user to upload cuts to the driverboard, and test the system performance. The beaglebone has the capability of being wirelessly connected to the users computer allowing easy uploads for new cuts.
Beginning of Semester after some wiring done:

What's Left
To this date (4/20/2015) the Lasersaur is at 85% completion; every component is wired any ready to go. Currently the only issue is with the Beaglebone mircrocontroller and is our only set back to actually turning on the system. A nitrogen tank or air compressor used for "air assist" is also needed because of charred pieces and fumes created when cutting different materials. There is also air tubing placed at each mirror and lens in attempt to blow away dust particles to increase longevity of these pieces. If the dust were to ignite due to the laser it would surely cause that lens or mirror to be damaged. The nitrogen tank/air compressor will not be needed right away until we ensure that; all carts move correctly, all limit switches are placed correctly and we actually turn the laser on. Once the Beaglebone is setup and working with the driverboard troubleshooting the system will be the only thing left in order to complete the project.


