Building and Implementation Instructions
The Box
The box is made from recycled sheet metal from a salvaged file cabinet and side panels from a range stove. Dimensions of the box can be modified, depending on the materials available and the optimum angle for the glazing.
Determining the Angle for the Glazing
The glazing is the surface through which the rays of light will travel into the box. The glazing of solar ovens is often set at an angle instead of parallel to the ground. When determining the angle at which the glazing should be tilted, it is important to consider where you are located; the angle of the sun in the sky varies widely depending upon your latitude and longitude. The website http://www.susdesign.com/sunangle/ can be used to determine the elevation of the sun in the sky for your location. Enter your zip code and determine the sun’s altitude for various times during the day and throughout the year to get an idea of the range of the sun’s location. For example, the altitude of the sun in Arcata, California varies (during mid-day hours) from approximately 20 degrees in the winter months up to approximately 70 degrees in the summer months. Since the oven is for an elementary school and likely will not be used as much during the summertime, the average altitude of the sun in Arcata, California during the oven’s projected hours of use is approximately 40 degrees. This is represented by h, the elevation angle, in Figure 1.
.JPG)
The most powerful rays from the sun are direct rays, as opposed to reflected rays. An oven that has its glazing at an angle of z degrees from the horizontal (the zenith angle; see Figure 1) will bring in the most direct rays and be the most efficient. To find the best angle of the glazing for the oven, determine the average elevation angle h for your location and subtract h degrees from 90 degrees. This zenith angle z is a good angle for the glazing.(Figure 2)

The Solar Swing is designed so that it can be propped up along its back edge so that more direct sun rays enter through the glazing while the food being prepared remains parallel to the ground. The Solar Swing can be propped up to approximately 25 degrees, which creates a range for the glazing’s angle. When building the oven, cutting the cost of materials and the desire to use as many recycled materials as possible may be high priorities. Due to the limited amount of sheet metal and, thus, limited dimensions, The Solar Swing has its glazing at approximately 12 degrees. The tilting effect allows the glazing to range from 12 degrees to 37 degrees, which approaches the desired angle of 40 degrees.
Cutting the Metal
The metal can be cut using metal shears. The dimensions will vary, depending on the angle that the glazing will be set at. The base and front wall likely will be the same dimensions as The Solar Swing’s, while the two side walls and the back wall will vary. Base – 23.75” x 30” Front Wall – 9” x 30” Two Side Walls – 23.75” x 9” x 24.25” x 14” Back Wall – 14” x 30” Use trigonometry to determine the height of the back wall. An imaginary triangle is created if you draw a horizontal line from the upper corner where the front wall and side wall meet across to the back wall. The base of this triangle is the width of the oven (23.75”), and the angle z is the angle that the glazing will be set at (see Figure 2). The height of the triangle (Y) can be determined by the following equation: Y = 23.75 * tan z The height of the back wall should be: H = 9 + Y Lay out the five pieces once you are finished (Figure 3).

Note: The remainder of these directions will be depicted as if The Solar Swing is being duplicated at its original dimensions. As the glazing angle and dimensions vary, the measurements given in the following sections will need to be modified.
Cutting the Aluminum
Using tin snips, begin cutting the L-shaped aluminum siding to the correct lengths: 2 @ 9” 2 @ 14” 2 @ 23.75” 6 @ 30” 4 @ 24.25”

Riveting the Box
The box’s walls are secured by riveting the walls to the L-shaped aluminum. Drill holes through the aluminum and the sheet metal at approximately 4” intervals and use a riveter to secure them to each other. Do this at all places where walls meet, but leave one side wall off for now. Along the top perimeter of the box, secure the L-shaped aluminum so that the L faces the ground. Then, rivet another piece of L-shaped aluminum around each of the four sides so that the L faces the inside of the box. This creates a frame for the glazing to rest in (see Figure 5). Take care to place your rivets for this glazing frame closer to the interior edge of the frame, as more aluminum framing will be slid underneath the frame from the outside later on in the process.

The Insulation
Insulation for The Solar Swing is made up of 1.5” thick Rmax insulation board, often available from hardware stores in 4’ by 8’ sheets. Use a measuring tool and a drawing tool to draw the outlines of the five pieces needed. The dimensions of these pieces are as follows:
1 @ 23.25”x29.5” 1 @ 29.5”x7” 1@ 29.5”x12” 2@ 20.25”x7”x20.7”x12”
A circular indent must be cut into each side wall with an exactoknife so that the wall fits snugly against one of the two flanges that support the dowel that holds up the swing. Use the flange to trace the circle out on the Rmax board. The flange should be placed about 1” below the slanted edge of the Rmax and 9.5” inwards from the taller edge of the Rmax. Cut out just enough foam so that the flange sits flush with the Rmax (see Figure 5).
Next, use a 3/4” drill bit to drill a hole through the center of each of the two indents made (see Figure 6). This is the hole through which the dowel will slide.
Now that all five pieces of insulation are ready, cut pieces of mylar that are large enough to “gift wrap” each piece of Rmax. Secure the mylar to the Rmax using a stapler(see Figure 7).
The wrapped piece of Rmax that serves as the base can now be placed inside the box (see Figure 8).
-
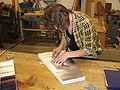
Fig 5: Cutting flange hole in Rmax
-
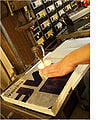
Fig 6: Cutting hole for dowel in Rmax
-

Fig 7: Stapling mylar to Rmax
-
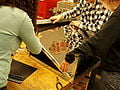
Fig 8: Putting in base insulation


The Swing
The swing is made of a full-sized baking sheet (18”x26”). The sheet is suspended by a 3/4” wooden dowel that is supported by the two flanges. Cut the wooden dowel so that it is 30” long. This can be done with a hand-saw (see Figure 9).
To thread the wooden dowel, place one of the flanges on the floor, step on it, and press and twist the dowel into the flange’s center. Before threading dowel onto the second flange, make sure the dowel is run through both pieces of the side wall insulation (see Figure 10).
Use the flange holes cut in the insulation to determine where the flanges will be secured to each of the side walls. Mark the flange’s perimeter and the locations of its holes onto the sheet metal. Drill into the sheet metal at the locations of the flange’s holes so that stainless steel bolts can fit through. Use the stainless steel bolts, washers, and nuts to secure the first flange to the side wall that is already riveted into the box’s structure.
Before the final wall can be put into place, two stainless steel hinges that support the glazing must be bolted to the back wall. Position each hinge on the exterior of the upper edge of the back wall, each at approximately 7” from the outside edges. Use tin snips to cut rectangles out of the aluminum framing so that the hinges are free to rotate in and out over the frame. The hinges must be bolted so that they leave a gap for the glazing and the stove gasket insulation. Drape the stove gasket along the inside of the frame and rest the pane of tempered glass on top. The hinge will be glued to the outside surface of the glass, so rest the hinge on top of the glass and mark the hinge’s position. Remove the gasket and glass, then drill holes for the hinges and fasten them into place with washers and nuts.
Slide the two side wall insulation pieces into place, then slide in the remaining wall of the box. Rivet the final wall into place.
To suspend the swing, drill a hole into each of the four corners of the cookie sheet so that the S-shaped hooks can fit through. Two galvanized, 5/8” wire rope clips are secured at each end of the dowel to support the chain that holds up the swing. Use two pieces of mason line to suspend the sheet. Each piece should be secured to two S-clips and should run up through the wire rope clip on the wooden dowel. Find the length of mason line needed to suspend the sheet, and then get two pieces of chain cut at a hardware store that match this length. Note that the string you use for the test suspension may stretch.
-
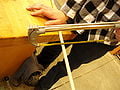
Fig 9: Cutting the wooden dowel
-
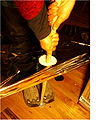
Fig 10: Threading the dowel
-
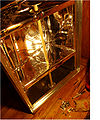
Fig 11: The first flange secured


The Panels
The panels are made from three pieces of flat-surfaced, corrugated plastic. The plastic should be cut into three panels of the following dimensions: 1 @ 30”x20” 2 @ 24”x20” Use silicone adhesive to glue sheets of mylar onto one surface of each panel (see Figure 12). Allow the glue to fully dry.

Cut two more pieces of L-shaped aluminum siding 24.25” long. These will be used on the upper edge of the two side walls. Cut three more pieces that match the lengths of the three segments that make up the frame on the upper edge of the back wall.
Slide each of these between the two L-shaped pieces already secured to each side of the box’s upper perimeter. Use tin snips to cut away excess material along one side of the L on each piece of aluminum- the slid-in piece should create a gap with the existing frame that is just big enough to slide a corrugated plastic panel into it. Rivet the four slid-in pieces into place. Next, slide the three panels into the holders created for them. Drill three holes in each panel that go through the panel’s bottom edge and each of the two pieces of L-shaped aluminum siding that hold the panel in place. Use long plastic bolts to slide through the frame and the panels. These will help secure the panels to the frame but are easily slid out, creating removable panels. Note that the aluminum siding is bendable. The housing for the panels can be adjusted as the oven is used to maximize the amount of sunlight entering the box.
The Glazing
The glazing is made of a 29.5”x23.75” piece of tempered glass. This likely will need to be ordered at a local glass dealer, as tempered glass cannot be easily and safely cut to different dimensions.
The glass will rest on ½” diameter stove gasket. Rivet the gasket inside of the frame on the top of the box (see Figure 13).

Lower the glass into the frame and slide it upwards so that its upper edge hits the middle of each hinge. Use high-strength epoxy glue that works on glass and metal surfaces to glue the hinges to the outside of the glass. Also, glue a plastic handle to the lower edge of the glass. Allow the glue to fully dry.
The Inserts
Cut five pieces of cardboard to line the interior of the oven: a base, a front wall, a back wall, and two side walls. The pieces should fit snugly into the oven, so the best way to determine the pieces' dimensions is to measure the space left in the oven's interior. Before inserting the cardboard pieces, wrap them well with heavy duty Reynolds Wrap. Reynolds Wrap is more resistant to high temperatures than mylar is, so the inserts will serve as the interior reflectors and protect the mylar from the sun's beams.
Finishing Touches
Use a file and metal repair tape along any sharp edges of the oven.
Set a stove thermometer on the swing in the oven’s interior so that the oven’s temperature can be monitored.
Since this is a solar oven for elementary school children, a fun project is to allow the students to create magnets to decorate the outside of the box. Once the magnets are put on, the oven is ready to be tested (see Figure 14).

Using the Oven
The Solar Swing is meant to be used during the daytime in sunny or partly cloudy conditions. It should not be left outside in the rain, in high winds, or in other kinds of weather.
To use to the oven, place it with the slanted top facing the sun for maximum temperature. Prop the back edge of the oven up if the glazing needs to be at a larger angle. Slide the three panels into the aluminum framing and insert the plastic bolts. The oven should be left and allowed to heat before food is placed in the oven.
Once the oven has heated up, the glass lid should be lifted by its handle, being careful not to touch the panels or the glass. Place the cooking pans in the oven. Food code policies followed by the school must be followed when using The Solar Swing. For example, according to California Retail Food Code, foods containing raw eggs must be heated to an internal temperature of 145 degrees Fahrenheit for at least three minutes. Be sure that the foods being heated are heated at high enough temperatures and for long enough durations.
Wait for the oven to cool before cleaning it out. Wipe down the swing and the Reynolds Wrap on the walls and the base with a damp cloth and a cleaning agent if necessary. The cardboard inserts can be removed and the mylar wiped down if food gets through the cracks. Remove the plastic bolts securing the panels and slide the panels out. The plastic bolts can be stored inside the oven and the panels laid on top of the glazing. The oven is now ready to be stored in a dry place.
Oven Maintenance
The Solar Swing is expected to last for three to five years. In addition to the cleaning described in the section above, it is possible that the mylar on the panels and/or the cardboard inserts covered in Reynolds Wrap need to be replaced. The costs of performing these maintenance tasks annually are depicted in Table 3 and Table 4 here