Note: These are the instructions for the simple RecycleBot interface.
If you're trying to run the MOST RecycleBot but are having issues, you have come to the right place! Herein will be covered how to turn on the MOST Recyclebot, how it's components are laid out, and how to operate the program.
Turning on the MOST RecycleBot
1. Turn on the Linux computer beside the RecycleBot and log into guest.
2. Connect the RecycleBot to the computer using the USB connection. This must be done first, before the heater or motor are plugged in, as the heater will default to ON without the Arduino to tell it not to.
3. Type in "arduino" in the terminal shell, to open the Arduino IDE, where the software for the arduino is written. (The shell is the black box at the top of the screen on the menu bar. It resembles the command propmt symbol in windowsOS) Find the location of the arduino software in /home/guest/recyclebot/arduino/recyclebotV2 and open the file, using the newly opened Arduino IDE.
4. Upload the program to the Arduino Uno, to make sure that the correct software is on the board. USETHISPICTURE
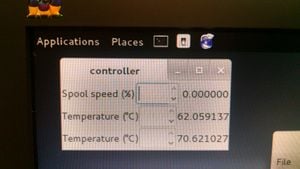
5. Initiate the Controller software as shown here.
6. There are 3 wires for the RecycleBot that need to be plugged in, a ground, the heater cord, and the motor cord. The ground should be plugged in only. Proceed to the next step.
7. Generally the motor will not need to be plugged in until the heater has melted some of the plastic first. It will be up to the user to determine that, depending on their situation. After all of the wires are plugged in, the RecycleBot is powered and controlled, and shoul run effectively.
Wiring
Concept
The wiring is very simplistic, using an Arduino Uno as a board, and then 2 resistors, 2 thermistors, and a few wires to connect all the parts together. This simple approach should make troubleshooting quite easy, as there are only so many wires which one could possibly be looking at.
Each thermistor is connected, in series, to it's own set or a resistor, an analog input, a ground, and a 5V pin. The way it works, is that the 5V goes into the circuit, and through the thermistor, which changes resistance based on temperature. By using the Arduino Software to analyze the ratio of the fixed resistor and the thermistor, a temperature can be determined.
Illustration
Controller Software
Concept

The controller software runs on the Linux computer right beside the RecycleBot. This allows user input, and also outputs what the current temperature of the extruder is. The spooler speed entry box currently does nothing (10/8/14) and the two temperatures indicate right by the die nozzle, and deeper inside the extruder.
To run the controller a new terminal shell must be opened. There is an icon on the top of the screen which resembles a black box, and looks similar to the WindowsOS command prompt. Open the terminal, and then type the following:
cd recycleot/arduino/
THEN
./controller
Each should have a space before the command begins.
Arduino Software
Concept
The software that runs on the RecycleBot's Arduino was written by Bas Wijnen, and can be found almost here. Written in C++ using the Arduino IDE, it examines and controls the temperature in the extruder, based upon user input and feedback.
The software may need to be re-uploaded to the Arduino occassionaly, and if it is uploaded everytime, it will do little harm.
Details
The software previously had a variable inside of it called "Alpha" which represented all of the constants in the equations to calculate what the temperature was based on the thermistor. After some issues began to crop up, the "Alpha" variable was removed and replaced with all of it's components, illustrated here. PICTURE OF ARDUINO TEMPERATURE EQUATION

