(Created page with "{{777}} == Project Title == Project developed by [Blake Hereau] {{Statusboxtop}} {{status-design}} You can help Appropedia by contributing to the next step in this OSAT's...") |
|||
| Line 56: | Line 56: | ||
== Benefited Internet Communities == | == Benefited Internet Communities == | ||
Bike Forums [https://www.bikeforums.net/] | |||
Cycle Chat [https://www.cyclechat.net/] | |||
Bike Radar [https://www.bikeradar.com/] | |||
==References== | ==References== | ||
Revision as of 15:38, 7 December 2019
Project Title
Project developed by [Blake Hereau]
Template:Statusboxtop Template:Status-design You can help Appropedia by contributing to the next step in this OSAT's status. Template:Boxbottom
Abstract
- This project is an attempt to create a simple bicycle brake for the open source community. This brake relies on minimal hardware and uses scarp rubber for the brake pad material. If the users budget allows, conventional bike brake pads could be utilized. These brakes are adjustable to fit a multitude of bikes as long as they have a provision for brakes on the forks of the frame. These brakes are also lighter than conventional brakes.
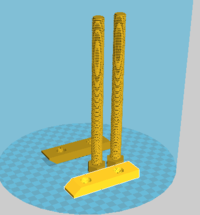
- Picture of completed print using your printer

Bill of Materials
- 2 7mmx40mm bolts
- 2 7mm nuts
- 1 3mmX20mm bolt
- 1 3mm nut
- Part Files [1]
Tools needed for fabrication of the OSAT
- MOST Delta RepRap or similar RepRap 3-D printer
- Pliers or tool to remove supports
- Basic Bike Maintenance tools
Skills and Knowledge Necessary to Make the OSAT
Technical Specifications and Assembly Instructions
- After Printing, remove supports from parts.
- Assemble brake pads by running a bolt through and seating it in the hole.
- Run the scrap rubber across the front through the slots
- (Optional Step) Secure rubber to the back of the brake pad with screws
- Attach the brake pads to each of the sides with nuts
- Mount the brakes on a bike with the center bolt
- Run the brake cable through the top and attach it to the
- Print Time - Approximately 2 hours
- Assembly time - 5 minutes
- Including drawings or pictures of the device at stage of assembly at minimum. (http://www.appropedia.org/Special:Upload)
Common Problems and Solutions
Supports can be tricky to remove. Try reducing the amount of supports to make it easier to break them free.
Cost savings
Print cost $1
Hardware cost $3
Total $4
Commercial equivalent $18 - [2]
Cost Saving
$14 cheaper
80% cheaper
Benefited Internet Communities
Bike Forums [3] Cycle Chat [4] Bike Radar [5]
References
<nowiki>