(Created page with "<!-- Comments that appear only in the edit view are formatted like this. --> <!-- These comments are offered as an aid as you get started. Remove as you wish. --> <!-- next li...") |
Sophivorus (talk | contribs) m (Text replacement - "contact-appropedia-user" to "authors") |
||
| (22 intermediate revisions by 6 users not shown) | |||
| Line 1: | Line 1: | ||
{{Infobox device | |||
|title=Limb Prosthetic | |||
|image=ModeledProsthetic_limbprosthetic.png | |||
|description=This limb prosthetic could be used in areas where such would be hard to come by or too expensive to buy. It could also be used for someone who would like to customize their limb prosthetic and make it personalized. | |||
|keywords=3D printing, custom hand prosthetic | |||
|intended-use=medical, development | |||
|development-stage=prototype | |||
|made=Yes | |||
|made-independently=Yes | |||
|estimated-cost-amount=70.72 | |||
|estimated-cost-currency=USD $ | |||
|countries-of-replication=United States | |||
|sustainable-development-goal=Sustainable Development Goal 3 | |||
|authors=User:Acroche | |||
|manufacturing-files=https://www.thingiverse.com/thing:574504 | |||
|documentation-language=English | |||
|manifest-language=English | |||
|manifest-date-updated=2020-06-04 | |||
|manifest-author-name=Kathy Nativi | |||
|manifest-author-affiliation=Appropedia | |||
|manifest-author-email=info@appropedia.org | |||
}} | |||
{{777}} | |||
== Open Source Basic Limb Prosthetic == | |||
Project developed by [[User:Acroche|Acroche]] ([[User talk:Acroche|talk]]) 10:25, 2 December 2014 (PST) | |||
{{Status|design}} | |||
{{Status|prototype}} | |||
== | ==Abstract== | ||
For the OSAT (Open Source Appropriate Technology), I chose to create a limb prosthetic as I felt it was a technology that is needed at a low cost. | |||
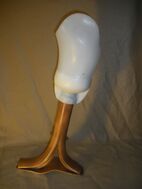
I set out by first researching other prosthetics. I found out that to attach a prosthetic, how it usually works is to put a sleeve on to the limb which then will adhere to the prosthetic by a strap with a clasp or other implementation. This will allow the prosthetic to have a tight fit (without squeezing the limb) and to also be attached to the prosthetic so that it could not slip off. I also looked at different types of hand prosthetics that are made and used. A realistic hand was out of the realm of my personal capabilities via OpenSCAD, therefore I chose to do a hook implementation. My implementation is a simple hook that could be used for holding or grabbing things. A grip was not made, but could be added in the future to allow for more capabilities with the limb. | |||
This limb prosthetic could be used in areas where such would be hard to come by or too expensive to buy. It could also be used for someone who would like to customize their limb prosthetic and make it personalized. | |||
= | {{Gallery | ||
|title=Prosthetic + Parts | |||
|Image:ModeledProsthetic_limbprosthetic.png|Modeled Prosthetic | |||
}} | |||
== Bill of Materials== | |||
#3D Printer | |||
#Open Source Limb Prosthetic model | |||
#PLA/ABS/or other appropriate filament | |||
Here is a link to all source, stl, and gcode files | |||
http://www.thingiverse.com/thing:574504 | |||
== | == Tools needed for fabrication of the OSAT== | ||
* [[Delta_Build_Overview:MOST| MOST Delta RepRap]] or similar RepRap 3-D printer | |||
== Skills and Knowledge Necessary to Make the OSAT == | |||
*Basic knowledge for 3D printing with your printer of choice | |||
*Measurements for limb (such as width and length necessary for snug fit) | |||
== Technical Specifications and Assembly Instructions== | |||
# Download files from link above | |||
# Make necessary modifications of code (such as measurement of fit for limb) | |||
# Prepare printer and load .gcode file or slice the .stl how you like and then export a .gcode file (recommend 50% fill or higher) | |||
# Print, remove supports, smooth out any rough edges, and strap limb in with sleeve (sleeve not provided) | |||
* Estimated print time: ~14 hours (depends upon sizing of limb, 14 hours is at a width of 91mm and height of 160mm for direct limb attachment part and hook scaled in unison). | |||
You may need | === Common Problems and Solutions=== | ||
Fit of Prosthetic | |||
*It is essential to make sure measurements are correct prior to printing. You may need to go into the code and make sure that the radius of the opening is correct, as well as the length needed to fit around the limb. Measurements should be taken after putting on sleeve that will allow for prosthetic to stay in place. | |||
*If the fit is slightly too tight, you can try carving out some space as needed. | |||
*If the fit is slightly too long, you can try adding material in the front of the prosthetic to fill that space. | |||
*If the fit is slightly too big, you can try adding an additional sleeve to fill the empty space around the limb. | |||
*If the fit is much too big/small or much too long/short, it would be best to remeasure and reprint the prosthetic. | |||
Size in Code | |||
*The code is built small, but you will need to manually go in and change sizing to what is needed. | |||
*As a simplier route, when you pull the .stl files into your slicer (Cura for example), you can set the scale to what is needed. Therefore, you can change the width and height independently as needed. | |||
== | == Cost savings== | ||
* Estimated costs | |||
$70.72 (Cost depends upon size of build; this price based upon the 14 hour build mention above) | |||
* Commercial equivalent | |||
$421.36 (http://www.amputeesupply.com/index.php?main_page=product_info&cPath=5&products_id=60&zenid=8a8mp63llk59sm2g3lsl4ecr41) | |||
* $ savings and % savings | |||
$350.64 saving | |||
83.2% saving | |||
== | ==References== | ||
*https://www.youtube.com/watch?v=ln7vow0pxXY | |||
*http://science.howstuffworks.com/prosthetic-limb.htm | |||
*http://www.amputeesupply.com/index.php?main_page=product_info&cPath=5&products_id=60&zenid=8a8mp63llk59sm2g3lsl4ecr41 | |||
[[Category:Medical]] | |||
[[Category:Prosthetic]] | |||
[[Category:OSAT 3D-Printable Designs]] | |||
[[Category: | |||
Revision as of 13:26, 17 October 2020
Open Source Basic Limb Prosthetic
Project developed by Acroche (talk) 10:25, 2 December 2014 (PST) Template:Status Template:Status
Abstract
For the OSAT (Open Source Appropriate Technology), I chose to create a limb prosthetic as I felt it was a technology that is needed at a low cost.
I set out by first researching other prosthetics. I found out that to attach a prosthetic, how it usually works is to put a sleeve on to the limb which then will adhere to the prosthetic by a strap with a clasp or other implementation. This will allow the prosthetic to have a tight fit (without squeezing the limb) and to also be attached to the prosthetic so that it could not slip off. I also looked at different types of hand prosthetics that are made and used. A realistic hand was out of the realm of my personal capabilities via OpenSCAD, therefore I chose to do a hook implementation. My implementation is a simple hook that could be used for holding or grabbing things. A grip was not made, but could be added in the future to allow for more capabilities with the limb.
This limb prosthetic could be used in areas where such would be hard to come by or too expensive to buy. It could also be used for someone who would like to customize their limb prosthetic and make it personalized.
Bill of Materials
- 3D Printer
- Open Source Limb Prosthetic model
- PLA/ABS/or other appropriate filament
Here is a link to all source, stl, and gcode files http://www.thingiverse.com/thing:574504
Tools needed for fabrication of the OSAT
- MOST Delta RepRap or similar RepRap 3-D printer
Skills and Knowledge Necessary to Make the OSAT
- Basic knowledge for 3D printing with your printer of choice
- Measurements for limb (such as width and length necessary for snug fit)
Technical Specifications and Assembly Instructions
- Download files from link above
- Make necessary modifications of code (such as measurement of fit for limb)
- Prepare printer and load .gcode file or slice the .stl how you like and then export a .gcode file (recommend 50% fill or higher)
- Print, remove supports, smooth out any rough edges, and strap limb in with sleeve (sleeve not provided)
- Estimated print time: ~14 hours (depends upon sizing of limb, 14 hours is at a width of 91mm and height of 160mm for direct limb attachment part and hook scaled in unison).
Common Problems and Solutions
Fit of Prosthetic
- It is essential to make sure measurements are correct prior to printing. You may need to go into the code and make sure that the radius of the opening is correct, as well as the length needed to fit around the limb. Measurements should be taken after putting on sleeve that will allow for prosthetic to stay in place.
- If the fit is slightly too tight, you can try carving out some space as needed.
- If the fit is slightly too long, you can try adding material in the front of the prosthetic to fill that space.
- If the fit is slightly too big, you can try adding an additional sleeve to fill the empty space around the limb.
- If the fit is much too big/small or much too long/short, it would be best to remeasure and reprint the prosthetic.
Size in Code
- The code is built small, but you will need to manually go in and change sizing to what is needed.
- As a simplier route, when you pull the .stl files into your slicer (Cura for example), you can set the scale to what is needed. Therefore, you can change the width and height independently as needed.
Cost savings
- Estimated costs
$70.72 (Cost depends upon size of build; this price based upon the 14 hour build mention above)
- Commercial equivalent
- $ savings and % savings
$350.64 saving 83.2% saving


