(From BITTERSWEET, Volume II, No. 2, Winter 1974)
Story and photographs by Stephen Hough, Jay Hillig and Rick Bishop
The day was cold, a chilling damp cold with overcast skies, hard for the three staff members to get used to after the long Indian summer of early November. Elmer and Letha Simpson, and their neighbors Sidney Howell and his sister Verba who came to help them, did not notice the cold as they went about the business of butchering a hog for their year's supply of meat. Spread out on the table under the big post oak was the opened and split carcass of a hog. The men were cutting up the meat while the women were making preparations for rendering the lard and grinding the sausage.
Situated on bench land overlooking the river bottom fields where cattle were grazing and just under the steep hill bordering the valley, the usually quiet farm home of the Simpsons was filled with activity of butchering day.
Explaining to the boys as he was cutting up the meat Sidney said, "This is your fat that makes the lard. It's the leaf that makes the best lard. See there?" He pulled out the layers of fluffy white fat. "You just drag it right out."
He cut under the ribs with his knife to remove them.
"Is that the backbone there?" Steve asked pointing to a long bony strip. Sidney nodded and then pulled out a long narrow piece of pink lean meat.
"What' s that part?"
"Tenderloin. And right here is your sausage." Sidney held up some scraps of meat he was trimming off.
"Boy, you don't get much sausage out of it."
"We'll get some more. There's other things that goes in it. But that's part of it."
"Do you grind up different parts of the meat to make the sausage?" Jay wanted to know.
"It's the trimmings off of all of the parts."
Sidney and Elmer cut out the bacon, shoulders and hams.
"What's the shoulder used for?" Steve asked.
"Just meat is all we know," Sidney said. "The shoulder is the front joints or legs. Now see, here's your ham. It's the hind joint. Here's a slab of bacon right now. That's the part between the shoulder and ham."
"What's the meat they call salt pork?" Jay asked.
"That shoulder will be salt pork there after it's salted and cured," Elmer explained. He trimmed the pieces tossing the meat scraps in a bucket.
"There's more sausage coming out now," Sidney said. "Now this is every bit of the bacon and that's a ham. That over there is the backbone. Have you got it straight?"
"Do you always do this on a cold day?" Jay had stayed as close to the fire as he could all morning.
"Why shoot," Sidney teased, "it's a warm day."
"A warm day !"
"Yeah. It's warm for butchering," Elmer said. "You need a cold day to chill the meat."
"Do you butcher your meat all the time?" Rick joined the group after warming up in the house.
"I've butchered every year for forty-seven years."
"Say, how old are you, Elmer?" Sidney asked.
"Seventy-two and it ain't killed me yet!"
This conversation may give you some idea of what it was like that November morning butchering a hog at Elmer Simpson's. Butchering has been done for centuries, even the Bible talks of butchering. But, the day is almost past when neighbors get together to butcher their own yearly supply of meat. Nowadays most people go to the supermarket to buy what they want, or, if they raise their own hogs, they have the meat plant butcher for them. There are a few people though, who continue the old way so they can cut their meat the way they like it. Traditionally the men do the butchering, cleaning, and the cutting up of the meat. The women strip off the intestinal fat, help render the lard, make the sausage, and of course, do the cooking.
MATERIALS[edit | edit source]
To butcher you must have the proper utensils. It doesn't take the big fancy machinery you see in the meat department of the grocery store. The first thing to get are several sharp butcher knives which are used for both scraping the hog and cutting up the meat. You'll need a sharp ax to chop the bony pieces. Next you'll need a 55 gallon metal drum or similar container. About ten feet directly above the barrel you need a pulley tied in a tree to raise and lower the hog from the barrel. Several feet of rope will be needed for the pulley in order to hang the hog and secure it to the tractor at the other end. Naturally a table will be needed to lay the cleaned hog on to cut it up. An impromptu table of saw horses and boards works very well. A wash tub or an extra large bucket will be needed to put the intestines in. At least two pans or buckets will be needed to put the scraps of meat in to be used for lard or sausage. Last is a kettle for rendering lard and another pan large enough to hold the hog's head.
The barrel should be set under a strong tree limb. This is so the pulley can be put overhead to raise and lower the hog from the barrel. Because a small fire must be built Under the barrel it must be set about six inches off the ground. You can do this by simply setting it on some flat rocks, leaving enough room to set a fire underneath. Fill the barrel about one half full of water and begin to heat it. Set all your utensils near the barrel, especially the table which should be only a few feet away. This is so you can swing the cleaned carcass over to the table and lay it on it to cut up.
SLAUGHTERING[edit | edit source]
Elmer says the best age of a hog to butcher is one six to eight months old. That's when the meat is the tenderest and the best. The breed of hog he butchered was half Hampshire and half Duroc.
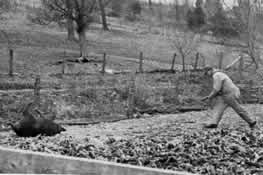
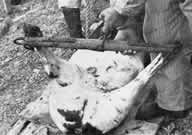
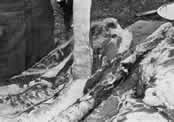
Now you are ready to begin the butchering process. Sidney used a single shot .22 caliber rifle to shoot the hog between the eyes, killing in instantly. Be sure to have a knife ready, because as soon as it is down, you must cut its throat to bleed it. (see photo #2) You should hit the main artery while the hog is still kicking to force out all the blood. The hog must bleed so that the blood won't coagulate and get into the meat.
SCALDING[edit | edit source]
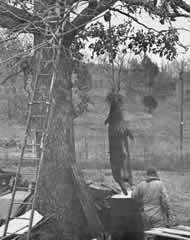
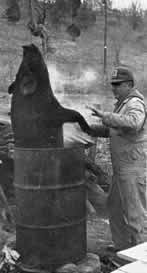
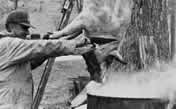
Scalding loosens the hair just as scalding a chicken makes feathers pull out easily. Elmer rolled the hog on a wooden sled and moved it over to the barrel with a tractor. To make it easier to raise and lower the 275 pound hog in the barrel of water, it is attached by rope through the pulley to the tractor. In earlier days a horse was used for power. First run a wire through the hog's mouth and under its chin and fasten the ends together. Then take one end of the rope from the pulley and tie it to the wire. Raise the hog above the barrel of hot water and lower it into the water. Lower the hog until as much of the hog as possible is covered. (see photo #3) Be careful you do not let the hog touch the bottom of the barrel or that you do not let the water boil. Too high a temperature will set the hair so that it can't be scraped off. At least one half of the hog will have to be covered so add more water if needed. Do not leave the hog in the water long, just until the hair pulls out easily. Some people add a few ashes to the scalding water so that the lye in the ashes will help loosen the hair for scraping.
Photo #2 - A hog must be bled immediately after it is shot.
Photo #3 - Lower the hog in scalding water just long enough to loosen the hair.
SCRAPING[edit | edit source]
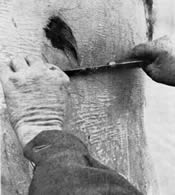
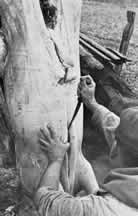
Scraping a hog is not hard. After raising the hog from the water begin pulling the hair out with your hands and scraping with a broad-bladed knife. Since you do not skin a hog you must be sure to get all the hair off. Hold your knife in both hands so that the blade is against the skin and scrape. (see photo #4) If the hair is stubborn in coming off, dip the hog in the water or pour hot water over especially bad places. To scald the head and shoulders reverse the hog. Fasten a single tree to the hind legs to raise and lower the hog. A single tree is normally used to work with horses but it makes dipping the hog much easier. To reverse the hog, lay the hog down on the table and then cut behind the tendon on the back part of the hog's hind legs between the hoof and hock and then pull on the hamstring. Take the hooks on the single tree and hook them to the hamstring. (see photo #5) Now tie the rope from the pulley to the single tree and raise the hog above the barrel. Lower the front end of the hog into the water and after raising, scrape off the hair. As before you will probably have to lower the hog into the water several times to loosen all the hair.
Photo #4 - After scalding, the hair scrapes off easily with a knife.
Photo #5 - To reverse the hog hook a single tree in the hamstrings. Then hoist to scald.
THE HEAD[edit | edit source]
Now cut off the head. (see photo #6) As you can tell from the picture this is quite messy. It is very simple, though, so it won't take long. You begin by cutting through the flesh on the neck all the way around the bone and then twisting the neck until the bone breaks. Put the head in a kettle with a little water in it. The head can be used to make many things such as mincemeat, headcheese, pickled ears, and the jowls can be cured. Even the brains and tongue can be used for food. Nothing is wasted.
Photo #6 - Sidney Howell cuts off the head while the hog is still hanging.
CLEANING[edit | edit source]
The next step is to clean the hog internally. It needs to be opened up all the way down. With the hog hanging by the hind legs start at the top at the back center and cut all the way through the skin down to the hind bone. Then make a shallow cut the rest of the way down the hog so not to cut into the intestines. Be sure to cut around the end of the intestines.
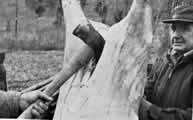
With an ax cut the hind bone in half. (see photo #7) This has to be done in order to split the hog in half for cutting up. Tie off the end of the intestines with a piece of string. Now cut the breastbone. This is the hardest part because you must be careful not to cut the intestines when cutting the breastbone with a knife. Cut all the way through the skin and find the breastbone and cut it. The picture shown can give you an idea as to where to find it. (see photo #8)
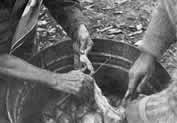
Now the intestines can come out. Open the stomach entirely and put the intestines into a large wash tub. (see photo #9) The intestines are saved because of the fat on them.
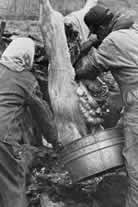
Photo # 7 - After cutting through the flesh with a knife, chop through the hind bone.
Photo # 8 - Be careful not to cut the intestines when cutting the breastbone.
Photo # 9 - Catch the intestines in a tub.
CUTTING THE MEAT[edit | edit source]
The cutting of the meat is next. Swing the carcass to the table and lay it on its back with the skin against the table so that it splits open.
First to cut is the backbone which has to be cut apart from the rest of the meat. You do this by chopping with an ax down the length of the backbone on both sides where the ribs join it. The backbone and the tenderloin together make pork chops, but Elmer doesn't cut it that way. He likes to keep them separate. The backbone has meat on it as good as the tenderloin, so he cuts it up and boils it like stew meat, but with the bone still with it. The way to make pork chops is to saw down the center of the backbone and cut off the extra rib ends about five inches from the backbone. Sawing the backbone is done while the hog is still hanging from the pulley.
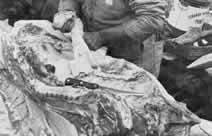
The leaf lard comes now. It is a thin layer of pure fat that is right against the ribs. This lard can be pulled out easily by hand. Put this lard in a pan along with any other fat you cut off. (see photo #10)
Photo #10 - The leaf lard lies on top of the ribs.
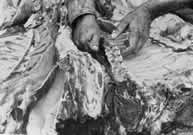
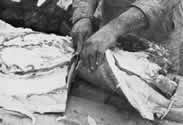
Ribs aren't too hard to cut out. They are a large slab on both sides of the backbone. To cut them out you start from the backbone and cut to the outside. Put your knife just under the ribs and cut all the way under them; continue this until you have cut them out completely. (see photos #11 and #12)
Photo #11 - Cut the ribs just under the bone and ....
Photo #12 - ....slice the entire length of the ribs.
The tenderloin, like the leaf lard, can be pulled out of the hog. In comparison to the other cuts of meat it is a small portion of the hog, stretching along the sides of the backbone. (see photo #13) It is also the best portion of a hog. It is only about five inches thick but it shouldn't be hard to find.
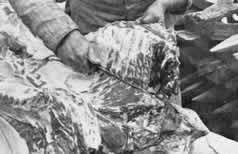
What remains to cut now are the hams, sides and shoulders. Cut straight across to cut out the sides or bacon. The pictures (see photos #14 and #15) show where to cut it into slabs. Trim the bacon to get off the excess fat.
The hams and shoulders are the last pieces of meat to be cut. Just cut at the knee joint to cut off the feet and you're done cutting up the meat. Ham and shoulders are cut and cured alike.
There is one more thing that can be done and that is to cut the line bone out of the hams. (see photo #16) Elmer did this because a boneless ham cures better and is easier to slice when cooked. Cut with your knife around the bone and pull it out. Now all there is left to do is to trim the meat and cut off any excess fat to be used for lard. Put the trimmings to be used for sausage in a pan for making sausage later.
Photo #13 - The tenderloin pulls out by hand. It lies beside the backbone.
Photo #14 - The shoulders, sides and hams are ready to be cut. This shows cutting of the shoulders.
Photo #15 - Then cut the ham from the sides or bacon. These three pieces are cured.
Photo #16 - The line bone is cut out to make a boneless ham.
SAUSAGE[edit | edit source]
Everyone knows how good sausage smells as it is cooking at 6:30 in the morning, and many people don't consider a breakfast complete without sausage.
If you have never tasted fresh, homemade sausage, you have missed out on one of the tastiest meats available.
After the shoulders, ribs, hams, jowls and sides have been trimmed, the fat is used for lard, and meat which is not used for anything else is used for sausage. Many people put the heart, tongue and melt (spleen) in the sausage. Some who like a lot of sausage cut up the tenderloin and a shoulder.
To prepare the meat for the sausage mill, it must be cut into pieces small enough to fit into the mill easily. Mostly lean meat is used for sausage, but on a hog many of the scraps are partly lean and partly fat, like bacon. This is all put into the sausage. Too much fat will make cooked sausage shrink up and leave mostly grease in the pan. Good sausage has just enough fat to make it juicy.
A sausage mill grinds the meat into sausage. The mill is a small hand operated machine with a small hopper at the top into which the pieces of meat and fat are pushed a few at a time. There is a crank located on the side of the mill which when turned by hand, turns an auger inside of the mill, forcing the meat through knives and out through a chute located on the front of the mill. When grinding sausage, alternating putting in lean and fatty meat will help in mixing the sausage to more uniform consistancy. The ground up meat drops into a pan under the mill.
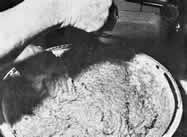
Photo #17 - Season sausage according to taste and mix well.
Once all the meat is ground and in a large flat pan like a dish pan, you are ready to mix in the spices. Letha Simpson never uses any measurements when making sausage. She goes by personal taste and experience. The most commonly used spices are salt, pepper, and sage. The best way to tell whether you have spiced the meat well enough is to fry a patty and taste it. All the time you are adding spices in with the meat you must mix constantly in order to mix the spices well. There is no better way of thoroughly mixing than with your hands. A spoon will not disperse the spices evenly enough.
The amount of sausage which is yielded from a hog varies according to the size of the hog and how much of the meat is put in. The hog Elmer butchered weighed around 275 pounds and it yielded 19 pounds of sausage.
LARD[edit | edit source]
In days gone by, lard was the only shortening Ozark cooks had other than butter. So, for fluffy biscuits, flaky pie dough, rendering out the lard had to be done with care to get a soft white product.
Lard is made from intestinal fat, leaf fat, and scraps of fat from the butchered hog that are trinmmed off from different cuts of the meat. The intestines are covered with a layer of fat stretching the entire length of them. After removing the intestines from the carcass, strip them of all their fat with knives, being careful not to pierce them. (see photo #18) The best fat for lard is the leaf lard that comes from the inside of the ribs. This lard, in comparison to the whole hog, is a fairly small strip of fat that is removed by simply pulling it out by hand.
After enough fat is gathered from the cutting table, take it in the house to prepare for cooking. Lay the fat on the table and cut it into small cubes with sharp knives.
Photo #18 - The women saved the fat on the intestines by stripping it off with knives.
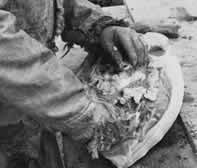
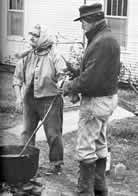
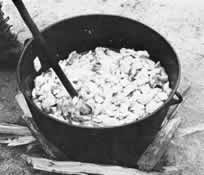
While the other women were cutting the fat inside, Elmer was setting up the iron kettle outside. The kettle has to be about 4 inches off of the ground to allow room for the fire wood. Put a small amount of water in the kettle to keep fat from sticking when you first put it in before any grease has cooked out. Build a fire under the kettle to get the kettle hot before fat is put into it. As the fat is diced, bring it outside and dump it into the kettle. What little water is left will boil out. Stir constantly with a stick or a paddle. Letha stirred the fat with her prized lard stick. Her lard stick was made of sassafras and she first used it to stir lard in 1927. (see photo #19) As the fat gets hot, it melts down into liquid grease. Stir it constantly to keep the fat from burning. Keep the fire low while in this process because the lard, if a flame is touched to it, it will catch fire and too hot a fire will cause the lard to be brown when it hardens.
Brown lard will get rancid more quickly. You keep dumping more fat in the kettle and dipping out grease as it cooks out of the fat until you have put in all the fat that you have. You keep cooking the lard until all the fat is extracted.
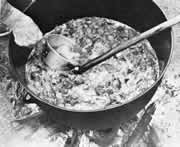
Low heat directed to the fatty tissues will melt the fat, leaving the cell structure and the rind. This residue will cook in the hot fat and float on the top of the grease. These are called cracklings. (see photos #20 and #21)
Photo # 19 - Every year Letha and Elmer Simpson enjoy making their own lard.
Photo #20 - Stir the pieces of fat constantly while cooking.
Photo #21 - Dip out the grease when the cracklings turn brown.
You can tell when the lard is done by the cracklings floating at the top. The fat that you pour into the kettle floats also but the fat is white until it is melted down to just the cracklings. So you can tell when you're done when everything floating at the top is brown.
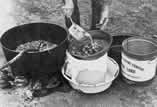
Dip the lard out of the kettle with a large dipper or sauce pan and pour through a straining pan and a cloth into a lard stand or container that can hold very hot liquids. (see photo #22) Cover the lard can and let it cool and harden. The lard is stored in lard cans in cellars, and this lard will keep all year.
The cracklings are caught in the straining pan and when they cook down they make good munching, like potato chips or corn chips. They have a nutty, crisp brown taste. Many like them in cornbread or for feeding farm pets. Another tasty treat cooked in the lard is the sweetbread or thymus which is found in the leaf lard.
Photo #22 - Strain the cracklings and grease through a collander and store in a cool place.
CURING[edit | edit source]
When you butcher a hog, you must have some method of preserving the meat. Today much can be frozen. The traditional way is by curing the meat. Pieces often cured are hams, shoulders, sides and jowls.
The first step in curing meat is to put the meat on a table in the smoke-house. You must wait until the body heat of the hog has left the meat before you apply the salt. It only takes a few hours for the heat to leave in cold weather. In the afternoon after butchering when the heat has left the meat, use two parts of commercially prepared sugar cure to one part table salt and rub the mixture into the skin side of the meat. Then turn it over and rub the other side. The salt mixture should cover the meat entirely, and should be a thin layer about 1/8 inch thick. It usually takes about a pound to a pound and a half of salt to ten pounds of meat. The meat has to sit then for about two or three weeks in cold weather to take the salt. When cured, wash the excess salt off of the meat and hang or store. It should then be properly cured.
Before sugar cure was available on the market, the old-timers used just plain table salt to cure the meat and then smoked it. Many times the meat wound up tasting very salty because of curing too long and had to be soaked to get out some of the salt. The present day sugar cure gives a simulated smoke taste. When it came on the market, most people stopped smoking the meat.
SMOKING[edit | edit source]
After the meat is cured, it can be smoked. Smoking the meat not only helps preserve it, but adds a very unique flavor that people still enjoy today. But smoking meat in earlier days was a bit different from the way most meat is smoked today.
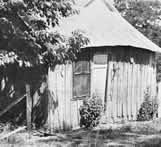
Each family did their own as simply as possible with the equipment they had--an iron kettle, hickory chips from the woodpile and a smokehouse. Every farm had a smokehouse as surely as they'd have a barn. In the Ozarks the smokehouse was usually a small rough-sawed oak building about 8 x 10 which doubled as storage and catchall. It was stripped to hold in the smoke. (see photo #23)
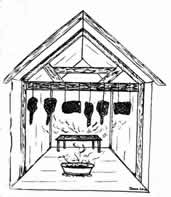
After the salt cure the meat was hung by wire to the joists in the smoke-house. Meat is hung the same way it is on the animal, sides hung with the thickest part up and joints, such as hams and shoulders, also hung with the thick side up. The part the hog stood on is still down. That natural position keeps the grease from dripping out when it gets warm. If you hang it upside down it will lose all the grease. The wires are put in by cutting a small slip in the hide and slipping the wires through the slit. The shoulders and hams only needed one wire at the top of the joint, but the sides need two, one at each end of the thick side.
After the wires had been inserted and the meat had been hung in the smoke-house, it was time to build the fire. The fire was built in an iron kettle, usually the same one that was used in making lard and doing innumerable other jobs about the farm. The kettle was put in the smokehouse directly under the meat being smoked. The best type of wood, and almost the only kind used, was hickory. Hickory smoke has a very pleasant smell and adds a desireable flavor to the meat. Most people used wood chips. If · hickory was not available, sassafras was sometimes used to give a different flavor.
They would put the chips in a kettle on a bed of ashes and set the wood on fire. When the fire was burning well, they took ashes and smothered the fire so that only smoke came out of the kettle, because the flavor was not in the fire itself, but in the smoke. Since many smokehouses were not tight, walls were sometimes papered temporarily to hold in the smoke as much as possible to reduce the smoking time. The kettle was placed directly under the meat that was being smoked. For instance, the kettle would be placed under the hams. The fire would be tended until the hams would be brown. It usually took two or three days for the meat to turn brown. When the hams turned brown, the kettle would be moved under the sides. In the Winter, the farmer might have three or four hogs in the smokehouse at the same time, depending on the size of his family.
When all the meat was smoked some people just let it hang in the smoke-house, while others took it down, wrapped it carefully and packed it in boxes. Whatever the farmer did with the meat, he had enough to last through the summer and into the next winter when it would be cold enough to butcher again.
Photo #23 - Smokehouses built of rough oak lumber were stripped to hold in the smoke.
Our thanks to Myrtle and Elva Hough for information on the curing and smoking of the meat.
