Introduction[edit | edit source]
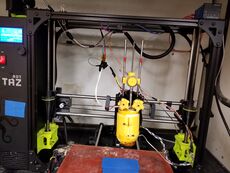
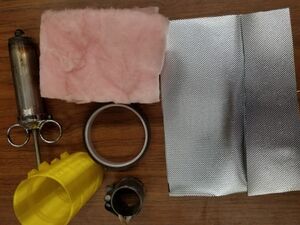
Filament 3D printers can do a wide variety of tasks and projects that come appealing to many people. However, the type of material that can be used in these printers are limited to the type of head that is attached, as well as the material's properties. If the filament is not completely uniform in diameter, the print will have a high possibility of failure. Thus the heated syringe printer is a perfect resource for being able to print in multiple different materials, such as plastic bags or water bottles. The syringe was made from multiple pieces of 316 Stainless Steel that were welded together. A pipe heater was then inserted over the shaft, wrapped in a total of four layers of insulation and heat resistant tape, and secured with a 3D-printed "belt" to secure the insulation on the syringe (Figure 01).
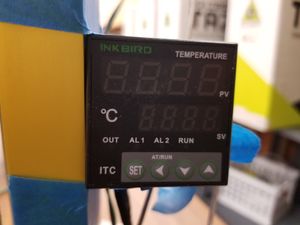
The syringe is heated by a temperature controller.
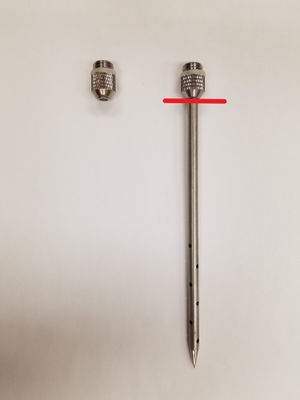
In regards to the nozzle, the injector accessories were cut using a hacksaw.
Safety[edit | edit source]
- Always use PPE when assembling and operating.
- Be cautious when handling the syringe after heating as it will be hot to touch, along with the material that has been released from the syringe. Contact with these can cause severe burns.
- Be careful around the wires that may be exposed and confirm that they are not touching one another and are wrapped in electrical tape. If they do touch, it has the potential to start a fire.
- Confirm that the syringe is secured tightly on the holder and is straight.
- Always keep an eye on the printer while it is printing.
- Always use under an approved fume hood. Wearing a mask is recommended but not required.
Equipment or Bill of Materials[edit | edit source]
3D-printed Parts[edit | edit source]
TBA
Mechanical Parts[edit | edit source]
- Stainless Steel Injector
- 316 Stainless Steel Rod (dimensions: TBA)
- 316 Stainless Steel Rod (dimensions: TBA)
- 316 Stainless Steel Tube (dimensions: TBA)
- x2 DC Brushless Fan
- Temperature Controller
- Insulation
Wiring Components[edit | edit source]
- Male-to-female Connections
Calibration & Tolerances[edit | edit source]
Calibrating the target temperature of the syringe during operation requires a material melting point verification step. Use a hot plate and ramp the temperature from ambient conditions to the expected melting point of the material. Polymeric materials typically have a melting range, so its a good idea to take multiple samplings from your material source and make sure they melt at similar temperatures. Once the melting range has been identified and measured(a surface thermometer or infared thermometer work well) begin running a material extrusion calibration test. TBF(To be finished)
MSDS's[edit | edit source]
Operation & Procedure[edit | edit source]
Syringe Assembly[edit | edit source]
NOTE: Machine shop equipment (i.e drill press and band saw) are required.
- Take the rings and nozzle components from the seasoning injector. Measure the thread value and record for later.
- Take the 316 Stainless Steel rod and cut to the same length as the rod of the seasoning injector. Sand down a small portion of the top of the rod so that it is able to fit inside of the top ring. Using a tap set, thread the top of the rod so that it matches the threads from the top ring.
- Slide the two bottom rings over the rod. Remove the top ring from the injector and epoxy it to the stainless steel rod using metal epoxy. Let cure.
- While waiting for the epoxy to cure, take the 316 Stainless Steel tube and cut to the same length as the shaft of the seasoning injector.
- Take the 316 Stainless Steel cylinder and cut two pucks about the same size. Drill through both pucks so that one will fit the bottom of the rod and the other will allow for the nozzle to be screwed in. (Note: these will be different sizes). The puck that the rod will fit into will be the plunger.
- Using the tape set, thread the nozzle puck so that the nozzle can easily screw in. Weld the nozzle puck to the bottom of the shaft.
- Weld the rod to the plunger.
- Take the syringe accessories out of the package and cut the long, thin tube to create the nozzle. Screw the nozzle into the bottom of the syringe. You should have a fully completed metal syringe.

- Slide the pipe heater over the shaft so that it fits right above the weld.
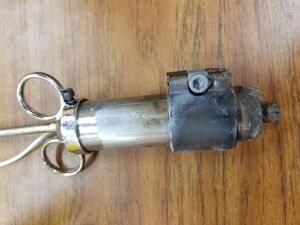
- Wrap at least two layers of insulation around the full shaft of the syringe with heat resistant tape in between to secure.
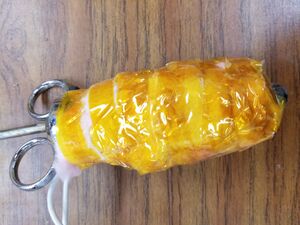
- Wrap at least two layers of insulation foil around the basic insulation. Secure with heat resistant tape.
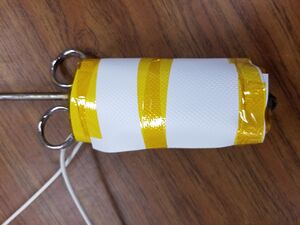
- Wrap the 3D-printed belt around the insulation and secure with two 3 mm screws. The nozzle should be exposed.
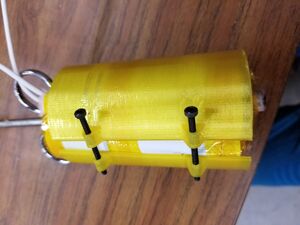
Printer Assembly[edit | edit source]
- Attach the syringe holder to the printer.
- Confirm that the wiring is correct by following the diagram below.
- Set the syringe on the holder and secure with the two hat-screws.
- Confirm that the temperature probe is touching the welded section of the shaft.
Printing Procedure[edit | edit source]
- Turn on the fume hood.
- Turn on the printer. Make sure the fans are operational. If they are not, check wiring.
- Heat up the syringe to the desired temperature by using the temperature controller.
NOTE: The temperature will vary based on placement of the temperature sensor. A normal range is anywhere between 205C and 260C.
- Wait until the syringe is heated and material is flowing steadily out the nozzle.
- Start the desired print. Make sure that the nozzle comes in contact with the metal probe plate. If not, turn off the printer and adjust syringe, or print bed, as needed.
- Wait until the print is completed.
- After print is complete, unplug the temperature controller and wait for the print to cool.
- Once cool, remove from the print bed.
Tips and Tricks[edit | edit source]
TBA
Shutdown[edit | edit source]
To shutdown, turn off the printer and confirm that the temperature controller is unplugged and the fume hood is off.
References[edit | edit source]
[1]Michigan Tech Open Sustainability Technology Lab, "Open source low cost syringe printer", 2019. https://www.appropedia.org/Open_source_low_cost_syringe_printer
[2] Michigan Tech Open Sustainability Technology Lab, "Franklin", 2017. https://www.appropedia.org/Franklin

