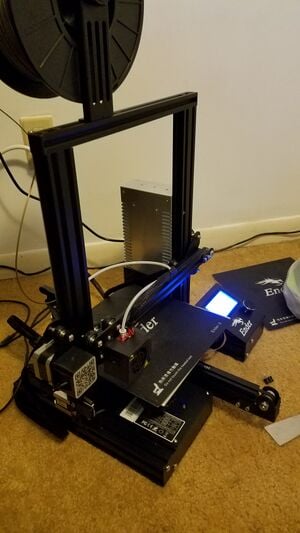
The Ender 3 3D printer is an open-source Creality 3D printer that uses the Marlin firmware. It is easily accessible from the LCD interface on the front of the Ender 3. For more information on Marlin, you can visit Marlin firmware github repository.
The building of the Ender 3 is very simple and takes most people around 2-4 hours from start to finish. This short time is possible due to everything needed for building, such as screwdrivers, allen wrenches, and parts are all included in the package of the Ender 3. The instructions included in the package are pictures without any text. Detailed, written instructions and images are available in the Assembly portion below. This is not a static guide, if there is something wrong with it, or a better way to explain it, please update it to make it as simple as possible.
Printer capabilities/statistics[edit | edit source]
Listed on their website here.
Ender 3 or AthenaII[edit | edit source]
Both of these printers are low cost 3D printers that can be used by inexperienced and experienced 3D print enthusiasts of the like. The AthenaII has been the printer of choice for the MSE4777 class since inception, but with printers like the Ender 3 become cheaper and also fully open-sourced, it begs the question of which printer should be used for the future.
Print Quality[edit | edit source]
From the time testing with the Ender 3 and the AthenaII printer, it depends how much time the user wants to put into it. The Ender 3 gets good print quality once calibrated properly. The AthenaII gets good print quality (and maybe even better than Ender 3) once you calibrate it and set the settings correctly in the slicer program. The AthenaII can also print a lot faster than the Ender 3 with very similar/better results once the user puts the time into it.
Interface[edit | edit source]
The AthenaII uses Franklin which is accessed through a wired connection, which can be made wireless. The user has a lot of tabs to sort through on the top of Franklin and sometimes during prints Franklin will just give up.
The Ender 3 uses Marlin. This is accessed through a LCD screen on the printer itself and for the most part, the knob feels smooth with some occasional hiccups where the knob turning doesn't register properly. The user is shown abstraction in this software by only seeing things that are required which helps navigating the software.
Building[edit | edit source]
The AthenaII build session is a very involved session that can be found here. The Ender build (which can be found below) is a lot easier to follow with a lot less moving parts. Another useful part of the Ender build is that it comes with all the necessary tools to build it, and it even comes with spare screws, extruder heads, and belts.
Modification[edit | edit source]
The AthenaII printer has a lot of modifications due to the MOST Delta mods. Most of them are pretty inexpensive and can completely change the printer into something else, like a Open-source syringe pump or a Open-source metal 3-D printer. The Ender 3 does not have a modding background like the AthenaII has but the Ender 3 has some helpful mods for it.
Summary[edit | edit source]
If the user is an experience 3D printer and has a lot of time to mess with the printer, the AthenaII is the best bet. If this is the users first 3D printer and/or has not too much time to mess around with the printer, the Ender 3 is a better bet. For the best way forward for the MSE4777 class, the Ender 3 printer is the way to go due to its ease of use, quick build time, and a great starting point for a 3D printer since this is the first 3D printer for many of the students in the class.
Files and Bill of Materials[edit | edit source]
Available at Github.
Tools[edit | edit source]
Everything needed to build comes with the Ender 3 package. The only recommended piece you may need is a stronger 2.5mm allen wrench for tightening the threaded rod to the motor shaft.
Before You Begin[edit | edit source]
Review the process below and collect all of the tools and consumables you need to begin the build. The list of tools above is not necessarily exhaustive.
Assembly[edit | edit source]
Assembly is organized by functional group.
Note that all of the pictures in the process can be enlarged by clicking on them.