Sophivorus (talk | contribs) m (Text replacement - "{{OpenKnowHowManifest" to "{{Device") Tags: mobile edit mobile web edit |
mNo edit summary |
||
| Line 13: | Line 13: | ||
|manifest-language=eng | |manifest-language=eng | ||
|documentation-language=English | |documentation-language=English | ||
|countries-of-design=Category:United States | |||
|main-materials=Plastic | |main-materials=Plastic | ||
|estimated-cost-amount=3.57 | |estimated-cost-amount=3.57 | ||
Revision as of 11:58, 17 September 2020
Crawler Harness Holder
Project developed by Charlesz
Link to .STL and FreeCAD Files can be found here Template:Statusboxtop Template:Status-design Template:Status-prototype You can help Appropedia by contributing to the next step in this OSAT's status. Template:Boxbottom
Abstract
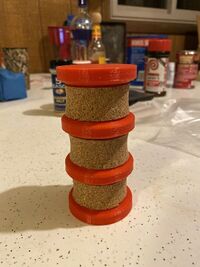
Crawler Harnesses can be cumbersome to keep in your tackle box without a holder and more often than not, if you're walleye fishing, you have a tackle box FULL of crawler harness holders just to keep up. Instead of buying out Dick's Sporting Goods, or not having a place to buy these holders nearby and getting them all tangled, why not print one of your own? This 3D printable crawler harness holder just needs foam or cork to make it very useable as it is a very easy print.

Bill of Materials
- 28m of filament- $1.68 ($20 MatterHackers Build Series and about 330m per kg so $0.06 per meter)
- 1 Tube of super-glue- $0.59
- 1 square foot of foam or cork- $1.30 (4 pack is $5.19 on Amazon)
Total: $3.57 or about $0.43 cheaper than a standard one
Tools needed for fabrication of the OSAT
- MOST Delta RepRap or similar RepRap 3-D printer
- Cutting tool such as scissors or a knife
Skills and Knowledge Necessary to Make the OSAT
- 3D printing
Technical Specifications and Assembly Instructions
- Make sure one end is down on the build plate when slicing, no support should be necessary
- I printed this at 80 mm/s with 25% fill and 0.6mm wall thickness, it shouldn't need to be any stronger or more precise
- Keep the layer height small to avoid the need for supports. I would recommend 0.2mm layer height
- Print should take about 2.5 hours depending on your speeds, infill, wall thickness etc.
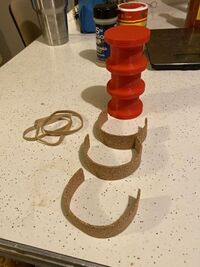
- Once print is completed, cut 3 strips of foam or cork to fit the three smaller diameter sections
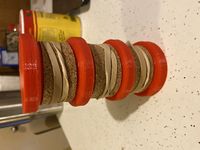
- Glue and use a rubber band or masking tape to hold foam or cork in place until adhesive is dry
- Assembly should take about 10 mins plus additional time for the glue to dry

Common Problems and Solutions
- Avoid adhesives that will not adhere to plastics (like PLA) or foam or cork. This could cause the foam or cork to come off of the main printed part. Instead use a cheap, strong adhesive like plastic epoxy or super-glue.
Benefited Internet Communities
References
- ↑ web page: Cabela's 1996-2019 Available: https://www.cabelas.com/product/BASS-PRO-RIG-NCADDY/3183214.uts?productVariantId=6149353&WT.tsrc=PPC&WT.mc_id=GoogleProductAds&WT.z_mc_id1=02245053&rid=20&ds_rl=1246492&ds_rl=1246531&ds_rl=1247882&ds_rl=1252079&gclid=EAIaIQobChMI34T5l96c5gIVzoCfCh0E3AxNEAQYBSABEgIPuvD_BwE&gclsrc=aw.ds
[[Category:How tos]] [[Category:Electricity]] [[Category:Electric lighting]].
