
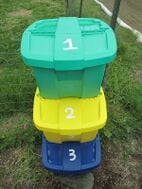
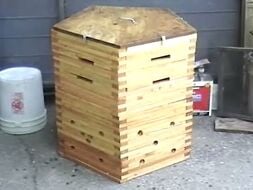
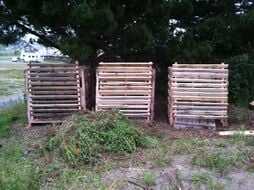
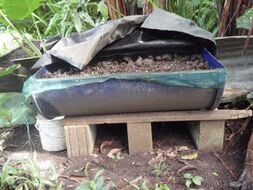
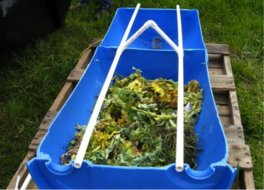
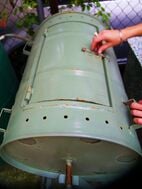
Bin composting is the most popular and advanced version of home composting system that overcomes problems experienced in other composting systems. There are different types of bins available for home composting and generally it varies from 200- 300L in size. These are from different materials such as cement/concrete, plastic, metal, etc. The bins allow higher stacking of composting materials and better use of floor space than free-standing piles. Bins can also eliminate weather problems and reduce problems of odours, and provide better temperature control. At present, most bins are designed to suit the urban landscape as well.
As mentioned before, composting bins are popular in urban areas with emerging solid waste disposal problems and therefore, it is important to give proper guidance to the community in using composting bins. It is identified that some technical and management problems have been the main constraints in popularising the composting bin among citizens.
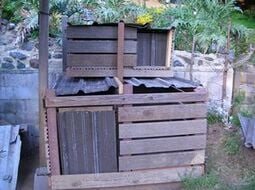
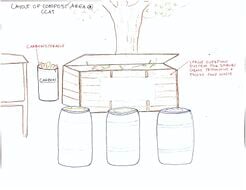
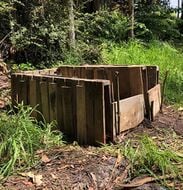
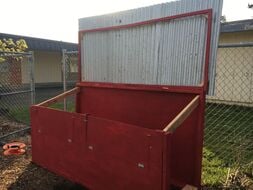
DIY compost bin ideas[edit | edit source]
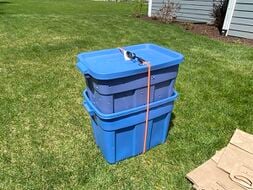
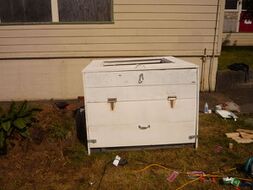
Here are all the Appropedia original projects that show how to make or build a compost bin. Feel free to add your own by creating a page and adding "Compost bin" to the "Instance of" parameter in the project databox.


Considerations[edit | edit source]
The bin design should facilitate the composting process with easy management practices. Therefore, standard bin design should focus on:
- Easy transportation and installation:
- Good aeration (sufficient aeration for all parts of the bin - aeration hole diameter - < 1cm)
- Drain the excess moisture (porous bottom pad)
- Protect from external whether conditions, mainly rain, winds (proper cover or lid)
- Retain the temperature inside (dimensions of the bin and material used for constructing)
- Easy adding and mixing of waste (proper height,easy handling lid)
- Easy removal of compost (size and number of compost removing doors)
- Keeps away from the pest like rats, dogs crows etc.
Durability[edit | edit source]
As management practices, more care should be taken on selecting suitable materials for composting. In most systems, 98% of the biodegradable can be composted without much problem. But in urban areas, as there are space limitations any form of malfunction in the composting process can lead to environmental issues in the surroundings. Malfunctions are caused primarily when non-degradable materials are added to the composting bin. (Table: 1)
How to use a compost bin[edit | edit source]
1. Correct Locating of the bin[edit | edit source]
Bins should be located on a suitable place of the garden with convenient distance from the kitchen (5 - 15 m).This place should not be a water logged area during the rainy season and a good basement is required for a steady installation. The basement should allow the drainage of excess water and it should permit the entry of soil microorganisms, earthworms etc. It is important to ensure that rats or any other pests should not enter tot the bin. It is best that the bin is placed in a sunny area to enable better composting in high temperatures (Thermophlic composting).
2. Adding the materials for composting & maintenance[edit | edit source]
- Fill the bin with household organic waste as alternative layers of kitchen waste and dried garden waste. Do not add inorganic (polythene, plastic, glass, metal) or slow degradable materials like coconut husk, coconuts shells, banana stalk etc.(table:1)
- some twigs and branches can be shredded into smaller pieces so that it accelerate the composting process
- Do not add any problematic materials like meat scraps, fish, dairy products and oily products to the bin (this attract pest). Smaller quantities of above waste can burry in the centre of bin to minimise pest attraction and malfunctions. Further, good monitoring mechanisms are needed to optimise the composting process.
- A minimum volume of material is required to activate composting and therefore, the compost bin must be at least ¾ full for the process to work well.
- Composting cannot occur without moisture and therefore, spray some water to moist the dry materials in a bin. Too much moisture creates anaerobic conditions that can create unpleasant odours (moist but should not squeeze out water from the bin).
- Balance substrate is required for optimum growth of the micro-organisms. One material alone is sometimes not good substrate for composting and it can overcome by mixing different substrate which is rich in different components (e.g. dry garden waste with kitchen waste). Kitchen waste alone provides good substrate for fly breeding and it can minimize by covering a thin layer of dry garden waste.
- Mixing or 'turning' the composting material from time to time will aerate and help composting material break down faster (and also prevent unpleasant odour). The compost must be turned at least once a week.
- Microorganisms in active composting stages produce lot of heat. Therefore, temperature can reach over 60°C in the centre of a bin. This heat is desirable, as it helps to kill weed seeds, pathogens and to break down the materials. Placing the compost bin in a sunny location will also help the compost inside to heat up and decompose faster.
- The lid of the composting bin has to be secured to prevent pests getting in. When pests such as ants and cockroaches enter the bin will also indicate that the material in the bin is too dry.
| Materials to include | Materials to exclude |
|---|---|
| Vegetables/kitchen refuses, Garden trimmings, grass clippings Leaves, dry leaves (straw), Twigs and shredded branches, Food refuses:bread, buns etc, Egg shells Farm animal manure (e.g. Cow, Sheep, Goat, Poultry), Fruit refuses, Wood ash | Non biodegradable waste: polythene,
plastics, glass, metal etc. Human faeces, pet manure(e.g. dog, cat), Dairy Products, Diseased plants, Fish, meat scraps and bones, Slow degradable materials like coconut shells, coconut husk, komba etc. Fats/cooking oils, Hazardous material like batteries, bulbs, electronic components, chemicals |
| Problems | Possible Causes | Solution |
|---|---|---|
| Materials in the bin not decomposing or not heating up at all. | Not enough nitrogen Not enough oxygen Not enough moisture | Make sure you have enough nitrogen rich sources like manure, grass clippings or food scraps. Mix up the materials in the bin, so that it can breathe. Add some water to the bin and make sure there is enough moisture for composting process. |
| Matted leaves or grass clippings are not decomposing. | Poor aeration Lack of moisture. | Avoid adding thick layers of same material. Use of one substrate alone does not provide balance nutrients for microbes. Eg. Leaves, paper, grass clippings. Therefore, shred and mixe such material with other material to help composting easy and faster. Break up the layers and mix the materials in the bin. |
| Stinks like rancid butter, vinegar or rotten eggs. | Not enough oxygen, Bin is too wet, or compacted. | Mix up the bin for aeration so that it can breathe. Add course dry materials like straw, hay or leaves to soak excess moisture. Add dry materials and mix well, if it creates an unpleasant odour. |
| Vermin problem (fly larvae) | Inappropriate materials like meat, dairy products Bin is too wet Poor aeration | Adjust the moisture by adding dry materials or ash. Locate the bin in a sunny place. Heat helps to destroy fly larvae, weed seeds and other pathogens. Switch to a fly-proof closed bin with enough aeration. |
| Odour like ammonia. | Not enough carbon. | Add brown materials like dried leaves, straw, hay, shredded paper, etc. |
| Attracts rodents, flies, or other animals (rats, crows, dogs etc.) | Inappropriate materials (like meat, oil, bones), Material like fresh food is too close to the surface of the bin. | Do not add inappropriate materials to a compost bin (large scale). Switch to a rodent-proof safe bin. |
| Attracts insects, millipedes, slugs, etc. | This is normal in composting and part of the natural degradation process. | Sometimes become a problem. Use proper bin design which can keep away from household pest like cockroaches, slugs, spiders |
| Advantages | Disadvantages |
|---|---|
| Management practices are easy since it eliminates external weather conditions. Minimum animal/pest attractions due to safe bin designs. Improve hygiene conditions of the surrounding environment. Takes less space in the garden. The unit is movable and can locate on any place in the garden. Aesthetically good looking. | High cost for purchasing(Rs. 1000/- to 2500/-).
Improper/poor designs create problems and therefore it can discourage bin users. Need proper maintenance (if proper moisture level is not maintained unpleasant odour, and vermin problems will occur). Some poor designs stops contribution of soil micro-organisms and earthworms to the degradation process. |
Compost collection can be commenced 2-3 months after starting the bin. The time taken for composting depends on the material added to the bin and maintenance practices that are followed. Removed compost must heap up outside (1-2 weeks) for maturation. This reduces the phytotoxic compounds in the compost. In order to obtain a uniform product, this compost is sent through a 4 mm mesh. Oversize particles can be sent back to the bin for further decomposition.