| Line 11: | Line 11: | ||
==Abstract== | ==Abstract== | ||
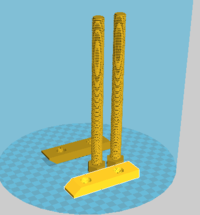
# Picture of completed print using your printer [[Image:Wood_WorkingClamp_Parts.png|200px|right]] | # Picture of completed print using your printer [[Image:Wood_WorkingClamp_Parts.png|200px|right]] | ||
This OSAT prototype is a community comment box where members can drop in comments that can not be removed other than by removing the lock from the back. This fulfills the need for communities to provide a location for honest feedback that can not be tampered with. | This OSAT prototype is a community comment box where members can drop in comments that can not be removed other than by removing the lock from the back. This fulfills the need for communities to provide a location for honest feedback that can not be tampered with. | ||
Revision as of 20:47, 6 December 2016
Title of the device or system
Locked Community Comment Drop Box
Project developed by mcbrand
Template:Statusboxtop Template:Status-design Template:Status-prototype You can help Appropedia by contributing to the next step in this OSAT's status. Template:Boxbottom
Abstract
- Picture of completed print using your printer

This OSAT prototype is a community comment box where members can drop in comments that can not be removed other than by removing the lock from the back. This fulfills the need for communities to provide a location for honest feedback that can not be tampered with.
Bill of Materials
- Provide a full BOM -- Materials needed for fabrication of device and alternative materials if they are not available, prices/sources of non-printable parts
- Upload and link to all source files from open source CAD
- Upload and link to all STLs
Tools needed for fabrication of the OSAT
- MOST Delta RepRap or similar RepRap 3-D printer
Skills and Knowledge Necessary to Make the OSAT
- No special skills are needed
Technical Specifications and Assembly Instructions
- First print both lower box and lid portions of the drop box.
- If support in the print was used, remove the support material so the lid can slide in.
- If no support material was used, simply slide the lid into the grooves and lock it via the holes on the back side.
- Estimated print time for the lower box portion is 7 hours. Estimated print time for the box lid is 2 hours.
- Assembly time is minimal. Simply slide the lid in the slot and lock the box.
Cost savings
- Estimated costs: $3.59
- Commercial equivalent: $11.15 [1]
- $ savings: $7.56
- % savings: 68%