Template:Statusboxtop Template:Status-design Template:Status-model Template:Boxbottom
Connecting Rod Sound Dampener
This page lays out the steps required to convert your current Delta Athena II printer to reduce the rattling of the connecting rods during printing.
Design and Printing
Design
This is a relatively simple design, meant to cover the plastic bags which are actually doing the sound dampening. The plastic parts cover the plastic bag so it doesn't interfere with other components of the printer and the rubber band holds the covers stable.
Printing
These can typically print with no problem, with printing at 20% infill at a speed of 140 mm/s and layer size of .15, this design costs about 20 grams per cover and about 120 g overall. To avoid too tight of a gap on the printed parts, print at about a scale of 110% if you're having problems with getting the parts to slide over the plastic bags after wrapping the connecting rods. Supports should be used to cover the rubber band slot area. 3D Printing Files

Installation
Installation
Below are the assembly instructions and bill of materials indicating what parts you'll need to upgrade your printer.
| Description | Link | Price | Count |
|---|---|---|---|
| Connecting Rod Cover | 3D Print from here: https://www.thingiverse.com/thing:3281225 | $3.20 | 6 |
| Rubber Bands | From Walmart or Amazon : https://smile.amazon.com/AmazonBasics-Assorted-Color-Rubber-Bands/dp/B074B1KCXD/ref=sr_1_5?s=office-products&ie=UTF8&qid=1544710205&sr=1-5&keywords=rubber+bands | $0.10 | 12 |
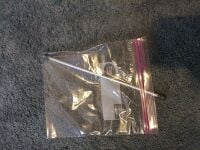
| Plastic Sandwich Bags | From Walmart or Amazon : https://smile.amazon.com/Ziploc-Sandwich-Bags-90-Count/dp/B00RBFGAX8/ref=sr_1_1?ie=UTF8&qid=1544710249&sr=1-1-spons&fpw=pantry&keywords=sandwich+bags&psc=1 | $0.60 | 6 |
Assembly:
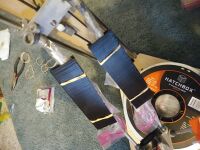
- After taking the connecting rod off of the printer, place a single rod in a sandwich bag with the ball bearing in the corner of the bag.
- Wrap the plastic bag around the connecting rod tight to the cylinder.
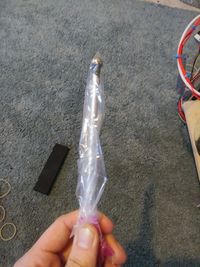
- Push the cover over the plastic bag and rod about midway down the shaft. Be careful not to push so hard you bend the connecting rods.
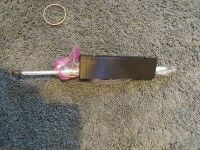
- Place rubber bands around the cover in the indented slots. You may have to double wrap in order to have a tight fit.
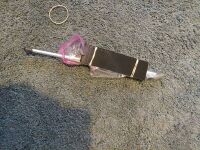
- Reattach the connecting rod onto the printer after lubricating the outside of the plastic on the ball bearing end.


Sound Dampener
This video shows a Yooper Keychain from Thingiverse printing orange Hatchbox PLA at 160mm/s being printed at the same time points by the Athena II without the connecting rod sound dampeners and with the connecting rod sound dampeners for a demonstration of functionality.
| Sound Dampener vs. Normal |
|---|
Error in widget YouTube: Unable to load template 'wiki:YouTube' |
Common Problems
Be careful to not push to hard on the bars to get the plastic bag within the cover, this can cause the bars to bend. If you're having issue with getting the cover to slide over the bar, try printing at a slightly larger scale.