Caliper
Project developed by User:Amherbst Template:Statusboxtop Template:Status-design Template:Status-prototype You can help Appropedia by contributing to the next step in this OSAT's status. Template:Boxbottom
Abstract
Calipers are a useful tool because they provide a bit more accuracy than a standard ruler. This design is 3D printable, and can be modified to change the length, and increment size. It is nowhere as accurate as a digital caliper. But it helps to get rough measurements
Bill of Materials
- PLA
- Superglue
Tools needed for fabrication of the OSAT
- MOST Delta RepRap or similar RepRap 3-D printer
Skills and Knowledge Necessary to Make the OSAT
- Knowledge of how use openSCAD to modify the length and increment size of the caliper
Technical Specifications and Assembly Instructions
- Parts are on on this YouMagine link https://www.youmagine.com/designs/caliper#documents
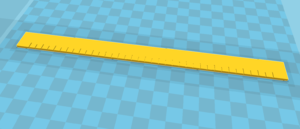
- Print the ruler model either flat on its back or on its side opposite of the increment marks.
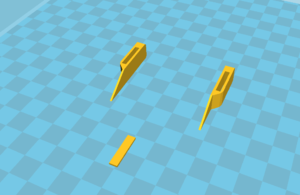
- Print the caliper pieces on either of their sides
- Print both left and right caliper pieces and end cap together to prevent warping.
- Glue left caliper to the left end of the ruler
- Insert right caliper
- Glue end cap to the right end of the ruler to prevent right caliper from falling off.
- 20 minute print time
- 1 minute assembly time
- Ruler:

- Caliper Parts:

- Assembled Caliper:

Common Problems and Solutions
- when the ruler is printed on its back it becomes slightly warped, however this does not effect the functionality of the caliper. Printing the ruler on its side solves this problem.
Cost savings
- 3D printed non-digital Caliper 0.15$
- Digital Caliper 15$-100$
- Minimum savings 14.85$ (99%)
References
- No references were used for this project.