Eli Gooding (talk | contribs) |
Eli Gooding (talk | contribs) |
||
| Line 20: | Line 20: | ||
== Bill of Materials== | == Bill of Materials== | ||
Materials Needed | Materials Needed: | ||
#Filament: 10.88 meter or 32 grams | #Filament: 10.88 meter or 32 grams | ||
#[http://www.amazon.com/C2G-Cables-43036-4-Inch-Cable/dp/B0002GX1XA/ref=sr_1_4?s=electronics&ie=UTF8&qid=1449542683&sr=1-4&keywords=zip+ties Zip Tie] approximately $2.00 | #[http://www.amazon.com/C2G-Cables-43036-4-Inch-Cable/dp/B0002GX1XA/ref=sr_1_4?s=electronics&ie=UTF8&qid=1449542683&sr=1-4&keywords=zip+ties Zip Tie] approximately $2.00 | ||
#[http://www.thingiverse.com/thing:340616 Mountain bike mudguard] | #[http://www.thingiverse.com/thing:340616 Mountain bike mudguard] | ||
== Tools Needed== | == Tools Needed== | ||
Revision as of 05:19, 8 December 2015
Bike Fender Extension
Project developed by Eli Gooding (talk) 19:59, 7 December 2015 (PST)
Template:Statusboxtop Template:Status-design Template:Status-prototype You can help Appropedia by contributing to the next step in this OSAT's status. Template:Boxbottom
Abstract
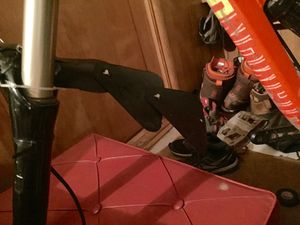
This OSAT project is to build upon previous bike fender creations. This is an extension to the "Duck Flap" bicycle mud flap. This is intended to cover the gaps that the Duck Flap does not cover and to extend as far as the user can print. This is appropriate for the practical user that is tired of the excess mud and liquids flying onto the user's person while riding a bicycle.
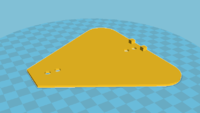
Fender has proven to be difficult to print and extremely brittle when printed. The large surface area of the extensions and fender cause difficulty when print bed is not level. If the user is running large tires (2.4 inch wide) the fender has minimal room for error so print wisely.
Finished Product: Bike Extension


Bill of Materials
Materials Needed:
- Filament: 10.88 meter or 32 grams
- Zip Tie approximately $2.00
- Mountain bike mudguard
Tools Needed
- MOST Delta RepRap or similar RepRap 3-D printer
- 3mm drill bit for mud flap alterations.
Skills and Knowledge Necessary
- Appropriate zip tie application
Technical Specifications and Assembly Instructions
- Estimated Print Times:
- Mud flap: 1.5 hrs
- Extensions 2 hrs
- Assembly Time: 5 minutes
Assembly
- Print all components
- Mud Guard
- Mud guard extension; as many as desired.
- Use the 3mm drill bit to ream two holes in the mud flap.
- This can easily be done by placing the square end of the extension on top of the thinner section of the mud flap to ensure correct placement for the holes.
- After reaming, keep the extension on top of the flap.
- Feed Zip tie through top side of extension and through mud flap and back through the unused hole.
- Repeat step 4 for each extension.
Common Problems and Solutions
- Print does take up a significant amount of bed space.
- Make sure bed is level and up to snuff.
Cost savings
- Pricing and Equivalents have been linked to the components
| Component | 3DP | Cost |
| Duck Flap | No | $12.99 |
| 3DP Duck Flap | Yes | $0.52 |
| 3DP Extension | Yes | $0.83 |
| Zip Tie | Yes | $2.00 |
| Total Savings (Non3DP-3DP) | ---> | $9.64 |
References
- 3DP pricing has been associated to the Black Hatchbox filament with including shipping from Amazon.