The printable version is no longer supported and may have rendering errors. Please update your browser bookmarks and please use the default browser print function instead.
Constructing the Lower Platform
Before You Begin:
Make sure you have the everything to build the lower platform:
Hardware:
3 – M3x35mm socket head screws
12 – M3 x 10mm socket head screws
3 – M3 ny-lock nuts
18 – M3 Flat Washers
Electronics
3 – Nema 17 Motors
Printed Parts:
3 – Motor Ends
3 – Platform Spacers
Required Tools:
2.5mm Alan Wrench
5.5mm Combination wrench
Recommended Tools:
3mm or 1/8” Drill bit
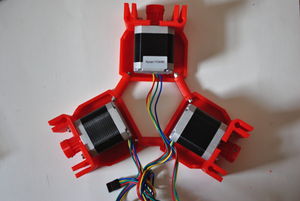
Building the lower platform:
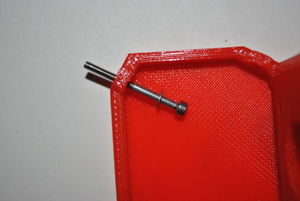
Take 1 M3 x 35mm and put 1 washer on it. Insert it into one of the two holes opposite the motor mount.Step One
Place the platform spacer on the screw with the flat part down.
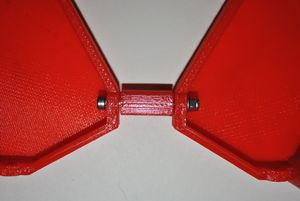
Place another motor end on the screw, followed by 1 washer and 1 ny-lock nut. Do not tighten the nut all the way, keep the nut loose, in order to attach the other two platform spacers. Repeat steps 1-3 for the rest of the motor mounts and spacers. One complete, tighten all the screws and nuts.Steps 2 & 3
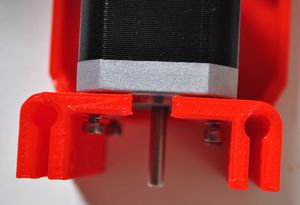
Now it is time to mount the motors. Start by taking 1 Nema 17 and inserting it into the slot on the motor mounts.
Take 4 M3 x 10 and 4 Washers and screw them into the motor through the Screw holes in the motor mounts. Tighten the screws. Repeat steps 4 & 5 for the rest of the motor ends. Be sure to keep all the wires facing toward one side.Steps 4 & 5Steps 4 & 5
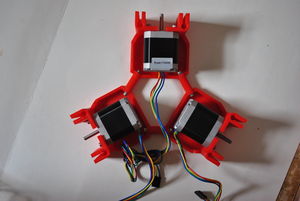
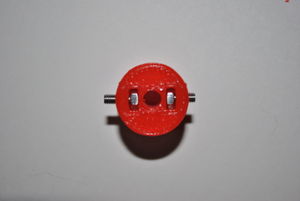
Take the belt pulley and insert a nut into each of the nut traps. Thread a set screw into each of the nuts through the holes in the side of the pulley.Step 6
Slide the pulley onto the motor shaft. It should go on only one way. The nut-trap side should be facing away from the motor. Th other side of the pulley should be a millimeter or 2 from the motor.Step 7
Repeat steps 6 & 7 for all the motors. The lower platform is now done.Final Platform