An Introduction to AFM – Atomic Force Microscopy

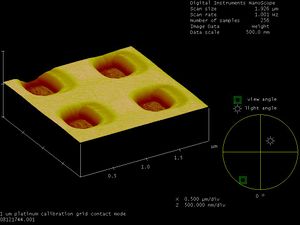
An W (AFM) is a microscopy device that allows for high-resolution imaging at the nanoscale. AFMs function by moving a tip across the sample's suface and detecting the small changes in vertical deflection of the tip in response to the topography of the material. AFMs can image at incredibly high resolutions, easily surpassing the limits of optical microscopy, and can even detect individual atoms using special techniques.
The following sections outline the capabilities and procedure for the atomic force microscope available in Nicol Hall at Queen’s University. It is the property of the Materials Physics group, and requests for use should be directed to Ms Chelsea Elliott.
General Procedure
Be sure to check the manuals around the lab for a complete description of the procedure. Listed here are some of the key points for safe and responsible operation of the equipment.
- When ready to power on, first power up the desktop computer and start the software, Nanoscope SPM v5 (note: there is no password for logging into the computer). Next, plug the cable into the AFM unit located on the vibration-isolation table and power on the controller box before powering on the AFM unit using the switch on the top left side of the base of the microscope (Note: Feed the cable to connect the AFM to the controller through the slot on the right side of the vibration isolation table, DO NOT let the lid close over the cable as it will crush it). This ensures that the microscope will always be in control and will help to avoid damaging the equipment or test samples.
- To load a probe, remove the head on the microscope very carefully. Unplug the black power cord which connects the head to the base of the microscope then remove the springs on either side of the head. Hold the head carefully with one hand during removal, and be careful not to look into the head from the bottom, as the imaging laser shines out in this direction.
- When installing a probe, be careful to note which direction is up (there will be a small lip around the base of the tip, as visible from the top of the tip once mounted). Also note that there are two triangular tips on each end of the probes used for contact mode (each one being triangular and having a unique spring constant). The probes used for tapping mode have only one tip on one end.
- The AFM in Nicol hall can be operated with a variety of detector heads, each offering different sample stage sizes and resolutions. The available heads include a J-Head (100um by 100um), E-Head(10um by 10um), and an A-Head (400nm by 400nm).
Manuals
There are several manuals around the lab related to use of the software, controller and microscope. Complete information for operation of the microscope system is somewhat scattered through these manuals. The following provides a list of the type of information found in each manual. Note that all manuals are published by Veeco, and are related to Part Number 004-130-000 (standard).
- Nanoscope 6.11 Software: This manual outlines use of the software. Note that there are different software profiles required for each of the modes of the microscope (i.e. tapping, contact, fast mode, etc.). In addition to allowing the input of parameters for operation of the microscope, the software provides basic image analysis tools such as rotation and producing a three-dimensional image. Another key feature of this manual is the list of example input parameters it contains for both tapping and contact mode. For more information, see page 17.
- Nanoscope IV Controller: Instructions for the installation and modification of the controller are outlined in this manual. Note that standard operation (in tapping and contact modes) can be conducted without alteration to the operation of the controller. An important point: always ensure that the computer is on before turning on the controller, and turn off the controller before turning off the computer. This will prevent serious damage to the controller, computer, microscope, samples and probes.
- Scanning Probe Microscope: This manual outlines specific operation of the microscope unit itself. It describes the pros and cons of contact/non-contact/tapping mode (pp. 12), probes (pp. 21), and abbreviated instructions for operation of the microscope (pp. 29).
Other important documents in the lab for operation of the microscope include:
- Multimode AFM Checklist: Described here are the key points for safe, accurate operation of the AFM. This document should be consulted first before any of the equipment is operated. It outlines the basic information for use of the machine, with the rest of the available documentation providing more in-depth instruction. This document can be found in the black plastic folio in the lab, titled AFM Handbook.
- Introduction to AFM: A document produced by the Materials Physics group, this document outlines the basic calibration and operation instructions for the AFM.
- Command Reference Manual: Software version 5.12 Rev. B: This large book provides complete instruction for operation of the computer software to control the AFM and capture useful images of samples.