Cross-cut Saws[edit | edit source]
TYPES OF CROSS-CUT SAWS[edit | edit source]
If cross-cut saws are used, a comprehensive tool outfit is required. The saw must be well maintained in order to make the job easy and efficient. Properly maintained saws require less energy in use and increase production.
The saw should be made of high-quality steel. For large trees, a straight-back type of saw is preferable (1a) and for small to medium trees a hollow-back type. The cutting edge should be thicker than the back in order to reduce friction and the risk of "binding". The length of the saw should be 100 cm plus the diameter of the tree. The saw should be fitted with detachable handles (1b) which can easily be screwed on and off. A protective cover (1c) is needed to guard the cutting edge during transport.
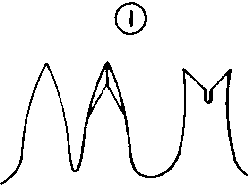
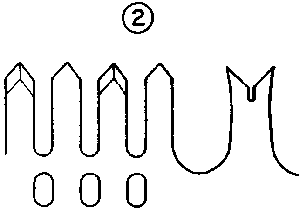
Peg-tooth type saws are common because they are easy to maintain (2a).
Raker-tooth type saws are preferred by professional workers. They cut faster but require more skill in maintenance (2b).
Saw teeth must do three things:
- cut through the fibres;
- break loose the cut fibres;
- remove the loose fibres (sawdust) from the kerf.
In peg-tooth saws, these three things are done by one tooth. In raker-tooth saws the first of the three actions is done by a group of cutters cutting on alternate sides of the kerf. The second and third actions are done by the raker following the group of cutters.
Figure
Figure
MAINTENANCE TOOLS FOR CROSS-CUT SAWS[edit | edit source]
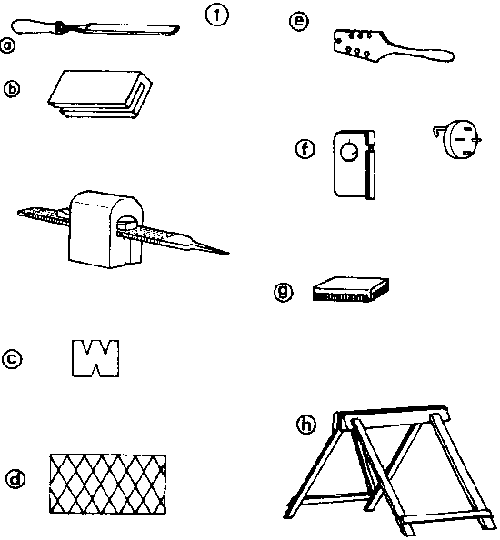
The following maintenance tools are necessary for peg-tooth type saws:
(1a) Millsaw file (single cut)
(1b) Jointer, commercial or self-made using a worn file
(1c) Angle gauge
(1d) Filing grid
(1e) Setting iron
(1f) Setting indicator, commercial or self-made
(1g) Whetstone
(1h) Filing vice
(The self-made setting indicator consists of a piece of wood with three metal pins of the same length in a fixed position and an adjustable screw-type pin.)
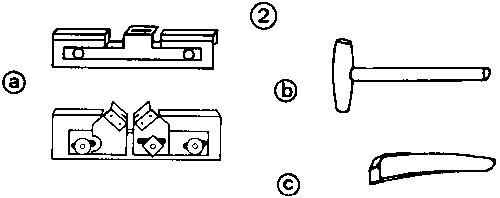
For raker-tooth type saws, the same maintenance tools are needed, except for the following differences:
- a raker adjuster (or a combined raker adjuster and shaper) (2a) is necessary; and
- a setting hammer (2b) and a setting anvil (2c) replace the setting iron.
Figure
Figure
FILING VICES, SELF-MADE[edit | edit source]
A filing vice holds the saw firmly in position during maintenance. Peg-tooth saws are held vertically. Filing vices for raker-tooth saws must hold the saw-blade firmly in vertical and oblique positions that can be easily changed. Opening and closing should be easy. Saw vices must have a length of at least 50 cm, preferably more. They must be steady. The saw should be held at the height of the worker's elbow allowing a comfortable working position whether he is standing or sitting.
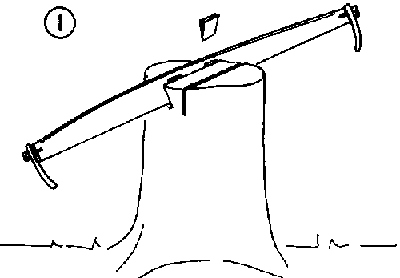
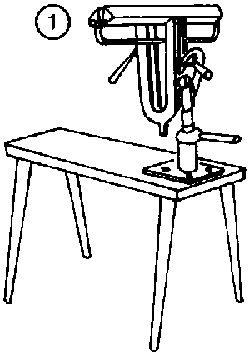
A filing vice can easily be made from a standing tree of no or little commercial value sawn off at elbow height. As required, vertical and oblique cuts are made into the stump. The saw can be firmly held in these cuts by using small wooden wedges (1).
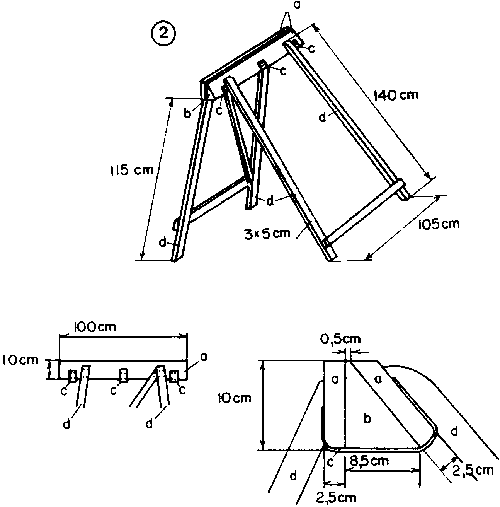
The Swedish saw vice (2) is built of two boards (2a) enclosing a wedge-shaped centre piece (2b) and connected by three leather straps (2c). Four wooden legs (2d) are screwed on to these boards. When the vice is erected, the saw is held between one of the two boards and the centre piece in a vertical or oblique position.
The Swedish saw vice can be made easily from locally-available materials and is easily transportable.
Figure
Figure
FILING VICES, COMMERCIALLY-MADE[edit | edit source]
Commercially-made filing vices are available in various types. Two handy examples are given:
The Swiss filing bench has the advantage of enabling the worker to sit during filing (1).
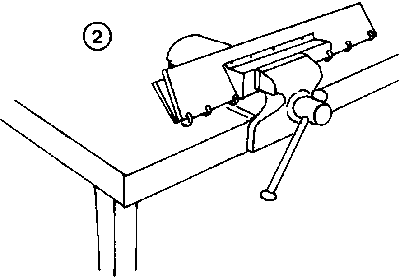
An engineer's vice can be used as a filing vice by inserting two pieces of wood in a vertical position connected with flap hinges between the vice jaws. An oblique position of the saw can be arranged using two wedges (2).
Figure
Figure
MAINTAINING A PEG-TOOTH CROSS-CUT SAW[edit | edit source]
The following measures are recommended for triangular teeth:
|
Hardness of wood |
Distance between points of two teeth |
Height of tooth |
Width of gullet between two teeth |
|
Hard |
17 mm |
16 mm |
|
|
Soft |
9 mm |
12 mm |
|
|
Mixed hard and soft |
14 mm |
15 mm |
|
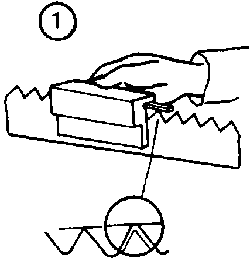
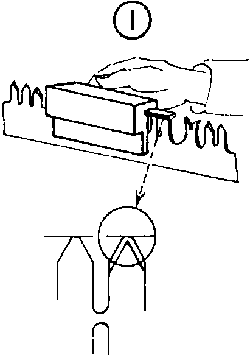
Maintenance starts with jointing while the saw is firmly held in a vertical position by the filing vice. The jointer is run along the saw teeth using very little pressure (1). In normal use, the teeth in the middle of the saw will wear more quickly than those at the end. This is adjusted by increased pressure at the beginning and the end of the jointing stroke.
The jointing is continued until all cutter teeth show a small "flat" and jointing should stop when this happens. One or a few (if evenly distributed) badly worn or broken teeth are not considered. Further jointings will bring them back into the tooth line.
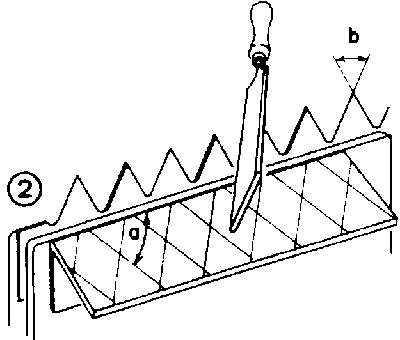
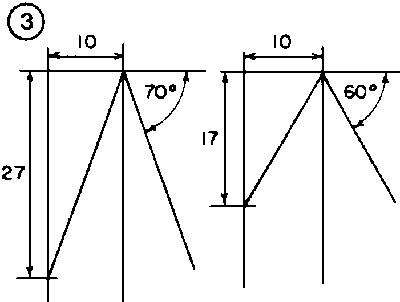
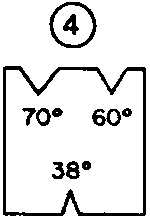
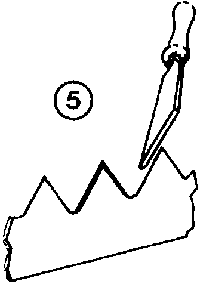
Cutter teeth filing is done with a 20 cm millsaw file using horizontal strokes parallel to the lines of a grid attached to the vice (2). The sharpening angle marked on the grid (2a) is 70° for hard wood and 60° for soft wood. These angles may be copied from figure 3. The top angle (2b) is 38° for hard and soft wood. A gauge is needed to check the sharpening angle and the top angle (4). During filing, the gullet should be lowered at the same time (5). First file one side of the saw, tooth by tooth, and then turn the saw and file the other side. Care must be taken to stop filing when the flat is about to disappear.
Deburring is done with the whetstone, the fine side of which is run lightly along both sides (as for raker-tooth saws, see page 38).
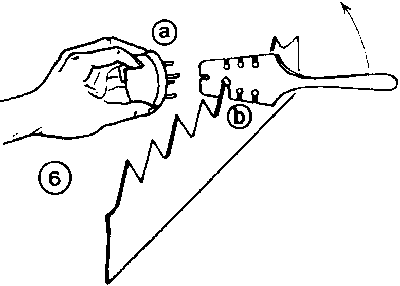
Setting is carried out with a setting indicator (6a) and a special saw set (6b). The correct set is 0.3-0.4 mm for hard wood and 0.5-0.6 mm for soft wood.
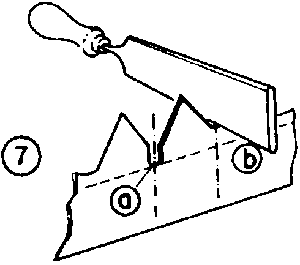
Note: Badly worn saws may need gulleting before sharpening begins. This is best done after having marked the gullet depth and position (7a). The round edge of the millsaw file is used for gulleting (7b).
Figure
Figure
Figure
Figure
Figure
Figure
Figure
TYPES OF RAKER-TOOTH CROSS-CUT SAWS[edit | edit source]
The raker-tooth cross-cut saw is the most efficient type of saw for felling and cross-cutting. This type of saw is recommended for professional use.
There are two types: one raker followed by two cutters (Champion teeth BM1) for harder wood (1) and one raker followed by four cutters (Lance teeth, 4 YM1) for softer wood (2).
1 According to International Organisation for Standardisation.
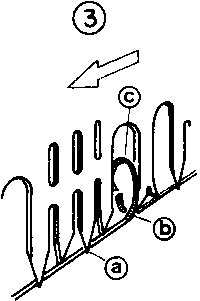
The raker's work can be compared with that of a plane. It removes the fibres (3b) which are cut on both sides of the kerf by the cutters (3a). The raker must be slightly shorter than the cutters so that it will not break off uncut fibres. However, if too short, it will not sufficiently break loose the cut fibres and the cutters will jam in the kerf. A gullet of sufficient depth is needed to hold and transport the sawdust (3c).
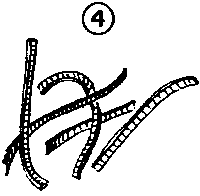
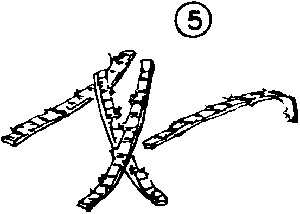
Correct raker depth produces long chips with clean edges (4); if the raker depth is too long, chips tend to have whiskers (5); if too short, fine sawdust is produced.
Figure
Figure
Figure
Figure
Figure
MAINTAINING A RAKER-TOOTH CROSS-CUT SAW[edit | edit source]
Maintenance work follows the same pattern as for peg-tooth saws except that, additionally, raker adjustment is needed. The saw is held at all times in a vertical position during maintenance work.
Jointing is done in exactly the same way as for peg-tooth saws (1).
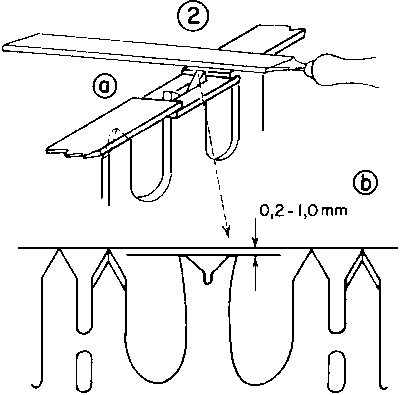
Raker adjustment. The raker adjuster, correctly set, is placed over a raker (2). Holding the tool firmly against the saw, the raker is filed flush with the tool guide plate (2a). The raker depth should be 0.2-0.5 mm for hard wood and 0.6-1.0 mm for soft wood (2b). The correct depth must be found under working conditions and will be indicated by properly-shaped saw chips.
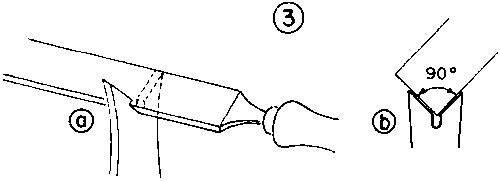
Raker filing is done after adjusting the raker height (3). It is continued until the flat is as small as possible. Horizontal file strokes are used (3a). The raker angle should be 90°. It can be checked easily during filing with the top end of the mill-saw file (3b).
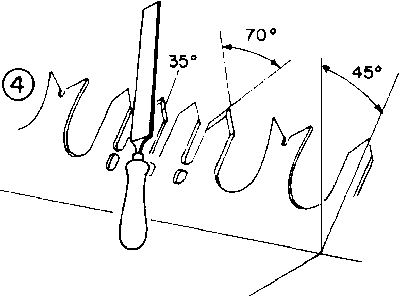
Cutter teeth filing is done with the saw in the oblique position (4). A top angle of 70 and a side angle of 35 must be produced. Filing strokes should not exceed 60 per minute. The full length of the file is used and an even pressure put on the file. Check the angles with the gauge frequently and when the flat almost disappears, tap the top of the tooth with the file handle or small piece of wood. This gives a true picture of how much flat is left. The last strokes with the file must be very gentle. Sharpening is finished when the flat is just about to disappear.
Figure
Figure
Figure
Figure
Deburring. Put the saw in a vertical position. The fine side of the whetstone is run along both sides of the saw to remove burrs (1). Be careful not to touch the sharp teeth with the fingers.
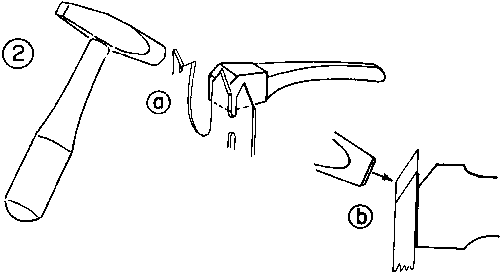
Setting (2). Check that the saw is held very firmly in the vice. For a right-handed man, the left arm is put over the saw, taking care not to catch the saw with the arm or body, and the anvil held in the left hand. Those teeth with the bevels towards the body are set first. The anvil is placed against the back of the cutter. The cutter is set with short and firm strokes of the setting hammer held in the right hand (2a, 2b).
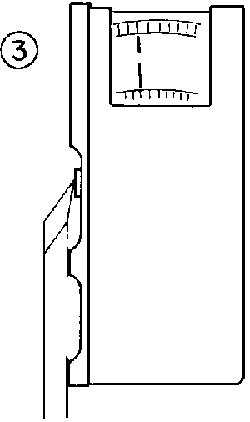
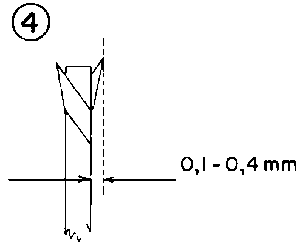
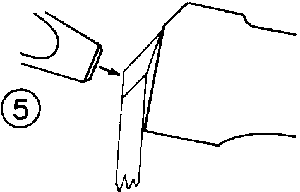
The setting indicator is used to check the set of each tooth (3). The correct saw set for hard wood is 0.1-0.2 mm, for soft wood 0.2-0.4 mm (4). Insufficient set is corrected at once by further hammer strokes. If the set is too great it is removed with the setting hammer after the position of the anvil has been changed (5). After setting one side, the saw is turned round and the other side is set.
Note: The first six teeth on either end of the saw need no setting.
Setting normally follows cutter teeth filing but the order can also be reversed.
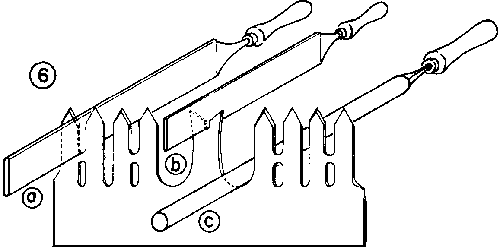
Deepening of gullets. At intervals of about four weeks, it is necessary to deepen the gullets on the cutters (6a) and the gullets between the rakers (6b) with the millsaw file and the big gullets between the rakers and the cutters (6c) with the round file.
Figure
Figure
Figure
Figure
Figure
Figure
MAJOR OVERHAUL OF CROSS-CUT SAWS[edit | edit source]
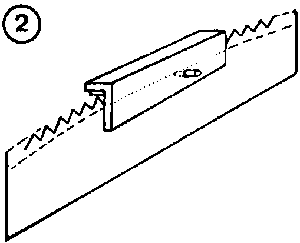
If saws become badly out of tooth line, it is necessary to adjust the tooth line. This can best be done by using a new saw which is properly shaped as a model. Its tooth line is marked with a scribe on the old saw (1). A second line is drawn underneath at the correct gullet depth. This can also be done after jointing with a scribe attached to the jointer (2). The position of tooth points is also marked on the old saw to avoid incorrect spacing.
If a new saw is not available, a thin flexible board (or a straight-back saw) can be used to draw the desired curve (3). It is fixed on both ends and bent in the middle to the correct tooth line shape. If a straight line (3a) is drawn between the two ends of the board, the correct curve is obtained if the middle of the board is bent outward (3b) by 7 cm for 1.5 m saw length, by 8 cm for 2.0 m saw length and 9 cm for 2.5 m saw length.
Reshaping the curve according to the new tooth line marked on the saw is facilitated if shears can be used instead of files. Shears may be found in central workshops.
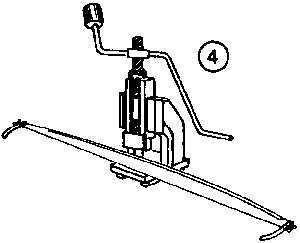
Use of a press
In central workshops, it may also be useful to provide a press for deepening gullets and reshaping worn saws (4). This saves files and time.
Figure
Figure
Figure
Figure


