This special page shows all uploaded files.
| Date | Name | Thumbnail | Size | Description | Versions |
|---|---|---|---|---|---|
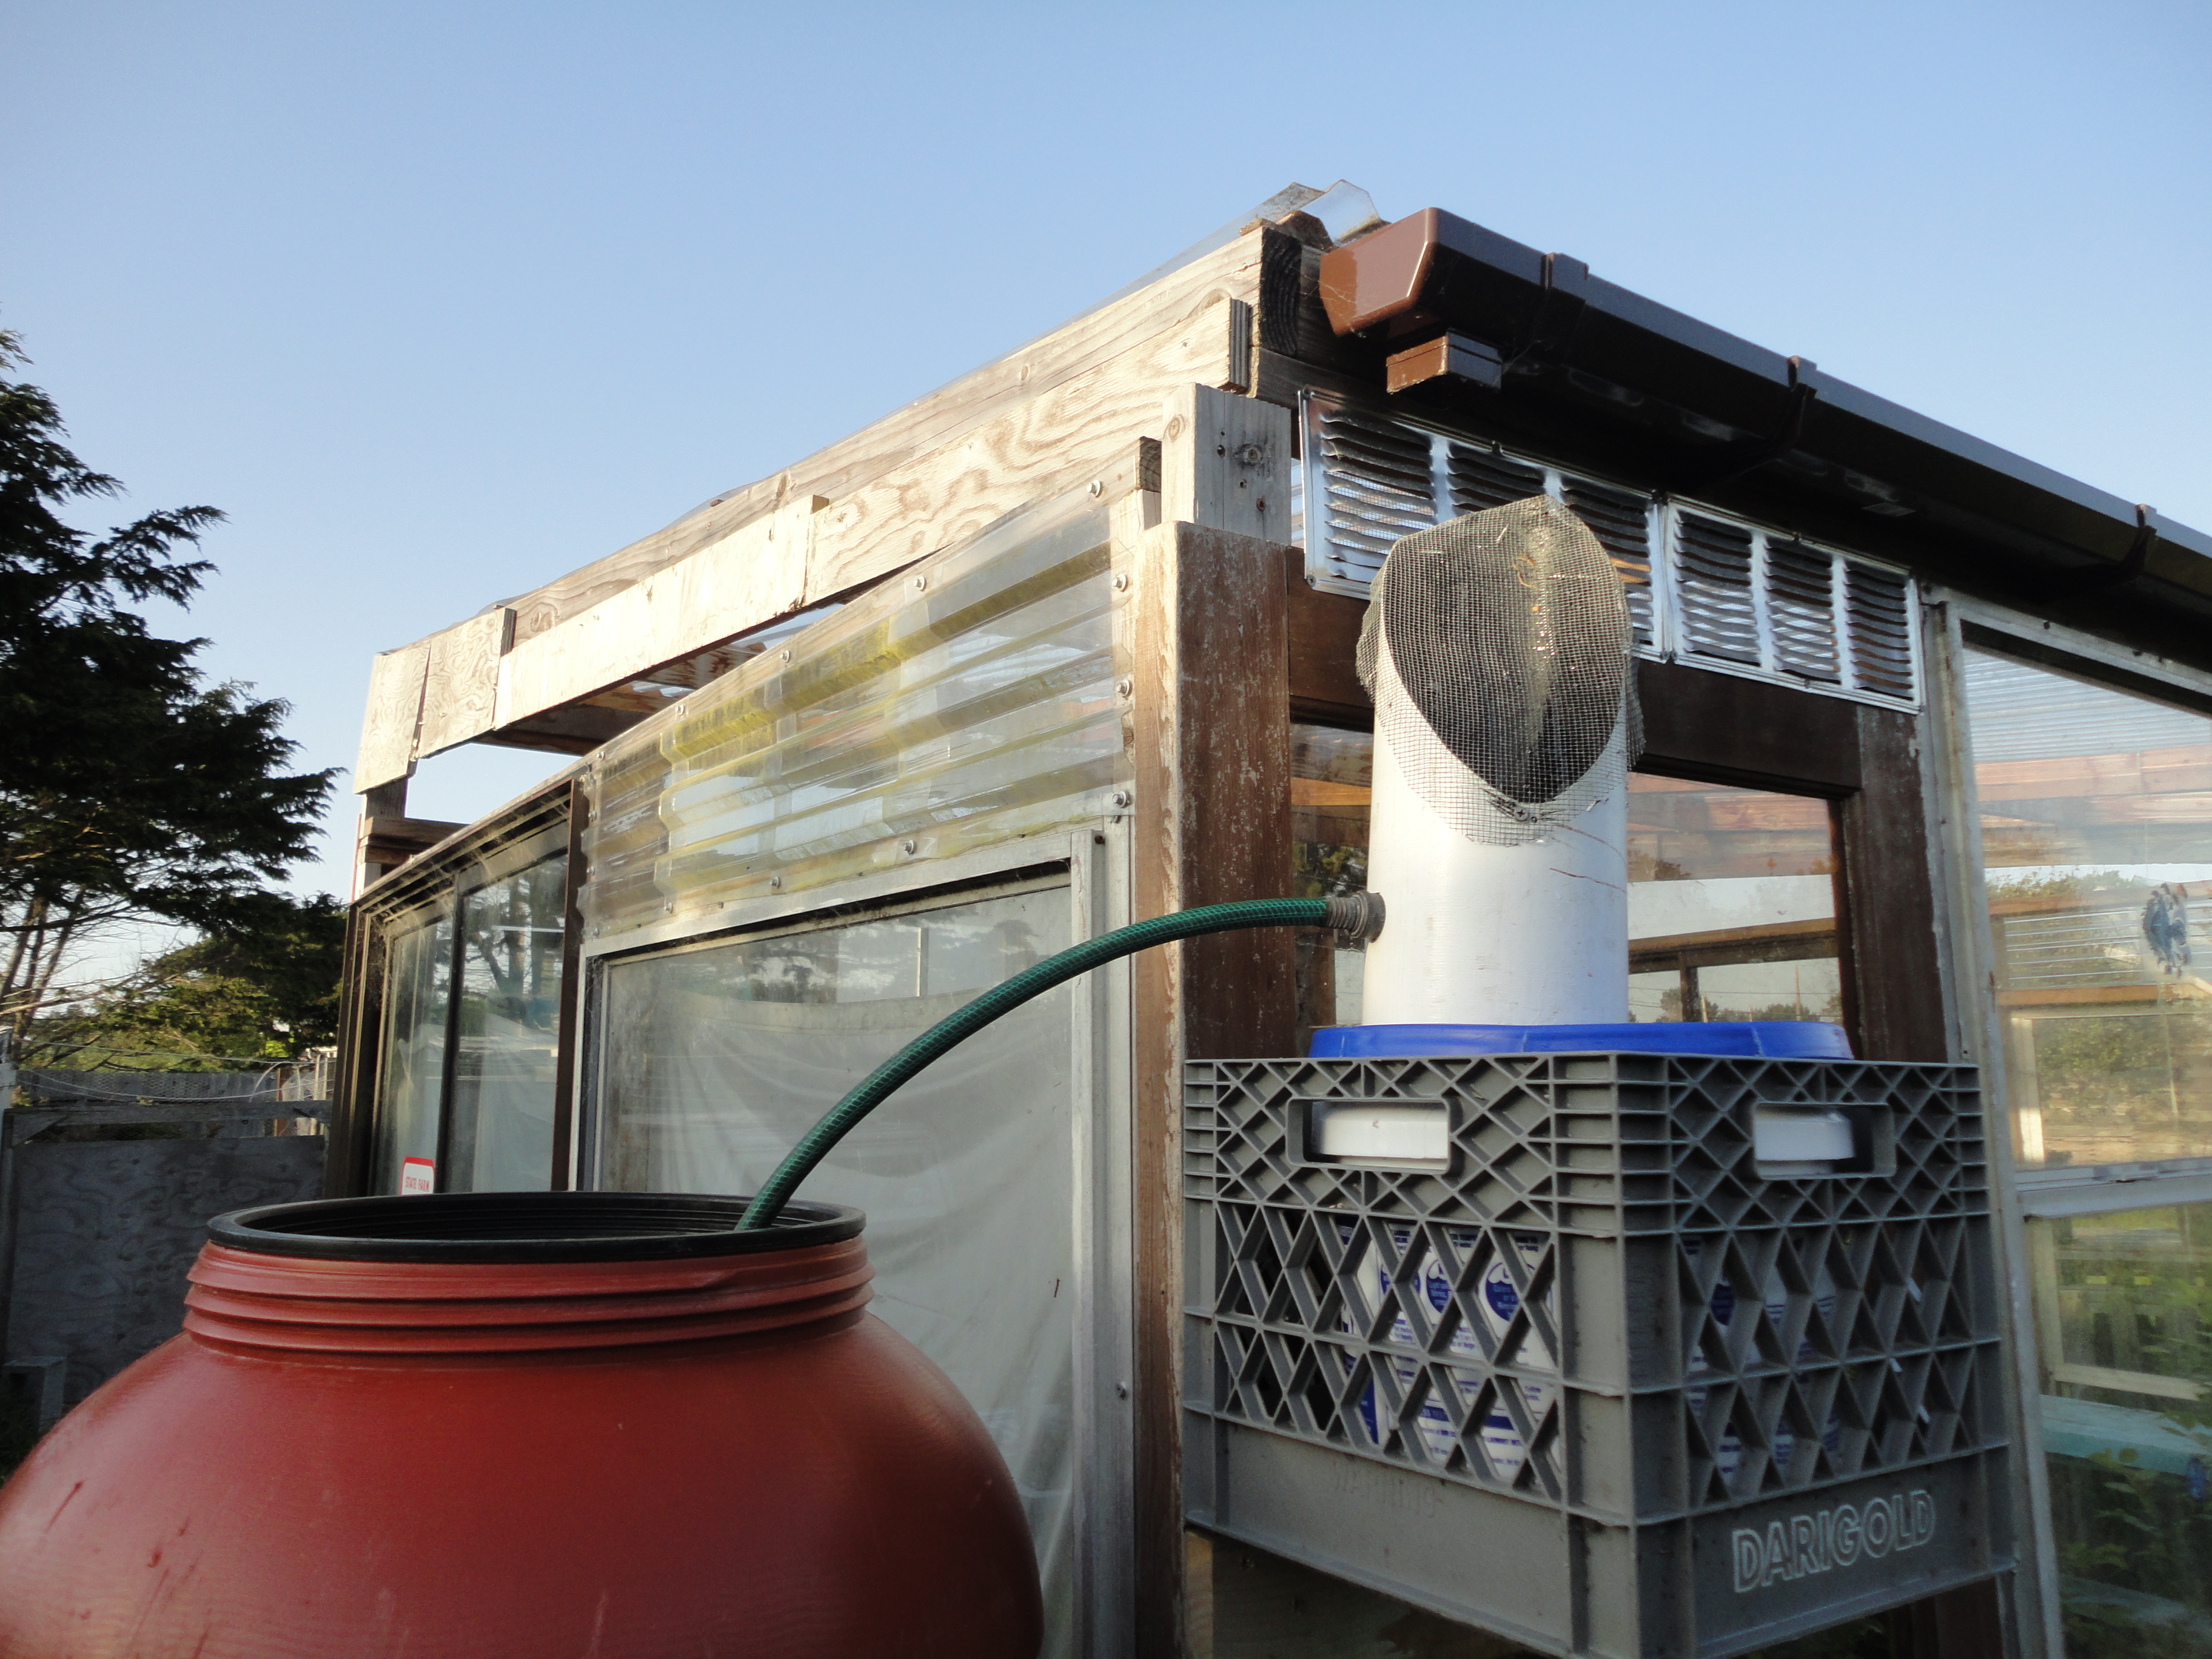
| 06:56, 7 May 2012 | Taking a closer look at the rainwater catchment system.JPG (file) |  |
4.1 MB | Here is a close up of the first flush and large debris catchment system. | 1 |
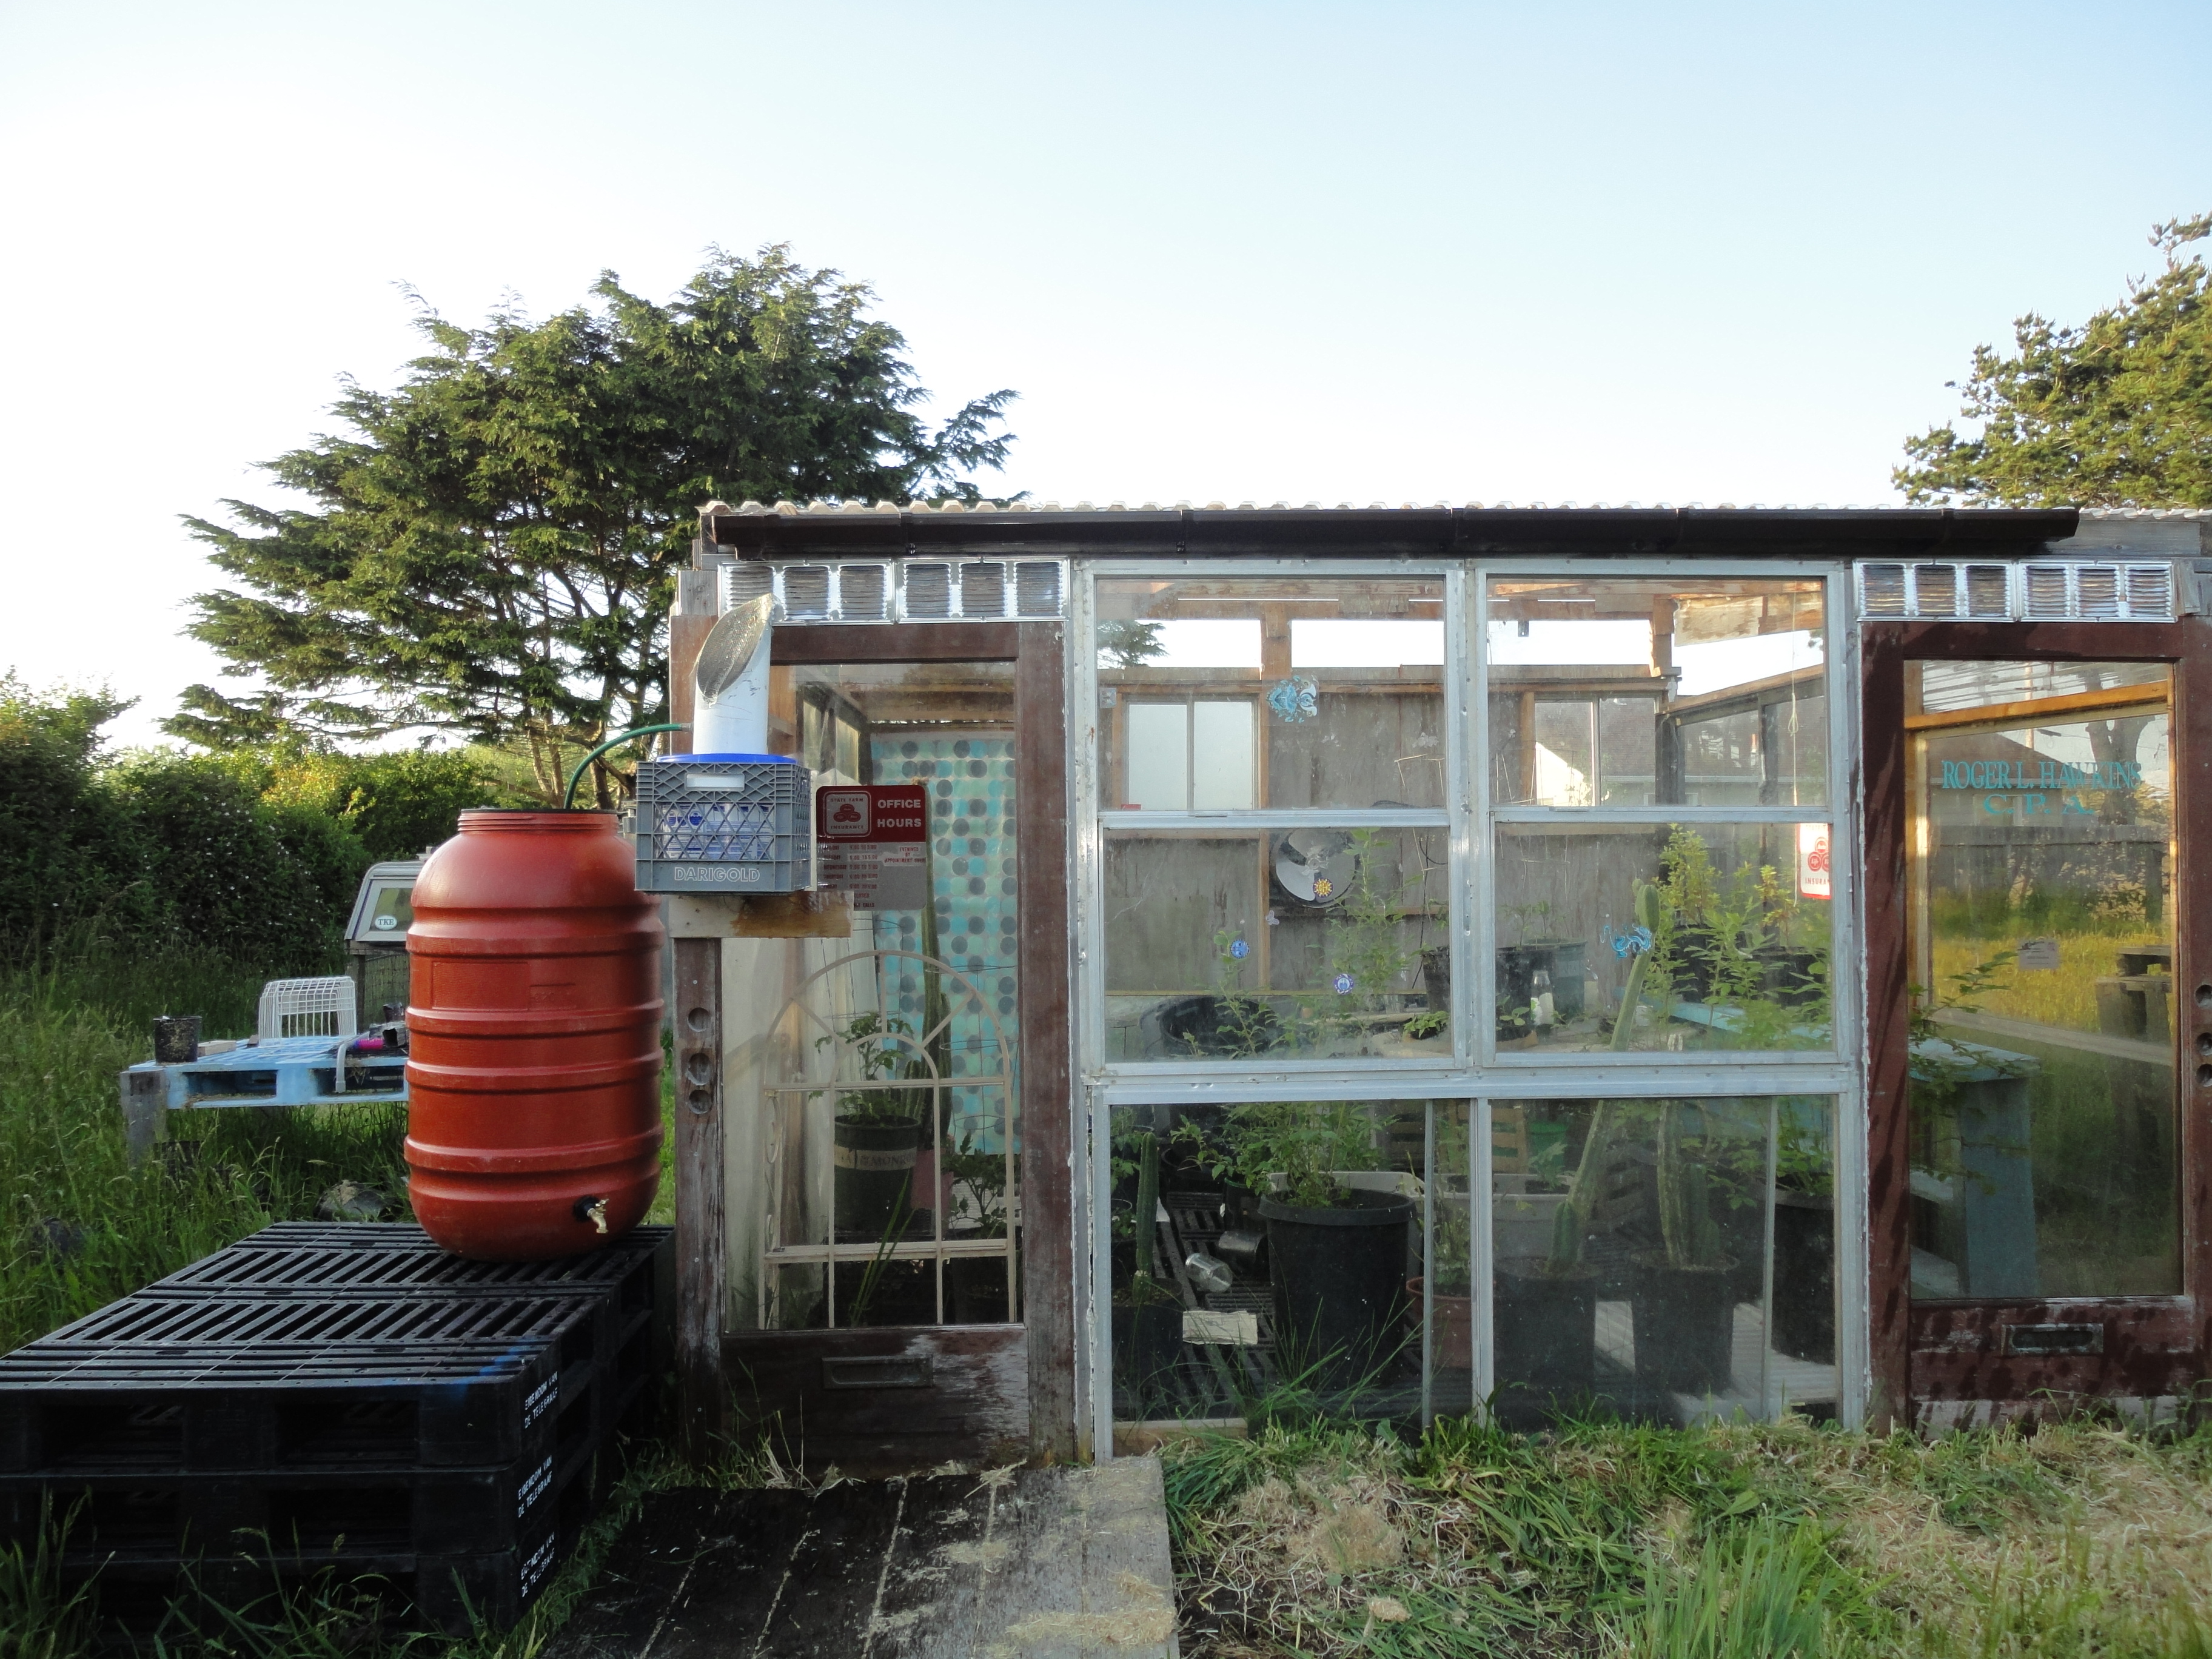
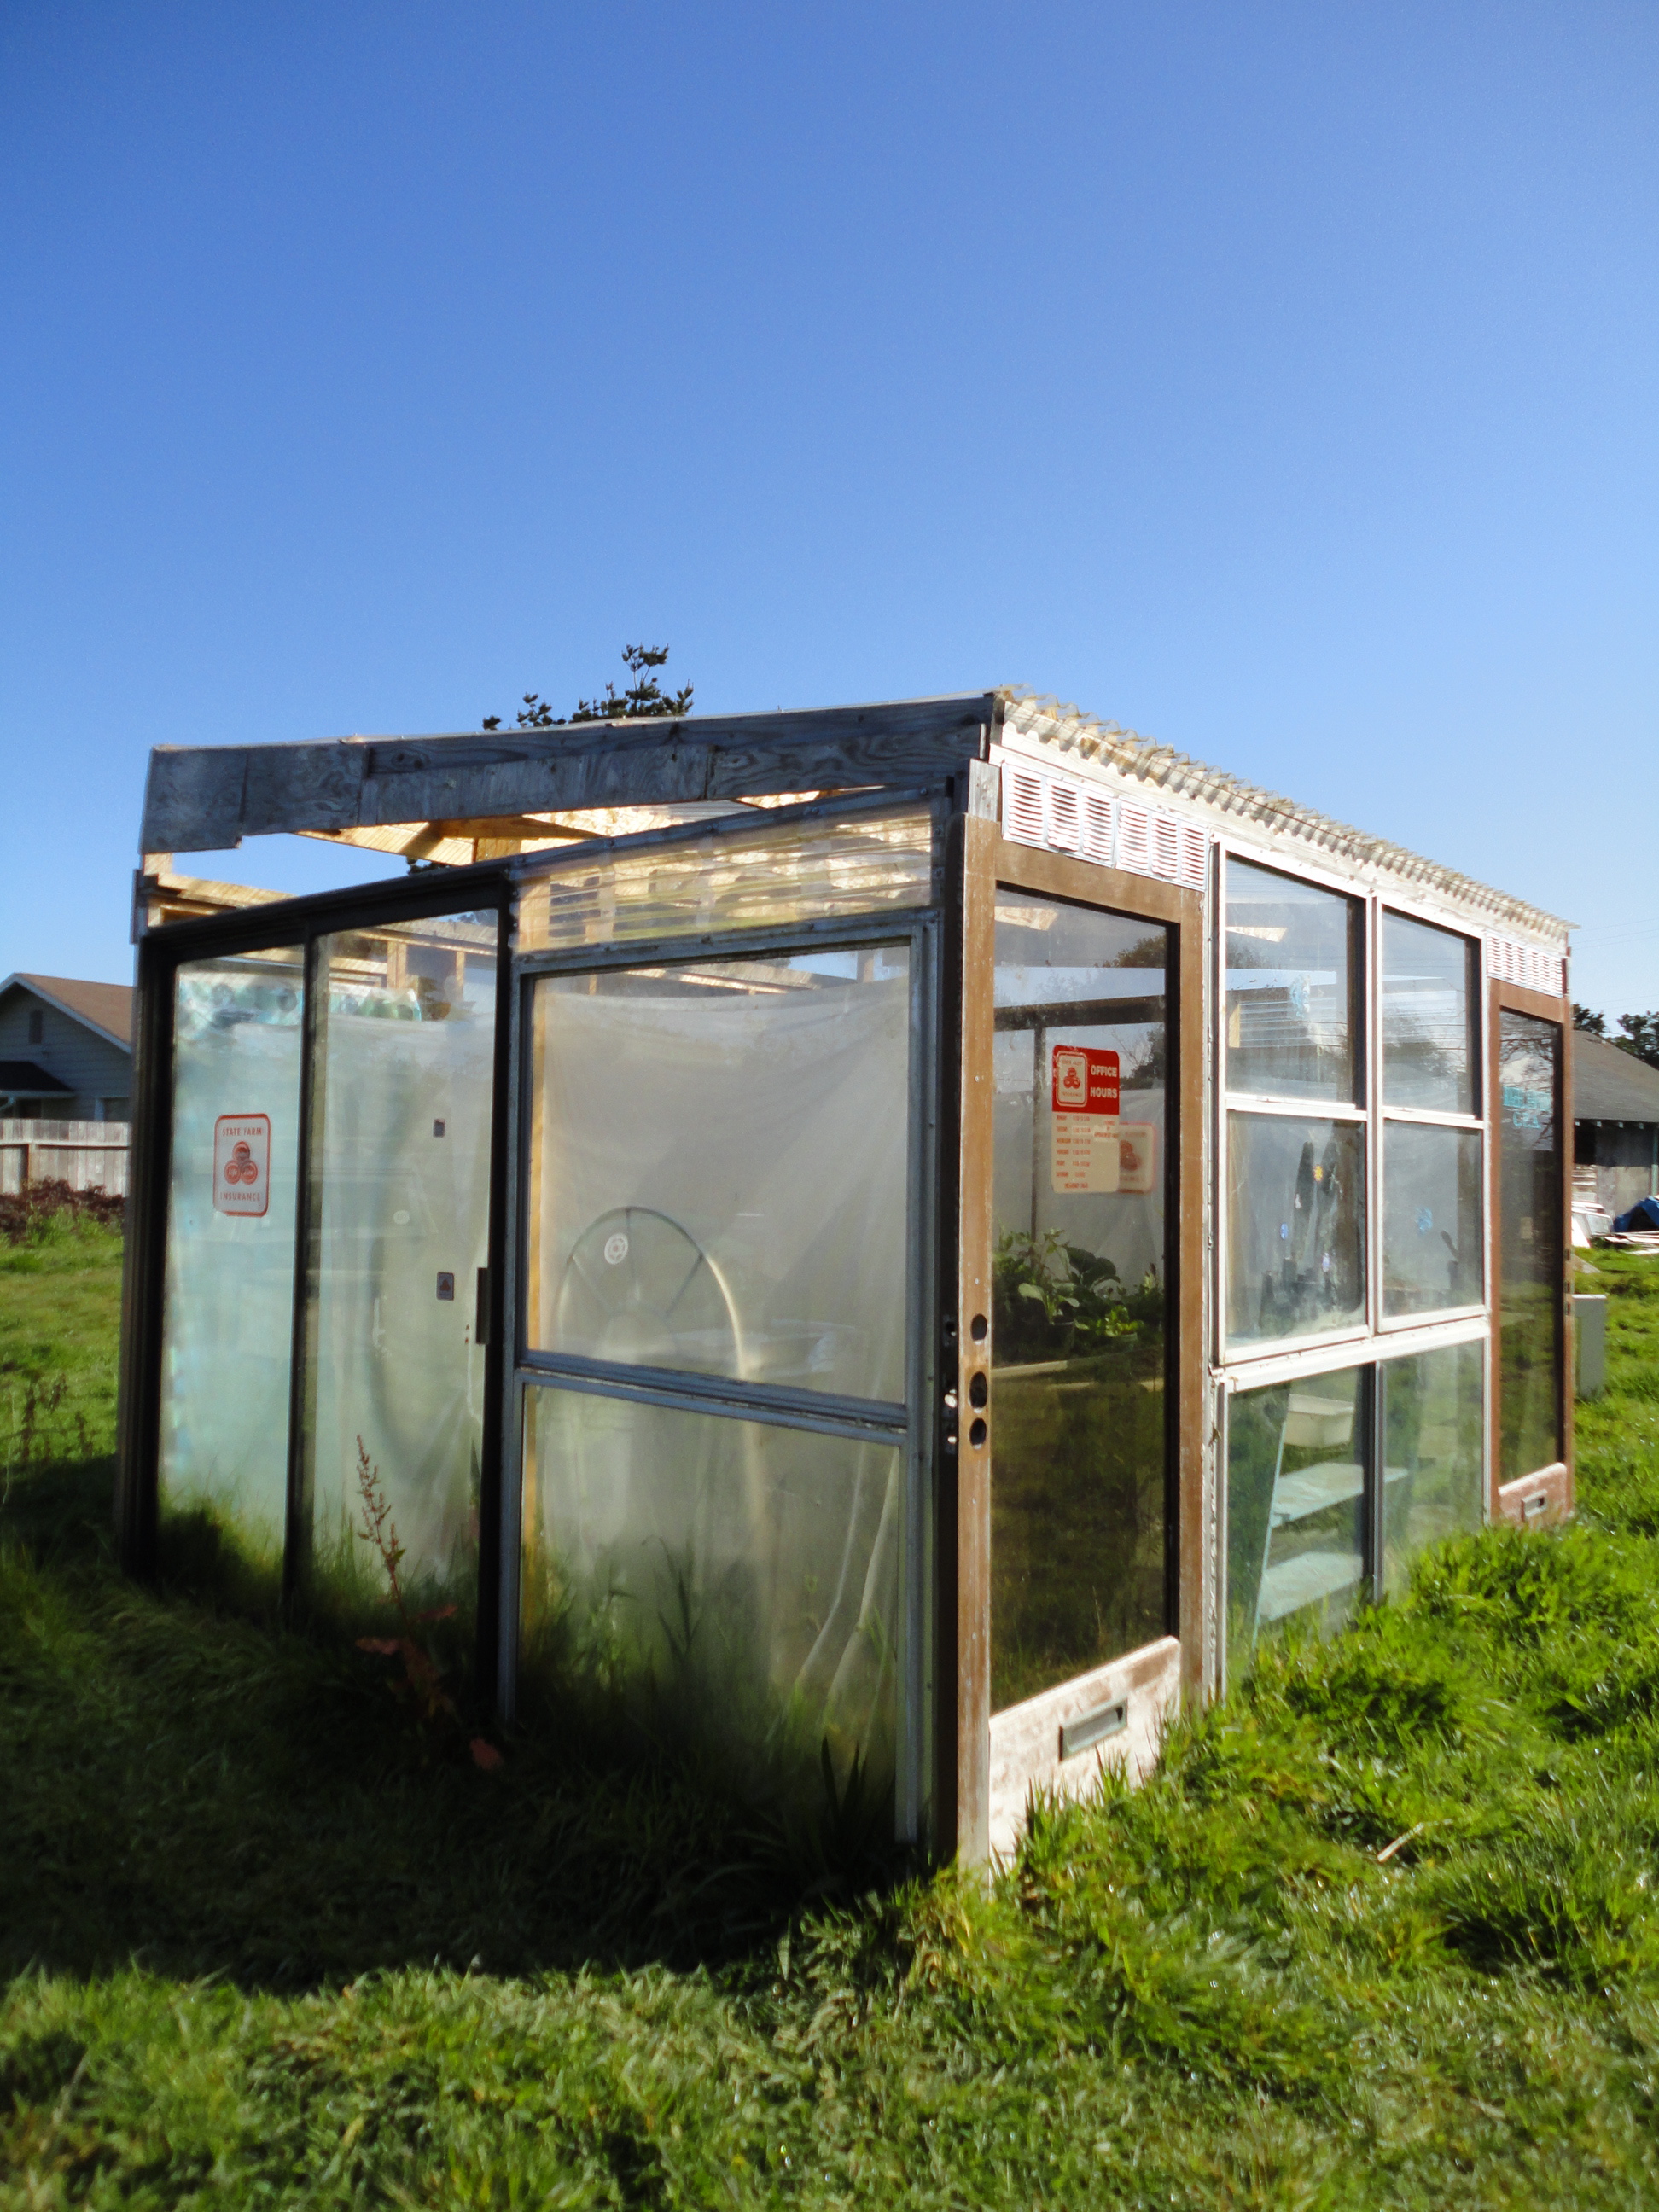
| 06:51, 7 May 2012 | Front View of Rainwater Catchment.JPG (file) |  |
4.02 MB | Here is a view of the installed rainwater catchment system from the front of the greenhouse. | 1 |
| 06:46, 7 May 2012 | Testing the large debris filter.jpg (file) |  |
3.17 MB | The large debris filter appears to be filtering out the large debris. | 1 |
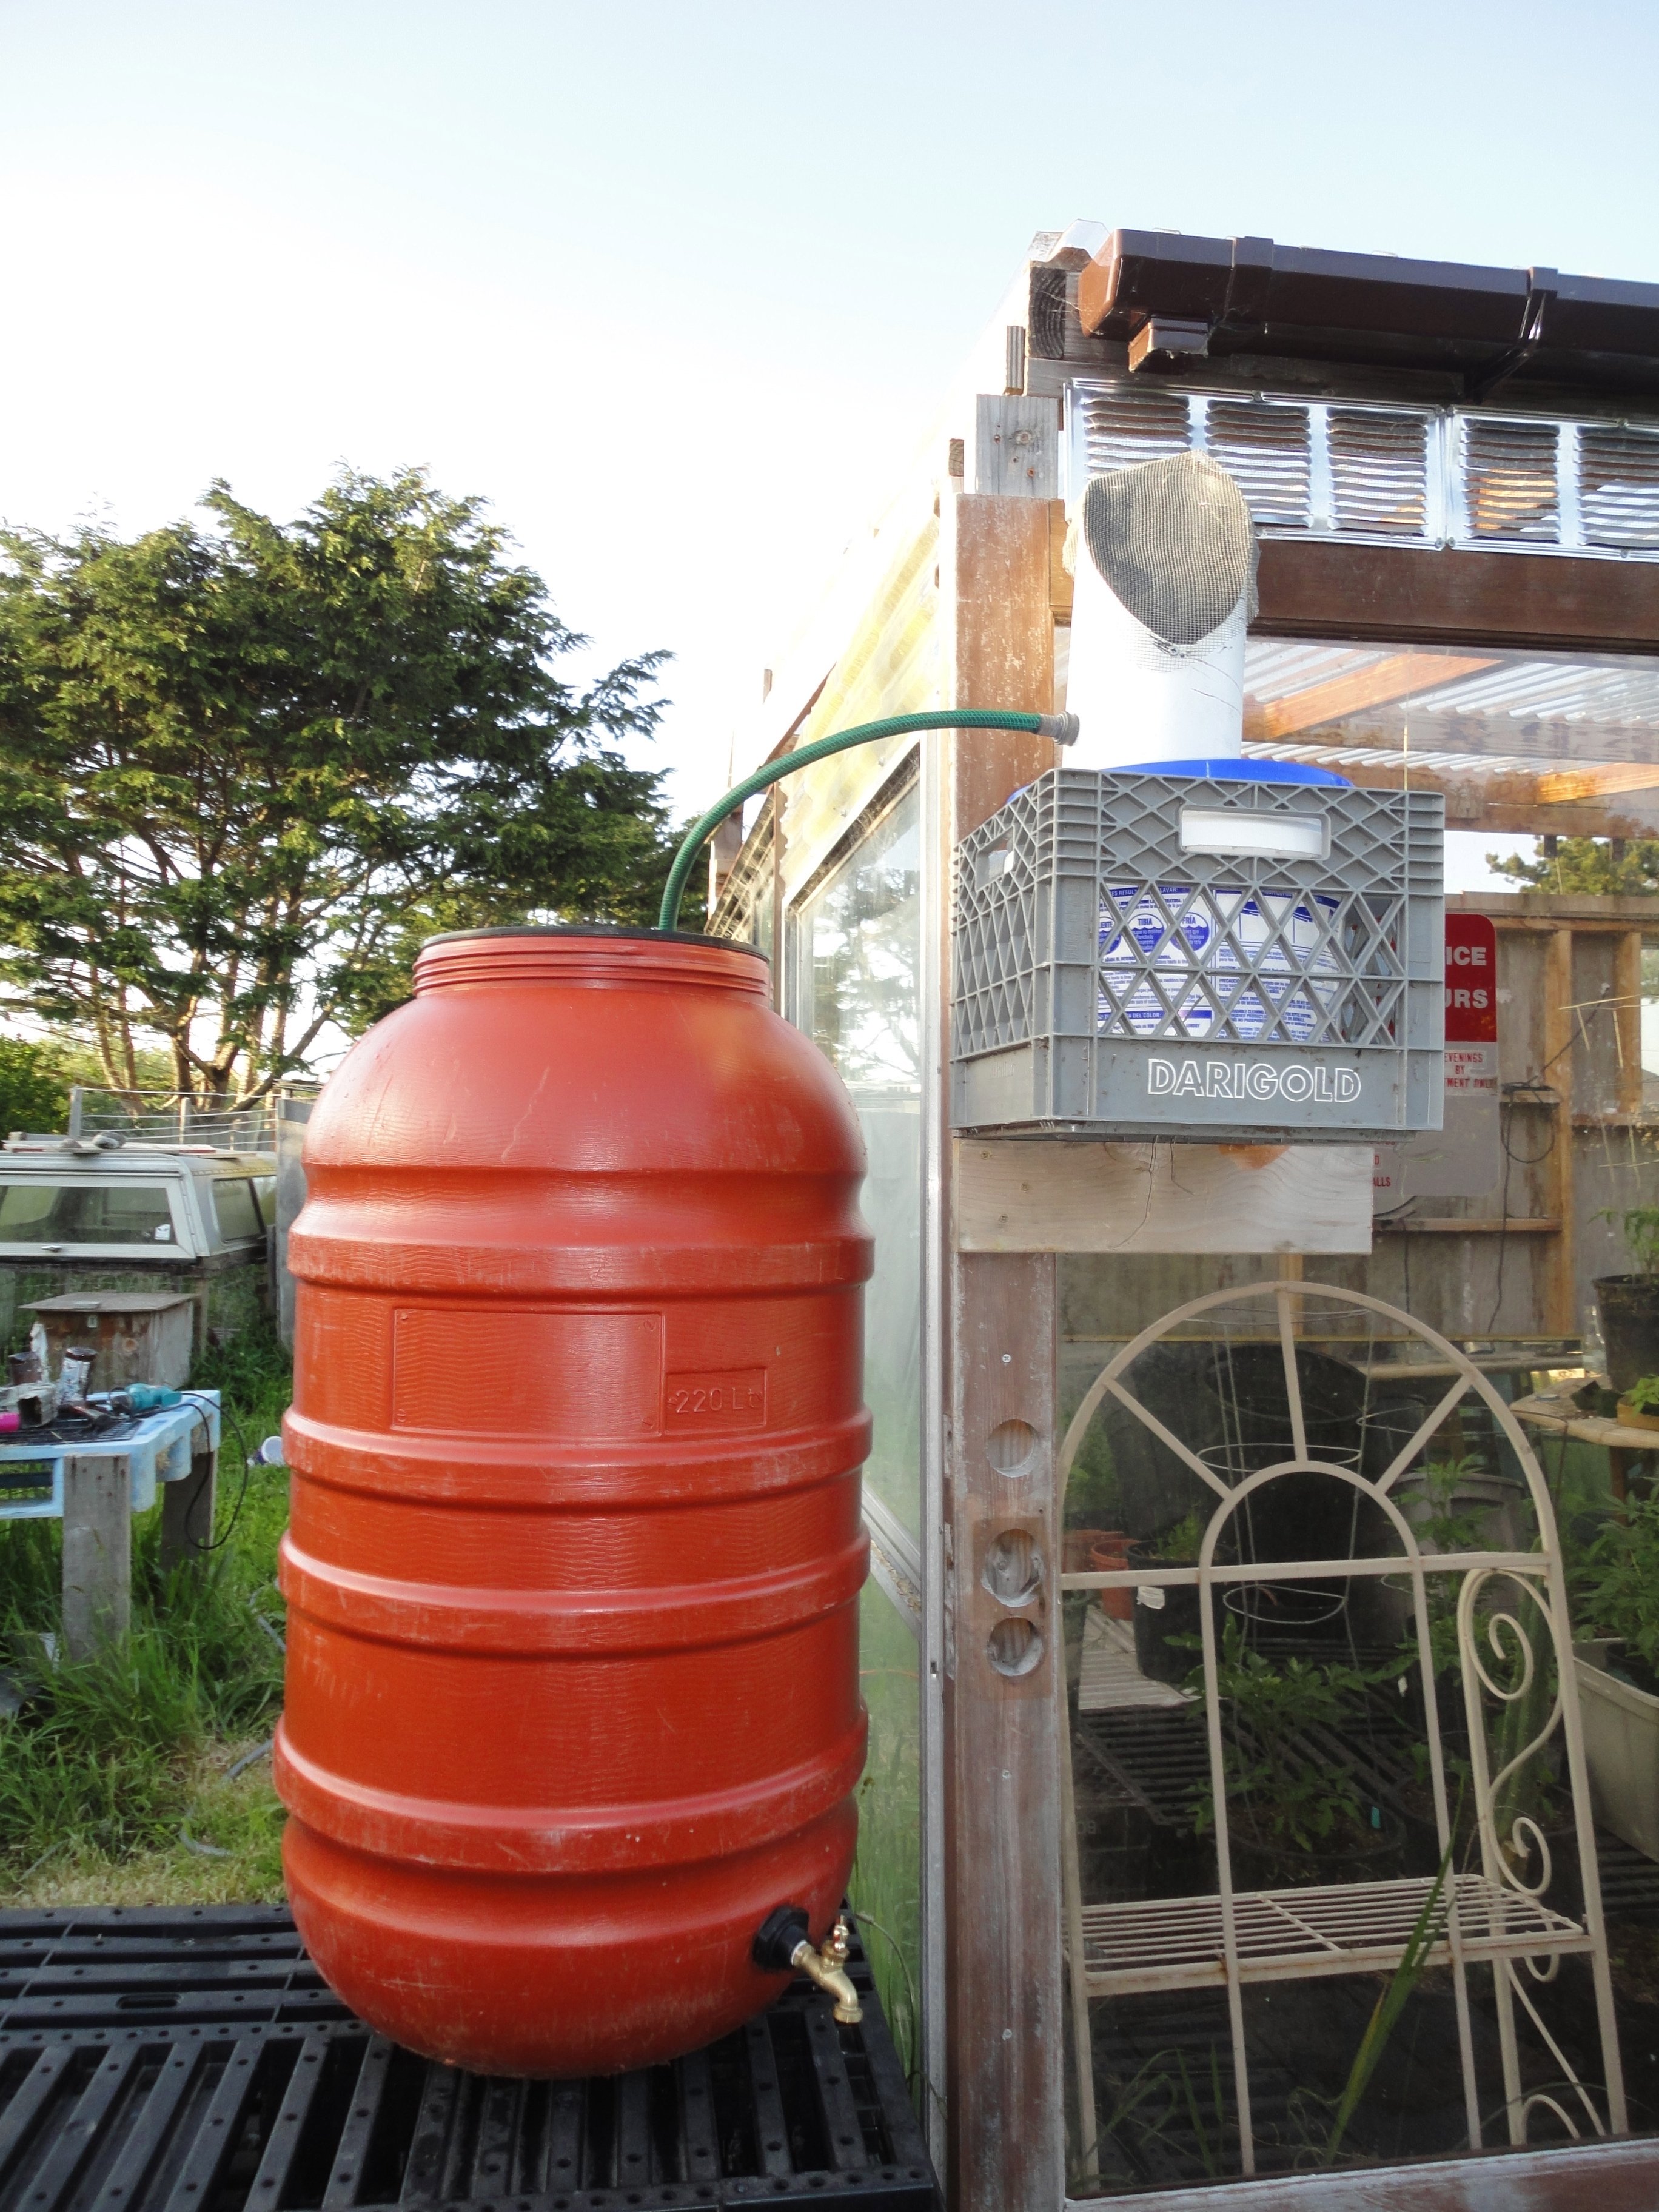
| 06:40, 7 May 2012 | Finished small greenhouse rainwater catchment project.jpg (file) |  |
3.07 MB | This is the finished rainwater catchment system that was installed in Manila, CA. | 1 |
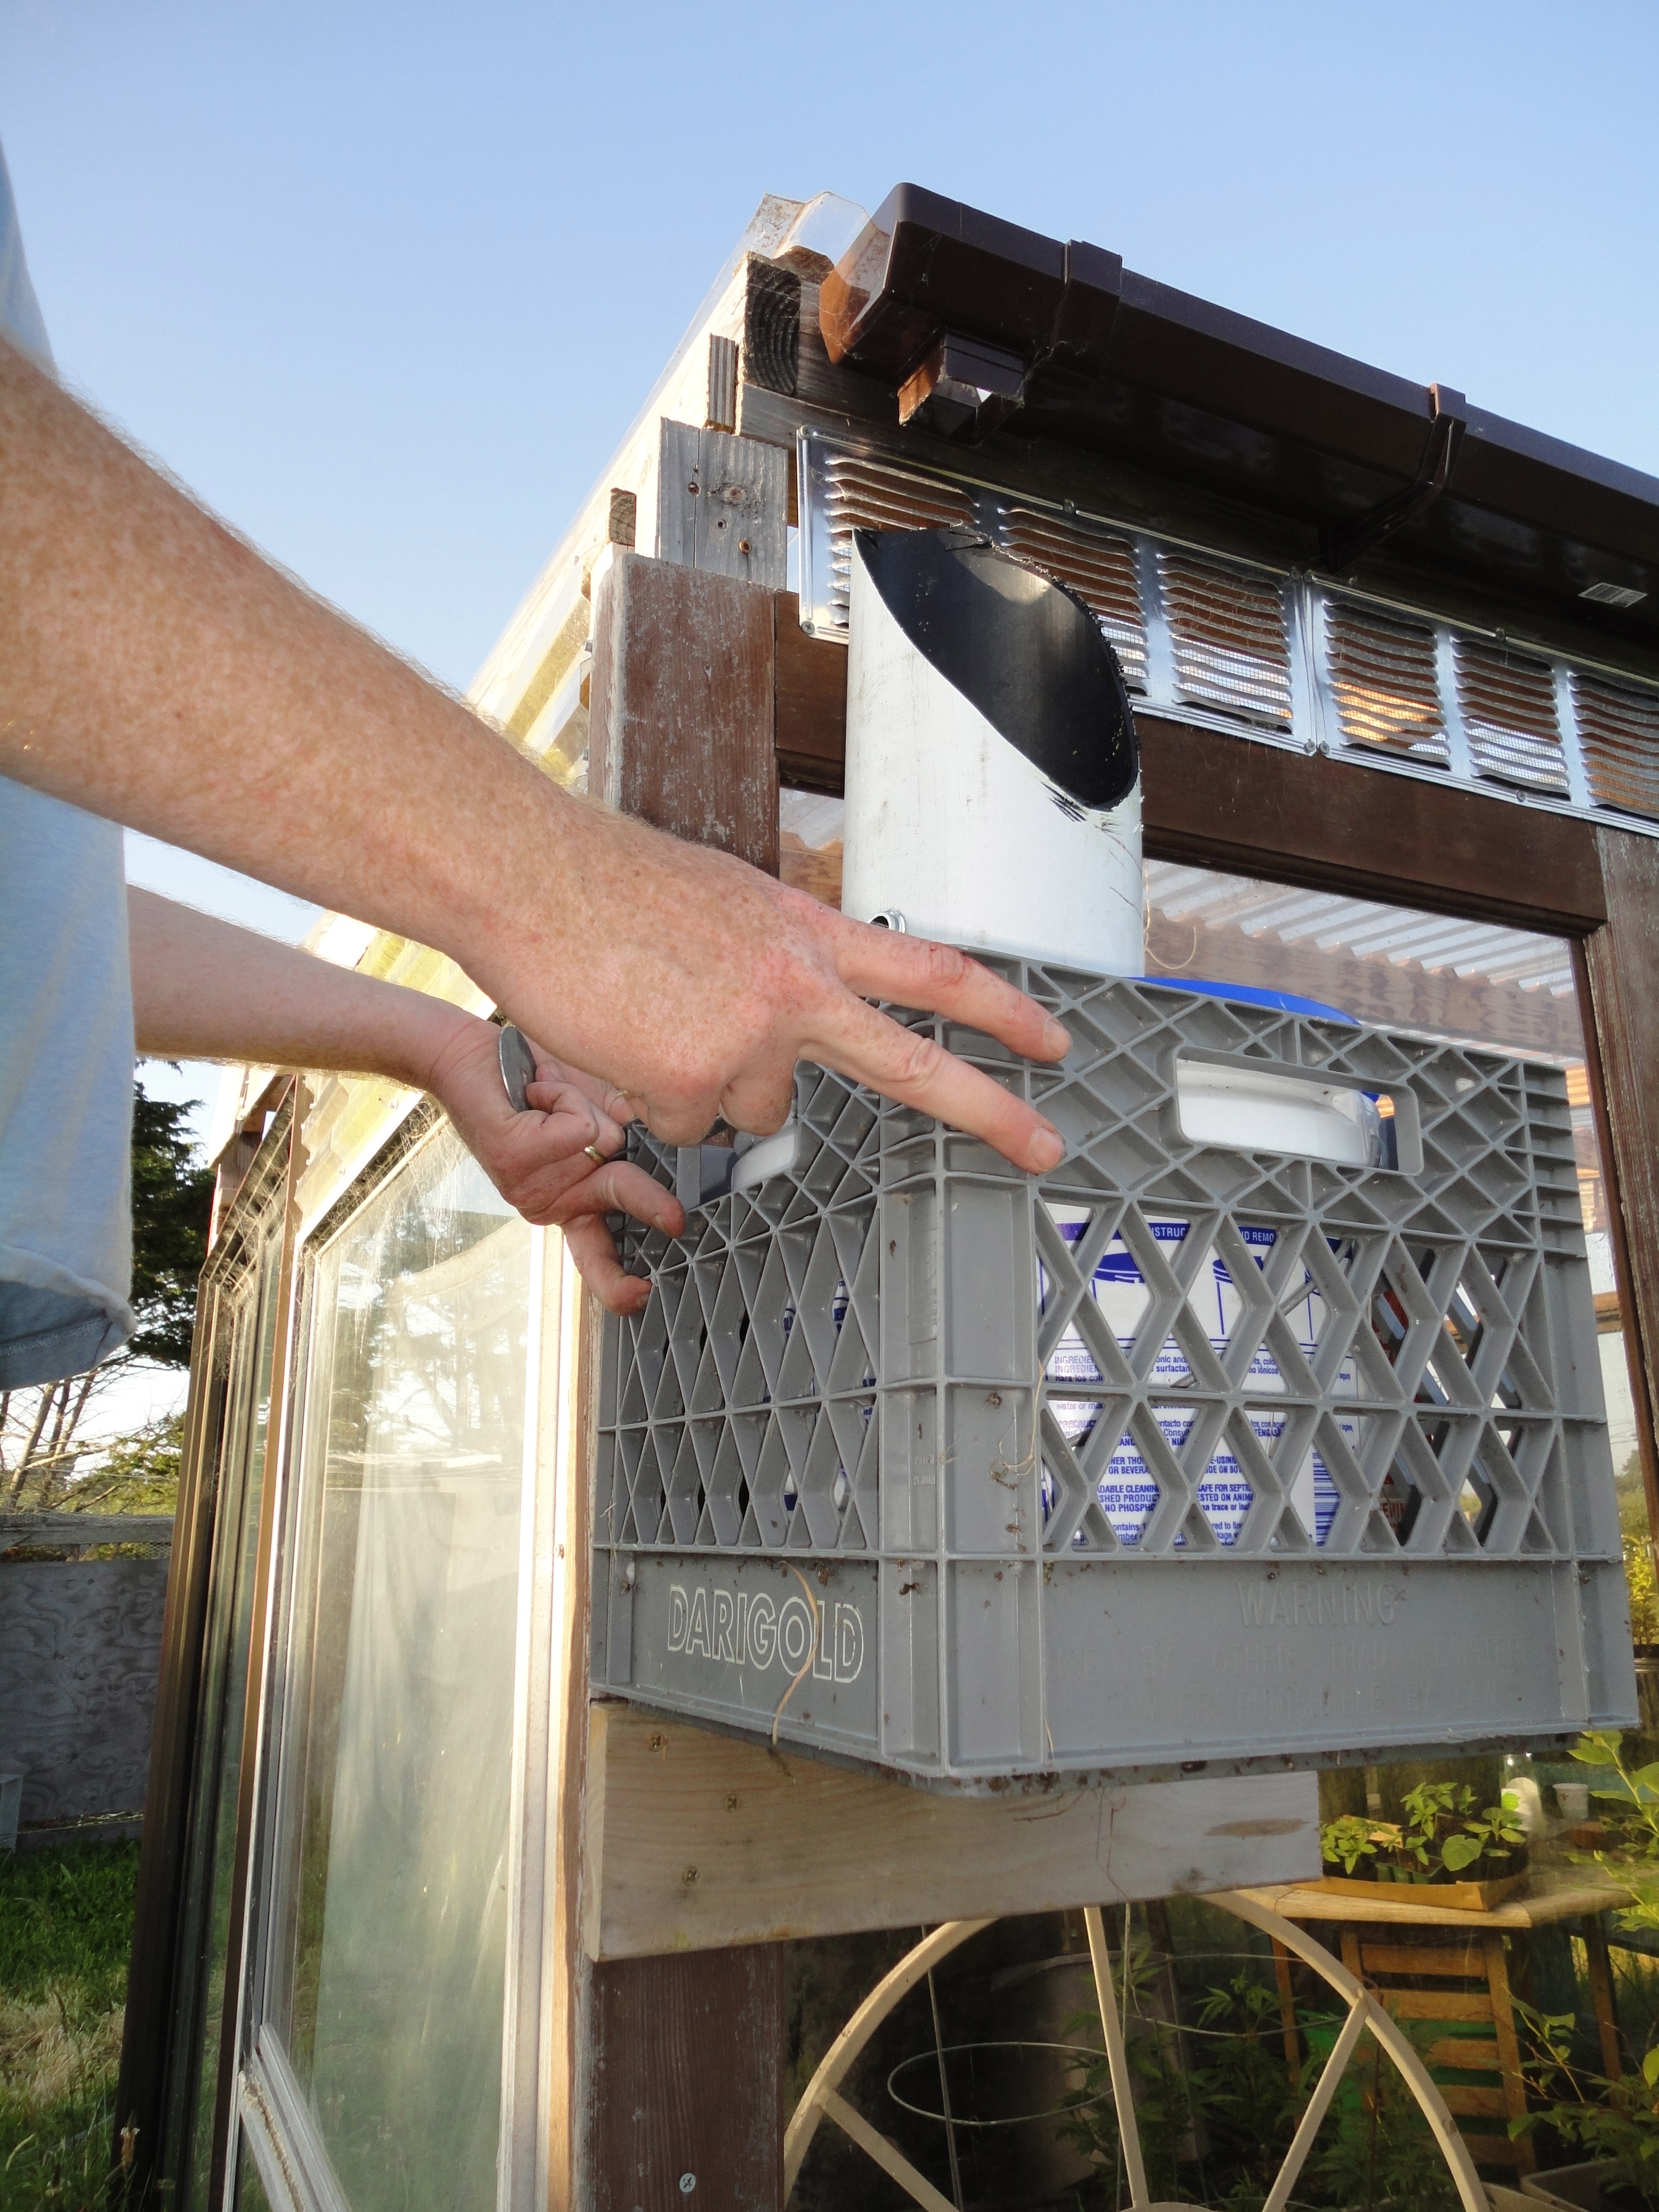
| 06:31, 7 May 2012 | Mounting the whole contraption.jpg (file) |  |
3 MB | Here we are mounting a milk crate onto the greenhouse to hold the first flush storage and the large debris filter. | 1 |
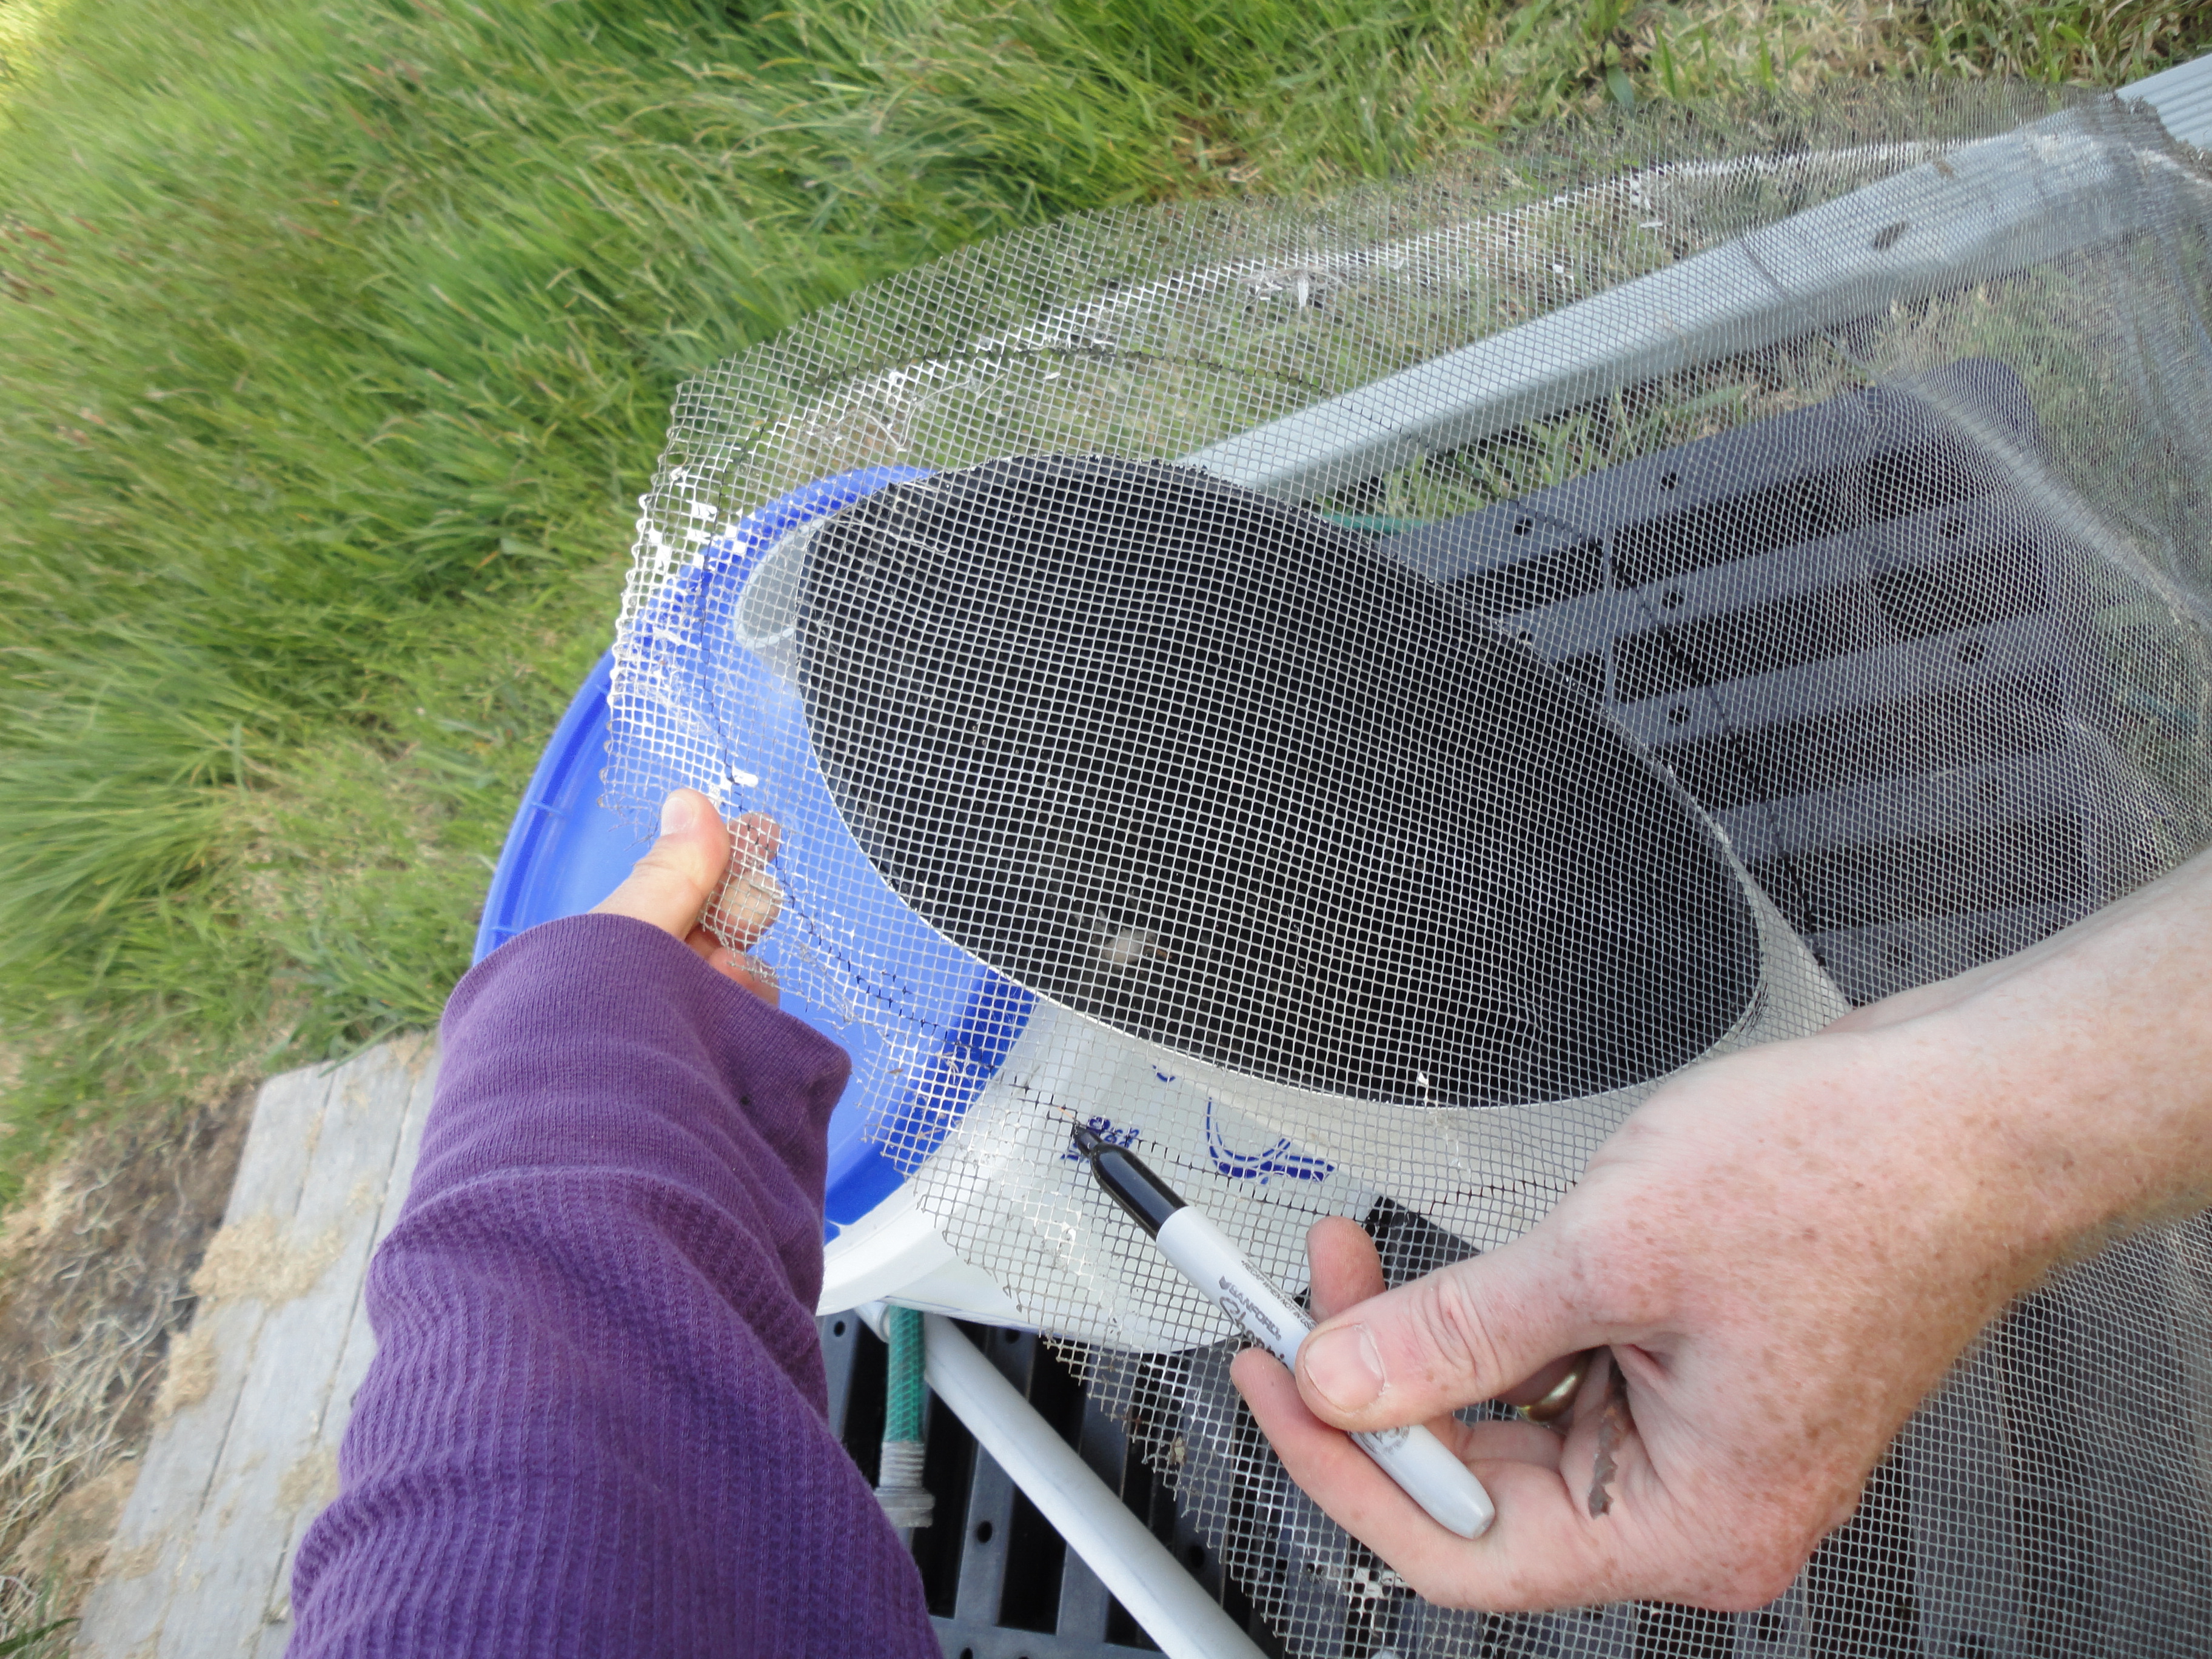
| 06:06, 7 May 2012 | Measuring a screen for a large debris filer.JPG (file) |  |
4.23 MB | We repurposed an old chicken coupe wire and are cutting it up for a large debris filter. The filter is installed on a 60 degree slope so the water can rinse off excess debris that have collected on the filter. | 1 |
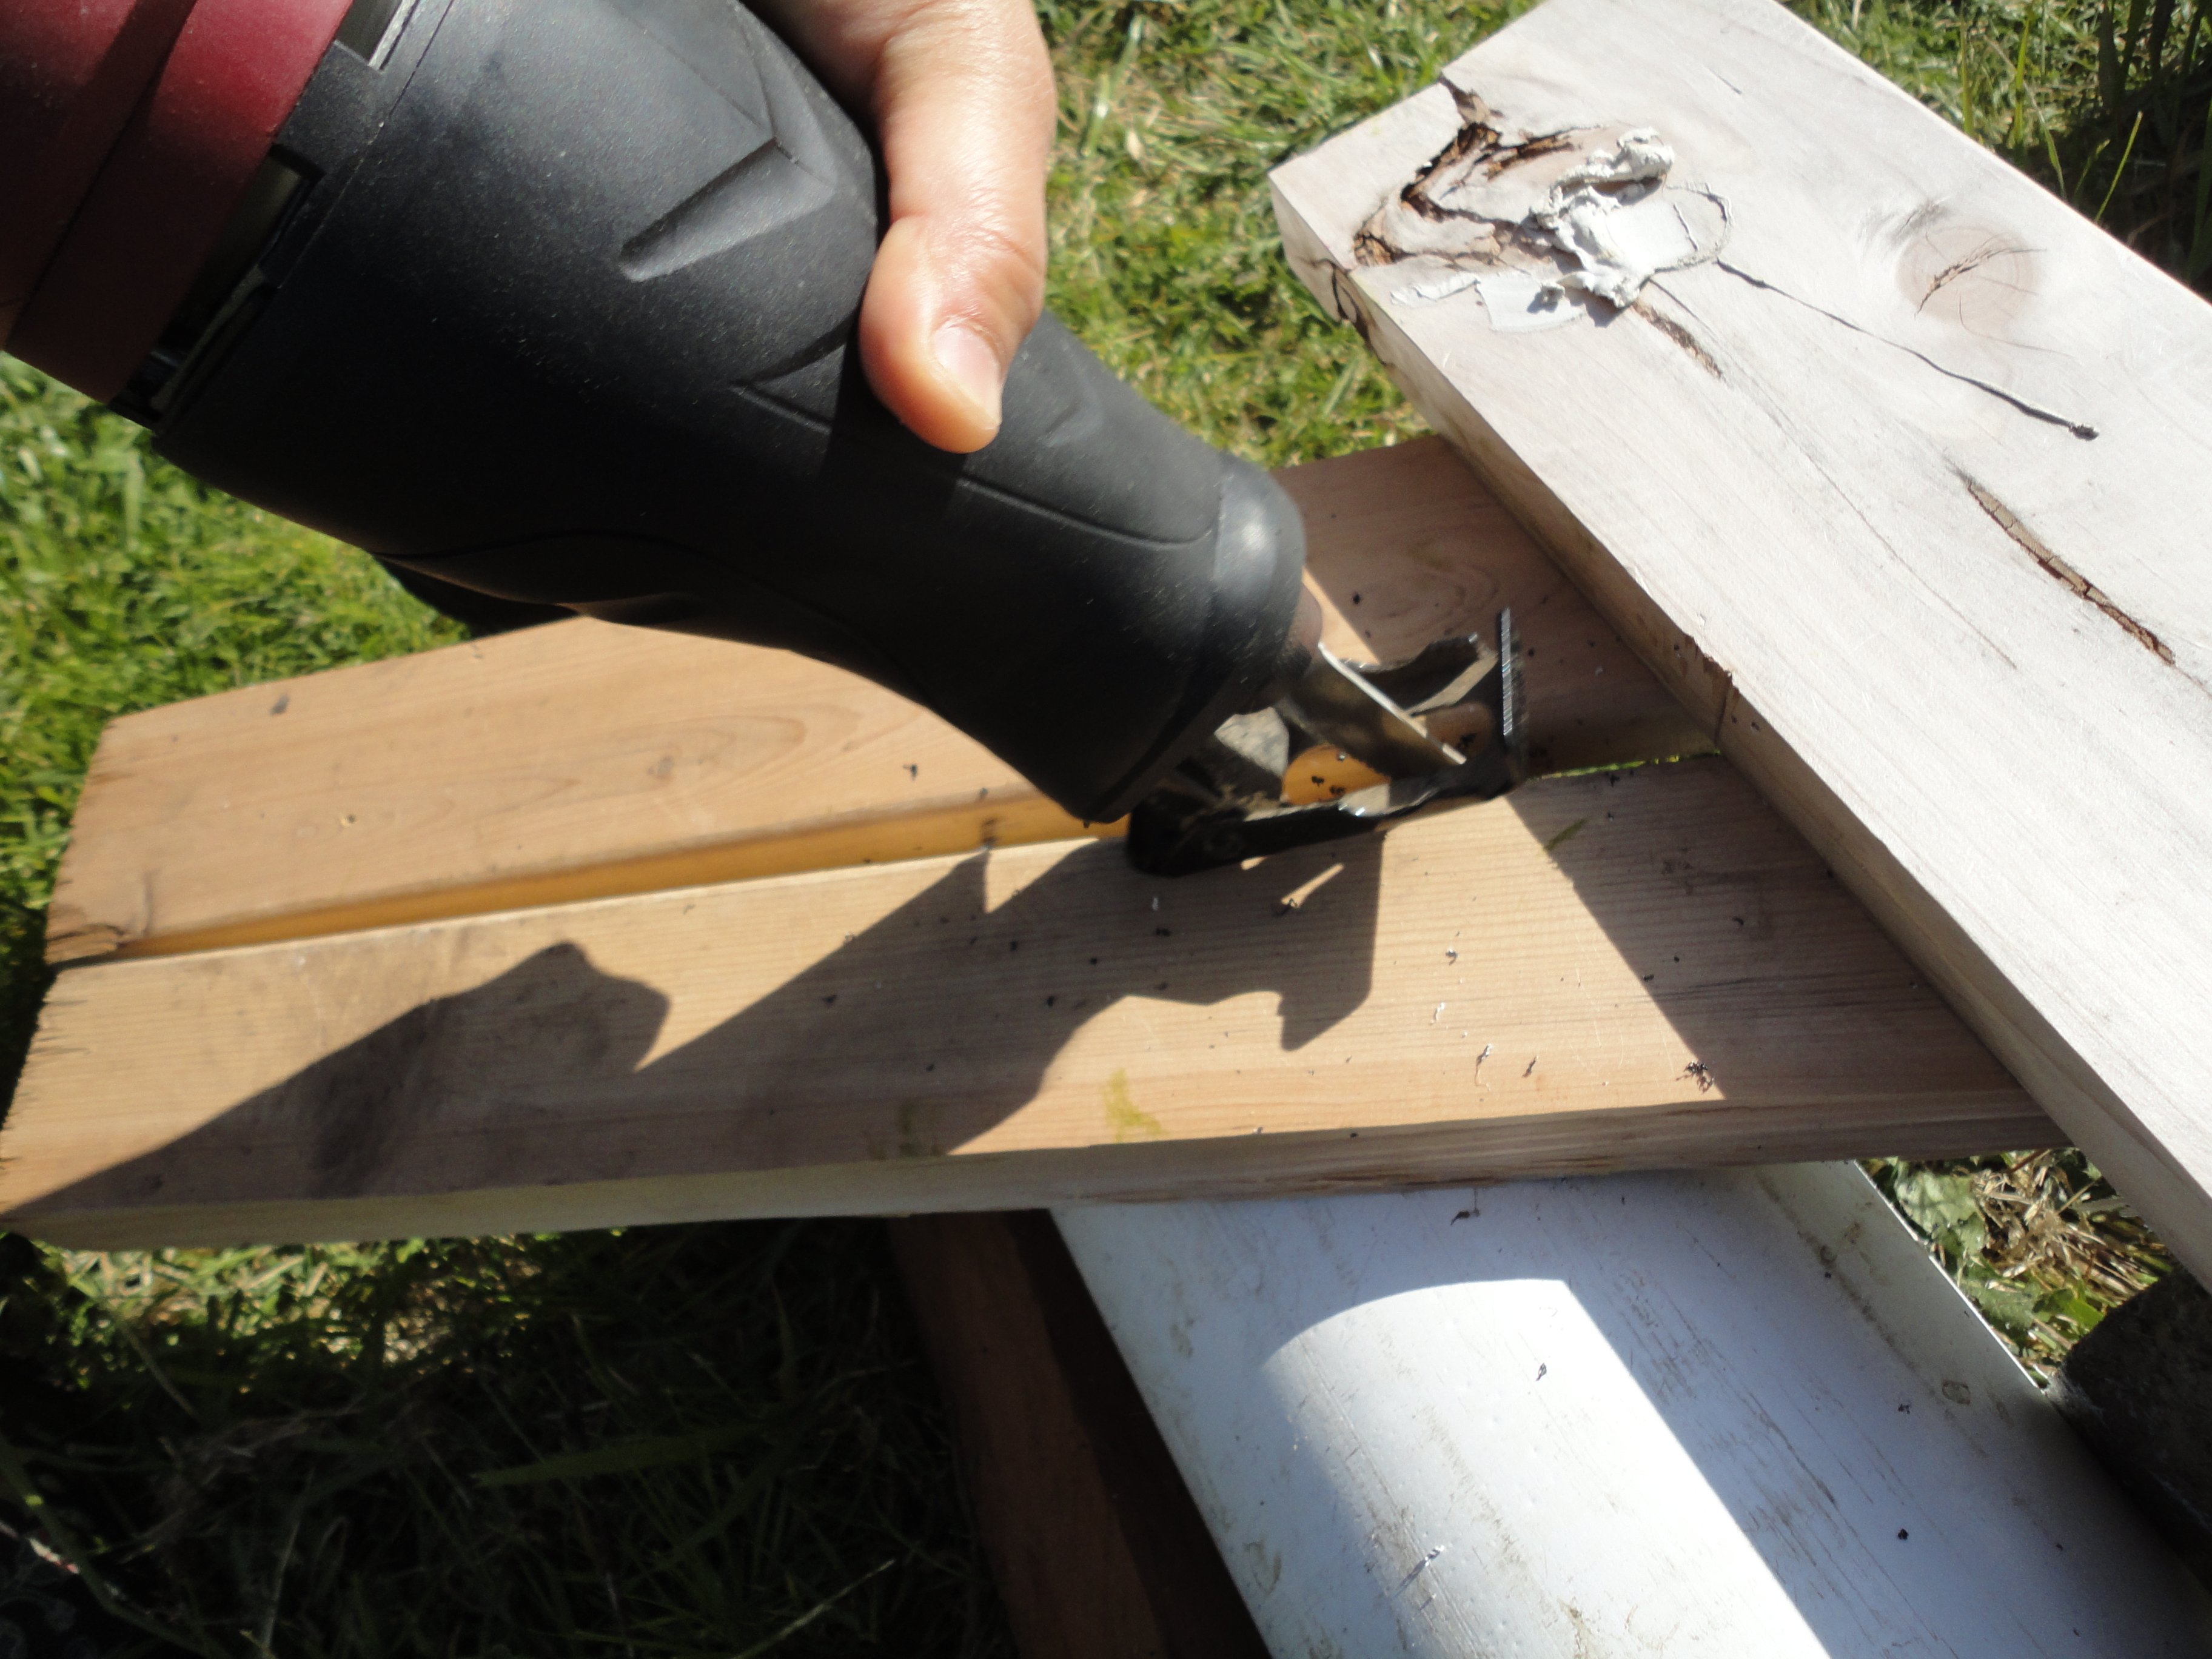
| 05:57, 7 May 2012 | Cutting a pipe at 60 degrees is tricky work.JPG (file) |  |
3.87 MB | Cutting a pipe at 60 degrees is tricky work. We found a PVC pipe that was left in our garage so we decided to repurpose it as our large debris filter. It took a few measurements to make sure the slope was 60 degrees. | 1 |
| 05:48, 7 May 2012 | The first flush ball valve floats.JPG (file) |  |
3.81 MB | The first flush ball valve floats! Yay, now lets seal it up! | 1 |
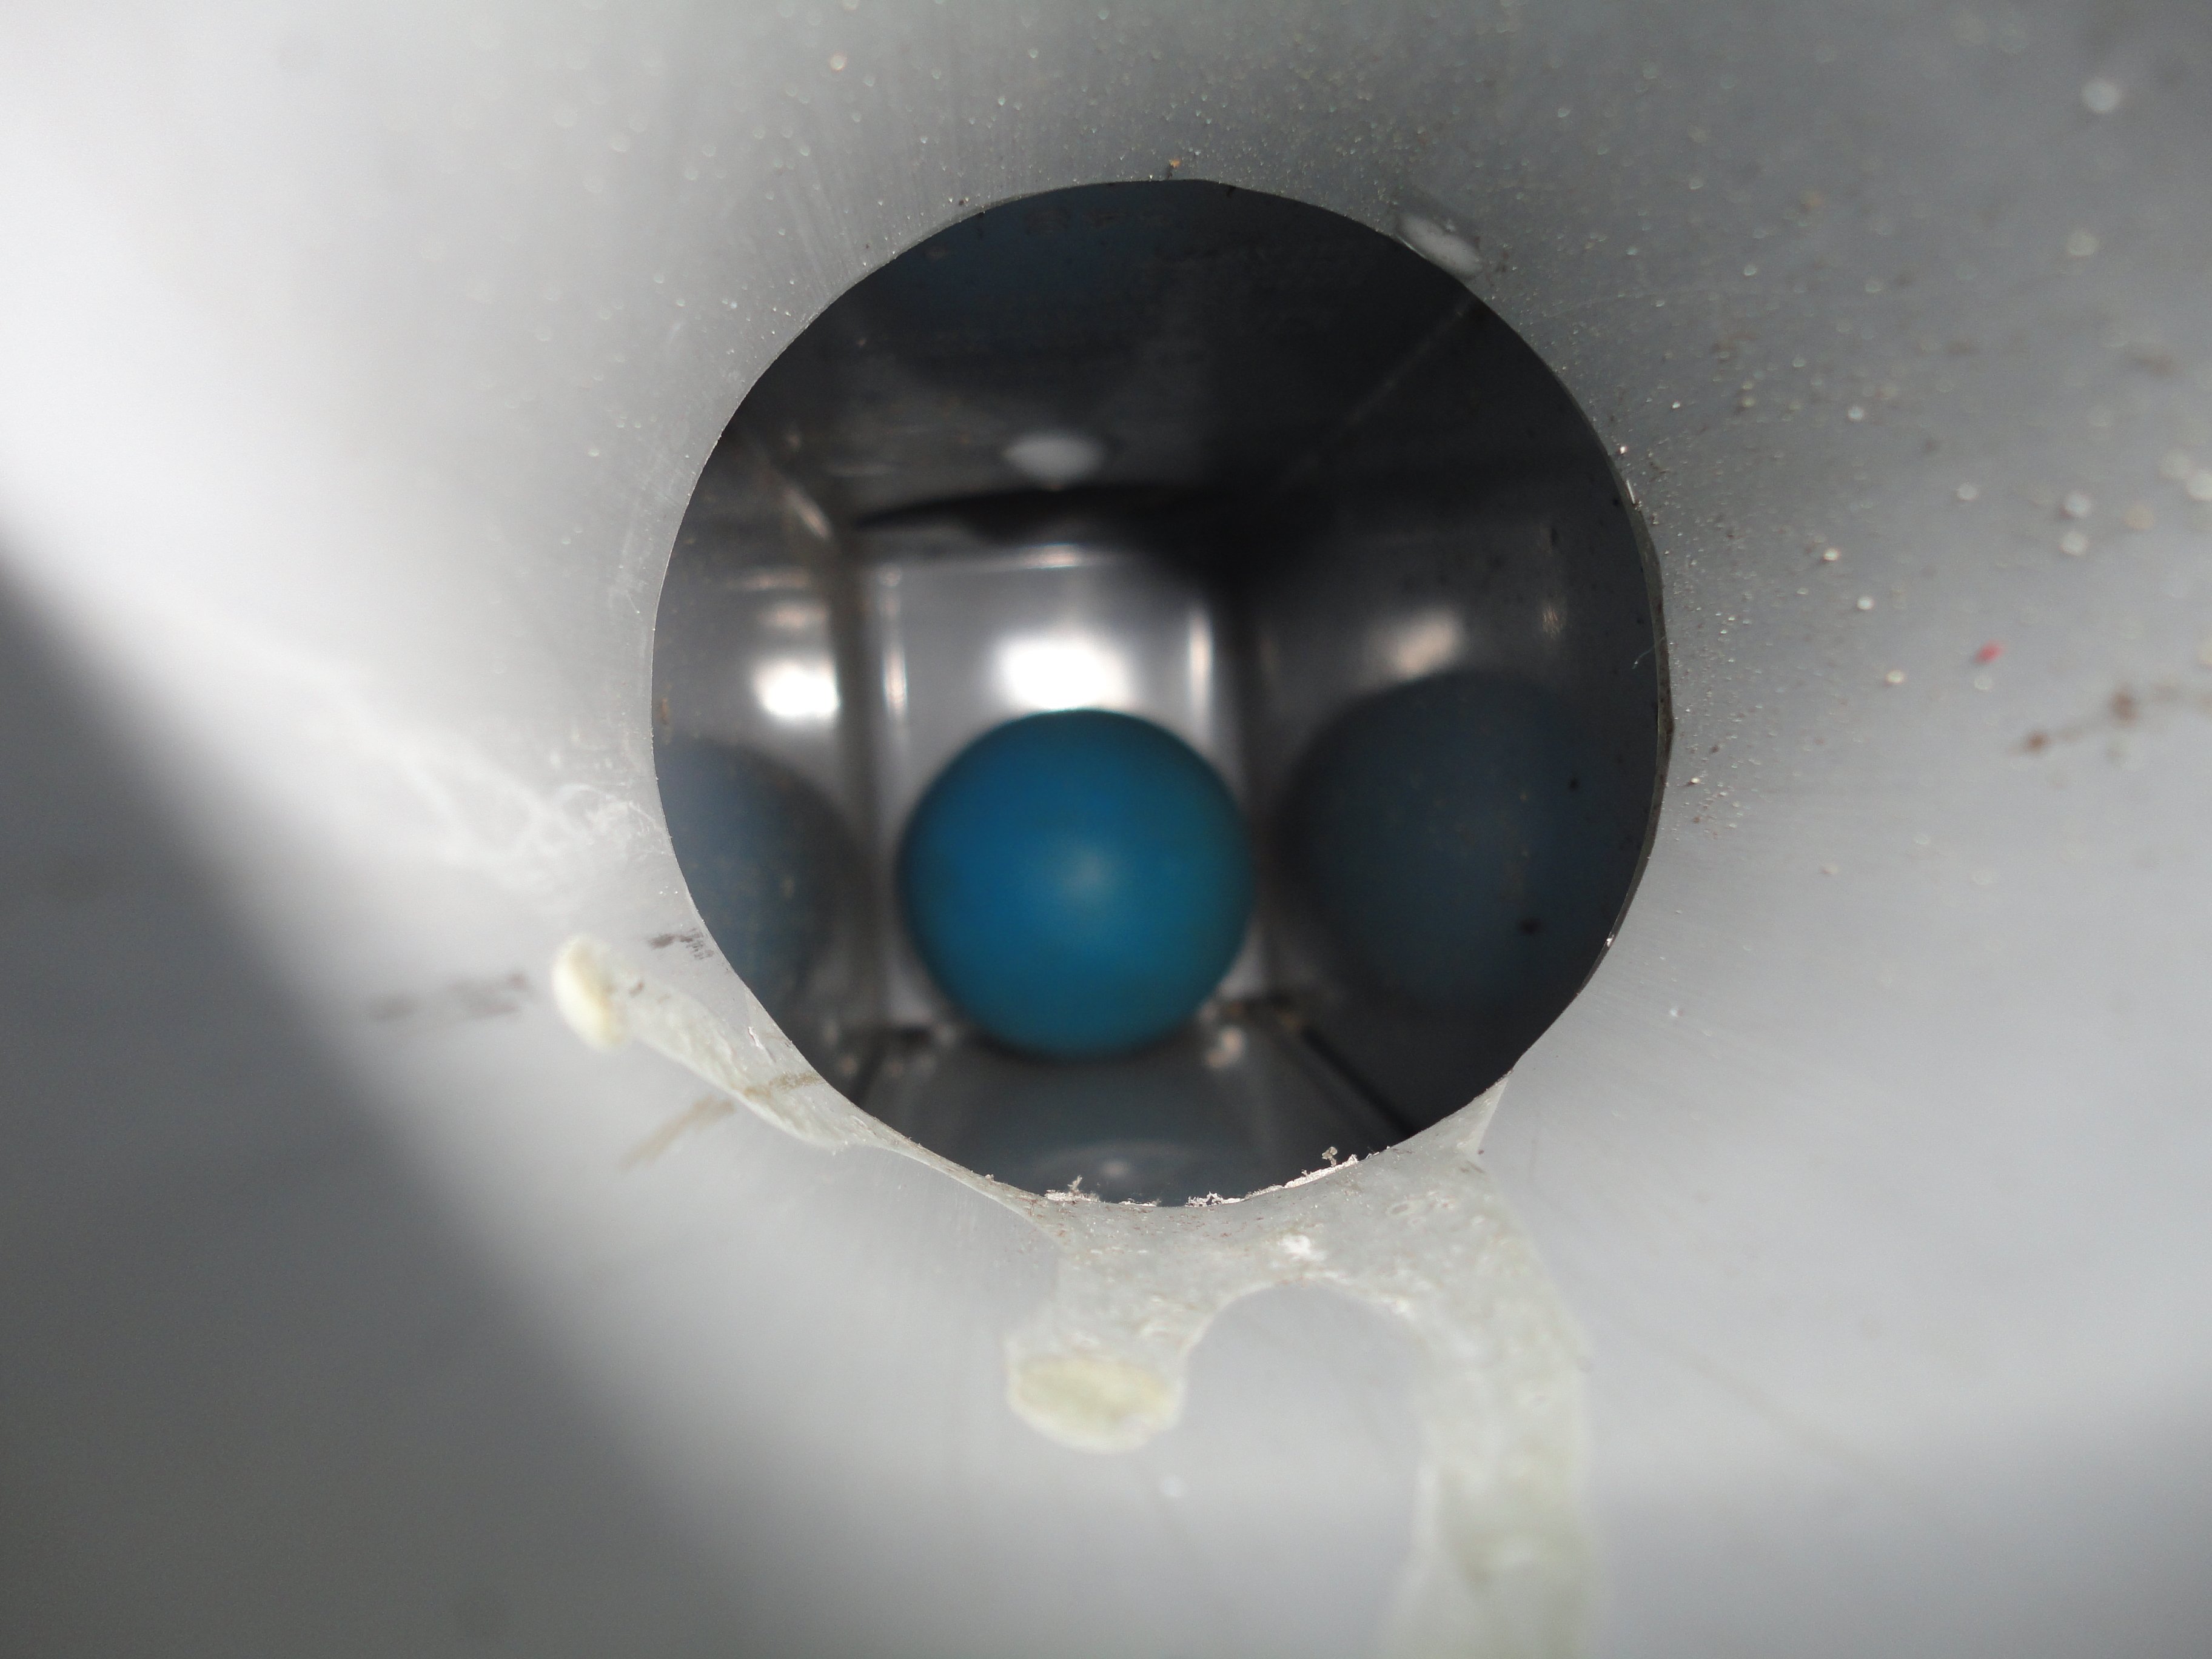
| 05:42, 7 May 2012 | First Flush Ball Valve- Before test.JPG (file) |  |
3.24 MB | Testing out the first flush ball valve before installing it. | 1 |
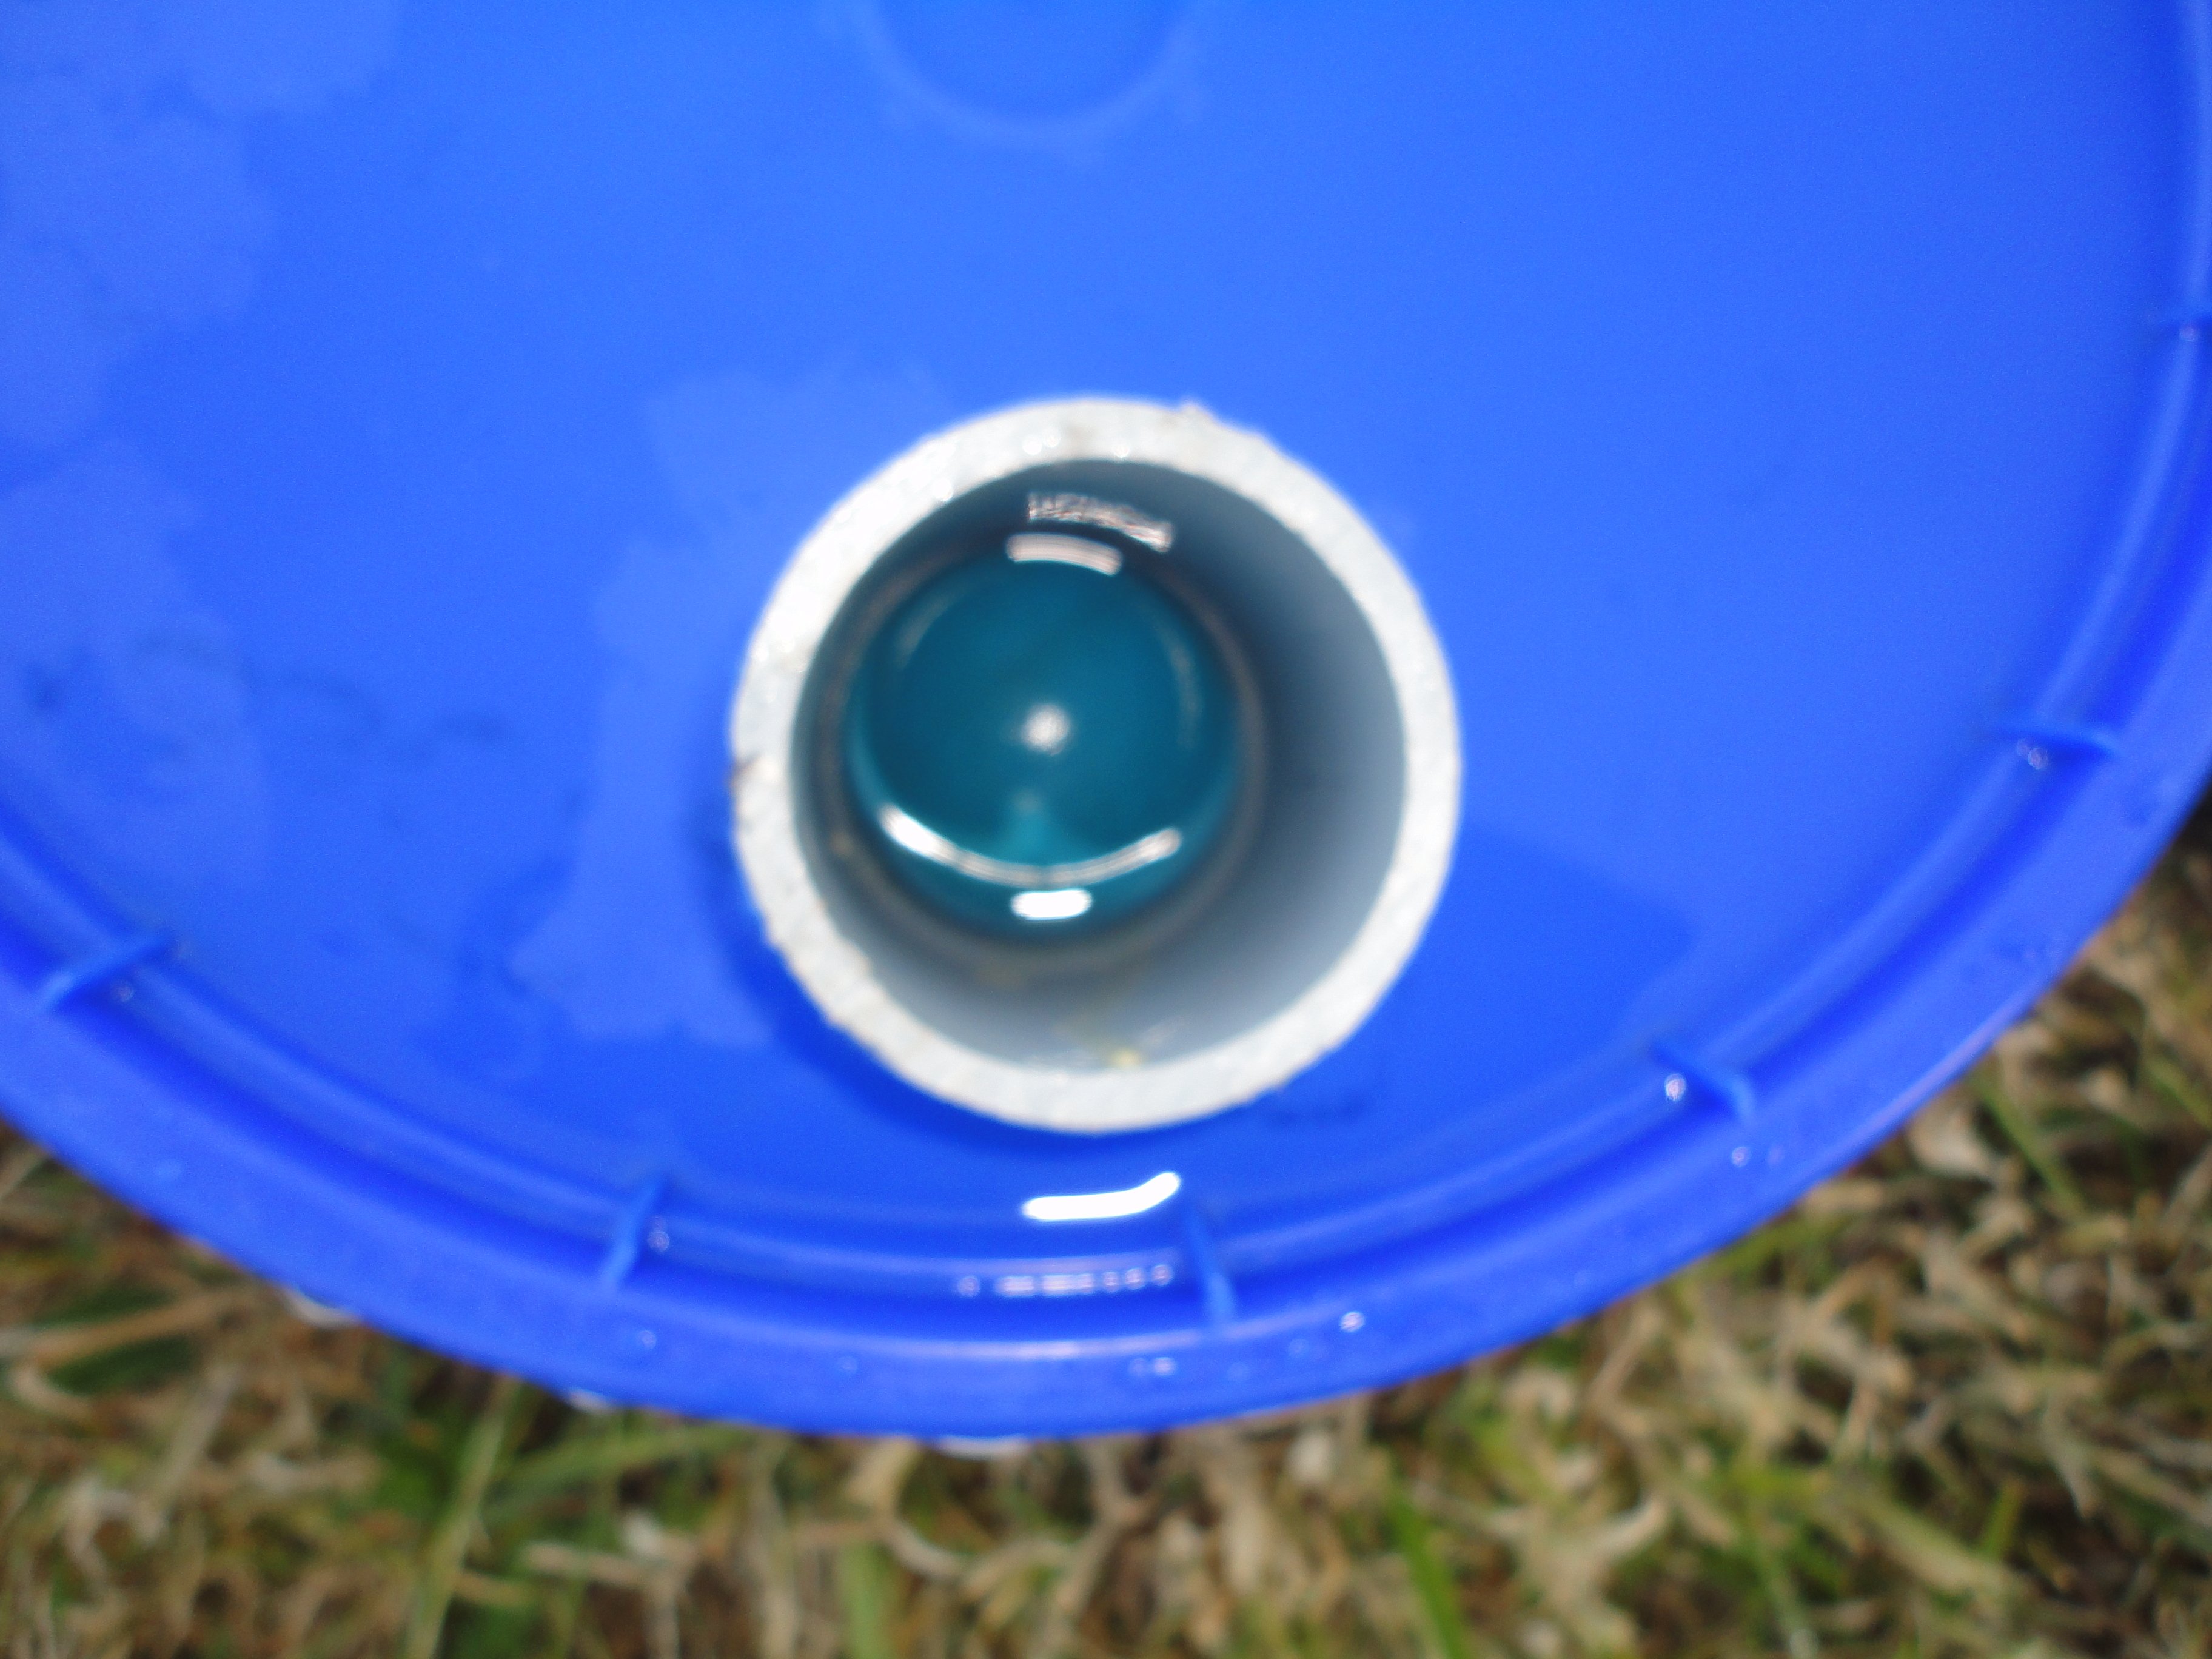
| 05:30, 7 May 2012 | First Flush Floating Ball Valve.JPG (file) |  |
4.33 MB | We used a raquetball inside a salvaged electrical box because the pipe was the perfect diameter for the raquetball to float to the top and divert the flow of water. | 1 |
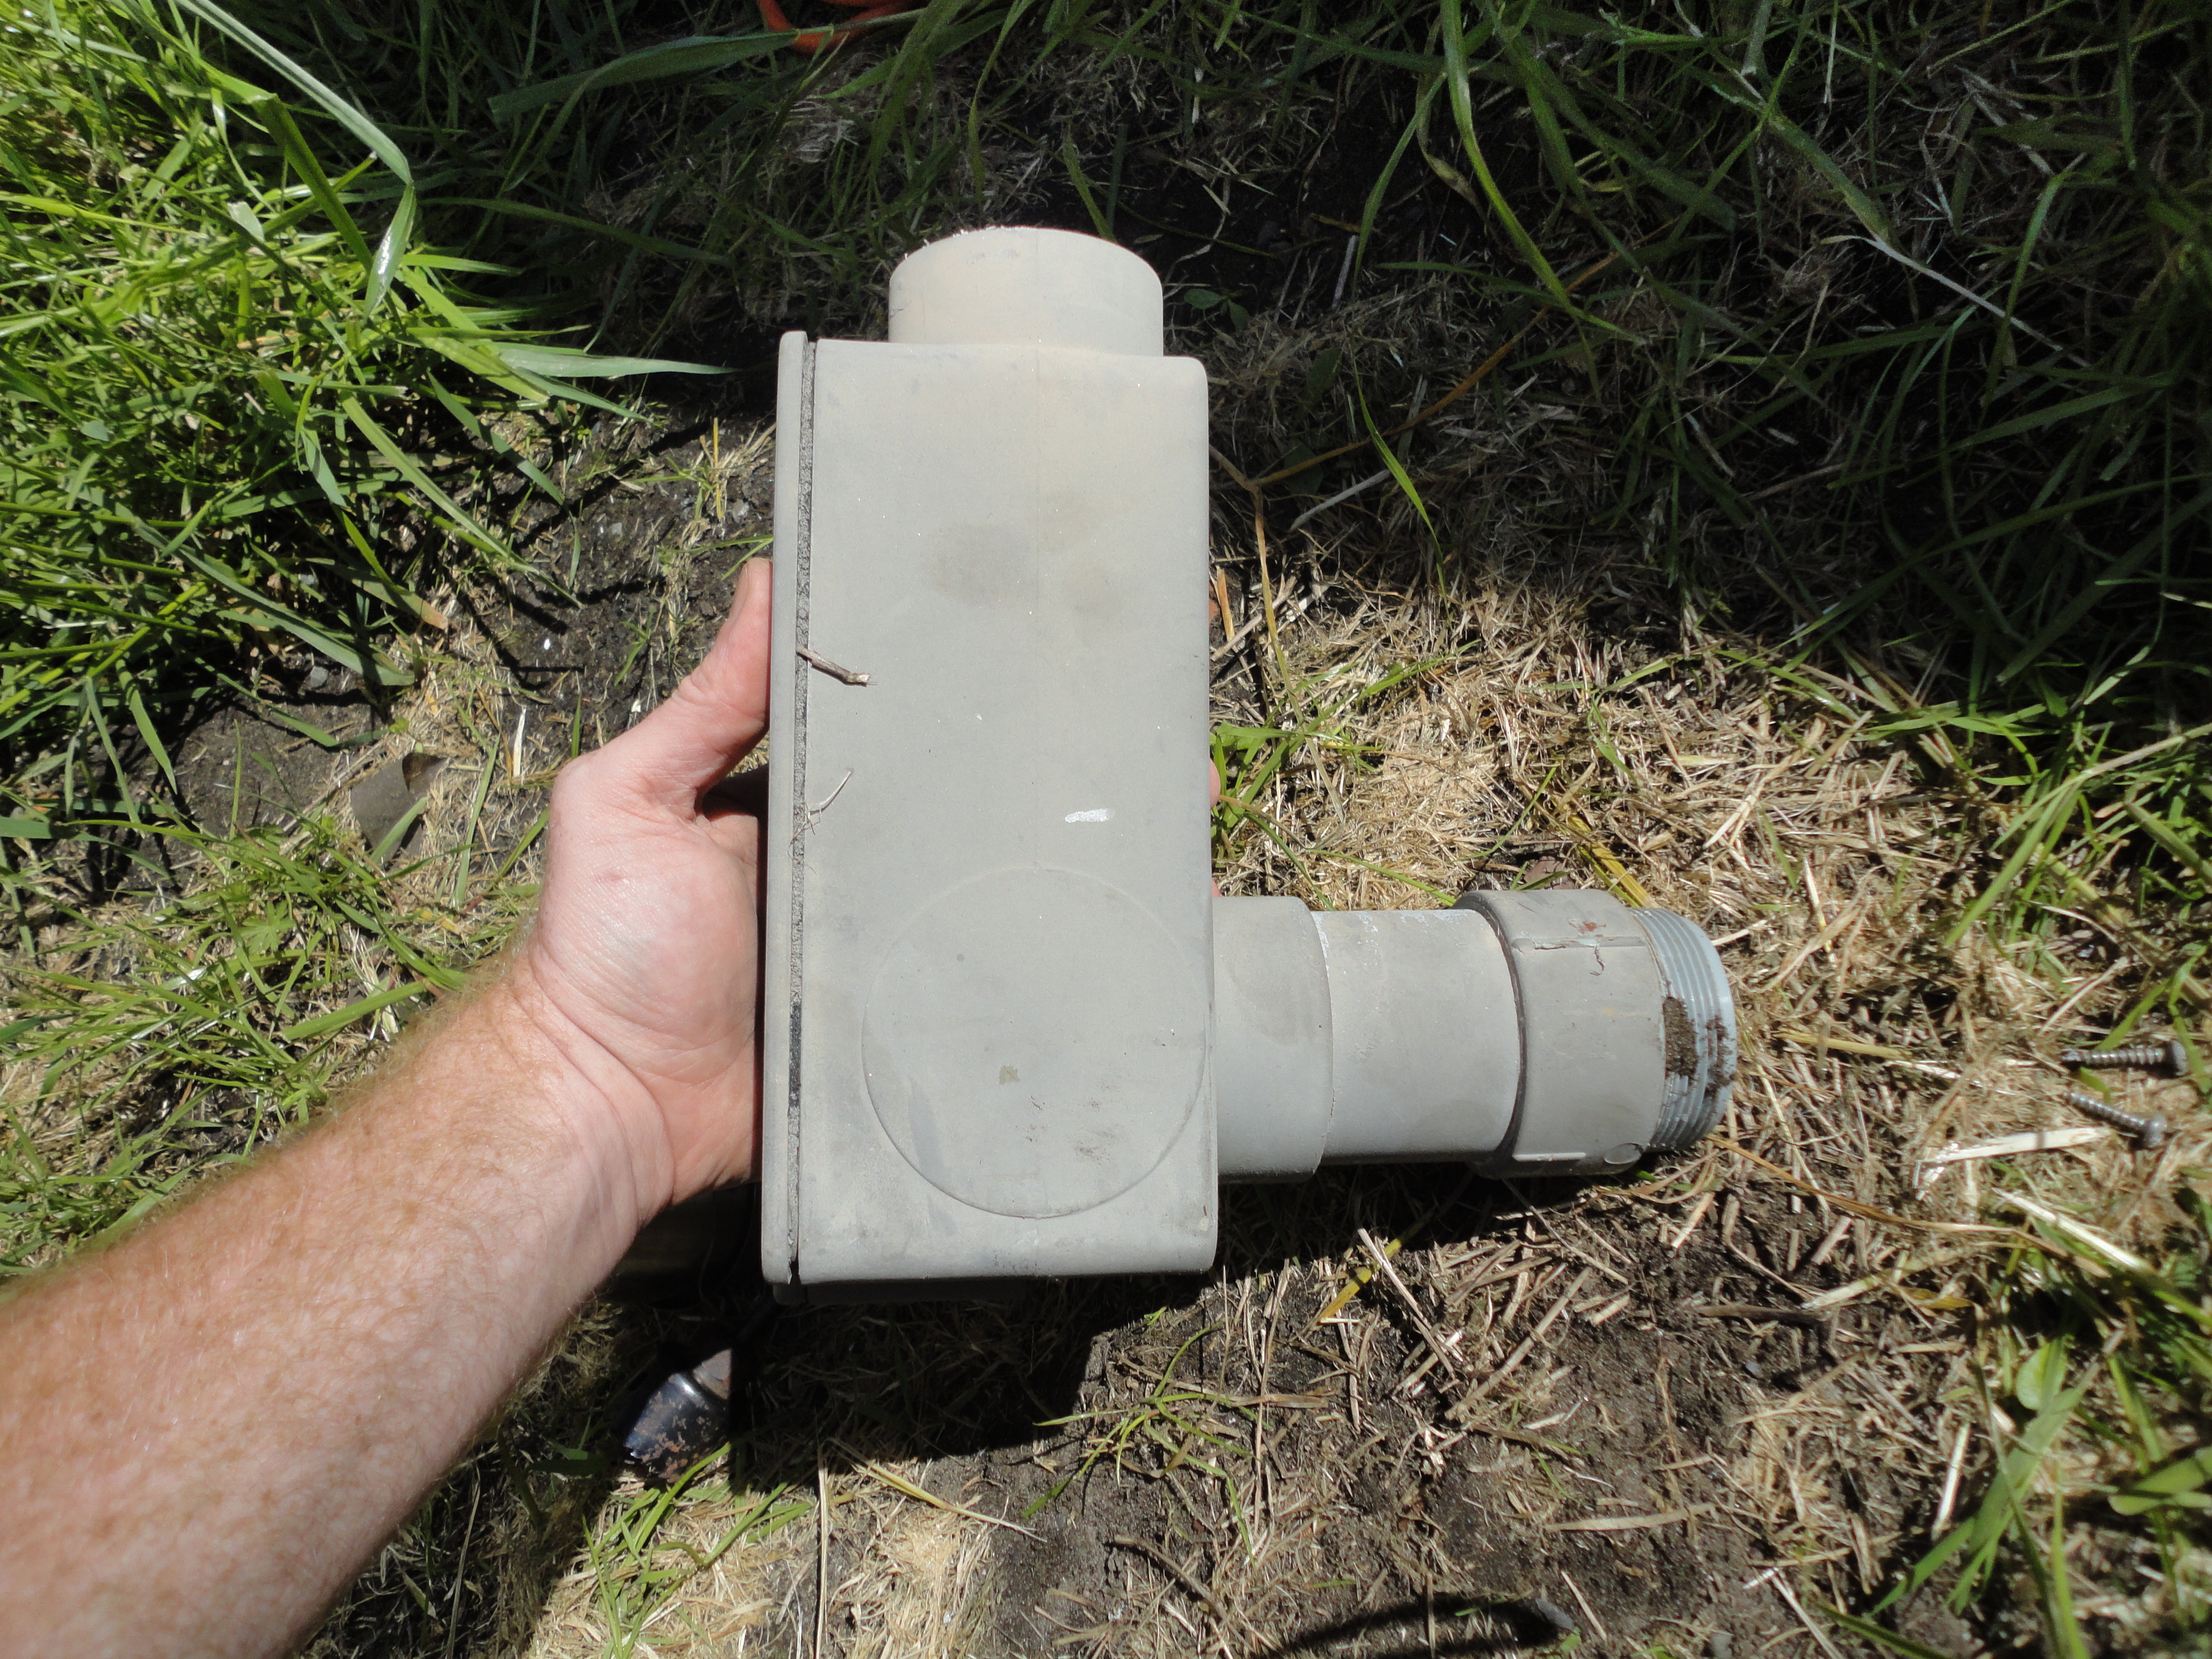
| 05:18, 7 May 2012 | Reusing electrical casing for first flush ball joint.JPG (file) |  |
4.19 MB | We decided to reuse the plastic electrical casing for first flush ball joint. | 1 |
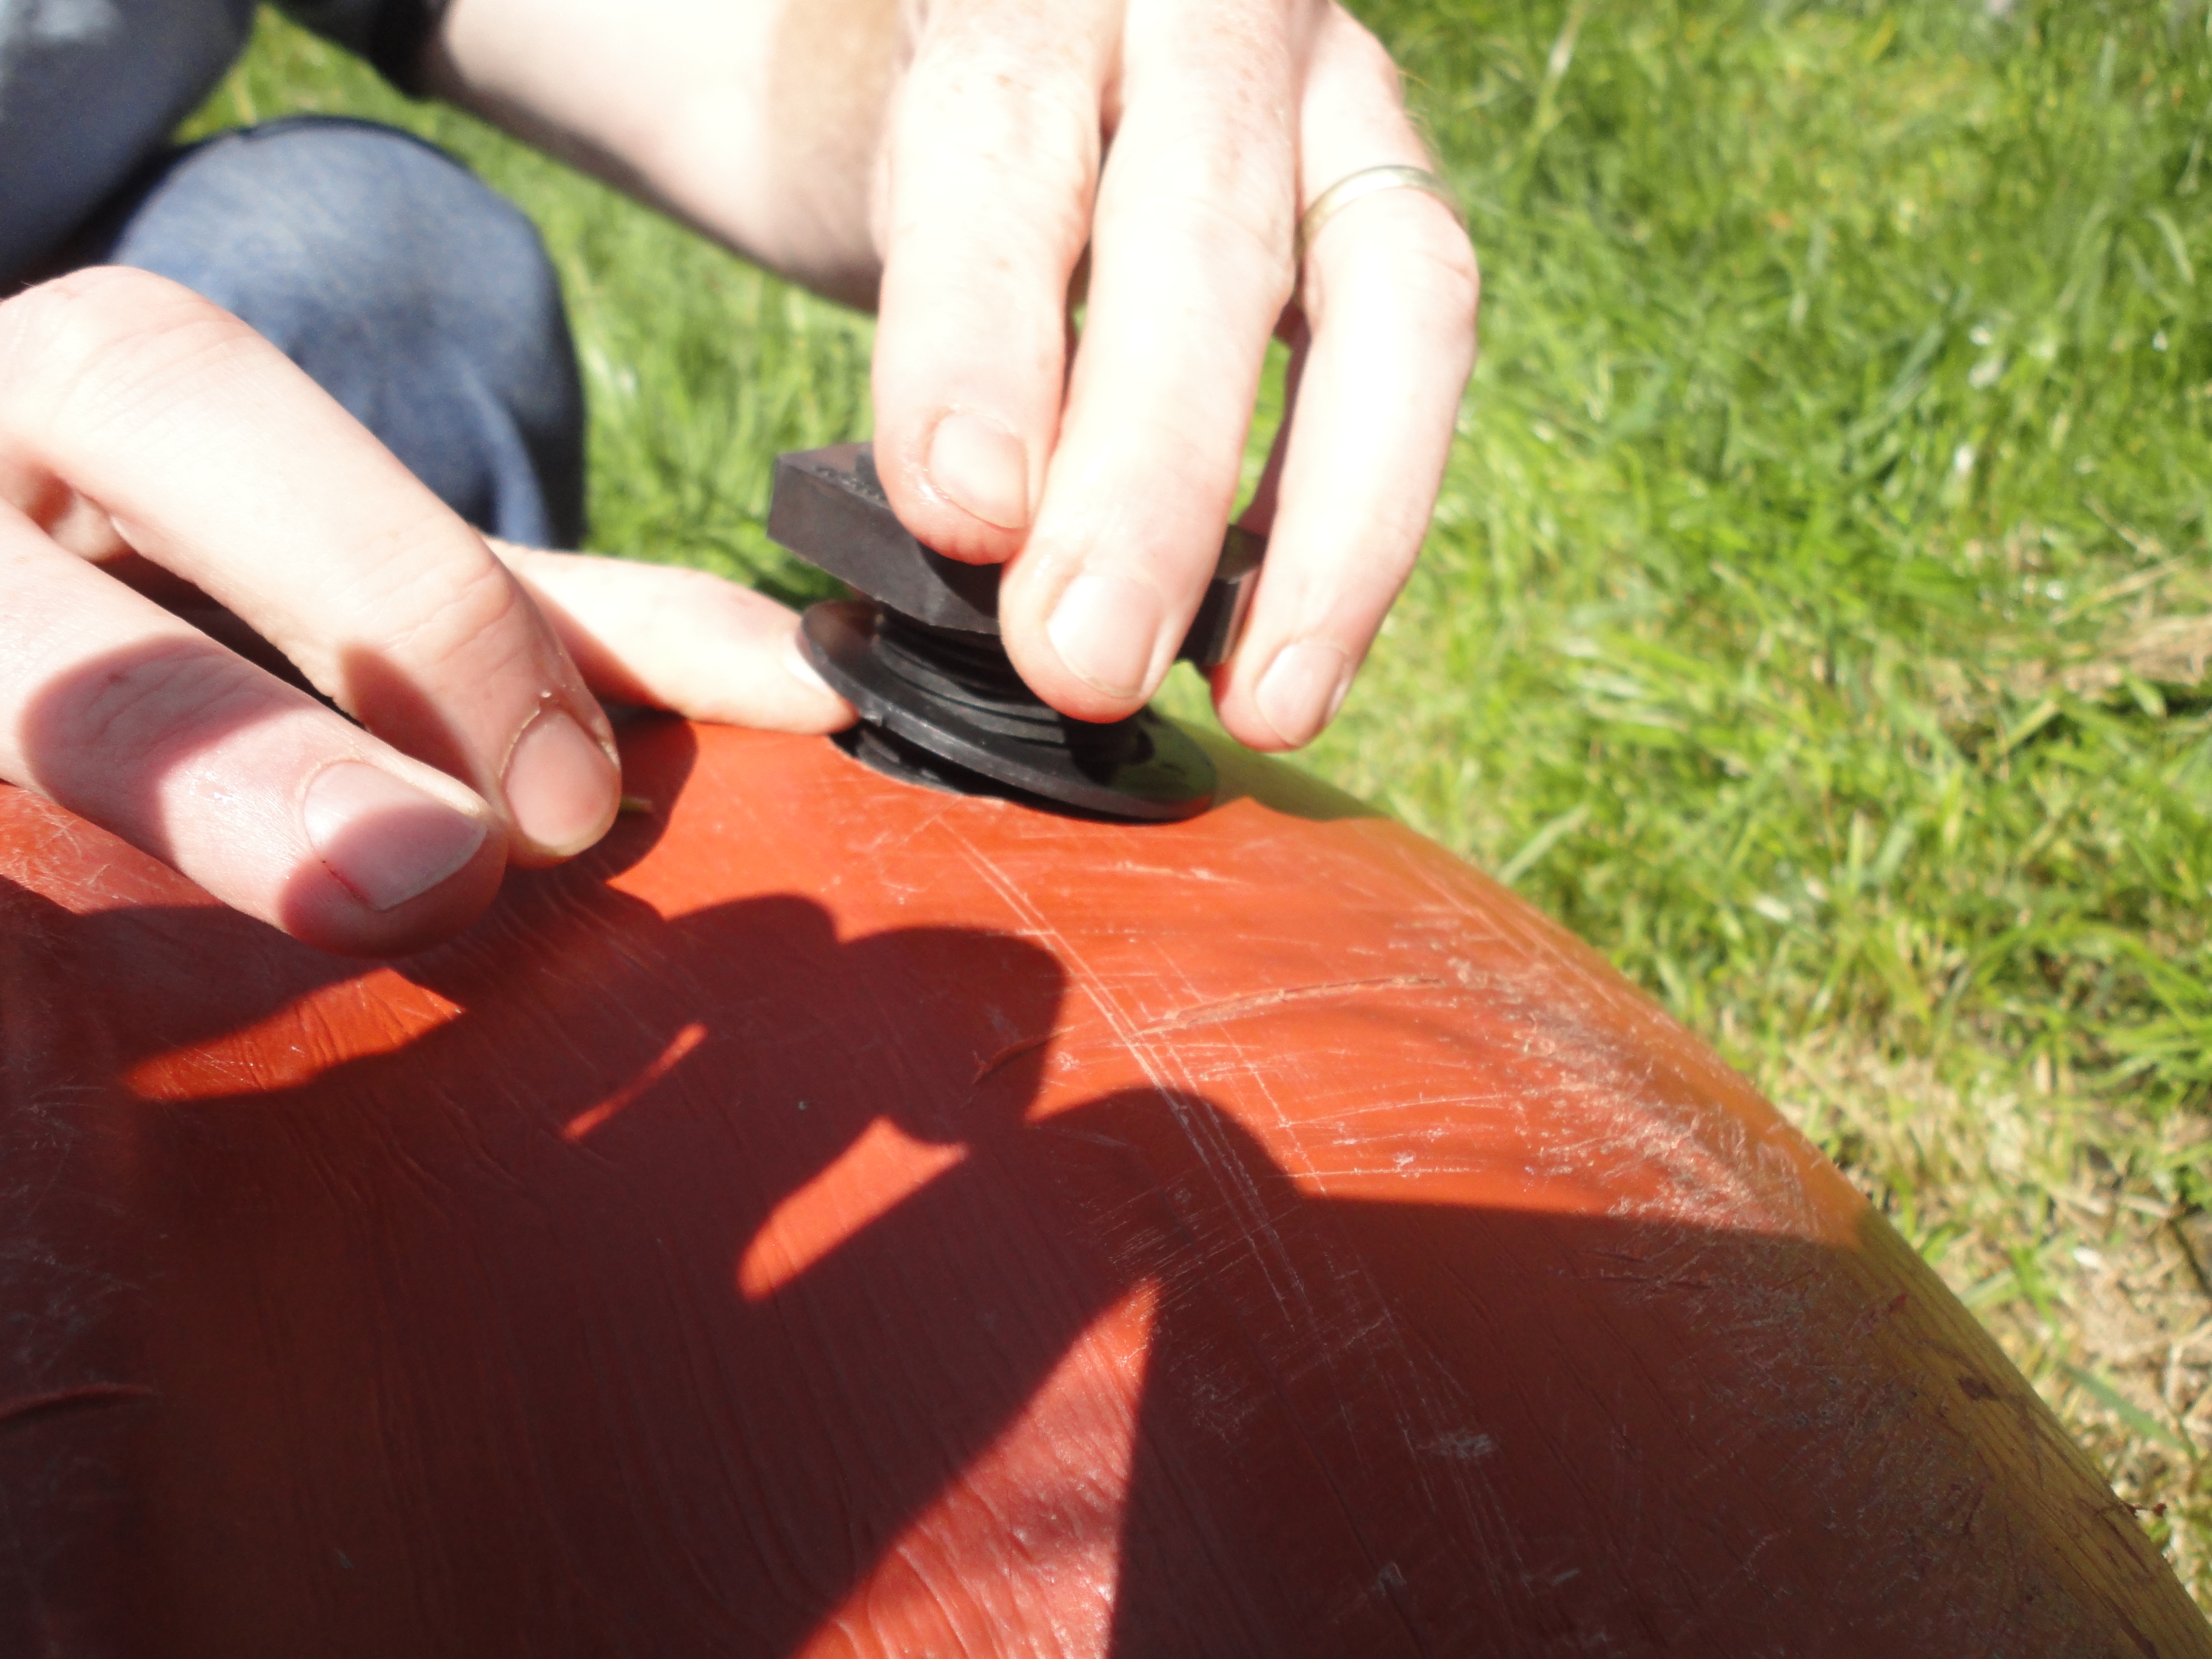
| 05:02, 7 May 2012 | Installing the mounting hardware for spigot.JPG (file) |  |
3.63 MB | Installing the mounting hardware for spigot on the rainwater catchment storage tank. | 1 |
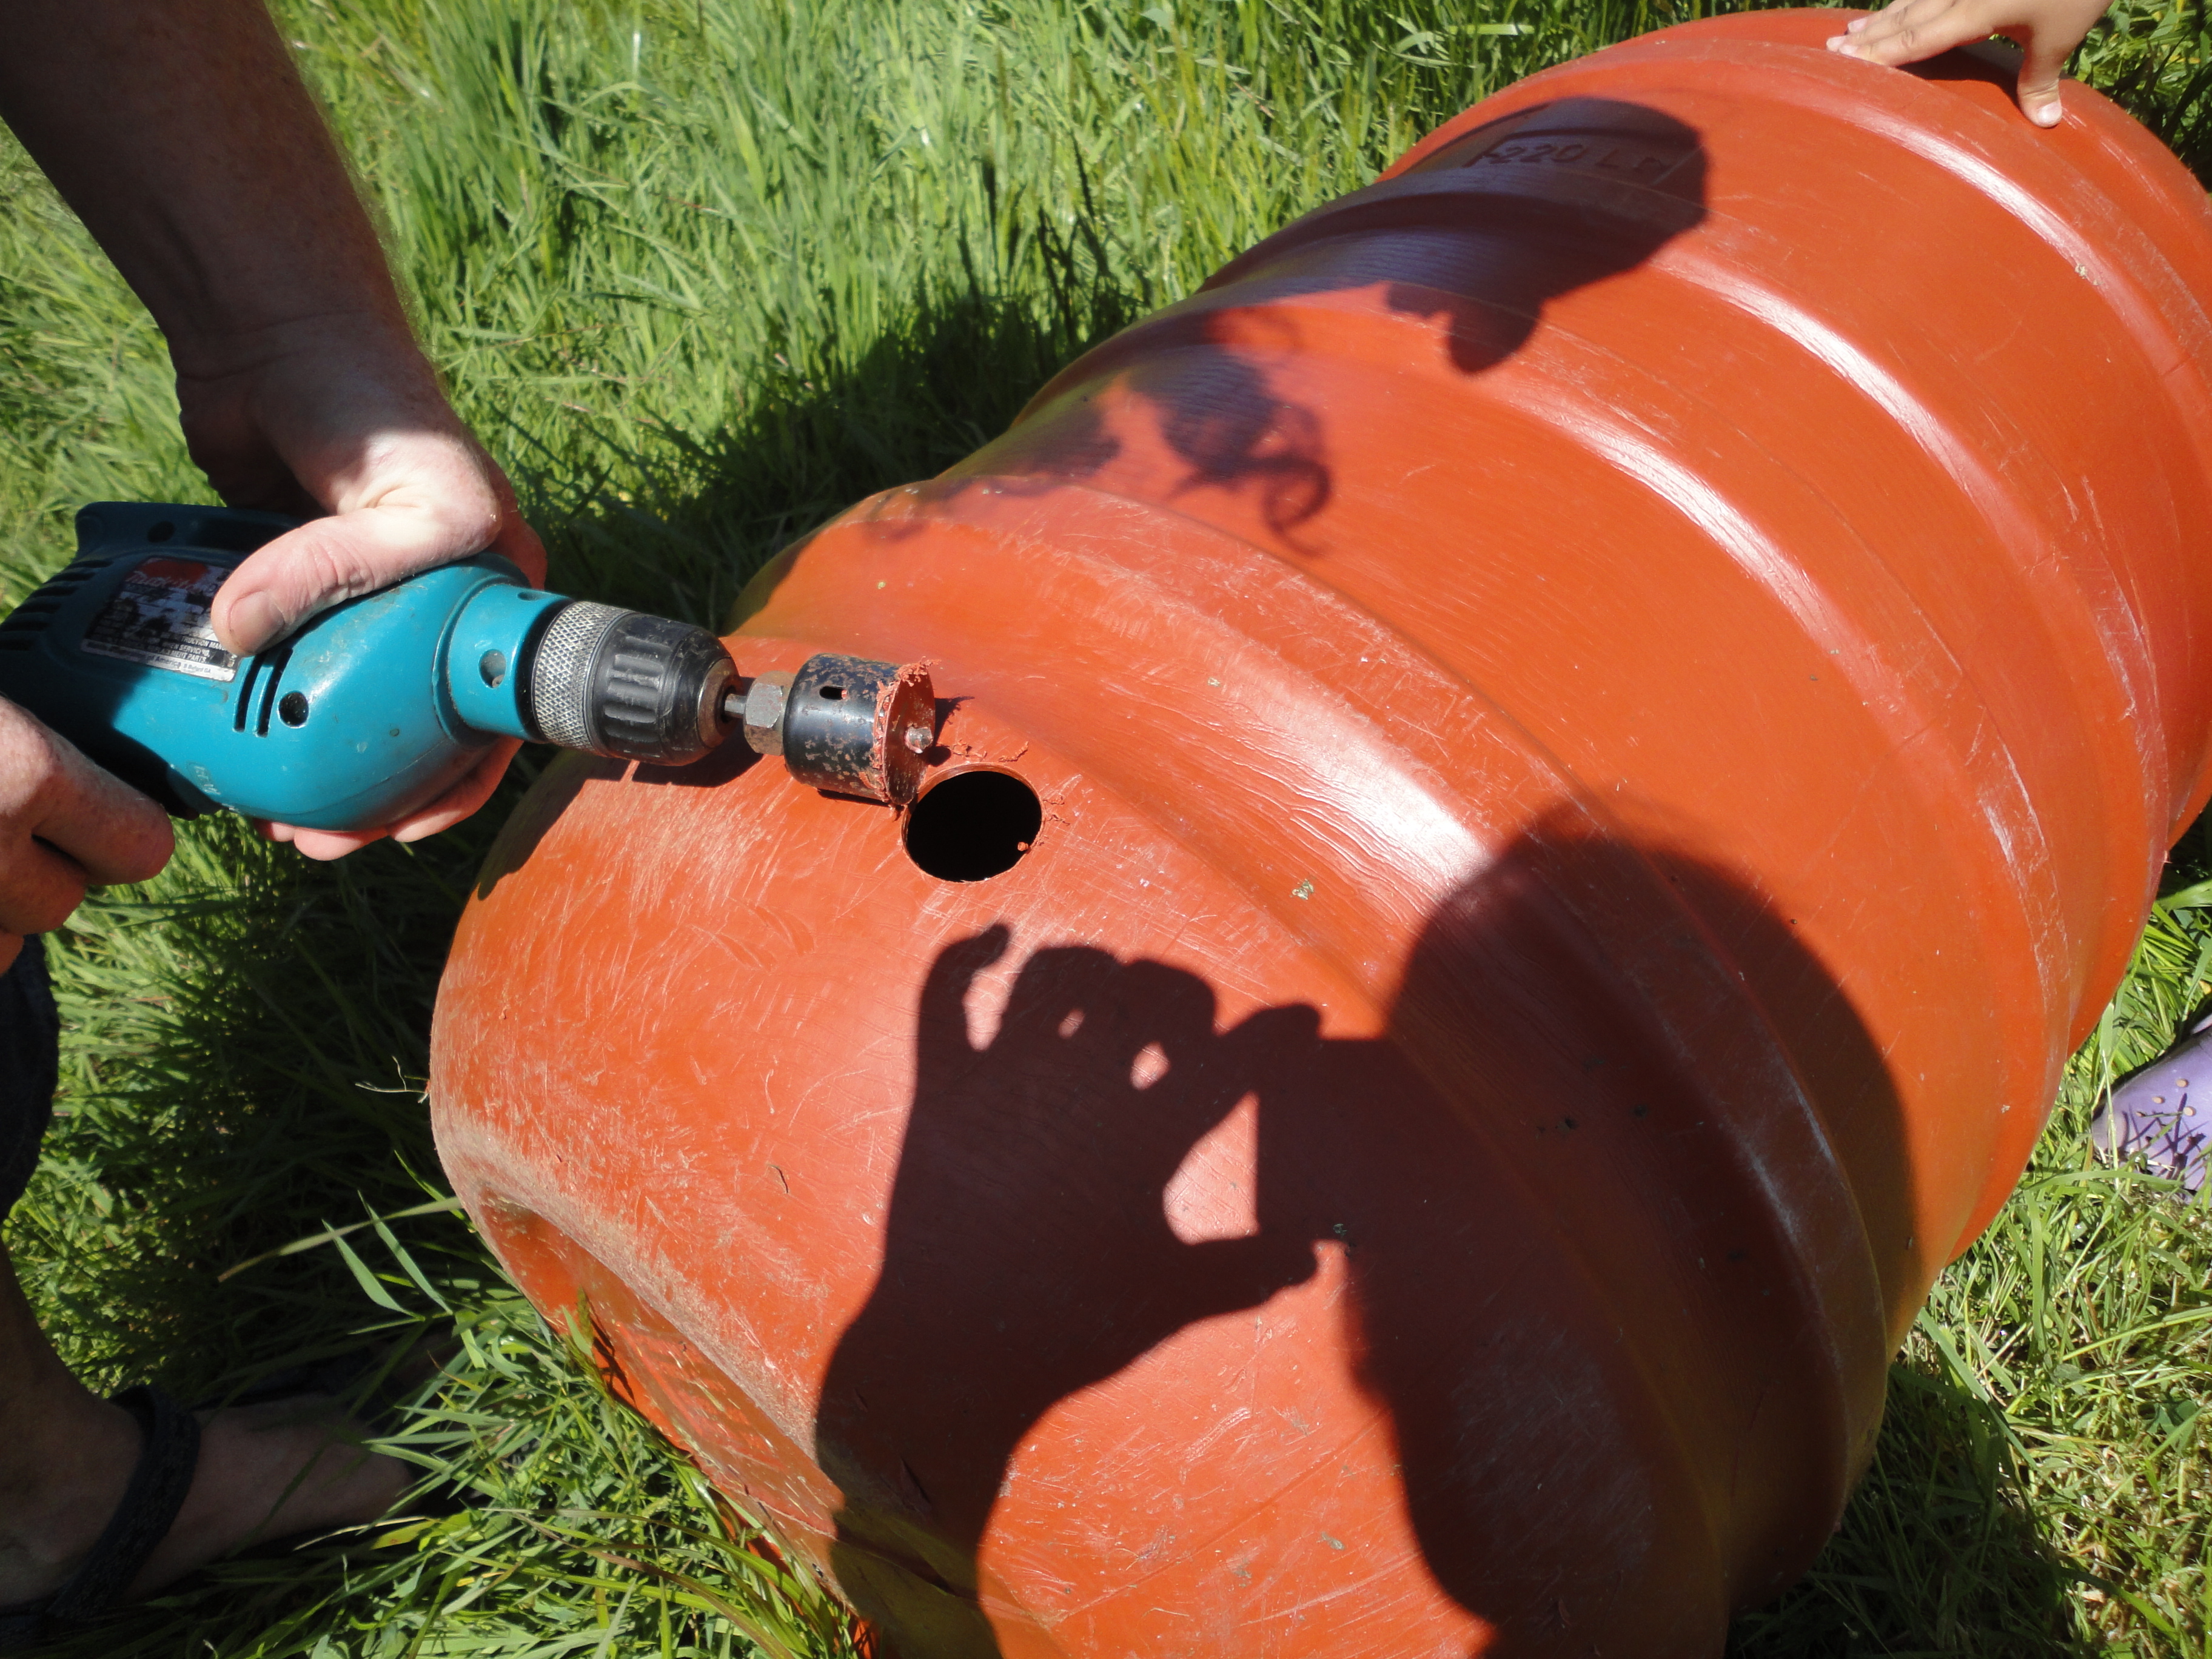
| 04:53, 7 May 2012 | Drilling out a hole for spigot mounting hardware.JPG (file) |  |
4.16 MB | We are using a drill to drill out a 1 inch hole for the spigot mounting hardware. | 1 |
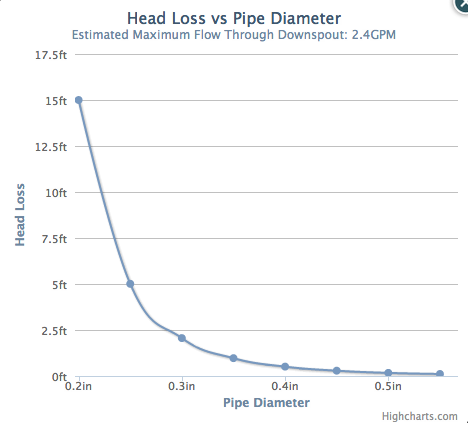
| 04:36, 7 May 2012 | Head Loss vs. Pipe diameter.png (file) |  |
34 KB | This is the chart of the estimated maximun flow through the downspout. | 1 |
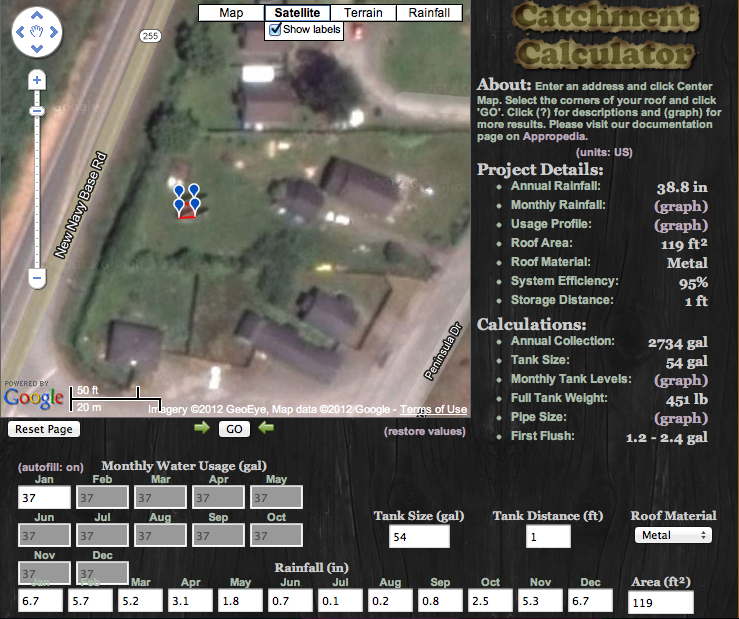
| 21:16, 6 May 2012 | PEqals.com screen shot.png (file) |  |
437 KB | Here is a screen shot from PEqal.com of an ariel view of the catchment site along with the project details and calculations | 1 |
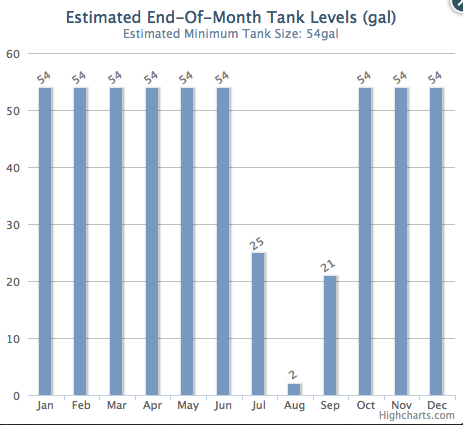
| 21:12, 6 May 2012 | End of Month Tank Level.png (file) |  |
27 KB | Chart of the estimated end of the month water storage tank level | 1 |
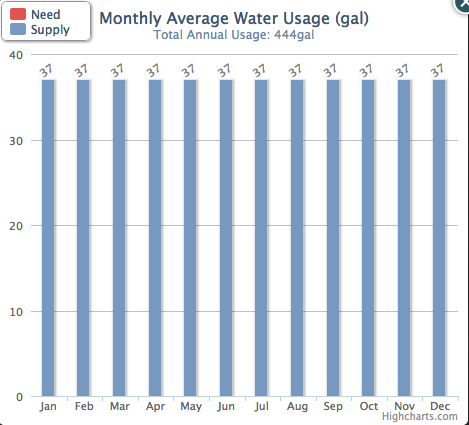
| 21:03, 6 May 2012 | Monthly Average Water Usage.png (file) |  |
28 KB | Chart showing the monthly average usage in the green house | 1 |
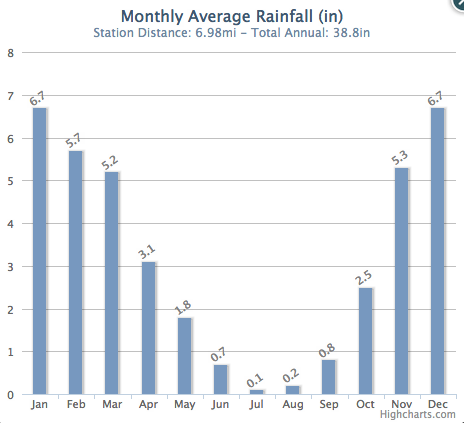
| 21:01, 6 May 2012 | Monthly Average Rainfall.png (file) |  |
29 KB | Chart showing the monthly average rainfall in Manila,CA. | 1 |
| 08:59, 7 March 2012 | Sideviewmanilagreenhouse1.JPG (file) |  |
1.83 MB | 1 |