(Created page with " {{MOST}} <!-- Comments that appear only in the edit view are formatted like this. --> <!-- These comments are offered as an aid as you get started. Remove as you wish. --> <...") |
|||
| Line 32: | Line 32: | ||
# Obtain an CAD model of your desired part | # Obtain an CAD model of your desired part | ||
## Search 3D model repositories ([https://yeggi.com Yeggi], [https://thingiverse.com Thingiverse], [https://youmagine.com YouMagine]) for existing models | ## Search 3D model repositories ([https://www.yobi3d.com Yobi3D], [https://yeggi.com Yeggi], [https://thingiverse.com Thingiverse], [https://youmagine.com YouMagine]) for existing models | ||
## Design a custom part using CAD software (free and open-source options include [//www.freecadweb.org FreeCAD] and [//www.openscad.org OpenSCAD]) | ## Design a custom part using CAD software (free and open-source options include [//www.freecadweb.org FreeCAD] and [//www.openscad.org OpenSCAD]) | ||
# Slice your model using a slicer (options include [https://ultimaker.com/en/products/cura-software Cura] and [//www.slic3r.org slic3r]) using suggested settings: | # Slice your model using a slicer (options include [https://ultimaker.com/en/products/cura-software Cura] and [//www.slic3r.org slic3r]) using suggested settings: | ||
Revision as of 07:07, 28 June 2017

Introduction
This procedure for open-source wax printers is based on work done at MichiganTech with RepRap derivative printers and custom RepRap driver Franklin.
Safety
Follow all safety procedures for your printer and the space you are in.
Equipment or Bill of Materials
Information about how to construct a delta-based printer can be found here.
- 3D printer capable of printing wax
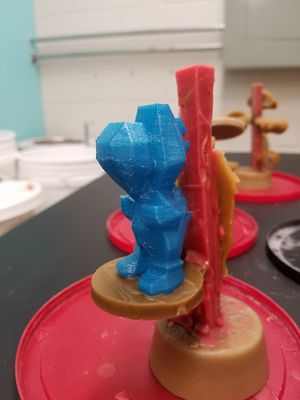
- Printable wax (found from Machinable Wax)
- Glue stick
Calibration & Tolerances
Information on how to calibrate a delta-based RepRap printer is found here.
Operation & Procedure
Generating g-code
- Obtain an CAD model of your desired part
- Slice your model using a slicer (options include Cura and slic3r) using suggested settings:
- Print speed: 25-40mm/s
- Brim-type adhesion
- 130C
- Save g-code
Printing
- Inspect the work area for any potential hazards and ensure equipment is properly hooked up
- Turn on printer and computer and navigate to your printer control software and load g-code to printer (if using Franklin, additional information can be found here)
- Apply glue stick to print bed and allow to dry completely
- Press print
Processing
- Printed parts can be removed carefully by hand or by gently lifting the edges from the print bed with a razor
- Printed parts can be wax welded to other pieces
- Print lines on the parts can be smoothed with hot utensils
Shutdown
- Allow hot end to cool to 50C before shutting off the printer

