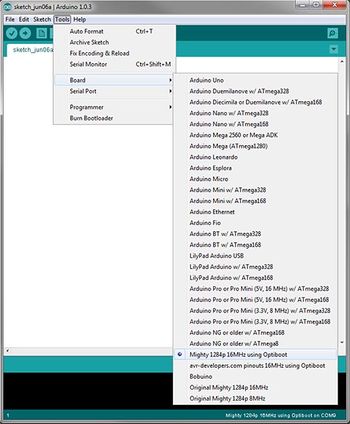
Arduino IDE select correct board.Ensure that the proper hardware files for the Melzi controller have been installed by selecting Tools>Board and locate Mighty 1284p 16 MHz using Optiboot. If not found in the list, return to overview and follow the instructions for installing the hardware files.
Select File>Open and navigate to the location where the MOST printer firmware was saved and select Repetier.pde.
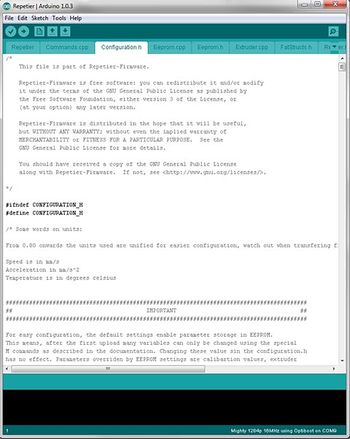
Open the Configuration.h tab.Note that the IDE separates the different files that make up Repetier firmware into different tabs along the top of the edit pane. Locate the Configuration.h tab and click on it.
The bulk of the definitions are logically named and documentation is thorough. Likewise, most of the settings will not need changing, but a few will.
Locate the line having "#define XAXIS_STEPS_PER_MM" and change that number to 53.3333. This is the number of steps the x-axis stepper motor must make in order to travel one millimeter.
Locate the line having "#define YAXIS_STEPS_PER_MM" and change that number to 53.3333.
Locate the line having "#define ZAXIS_STEPS_PER_MM" and change that number to 2560.
Locate the line having "#define EXT0_STEPS_PER_MM" and change that number to 750. This is the number of steps the extruder drive stepper motor must make in order to push approximately one millimeter of filament into the hot end.
The Arduino IDE does not automatically save the file upon compiling. Save the changes (File>Save or ctrl-s).
Upload the firmware to the printer controller (ctrl-u or clicking the upload button on the toolbar). The controller must be connected to the computer with a USB cable to upload the firmware.