Introduction
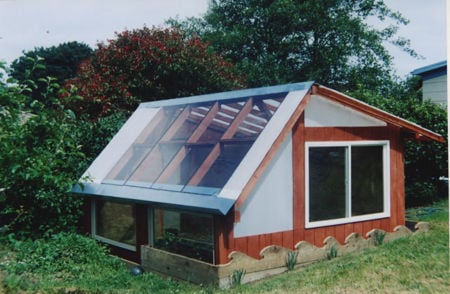
Welcome to our straw bale greenhouse. The following page will take you with us on our greenhouse building adventure. We will discuss the process, what worked best and did not work, problems we had, how much time it took to build, and the money spent on the project. Over all we hope that this is a fun and comprehensive look at what we did to make this project come together. The reason that we chose to build a straw bales greenhouse is that both Scott (my building partner) and I would like to get into alternative building as a career and we thought that this would be a good place to start and learn from.
Our Plan
To build a straw bale greenhouse where Kiva can grow chili peppers, tomatoes, and lots of other yummy warm weather plants. The reason we decided to build with straw bale was to gain experience with this material and the great insulative value of it. Scott and I decided to have two of the walls straw bale and the other two wood and glass. Where we live no permits are required for a 10' x 12' greenhouse, so we decided these would be the inside dimensions. To receive optimal year-round sun in our area the glass on the south facing wall is at a 40 degree angle. At the building site there is plenty of morning sun and not much evening sun so we opted to have our east side be glass and our west side be straw bale.
Building Process
Foundation
This is the yard before we did any work. The garden box and wheelbarrow are right where the greenhouse is going to be built. This part of the yard gets the most light throughout the day and putting the greenhouse here will not block the view from the house. The shade of the house next door will reach the greenhouse late enough in the evening that it will not have any significant affect.(Fig 1)

Because the yard is on a slant we had to level it to lay the foundation. On the side farthest away form the blue house we had to dig down about three feet. Moving all of the soil by hand took much longer then we originally thought and if I were to do it again I would consider renting a small bulldozer.(Fig 2) Once we leveled the ground it was time to dig out the area for the foundation. Scott is standing on the northern side and the fence is to the west. The northeast corner was the hardest corner to dig out and get the forms in place. It is all clay after the first foot and a half and was extremely difficult to work with. This corner took us almost the same amount of time to as the entire rest of it. When digging out where the foundation was to go it was really important to make sure it was level, square, and all four sides were even with each other so that our foundation would be level, flat, and square.(Fig 3) After the ground was dug and leveled, we put in the forms for the foundation, the posts for the retaining wall, and the rebar. The inside forms are 12ft by 9ft and the outside forms are roughly 14ft by 12ft. Because the north and west walls are going to be straw bale the foundation on those two sides has to be 18in wide. This is so that a bale can sit on its side and not hang over the edge of the foundation. We have three pieces of rebar running down each side of the foundation, which are sitting three inches off the ground and the poles for the retaining wall go into the ground about two feet and are leveled.(Fig 4) The concrete for the foundation we bought premixed and ready to pour. To get it from the wheelbarrow into the forms we used a small piece of metal stovepipe, which we got from the recycling center, that made a perfect shoot. In total we used about two and a half yards of concrete. Everything went really smoothly, the forms held and we had no disasters. Once the pour was complete we pushed L shaped rebar pieces into the foundation on the North and West sides so that they were sticking up vertically. These are to help hold the bales in place.(Fig 5