Available in other languages: /pt /tr
A large body of do-it-yourself hexayurt building information has been created by Vinay Gupta and average folk who made their own. Incidentally, a lot of the average folks attend the Burning Man Arts Festival, which is hosted in a windy, hot desert. Hexayurts made with rigid insulation are great in that environment. Whatever you're planning to build a hexayurt for, you can find all variety of hexayurt shapes and sizes, and instructions at Hexayurt playa. If you're interested in more about plywood hexayurts, see hexayurt.com.
Videos

Quicktime
Higher quality but we pay for the bandwidth. Please download these and save them locally if you want to view them frequently.
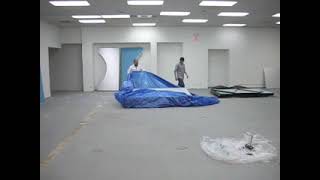
- http://files.howtolivewiki.com/tape_anchors.mov (7M) (How to make Tape Anchors - the tie-downs between the roof components and the guy lines on the larger hexayurts)
- http://files.howtolivewiki.com/6_foot_stretch_hexayurt assembly.web.mov (56M) (6' Stretch Hexayurt Assembly)
- http://files.howtolivewiki.com/8_foot_hexayurt_assembly_video.mov (39M) (8' Hexayurt Assembly)
Let's print a basic curriculum on each Hexayurt so that people can read useful information, relevant to their own health, comfort or survival, on the buildings we are going to send them. Furthermore, let's put the kid's material near the ground, and the more adult material further up the walls.
Sounds like a good idea?
While there is a lot of detail to be worked out, both of the materials we are considering for production units have printable surfaces, and large format printing on flat materials is a commonly solved problem. We can do this.
If we cover both the inside and the outside of the vertical walls we get the equivalent of 600 letter-sized pages on an 8' hexayurt, and 1200 pages on a 12' hexayurt. That's a lot of copy!
So what to print?
Wikipedia-type Content
We could do a lot worst than pick a few dozen of the more useful articles from Wikipedia and other open-source materials and reprint them. However, there are some severe problems with this approach:
- Wikipedia articles are long and boring
- They are not written as how-to guides
- They use a very large subset of the English language
- Some articles could be just plain wrong and misleading at the time they were taken and printed
However, as a very basic starting point, we could do worse.
Appropedia Content
The How tos from this web site would provide more targeted guides.
Repurpose Books
Another approach would be to try and get reuse rights to books like Where There Is No Doctor. However, we need a skilled team to know which books to obtain, and there may be unforeseen problems in the transition between the printed page and the printed wall. However, this approach offers the best access to high quality information in the immediate future.
One possible source of books, already scanned and ready to go, is the Appropriate Technology Library. Some of this content is already available here on Appropedia, such as that provided by CD3WD.
After reading through Where There Is No Doctor, it seems to me that wall/page space will become scarce quickly. There is a lot of information to get to the people, and printing just the basics of a topic won't get the job done, especially when it comes to medical situations with "If... then..." predicaments. This could lead to a need for lots of text on lots of walls.
We might configure the groupings of yurts in camps so that a certain number of yurts were purposed for more detailed information. In a grouping of 10 yurts, for example, 5 might be printed with medical info (ranging from very basic first aid to diagnosing and treating bacterial infections, etc), 3 might be printed with sanitation and camp/yurt maintenance recommendations, 1 might be for posting news about the camp and the after-math of the disaster, and the last 1 might be left available for people in the camps to leave messages for each other.
Of course this will also depend on the length of time a yurt camp is in use -- how much will a single family need to know about preventing heart-disease if they're in a camp for 2 months? Lots of long-term and obscure medical information could be omitted.
So how do we use camps as books? And which disaster situations require which kind of books? Is there a bank of basic educational materials in the public domain for Arabic, English, Mandarin, Hindi, French, Russian, Spanish?
Walls printed with text will effectively become "walk-through" or "live-in" books. Book/shelters. A catalog of some kind will be necessary to point people to nearby yurts with the information they need in a very quick and efficient manner.
Socio-cultural implications of this include changing conceptions of space and territory. Is a yurt the territory of the family who lives in it? How territorial will they be about the information printed on its walls? Is the potential for conflict here reason enough to develop a very basic 'curriculum' for each yurt, so that each structure is completely info-autonomous?
Custom Basic Educational Curriculum
The right approach is a basic educational curriculum targeted to each area. A BEC would provide introductory reading materials, so that those who already read English could teach others. It would have material for children and adults alike and focus on practical knowledge, explaining concepts like germ theory and crop rotation, thermodynamics in the context of drying food or making fires burn better, and so on.
As an example, consider explaining germ theory to a five year old child in a no-TV, no-Internet village.
You start from what they can see: pick an ant or another bug. Explain that we have large bodies, and the ant only has a tiny body. Explain that there are creatures which are as small compared to the ant as the ant is small compared to us. Explain that these creatures are so small we cannot see them. Explain that a person can get infested with these creatures, causing diseases. This explanation of germ theory seems like it would work more or less anywhere, for more or less anybody, and then concepts like basic sanitation practices can be taught on top of the accurate scientific model.
These basic scientific models are incredibly powerful. Consider that the Standard Days Method gives excellent birth control results with essentially no technological base. Any culture with counting could apply this technique, and there is no solid reason that a stone age culture could not have maintained the technologies to apply this method if they understood the principles giving rise to the practice.
A properly prepared knowledge packet could describe a wide range of tools and techniques, all of which can be implemented with field-available technologies, giving many of the benefits of 21st century science to people in essentially medieval living conditions. Of course, there are severe cultural problems related to magical thinking or cultural taboos which sabotage the success of some of these tools. Deep expertise and monitoring of results are required to ensure that this part of the project works.
Large Knowledgebase Distribution
There is no need to print the same material on every hexayurt. One approach would be to take a much, much larger knowledgebase and print a common set of materials on every yurt (instructions on hand washing, basic geography, whatever seems relevant) and then fill the remaining walls with parts of the larger corpus. Assuming 50% of the walls are devoted to printing parts of the larger knowledgebase, a 100,000 person camp has several million pages of text available to it. One would require a lot of replication to ensure that loss of a single building didn't make a bigger text useless - long books could span several buildings - and god alone knows how one could do indexing so you could find the building with the text you need on it... but if a sufficiently cheap and flexible printing solution can be found so we can put different material on each building, we could get enormous quantities of knowledge into the hands of those who need it most.
Language and translation issues
Most of the readily available material we have is in English. Most of the internet-connected writers who might participate in an open project speak English. So it is likely that a lot of the text will at least start in English. The BEC could be written in one of the reduced-vocabulary Englishes. One candidate is the Voice of America's Special English. This might also simplify translation and machine translation efforts.
Also, and this notion needs to be checked - my guess is that in most parts of the world, in a small camp, at least a few people will speak English well enough to teach people how to speak and read it. For short term deployment this is not going to help, but if people are going to be stuck in camps for generations, it seems like we could print as much material in the local languages as possible and the rest of the material in English and hope for the best. One approach would be to have machine-translated local language text running beside the English originals.
My guess is that a combination of these approaches could be tried at first and we could collect field data to see what was most useful.
Cultural Issues
What happens if something printed on a hexayurt is unacceptable for cultural reasons? The birth control instruction hexayurt winds up in a camp where people are angry and insulted at having improper materials sent to them.
I don't know how to avoid these issues. I don't even know where to begin to address them.
It may be that through mis-steps hexayurt camps are burned down by militant radicals that disapprove of some medical information printed on the walls. But in emergencies where the affected people have nothing left, how likely are they to react violently and destroy the only chance for their family's survival?
Cultural anthropologists should help decide what is printed and how it is printed, but even with their best guesses, some times things will fall through the cracks.
This page is for posting whatever speculations or brainstorms you have for the Hexayurt project, and asking any kind of weird question you think might help move the project along. It's a sort of sandbox. If strong ideas get generated here, refine them and post them in the appropriate wiki page (or start a new page for it).
There are further and boarder ideas on the To Do Page, which include infrastructure ideas as well as online education organization updates.
Flying Saucer/back rest Hexayurt. Make slight trapezoids of 4x8 wall panels of 8' Hexayurt. Trim narrow wedges from the ends of the wall pannels. Put narrow, long edge downward. Wall will then go up and out from ground, giving Hexayurt cool flying saucer appearance and also, good backrest angle to walls (though I know it's not recommended--maybe do this only with 2" thick panels or with wall reinforcement.
ABREF refugee shelters[1] at first look similar to Hexayurts. Both systems have a regular hexagonal perimeter of vertical sides. Both systems make all the roof pieces converge on a single highest point in the center. Perhaps mixing the best ideas from both systems will produce something better than either one?
Tape Eave/Drip Line Make a short eave of tape so that rain does not run down the outside of the wall. Add a 2-5" doubled over flap of tape around edge of roof panels that sticks out beyond the wall. At the very least, make tape awnings above windows and doors.
Insect-repellent panels. Organic & non-toxic. Cheap? How about a "wide spectrum" insect repellent to stave off fleas and other grim nasties too?
Kirkyan Hexayurts. This would take more money than... but if hexayurts weren't just "spimes" -- trackable in space and time, intelligent enough to push info back to the right radio signal --- but "kirkyans" --- spimes that can use environmental information to alter their form and configuration for greater efficiency and problem solving. Autopoeitic systems, environmental controls? Other uses? http://blog.rebang.com/?p=786
How do we get good Internet connection to these rural, poor camps after earthquakes? We can use the net to get very useful info quickly, and also use many apps on it as a 'virtual drive' to save info and come back to it later (like a Gmail accounts). Will the Gatr satellite sphere do this, or what else is needed?
Seed-impregnated hexacomb boards would make a ready to roll food source if the disaster were great enough that the camp would stand for 2+ months (depending on the crop). Just lay them out on the soil and use gray water. The hexacomb could come preloaded with soil. The roots would grow through the cardboard, into the topsoil.
All-season hexayurt As the structural isloation panel has two sides, one silver and one white, you could use the silver outside for hot seasons, and inside in winter. People inside would emit heat that would be reflected and saved, just as in an igloo. Also, any light used inside would reflect on the walls ; maybe it will make it possible to use very few energy for lighting : a bulb driven into a three-corner would spread much light.
http://web.archive.org/web/20160217165913/http://www.digital-librarian.com/yurts.html
Contacts

Email is the best way to contact us. Use BeautifulWorldCrew@HowToLiveWiki.Com.
Vinay's personal blog] has Hexayurt news in the "hexayurt" category.
For questions or ideas regarding the editing/updating of the Hexayurt Appropedia project, please contact User:Apepitone.
Project Discussion List
http://groups.google.com/group/hexayurt
Join the group at http://howtolivewiki.com/code/join_hexayurt_group.php
Available in other languages: /fi
When the Hexayurt is used in a hot climate it will get hot inside. The heat comes from four sources:
- Solar gains due to sunlight warming the fabric
- Fabric heat gains due to outside air being hotter than inside air
- Ventilation heat gains due to incoming air being hotter than the inside air.* Heat from people and equipment in the Hexayurt.
The Hexayurt has good insulation. It is highly reflective (when new and clean) so it reflects most of the solar energy. However it has very low thermal mass so that, with no air conditioning, it will heat up when the sun is out.
(This is theoretical. Can someone with more practical experience of using the Hexayurt please review).
Increasing the Thermal mass
If there is a significant temperature difference between day time and night time temperatures (i.e. desert areas) then increasing the thermal mass of the Hexayurt will slow down the speed with which the Hexayurt heats up during the day, reducing the temperature inside the yurt during morning and early afternoon. The simplest way to increase the thermal mass of the Hexayurt is to use the thermal mass of the ground under it. During the night maximise the exposed area of ground. Roll up any floor coverings, open all the vents. Sleep on camp beds raised off the ground so the night time cold air can circulate below the beds (or sleep outside). Wrap the floor coverings round you so they keep you warm but not the floor. Get the ground as cold as you can. As soon as the outside air temperature rises above the ground temperature (probably soon after dawn) close the vents and put back the floor coverings. In some cases the simplest way of doing this may be to move the entire Hexayurt at dawn and put it down on a nice cold bit of ground.
Controlling Ventilation heat gains
During the day limit the amount of hot outside air which comes into the Hexayurt. This will reduce the heat gains due to incoming air.
Bring the air in at low level so the cold ground can cool this incoming air so it doesn't heat the Hexayurt. This doesn't reduce the ventilation heat gains but it does improve conditions in the Hexayurt because the heat goes into the ground rather than warming the inside air and then using the ground coolth to cool the air.
The hottest air will accumulate at the highest point in the yurt so your exhaust vent should be higher up, on the downwind side of the yurt. As we have limited the ventilation to a minimum therefore we want to make sure the exhaust air takes away as much heat as possible. A Solar chimney can be used to help move the exhaust air and this will also help draw in supply air where there is no wind. (See also Cheap solar chimney)
Alternatively you can cover the ground with an insulating layer (sleeping bags, carpet etc.) to keep the ground cold during the day. You now have some nice cold ground to sit on when the Hexayurt seems hot; just pull back the floor covering and sit down. Sitting on the floor also means you are out of the bubble of hot air at the highest point in the Hexayurt. In this way the coolth stored in the ground is controlled and used for personal cooling rather than cooling the entire yurt.
Reduce the solar heat gains
Any shading which reduces the amount of sunlight hitting the Hexayurt will reduce the solar heat gains. Shading in the morning will keep out heat which would otherwise be in the Hexayurt all day. Putting the Hexayurt under trees or next to a hill can give this effect. A large banner if properly sited can cast a shadow which reduces the solar gains.
Keeping the Hexayurt shiny will mean more sunlight is reflected away and less is absorbed by the roof.
Reduce Fabric gains
Even if sunlight impinging on the Hexayurt is reduced the Hexayurt will still heat up till the outside surface is close to the temperature of the outside air and if this is hotter than the inside air then heat will leak through into the Hexayurt and heat the inside air adjacent to the walls and roof. Lining the walls and roof with drapes will keep this hot air from getting into the rest of the Hexayurt. These need to be light due to the limited load bearing capacity of the Hexayurt
Reduce equipment heat gains
As the Hexayurt is so well insulated any heat in the yurt will stay inside so be wary of operating any machinery in the Hexayurt during the day. Any heat given off will serve to heat the Hexayurt. Any computers should be laptops, not towers. Limit the amount of sunlight you let into the yurt - a lumen of light from an LED or a fluorescent lamp gives off fewer watts of heat than a lumen of sunlight. Any fridge or cooling unit should be set up so it's heat rejection (the pipe coil on the back) is to outside the yurt. If you do not do this then a fridge or cooling unit will just heat up the yurt.
SleepBreeze personal cooler
The SleepBreeze personal cooler is an intersesting device. Basically it is a small fan and which blows air into a long sock. The air leaks out of the sock creating a gentle breeze. If you put one on the bed beside you then it can create a current of air over you which may help you sleep.
Humidity
The paragraphs above consider the temperature. When considering the conditions inside the Hexayurt we also need to consider the humidity. If the Hexayurt is naturally ventilated then the moisture content of the air inside the tent (in grams of H2O per kG of air) will be pretty much the same inside and outside. If there are a lot of people or kettles boiling in the Hexayurt then moisture content will be higher inside. Moisture content is however not the same as relative humidity. When we talk of humidity we are usually talking about the relative humidity which is the moisture content as a percentage of the maximum moisture content at that temperature.
When we cool air then eventually the air gets so cold that water starts to condense out of the air as condensate or dew. That temperature is the Dew point and it is a measure of the moisture content of the air; the point at which the relative humidity is 100%. If we have air with a dew point of 10C then it's relative humidity will be 100% at 10C, 80% at 14C, 60% at 18C, 40% at 25C. The dew point of this air will still be 10C because the moisture content has not changed. The Psychrometric chart shows rH relative to temperature and dew point.
Cooling air will not affect the moisture content but it will increase the relative humidity. The only way to reduce the moisture content is to cool the air to below the dew point and make the moisture condense out. Then keep this drier air from mixing with the more humid outside air.
Evaporative cooling
See the article on Evaporative Cooling
If the humidity of the air is less than 100% then water will evaporate. It takes heat to turn liquid water into vapour so the remaining water will cool as it gives up heat to the vapour. In principal this will continue until the water temperature has dropped to the dew point of the air. This is how our bodies regulate their heat - by sweating and then, as the sweat evaporates, it takes this heat away, helping the body stay cool. This is why standing in a breeze feels so cooling - evaporation works much better if there is a constant stream of dry air on our skin. If the air is still we get a thin boundary layer of air which as been saturated in our evaporated sweat and this layer can't absorb any more moisture.
If, instead of a bucket of water we were to spray the water into the air then the water will evaporate in the air. As the water evaporates it cools until all of the spray droplets have evaporated and the air has cooled and the moisture content of the air has increased. This is known as Adiabatic cooling. Energy in the form of heat in the air is converted into energy in the form of water vapour in the air but the total enthalpy of the air doesn't change. The drier the air is the more effective evaporative cooling will be. From the psychrometric chart we can see that air with a dew point of 15C and a temperature of 30C (i.e. rH = 40%) can theoretically be cooled to 20C if we increase the rH to 100%. If we increase the rH to 70% then this will can cool the air to 24C.
In a Hexayurt possibilities include:
- Spraying the water into the air
- Spraying the water onto peoples skin or clothes so the cooling effect is directly applied to the body
- Put a net curtain in front of the incoming air stream with the bottom of the curtain in a trough of water so the water wicks up into the curtain as it evaporates off.
Note that the effect of any of these options will be to increase the relative humidity and the moisture content of the air.
See also Burning Man Evaporative Cooler
A hexayurt-like design pattern made from metal conduit.


Fully Funded Project Plan (pdf)
We estimate that it would take about $110,000 to get the Hexayurt project done to the point where it could be tested in the field with people's lives depending on it. That budget would fund a team of two full timers building units, living in them, coordinating both hired consultants and volunteers, to produce a completely tested, finished, documented hexayurt and infrastructure package.
All intellectual property we create or control would be released under an open license, most likely fully public domain, and available for any commercial entity to produce or for organizations like non-profits to source for themselves. Some of our vendors may also choose to open their designs, but if they do not, those products will be recommended and we will do our best to link to information about open alternatives where they exist. Not everything can be provided on an open IP basis, however (for example, LEDs still have many patents, as do NIMH batteries).
However, even $10-20,000 gets us a lot of forward progress - a long term (3-6 month) test of one or two units in one or two climates. A lot more investment would be required before we were ready to use hexayurts in a disaster or refugee situation, but it would at least prove several key concepts.
If you are interested in supporting further development of this project, please contact us. Small, non-institutional donations (yes, your $50 can help!) are welcome as well.
Available in other languages: /fi
Gas will be used for cooking and heating applications.
Substitute for natural gas infrastructure (pipes and plants, trucked in propane) with:
Wood gasification stoves use sophisticated combustion engineering realized in the form of cheap sheet metal forced air stoves. Two AA cells power ten hours of cooking, with a peak heat output of 3KW from finger-sized twigs. Wood gasification stoves are low emissions because the fuel is burned either as gas (volatiles boiled out of the fuel) in super-abundant oxygen blown in by the fan, or as charcoal similarly burned in abundant oxygen.
Wood gasification stoves are rated as ten times more efficient than open fires, and three times more efficient than high-efficiency clay stoves.
Financial model:
- $20 or less per stove, one per household
Fuel costs are low, perhaps $1 per household per week or less. In a small and well insulated shelter or home, even this relatively modest heating device should provide most or all of the heat required -- even through the winter -- in most climates.
This page is about making the hexayurts information rich at several levels.
The basic strategy is to use a variety of media and formats to make information about the hexayurts and about survival and recovery available to affected people.
I. Print useful text on the panels.
II. When possible and desirable, print the panels with 2D bar codes or embedded RFID tags.
III. Arrangement of hexayurts into patterns readable from a distance or from an aerial view.
Issues arising from this strategy
I.
- In what language or dialect to you print the panel text?
- Should there be standing "books" waiting in warehouses, ready for shipment? If so, what is the most useful text to put on the most generic panel?
- First aid. Hygiene.
- Use pictographs to illustrate assembly process.
II.
- Expense is not major issue for RFIDs compared to other material costs. Under 1 USD per tag for passive tags.
- Security is even more important. RFIDs are hackable, and they can be used as a platform for spreading viruses or malware to other systems and databases (citation needed). Could pirates exploit this by using the info on the RFIDs for ill purposes? Yes. Is this worth worrying about, or is it worth preventing RFID use? Probably not. Benefits outweigh risks.
- Passive RFID is just relaying an identifier number. This could be used to flag source material.
III.
- Think Semacode (link) or Kaywa's QR Code (link). Not human-eye readable, but from a distance ketai cams can discern massive amounts of information by the configuration of black and white pixels. What could physical camp configs tell relief workers?
- physical camp configuration would require that the entire camp layout be managed by planners able to arrange the camp in particular order adding needless complication to getting shelter assembled on the ground.
- Think "eye in the sky". If other communication channels fail, the arrangement of yurts in the camp could communicate information to aerial cams as 2-D barcodes. This is a built-in level of security. Only 2 guys know that if the water-pump pup hexayurt is moved adjacent to the 6th wall of the med supplies yurt it generates a message to equipped cams that reads: "Taliban is moving poppies thru this camp."
- integration of covert communication would only serve to encourage hostile parties to destroy the infrastructure, and again require the movement of individual units in a carefully planed fashion in order to communicate.
Gallery
-

Aerial view of camp works like QR code.
-
This is a standard printed panel. It incorporates at least 2 points from the strategy: eye readable; machine readable through barcodes and RFID.
-
Sketch of kirkyan concept for hexayurt camps. Kirkyan hexayurts are virtual/real and changes in one environment causes the kirkyan to respond by changing itself as needed in the other.
-
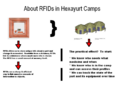
RFIDs can link database information to uniquely identified objects. Efficient way to track medicines and supplies, and to then deliver the medicines to the proper patient.
-
People and hexayurts (with attached property, infrastructure, medicines, etc.) are linked with RFID and QR tags. This is a real aid in managing thousands of people after a disaster.


Hexayurt Object Database
Hexayurt panels, wherever possible, have a 2D barcode or RFID tag attached to each one. The same thing should be done, wherever possible, with stoves and other items.
The goal is that items can be found in the field, their GUID extracted from the barcode or tag, and then that information checked against the database to show the history of this particular object.
This allows for long term lateral studies of several kinds.
The first is object endurance: which items, from which manufacturers, lasted? Which ones are commonly used, vs. being left in the scrap heap. What *worked.*
It's important that tags are per object, and not per class. While 50 stoves may appear to be identical, and were purchased at the same time, lo! the supplier changed sheet metal suppliers half way through the run, and the ones from Batch B rust to uselessness in 4 years, but the others last for 25.
Henry Ford allegedly had staff crawl around in junk yards to see what pieces of the Ford never failed, and were in good useful condition after the rest of the car had died. Those pieces where then allegedly manufactured to lower specifications to save money without impacting vehicle life.
We need a similar approach: understand exactly what got made where, and how it performed in the field.
Additionally, lateral tracking of object movement becomes very important: the stoves dropped in a camp in the Sudan show up in Tanzania, and the locals love them much more than their regular stoves because the Sudanese stoves handle fuel a little differently, for instance. Well, knowing which items are being traded and how they circulate tells us about local preferences, and also about appropriate technology transfer routes.
For this to work, we need a "Stamper" service like https://www.thinglink.org/ - a service which issues GUID numbers for arts and crafts projects.
Vinay

Available in other languages: /tr
Take your house. Cut off the water, the electrical power, the natural gas, and the sewage lines. That's what a hexayurt is like without the infrastructure systems which need to be shipped with it as an integral part of the housing system.
It helps to think of your own house as you go through this: replace each system in your mind with the one from the outline below. Remember that the systems are huge: the electrical system isn't the wires in your house, or strung along the poles outside. It's the power station, the huge transformers, the high voltage long distance lines, and the aspects of the government which regulate the grid, as well as the banking infrastructure to keep all that stuff paid for.
To provide services in the traditional way in the developing world is extremely difficult. Even though some of these line items look expensive, it's important to remember that they are very, very cheap compared to their first world equivalent service infrastructures!
Development Status
Together these systems appear to combine to provide the majority of the services provided by the pipe-and-wire infrastructure harness of a first world household for a cost in the neighbourhood of $200 per household for a relatively plush system, and a minimalist installation could be under $100 per household or less with more resource sharing.
The vast majority of the products required to put together this package are common, off-the-shelf items. However, very few if any of them have gone through the rigours of deployment in the field conditions we are talking about. The CCFL flashlights are an excellent example: available in stores for around $10, with an excellent battery life and 10,000 hour or better tubes, they appear perfect. But the are not waterproof, only water resistant.
What would the failure rate be if we deployed them in a refugee camp? Would the manufacturer - either Eveready, or the plant which makes them in China, be willing to make small design changes or product a special edition, or would we hit dead ends unless we were willing to have a custom model produced from scratch (a whole different line of business.)
My hope is that we can rely on the open source approach to solve many of these problems - that as long as all of our intellectual property is open, then domain experts can help us find answers to all the questions that come up, without feeling like they are helping a for-profit or partisan group. Free IP means freedom to participate for many people. We can give the companies who produce the products we want tweaked or improved the ideas on how to do it, and they can use them or not as they please.
My estimate is that it will take 10 to 15 years for this approach to be fully vested - tried in the field, failures identified and rectified, and technologies matured to the point where it becomes obvious to all parties that we have a scalable solution. Whole systems design is hard, and takes time, and a lot of lives are at stake.
But if we don't start now, we aren't going to have that fully finished solution 10 or 15 years down the line.
This is not to say that we could not push much harder and much faster - deploy units in the field and just see what happens, and learn by doing.
PS: the $200 number is padded for a more expensive toilet, and for a share of village-scale utilities like the one-per-village 2 kilowatt central power utility.
PPS: http://web.archive.org/web/20120820091728/http://www.rmi.org:80/sitepages/pid560.php (the Sustainable Settlements Charette, where a lot of the definition of scope happened)
http://web.archive.org/web/20150128031953/http://worldchanging.com:80/archives/002202.html (some older writing I did on infrastructure which might help fill in some details in my unusual perspective on this stuff.)

Disastr / Networked Domestic Disaster Response
A Note On This Plan
disastr.org is the current public homepage of this project.
A novel approach to handling mass refugee situations in the United State.pdf - the original proposal. Please note that there is new material on this Appropedia page which is not in the original proposal.
I presented this outline to two of the Directors of the American Red Cross in Washington, DC earlier this year. Their response was extremely favorable, calling the plan "incredibly innovative; as good as anything we have seen."
I talked with FEMA at the end of August 2007 and they are also extremely interested in the plan, and I believe that American Red Cross is discussing it with the Californian branch of FEMA also. This is a real and credible proposal, not just something you found on the internet. I'm publishing it widely because it is a community-led disaster response plan rather than something driven from centralized resources like those of government agencies.
This is about you.
The technology parts of this plan: a GIS, perhaps some online training tools, and a database application are well below the level of complexity of many services offered by, for instance, Yahoo or Google. An organization like that could build and host this service (except the financial infrastructure) as a way of helping ordinary Americans protect themselves in the event of a natural disaster or terrorism.
To do the supply chains for the building materials would require assistance from building supply companies like Home Depot or Lowes, and the tape is going to need to be stockpiled - call 3M. But with these pieces assembled, plus perhaps some of the additional infrastructure components outlined in the presentation PDF, there is no reason why an extremely high level of resilience could not be achieved without requiring complex government planning.
You can build a hexayurt yourself.
You can build a disaster response capability based on the hexayurt by working with your community and some companies.
A novel approach to handling mass refugee situations in the United States
- Vinay Gupta
- Hexayurt@gmail.com
Introduction
This document outlines a low cost ICT/training approach to handling millions or tens of millions of domestic refugees in the event of a natural disaster, epidemic, industrial accident, WMD or other event. The basic building block of this response is a low cost building called the Hexayurt which can be rapidly manufactured and assembled using common materials by semi-skilled teams. We then proceed to show how these simple, high quality shelters can be distributed and sited in a way which enables the non-displaced population to seamlessly absorb the displaced people at minimal cost.
Hexayurt Properties
A hexayurt is a 166 square foot "microbuilding" assembled from one to two dozen 4' x 8' panels. These panels are typically off-the-shelf polyisocyanurate building insulation boards, as commonly found at Home Depot and other building supply outlets for around $15 ea. Harsher climates and longer term use requirements can be met by custom runs of this material. The building geometry is extremely simple: the roof is made from half-panels, and the walls are made from full panels - an entire building requires only six straight cross-panel diagonal cuts. There are no framing timbers or other structural components. The pieces are then joined using an off-the-shelf 6" wide 600lb breaking strain industrial box closure tape or a custom adhesive. The entire process - from panels in a truck to a finished building - takes about two hours the first time and more like one hour with an experienced team of five or six. The design is in the public domain so can be used by anybody.
Shelter for One Million Families
One hexayurt can house a family group of up to five people. Building and siting one million units in three days is achievable at a cost ballpark cost of under $700,000,000 ($120 per head) given preparation, training and supply chain management. The notion is to use these buildings as "guest quarters" for refugees, to be added to existing family homes that provide hospitality and infrastructure.
Manufacturing the Hexayurts
The materials cost for each hexayurt is around $200 for very basic temporary units, through to about $600 for long-term high durability units. Cutting a factory-quality hexayurt takes about two hours with a single table saw, or about 30 minutes with garage space, two saws, timber jigs and a small team to cut, move stock and finished panels. Pre- assembling the walls and roof into a folding unit takes about another 30 minutes for a second team of three to five people. A unit built this way can be assembled on site in about an hour by a team of three. Each shop requires well under $1000 of equipment and can produce around 50 units (housing for up to 250 people) per day assuming three shifts. Note that the manufacturing capacity costs are around the same as two units.
Given these figures, manufacturing one million units in two days requires 10000 shops. Equipped from scratch, this is $10,000,000 of capital investment. However most of the required equipment is already in widespread use - table saws and 2x4 - so most of these shops would not have to be set up from scratch. Indeed, in a real disaster situation, the goal would be to press all available capacity into service.
The materials themselves, at over-the-counter prices, would cost $600,000,000. Polyisocyanurate boards are in common use all over the country in the building industry. 4 billion board feet (approximately 500,000,000 4'x8' panels) are used every year, which gives a daily supply volume sufficient to shelter around 600,000 people. Latency for further manufacture on an emergency basis has not yet been researched. It is likely that the various manufacturers of these products could stockpile the liquid chemicals required and step up production in a crisis. Another issue is tape - 6" wide bidirectional filament tape is widely available but not widely used. It may make sense to simply stockpile the required tape all over the country. Shelters can be constructed with standard 3" tape, which is extremely widely available, but requires more skill and can be a hit-and-miss process.
Staffing the Manufacturing Operation
The Red Cross training courses all over the country. Adding an "emergency shelter" training course, where volunteers are trained and certified to manufacture, site and assemble hexayurts and similar building systems, seems like a reasonable way to build local capacity. People with the certification could additionally register as having a shop with a "crew" – a staff like a volunteer fire department – who could manufacture units at a given capacity if materials were available.
To have 10,000 shops ready in the area around a disaster seems unrealistic at first. However, with the exception of the Mid West, cities cluster. A multi-year program to build local capacity could easily find 5,000 shops in most major cities. In a crisis, capacity close to the disaster is activated first. The trained staff of each shop would be augmented by other, unskilled volunteers who would pick up basic skills on the job.
Alternative Manufacturing Approach
Over the past year, it has become apparent that a basic, but functional, hexayurt can be cut in the field without power tools. This approach gives an hour to hour and a half end-to-end construction time for the shelter. Heavy duty insulation boards cannot be cut using this approach, but they comprise only a few percent of the total board volume. Standard boards as found in the supply chain can be cut as effectively with a snap-blade knife as with a table saw, which makes field manufacture eminently feasible.
Siting the Buildings
Buildings should be put up in the back yards of ordinary American families. The infrastructure requirements of one million families cannot be effectively met by large, centralized facilities. However, existing oversupply is so large that, for many Americans, providing a place to cook, shower and watch TV for a guest family in an emergency would not only be no hardship, but a welcome opportunity to participate. However, it is unrealistic to expect this kind of meeting of overcapacity and need to happen 'on the fly' when considering mass evacuation.
Therefore a national register of families willing to site American refugees in their back yards would be created: a centralized GIS database showing locations where hexayurts could be sited would be created and, in the crisis, individual evacuation maps would be prepared.
The first step is that the GIS marks off the areas which are effected in the disaster, and a first estimate of the refugee population is made. Secondly, information about local transport conditions is added: if major highways are out, they would be taken off the map. Finally, the system begins to identify the "closest" sites for hexayurt placement based on a transport- driven distance metric, rather than simply distance. These homes are contacted by an autodialer or SMS message and an automated system asks if they will be there to help receive an incoming family.
This "readiness roster" is then passed to a second system which communicates with the manufacturing shops; shops in each area are married to a set of sites and, as units come off the local production lines they are transported by pickup truck (one truck can take 5 units) to the home sites, where neighbors assemble them and wait for the refugees to arrive. I would foresee an additional "transport corps" which would help take refugees from centralized pickup points to their interim homes.
The requirement for databases with cell phone access to manage this entire process cannot be overstated. Although clearly a backup system based on paper is possible – maps printed off at a centralized location and then flown into the disaster zone and handed out to refugees – the challenges in keeping basic communications available and building robust interfaces to the planning databases are likely a lesser challenge.
Special Considerations in the Nuclear Scenario
In the nuclear scenario there are four special considerations.
- a large number of extremely severely injured people
- radiological contamination of individuals clothes and personal effects
- radiological contamination of individuals themselves
- massive national shock
Four measures may help.
Firstly, the ability to rapidly establish field hospitals, using military equipment for treatment facilities, and hexayurts and other temporary shelters for wards may address the need for segregated hospital facilities for victims.
Secondly, "wash and change" stations must be established at the perimeter, where people who show low levels of contamination can shower, abandon their contaminated clothing, and step into new outfits. These items can be provided by the large retail stores - simply transporting the stock wholesale is probably the best immediate approach. Shower greywater should probably be routed into settlement pits (which can be dug rapidly with backhoes) so that radioactive particles are not flushed directly into drains.
In practice, these "wash and change" stations also act as a filter - after washing and changing, people who still show significant levels of radioactive exposure may need to be quarantined, and can be expected to become very sick in the immediate future, where as those who show levels closer to background exposure may be safely resettled into the general population.
People who have taken extremely high levels of contamination may require seclusion while the short half-life isotopes degrade. Rather than siting shelters for these people in areas with existing infrastructure (homes) it may be wiser to site buildings for them in a green field area, with some separation from the general population until their condition stabilizes.
Finally, the overwhelming desire to Do Something can be channeled into shelter construction and housing the homeless after a nuclear event. There is a lot that people can do to help.
Managing the Supply Chains
In order to smooth this process, every American should be issued with a debit card akin to the FEMA cards or prepaid debit cards as commonly used. These crisis cards should ship in the "deactivated" condition. When a crisis happens, the cards should be enabled either nationally (in the event of a huge crisis) or locally – for example, turning on all the cards for a given set of zip codes. All the cards for people on the rosters as either manufacturing hexayurts, hosting refugee families, or otherwise providing services should also be enabled, with balances reflecting the expected expenses incurred by each group. For example, a manufacturing shop could easily go through $30,000 of building materials in two days and should have credit available to this task. This "pay as you go" approach to managing the supply chains has multiple benefits including empowering individual Americans to help themselves, and working smoothly with existing supply chain systems in place in building supply stores.
Because these cards are issued in peace time to individuals, and have strong identity information attached to each one, it should be possible to track fraud and abuse. It should also be possible to call an automated service and requisition additional card capacity so that, for example, an individual traveling in the disaster area can call in, activate their own card, and get out of trouble.
The Hard Case
This entire approach involves using overcapacity in the national system to cover Americans affected by disaster. However, in a bigger disaster, the national communications and electrical infrastructure may simply be unavailable. What then?
In these scenarios, local stockpiles of tools, material and information provide the only hope of effective local grass roots response. For example, schools could be nationally understood as being gathering points for planning groups, and school buses could drive their normal routes at all hours of the day and night to provide transport to these aid hubs. The Hexayurt infrastructure package (pdf) for the developing world includes heating, electrical lighting and various other essential services and an upgraded version of this package could be manufactured and stockpiled for use in crisis conditions in the United States.
Available in other languages: /fr /ja /ru /tr
Note: This page is very much related to Hexayurt Thermal Analysis.
Walls and Roof
- Hunter XCI 286 - Much like Tuff-R but *VASTLY SUPERIOR IN EVERY WAY* - much stronger, more fireproof, will last for years. This is The Way. -vg
- Tuff R/Super Tuff R - Quick-and-dirty units constructed directly from materials purchased at Home Depot or Lowes. That's what we did at Strong Angel.
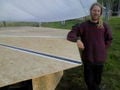
- OSB Board - with precision cutting of angles for tighter assembly. That means a table saw. Ideally we'd find a local wood shop and have them cut for us because: I'm, er, not the guy to be doing that work, and keeping my fingers!
- Dow Thermax HD - Higher spec materials which may need some wrangling to obtain. Two or three inches thick, better foil facing, generally much more like what you'd use in disaster relief situations.
- Hexacomb cardboard - (http://hexacomb.com/) which can be manufactured on site from flat pack core materials, so the 1"x4'x8' board is made from a core about two inches by six feet by one inch, and a couple of rolls of foil. Hard to explain, see the "Rapid Deployment Concept" page on http://howtolivewiki.com/hexayurt/
- Waterproofed Triplewall Cardboard - Weyerhauser has a really good waterproofed triplewall cardboard, as used in the Global Village Shelters. We're trying to source some but having problems, but of all the materials, it's probably the one closest to spec for developing world use if somebody wanted to start making units ASAP.
- Honeycomb Polypropylene - usually sold as a flexible mesh which will need to be glued to two facers to form a sandwich panel, but karton dot it has a material called exalite which has this done already, and looks like a good choice for hexayurts - but untested!
Plywood / OSB
https://web.archive.org/web/20100712052444/http://opensourceecology.org/weblog/?p=340 - $132 plus paint for 166 square feet. Unbeatable. and there's a ton of unedited video and pictures here:
http://www.files.howtolivewiki.com/open_source_ecology_plywood_hexayurt_build/
I think there's scope for an approach here where there is no flashing used, but (for example) the roof triangles over-lap a few inches at the center of each triangle and screws hold the boards together, and at the roof edges, the roof goes over the lower of the two boards comprising the roof triangle, and is screwed directly into place.
Could be hell to waterproof, could have structural problems, but my intuition is that there's an approach here which does plywood with no fasteners beside screws/nails which might be very useful for some circumstances.
Plastic-Hinged Hexayurt
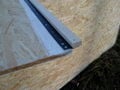
Andrewed says: Here is a prototype of an OSB hexayurt made with permanent plastic hinges. Worked really nicely.
4 roof panels and 2 wall panels, all with miter-cut edges, are joined permanently, Danger Hinge-style. Then these sub-assemblies get assembled into a complete building with the "opening" hinges. See each picture for detailed caption.
-
Roof before raising
-
Opening hinge
-
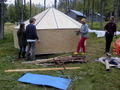
Completed Hexayurt
-
Hinge demo


The plastic hinge is made from propaflex. See:
propagroup.com > impact and handling problems > propaflex
It comes in rolls with the thin creases running perpendicular to the length of the roll. I just cut it at every second crease to make the hinges.
It is cheaper than standard plastic hinging and it works. It is a little weaker, so I worked out a trick to prevent tearing at the ends. Just trim the end of each piece so the thin, bending part in the middle sticks out beyond the thick flaps, like this:
 			 ___
 ______/ | \_____
|	 |	 |
|	 |	 |
|	 |	 |
|	 |	 |
|	 |	 |
|	 |	 |
|	 |	 |
|	 |	 |
|	 |	 |
|	 |	 |
|_______ | ______|
 			\_|_/
Corrugated Plastic
This is generally not a recommended approach because for most applications, polyisocyanurate boards with aluminum facing are a better bet for long life and insulation properties. However, should you wish, here's how to do it.
I had a little think about coroplast again, and spotted two things I have missed the first time we looked at coroplast.
We can now offer a pre-fab or field-fab hexayurt which folds up very much like the existing folding units. The mechanism might change just a little on the roof.
As a bonus, the coroplast hexayurts can be fastened with pop-rivets rather than tape, which cuts the price even more. Pop rivets are five cents each, and we'd use one about every six inches. They go in with a cheap manual tool or a power tool.
The trick for strength is that for the roof, where two panels come together, you take about four inches of each panel and make a crease. The panels are put side by side, with the 4" strip bent up at 90 degrees to each panel, forming a fin.
Those fins then re-enforce the roof from wind loads.
That fin - that vertical ridge - is then folded over in half, forming a 2" fin - and pop-riveted in that position. This connects the two panels, and and produces a structural reinforcing fin which is also watertight because there is no route for water to enter the building's roof, except by going up the fin, through the tight folds, and into the building.
A similar approach can be taken at the roof edge, incidentally producing a Rainwater harvesting gutter if done right.
Taking down the hexayurt would be a matter of using bolt cutters on the rivet (light ones, maybe even tin snips) or just ripping the rivets through the material - note the holes would only be in the fins.
With a little additional work, I'm also pretty sure we could make this entire assembly fold. There might be some fiddly little cuts or creases in the coroplast to make it work, but nothing you couldn't do with a craft knife or a hack saw. We could also spec an 8' roof pole to go into the center of the space, which removes all and any structural issues about the coroplast permanetly by putting it in tension, and it will simply never tear in that configuration (*very* strong in tension). I should have thought of that before.
Or consider the IcosaPod direction, and use ?triangular? box girders on the structure. They could, for example, be fabbed on the edge of each panel, or possibly done as separate items. Might be a good way of getting the roof pole also.
Tape
- Some great providers of Bidirectional tape are:
- Tape Providers -> Bidirectional filament tape, 6", Aluminum foil tape 4" and also they had created a Bundle with both tapes at a discount. Tape Providers also, sell this on Amazon but the price is better on their website
- T.R.U -> Bidirectional filament tape, 6" wide. Available from DistributorTape (ABT TRADING GROUP, Inc.), or by phone at 1-786-565-9858. Also available at Amazon: T.R.U. FIL-835B/D.
- Ideally we need a one-stop tape; a duct style waterproof, bidirectional filament tape with a foil face.
- People are adding some reflective tape to their Hexayurts and it looks awesome
Tent Pegs
Roof
Leather can be used on top of the OSB roof panels see the 2008 Hexayurt at Open Source Ecology.
Floor
Raised & Leveled Sand/Earth + Sheet Plastic or Tarp + Insulating Board + Plywood or Board (+ Carpeting or Mats) (Toczko Floor1)
The idea is create a level, dry, insulated floor that will support the weight of furniture legs and appliances, etc.
- First, to keep water out, prepare a level raised sand or earth surface, surrounded by rocks, cinder blocks or other material to keep it from spreading out. A ring of cinder blocks or rot-resistant wood staked in place with pieces of rebar would work. This is where the walls of the structure will sit, and where water will run off away from the structure, so we want the edge of the wall to be at the outer edge of the raised surface. Place the outer edge level. Fill the cinder blocks with sand or earth, if we are using blocks, and then fill the center area with sand or earth and level it with a long straight piece of wood, or scrape the high areas with the edge of a sheet of plywood until the floor is as level as we want it. (If you think that later on we will wish that we'd spent more time leveling the floor, then do that now :)
- The next layer is a one-piece sheet of plastic to keep moisture out of the structure. It doesn't need to be strong thick plastic because its not going to be exposed to wear and tear if we use the insulating board and plywood layers. if the plastic is going to be the top layer then yes, we do want the strongest plastic sheeting or tarp we can get. The plastic should extend out over the edge of the floor, and over the edge, to let water run off and away. (I'm assuming a tropical rain forest in a typhoon, or a winter flooding rain storm that goes on for a week. The sort of conditions that warrant building emergency shelters.)
- The next layer is insulating board, if we are in a cold environment. In a warm climate we probably don't need this.
- Plywood or board layer. This can be cheap thin sub-flooring, or scrap 2x4, or any flat material strong enough to support a furniture leg pressing on it. This could also be optional if we aren't going to be using that kind of furniture, or if there isn't any insulating board layer.
- Comfort layer: Carpeting, mats, blankets, etc. Whatever we have on hand, or whatever we want to use and can plan for.
If we make this floor with all the layers we have a surface that feels and acts like a standard Western floor: Carpeted, warm and dry, that we can sit a chair on and rock back and not poke holes in the insulated floor.
1 First described to me by my friend Greg Toczko as a geodesic dome floor.
Available in other languages: /fi /ja /tr
Why is the military interested in Hexayurts?
The short answer is that the military is always looking for new ways to solve problems.
The long answer is more complicated.
The Long Answer
The role of the military changes over time. Things are changing at the Pentagon. In 2005, Gordon England signed 3000.05 which says that the military has to develop really advanced capabilities in fixing things up, and that they should get about as good at fixing things as they currently are at breaking them. To be more precise, it says:
Stability operations are a core U.S. military mission that the Department of Defense shall be prepared to conduct and support. [Stability operations] shall be given priority comparable to combat operations and be explicitly addressed and integrated across all DoD activities including doctrine, organizations, training, education, exercises, materiel, leadership, personnel, facilities, and planning.
Stability operations are conducted to help establish order that advances U.S. interests and values. The immediate goal often is to provide the local populace with security, restore essential services, and meet humanitarian needs. The long-term goal is to help develop indigenous capacity for securing essential services, a viable market economy, rule of law, democratic institutions, and a robust civil society. (emphasis added)
This is a mandate for military-funded development of appropriate technology resources. Nothing else is even close to fulfilling this requirement.
I believe what's going to come out of this directive in the long run is high quality solutions for shelter, for housing in general, for power, for water, for lighting, for cooking, and for every needful thing.
I built Hexayurts at the Strong Angel III demonstration in San Diego, CA, and Combined Endeavor 2007 in Germany. I also presented on them to a group of senior logistics officers at the Pentagon, and work with the "Expedient Infrastructure for Transitory Populations" project. Buckminster Fuller worked extensively with the Department of Defense for many, many years, and I hope that I am helping keep his ideas alive for the current generation of the military.
- -Vinay Gupta 08:40, 2 August 2007 (PDT)
Available in other languages: /ar /de /es /fi /fr /ja /pt /ru
The Hexayurt Project won the Participate! Treehugger > Current.TV > Burning Man prize for eco-nifty Burning Man stuff. Never let it be said that weirdos can't get things done!
Scroll down to see why hexayurts are so fabulous, which one is best for you, and how to build one without standing around in the sun too long.
What is a Hexayurt
A hexayurt is a shelter designed for refugees and other people with a small housing budget. It's also for "recreational refugees" like Black Rock City residents, if built with rigid insulation.
Vinay Gupta invented the basic shape for classic hexayurts and a number of variations, and placed it in the Public Domain. This allows others to develop the original idea further. This wiki page, and associated pages, are the repository for hexayurt do-it-yourself building data, and primarily reference building techniques for the dusty desert environment of the Burning Man Arts Festival. If you're looking for plywood hexayurt information, see hexayurt.com. Other developments are here, also in the Public Domain.
The Hexayurt can be made from about $300 of materials from Home Depot, plus about $100-150 of mail-ordered tape (or a new method using vinyl, discussed later. Depending on the construction technique, it takes about 8 hours to prepare at home and 0.5-4 hours of assembly at your destination.
The Hexayurt is design is completely free, public domain. It's great for Burning Man. Anybody can use it, improvements are welcomed! This means you.
Become aware of hexayurts for refugees and disaster relief: Hexayurt Pentagon Presentation PDF - all about refugee use, including solar use, wood stoves, & water filters. The Hexayurt Mass Evacuation Plan - hexayurt use for evacuating cities in an American context.

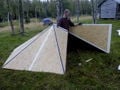
Above: Hexayurts at Burning Man 2010: two 8' hexayurts and a 6' hexayurt (back left). Notice they are very thoroughly staked down using tape-anchors, and sport a sturdy rounded door.
Why is this a good idea?
Millions and millions of people do not have proper housing. Designing like you give a damn can help.
Oh, you meant why for the Playa? That's simple. Hexayurts really enhance the Burning Man experience. You can sleep in during the morning heat. You have a warm place to party at 4AM. In short, it rocks. At 9AM a tent is an uninhabitable solar cooker, a hexayurt is blissfully cool and dark. The tape seals it from dust. And you did it yourself, without lugging an RV with air conditioning to the Playa. You built your own shelter with your own two hands. It's creative and very participatory. By building a hexayurt you're joining a community of engineers and creators who are helping to transform the planet.
Hexayurts aren't just for the playa, they're for the world.

Why is the Hexayurt cool and dust-free?
The Hexayurt is dust-free because, once it is securely staked down and taped to a tarp, it is basically air-tight.
The outside is silver, so it reflects away sunlight. You may want to bring some paint or other material to Burning Man to mat the surface if you are located in a position where the reflected light and heat is causing somebody a problem and you can't move. On top of that, the material itself is an insulator. Thermax has an R-value (insulation value) of 6.5 per inch, which is about the same as fiberglass. Between this and the reflective surface, very little heat enters a closed Hexayurt.
The ground is always at around 58F at a depth of six or more feet. If you shade an area for a day or two, the surface of the earth settles towards that temperature. So the floor of the Hexayurt gets cool, and stays cool, and tends to suck the heat out of the air inside making you feel cool. For maximum cooling, in the daytime, keep the floor of the Hexayurt free from insulating materials like blankets and cushions. For maximum warmth, at night, cover the floor of the Hexayurt with blankets.
Finally, the greatest trick on the playa is to take a little spray bottle (or, better still, a pump-up five-gallon garden sprayer!), close all the doors and windows, and spray high into the air in your yurt. The evaporation of the water rapidly cools the air of the Hexayurt. If you spray for a minute or two you can get shivering cold in the middle of the day. Also the air gets very humid, which is very nice. Then the air begins to warm up again as heat re-enters the space. So instead of being dry and hot, you are now damp and hot. This is worse. So you open a door or a window, and let out the warm, moist air, let in the warm, dry air, and then close the window and spray again. Usually, you have to do this every fifteen minutes or half an hour, and it takes about half a cup per cycle.
I've spent entire days sitting in the hexayurt doing this with friends, having people come in, sit down, drink some water, take their shoes off, cool down for a while and then go about their day. It's a really fun way of making a space to get to know people on the playa, and offering them something they need and enjoy.
A hexayurt at Burning Man is really good with a solar powered swamp cooler (it's been said it's better than an RV). See further down this page for details.
Classic Construction: This involves prepping panels at home (cutting some of the panels in half diagonally, and sealing all the raw edges of the panels with tape.) Then you cart the components to Burning Man and assemble them. Most of the Classic instructions and video include assembly in 3D by holding the pieces in midair to get them to their desired shape (this takes 4 people). There's a new way of assembling the pieces in 2D that will require 2 people for most of the process.
Semi-Folding Construction: Semi-folding hexayurts are perhaps the ideal design for Burning Man or any environment, because most of the prep is done at home. They are much easier to re-use because they are pre-fabricated in 4 pieces that accordion fold open. Initially they require the same amount of tape as in classic construction, but when you re-use your hexayurt, you'll need much less tape. You can make a semi-folding hexayurt two ways: with fancy tools and dust handling to miter the edges of the panels, or using Camp Danger Hinges. Mitering panel edges is messy and time consuming, but you get slightly better insulation.
Fully Folding Hexayurt: You can also build the hexayurt as a fully Folding Hexayurt. Few people choose this design. The Folding Hexayurt needs a table saw and precise angle cutting on the edges of boards, and is a large object to transport (8' x 12', six inches thick.) If you can swing that, you get a Hexayurt that goes up in 20 seconds plus the time it takes to stake it down. It's so fun to see it open and close, you might never live in it, but keep popping it open and closed as an art project. Just letting you know.

The 8 Foot Hexayurt aka 'H12': This is currently the most popular hexayurt (shown above, lower left.) The 8' Hexayurt has been ideal for Burning Man because it's a good size to transport, has 166 square feet inside, is short and not too vulnerable to high winds, and very easy to build. It has decent square footage that you can stand upright in, but the height of the entryway is 4'. Not bad compared to the average tent, but it's a limitation that has been improved upon in the taller hexayurts below. It is probably the simplest design, after the 6' hexayurt. There are very detailed instructions for building the 8' using the classic construction or as a semi-folding hexayurt. From the 8' Hexayurt instructions, you can probably learn to make any other hexayurt design shown on the side.
The Pentayurt aka H10: Previously a design considered for snow because of its steep roof. These gained some popularity at Burning Man 2011 because of the increased standing room and the smaller footprint in cramped camps with concerns about having enough space. More data to follow, here's an image (see bottom, right). Hexayurt project/Semifolding Pentayurt
The 6 Foot Hexayurts: The smaller Hexayurts have their niches, but they've lost popularity. The 6' Hexayurt is comparable to a small tent: good for one person, very cramped for two. The 6' Stretch Hexayurt is cozy for two, but provides little storage or room for people to socialize in your cool, dust-free place. These are easy to construct. They can also be made semi-folding, and plans are almost complete, see this great video for one person construction. The 6' stretch feels really big if you pop up the walls by an extra 2 feet, so you can stand in the whole yurt and have a full height door. A great solution for a camp that's cramped for space on the playa.
The H2 Pup-yurt aka Siestayurt: New as of 2012, the tiniest, simplest yurt. 2 panels form a pup-tent that's big enough for 1 person to sleep in. Ideal for efficient cooling and playa-naps.
The Square-a-Yurt aka H8: A few 4-sided yurts were seen at Burning Man 2011. Sometimes this was because there were not enough panels to make each household in a camp a separate hexayurt, so this solution was improvised. Photos and stories to follow.
H13 Hexayurt: A brilliant new variation of the 8' hexayurt is Hexayurt project/Hexayurt H13. This yurt design uses 13 panels instead of 12 (hence the name: H13), and raises one side of the hexayurt to 8 feet, allowing increased headroom and a good place for a door. It's a bit trickier than the standard 8' hexayurt because it is asymmetrical on one axis. This hexayurt is expected to be moderately stable in high winds, but it's second structural weakness is that a full height door cuts into the 'tape ring'. Be sure that you make a model of this hexayurt before you construct full-scale, and be sure that you have exceptional skills at tying down a structure. This can also be a semi-folding hexayurt using tape-hinges. here's a great picture. (H13 is a new design as of fall 2010).
H15 aka 10 Foot Hexayurt: Want a taller yurt? The 12' yurt (shown) is perhaps too tall for playa winds. The H13 is almost a perfect answer by just adding 1 more panel, but it's a trickier design. The simpler 8' hexayurt, or any other shapes, can have the wall height increased by 2 feet without waste of materials. This has taller walls, so thicker panels are recommended for stability in playa winds. You can also make this semi-folding.
H15 (10' tall hexayurt) versus H13? There's some debate about the practicality of the above "taller" hexayurts (H13 versus H15), mostly because they're new designs that haven't been tested multiple times in playa conditions. None were reported to blow down in 2011, but the winds were very mild. The 10' might have more stability than expected because it is symmetrical, doesn't have the protruding, high face of the H13, and is more reliable to tie down (especially with a rope halo, because the loads on the rope halo or tape anchors will be equal. Structures like H13, which are not symmetrical on all axes, are unpredictable. In general, the 10' is a conceptually simpler design to build. Structural engineers have been known to side with the 10' hexayurt over the H13. The H13 also lures one into building a human-sized door on the high 8' wall, however a door that size will cut into the tape tension ring that also creates stability in the hexayurt. At the end of the day, the common 8' hexayurt is still amazing because of its symmetry, low air drag (due to low height) and simple assembly.
12 Foot Hexayurt aka 'H18': The 12' Hexayurt is pushing the envelope on 1" Tuff-R rather further than is advisable for Playa use, the increased height is just not as aerodynamic in playa-force winds. Increased height requires thicker panels, and you'd better stake it down well. [2]
The Octayurt: This design created at GLAMCOCKS camp in 2012 can be built with only six 4'x8' panels, and comfortably sleeps two or three people.
Domes: Just to complicate matters, there's new 'Nearodesic Domes', in the hexayurt family. They are based on the 8'x4' standard building material size. These are challenging to build, uncertain in major playa winds, but apparently were made successfully at Burningman 2011. If you're building these, you should overbuild them, miter them, and tie them down very securely. Know what you're doing. Having one of these blow across your neighbors' camps would be BAD. Click for photos of the quaddome and tridome.
Octatipi: here's [another thought: http://www.youtube.com/watch?v=yYwHToAC3iY&feature=related]
(You can download Google SketchUp models of the basic Hexayurts.)
Building Basics
The basic 'classic' instructions for hexayurts are super simple. They vary depending on which shape and size of hexayurt you choose.
- Buy 4 (or better, 5) rolls of six-inch-wide bidirectional filament tape, like T.R.U. FIL-835BD. More on tape here. Total cost: ~$150 shipped. (Or ~$180 for 5 rolls.)
- Buy 12 sheets of a suitable 4' x 8' building material, like Thermax, from your local building supply store. More on panels here. Total cost: $200 - $400, depending on the thickness of the panels.
- Using a craft knife, cut six of those sheets in half along the diagonal, three from right to left, three from left to right. Total labor: an hour.
- Tape the edges of each board to protect you and the playa from the raw material. Total labor: two or three hours, or far less with three people and practice.
- Tape the building together by forming the roof from the triangles, and the walls from the six boards you did not cut. Total labor: two or three people for about an hour, barring difficulties.
Hexayurt project/Camp danger Hexayurt hinge technique has full instructions for building the 8' hexayurt as a semi-folding yurt, plus shopping info and video. Also ideas for the H13 and the 10' yurt as semi-folding, hinged hexayurts.
Hexayurt project/Hexayurt playa checklist has detailed instructions for building an 8' hexayurt the "classic" way (without making the hexayurt semi-folding), a shopping list, and video clips of the process.

Look at the picture and go through the steps in your mind again. You get the boards and you get the tape. Then you cut some of the boards into triangles, and tape them together to make the roof, and then you tape the roof to the walls and you are done. You just built a Hexayurt. This is easy. You can do this. If we were working with index cards and sticky tape, you could make one right now on your desk. You know how this works now. You can do this. There are details you will get have to get right to make sure the building stands on the Playa but all playa projects have details, and we cover the details in detail on this page and in the videos.
How Long, How Many People?
How Long does Construction Take? Basically, it depends. Like the estimated amount of tape, assume that 'your mileage may vary.' Save a day for at-home construction, after you acquire most of your supplies. On-playa, timing depends on your chosen construction technique: semi-folding hexayurts need a day of work at home, but are easy to assemble on playa, probably an hour plus the time to stake it to the ground, or less. Classically constructed hexayurts just need a little prep at home, but the assembly process is difficult, requires 4-5 people, and has numerous pitfalls that can increase time spent. Ultimately it would help if you share your experience on our discussion page. Tell us the following:
- Which hexayurt you chose to make.
- Which construction technique: classic, semi-folding, fully folding.
- Your skills, use of power tools or hand tools, # of people to help.
How many people? At home, all the prep of the panels (no matter what technique you use) is best with pairs of people: 2, 4, or 6, because the panels are large and the tape sticks to everything. An 8' hexayurt can be prepared at home with just one person, but this is difficult and not recommended. On playa, you'll need two people for most of the work, but then it depends on your construction technique: "classic construction using the 3D strategy" requires 5+ people for about 45 minutes. "Classic construction using the 2D strategy" only uses two people for 45 minutes, and then about 5 people to lift the roof cone up. Semi-folding needs two people for about 30 minutes and 5+ people for the roof cone lift.
Transport: You'll need the ability to transport a stack of 4 foot by 8-foot panels from the hardware store to your home, and then to Burning Man.
Watch the videos
The step by step instructions for the classic construction and the semi-folding construction have videos linked in at various steps, which is probably the less confusing way to view.
We don't yet have a perfect start-to-finish video resource. We probably have the footage from which a pretty decent guide could be made, but I have no significant video skills. For example, here's the raw footage from Hexayurt showing us constructing a roof cone.
This is all in the public domain, so perhaps there will be a tutorial video cut from there. I may even take a crack at it myself. In the mean time, I'm going to refer you to the raw footage.
Start with the Roof Cone construction video above (recall that this is for the "classic construction" of a hexayurt, the semi folding yurts don't require this step). It's also better to download and watch full screen than in the little flash video window. It's really complete and very easy to understand. You'll have the principle down in the first five minutes. Unfortunately the camera person had to leave before we put the roof cone on the walls, but that's the easy part.
The rest of the videos are in the Additional Resources section at the end of this page.
Make a model
You can build a paper model really easily. Try 1' to 1" - cut 12 pieces of paper or card, 4" by 8". Cut six of them in half with scissors, three left to right, three right to left. Now tape together a roof cone that looks like the one in the pictures, and tape the walls under it. Surprisingly sturdy, isn't it?
If you want to try a bigger experiment, build Woody's Pup Hexayurt. This requires a trip to the hardware store. You buy a single sheet of Tuff-R type board, for about $15, and get a three foot tall model hexayurt. It's a really, really good way of understanding the process. You can also build a folding hexayurt at this scale.
Materials
The Panels
There are two great materials to make Hexayurt panels for Burning Man: either DOW insulation or Hexacomb:
The Dow Route
The first is a Dow insulation product. You can pick Thermax, Tuff-R, Super-Tuff-R or anything else they have at your supply store. They all work more-or-less the same, just some have a thicker, more protective foil surface. You want 1" or thicker. 1" is just fine. There are parallel products from other manufacturers. RMAX is the most common insulation board used at burning man-- the silver stuff that's tan in the middle.
You can see from the video that the panels made of this stuff are very light, fairly strong, and easy to work with. Note that the edges of each panel are taped. Tuff-R/RMAX is dusty, nasty, and at no point to be cut on the playa for it is sacred to the gods of moop, shedding copious amounts of nearly playa colored crap all over the place. This is bad. It is also hairy with fiberglass, dozens of threads per inch of board. You can cut it with a craft knife, or you can cut it with a saw that has an excellent dust collector, but in either case, be aware and take care of your lungs. Gloves, N95 dust masks and goggles are recommended.
Anyway, for these reasons, you will see the edges are fully taped. No moop gets out, and no fiberglass makes your fingers itch on the playa after handling the boards. Take a look at them in the hardware store. They're not bad to work with, it's not evil stuff, it's just not cotton or wood. It's a technical product.
- Pro
- Cheap ($15 a sheet approx.) Easy to find. Easy to cut, easy to work with, insulating and robust. A perfect material for the job you want to do in the Black Rock Desert.
- Con
- It's basically polystyrene with fiberglass added, meaning you'll want a dust mask, and you'll want to wash your hands/arms after cutting it to avoid irritation.
Make no mistake, this stuff is environmentally questionable unless you treat it responsibly and reuse it many, many times.
Making a more reusable Hexayurt: Hexayurts could be cheaper. And again: this material isn't super eco-friendly, unless you re-use the hexayurt many times (or you put the insulation into a home that's being built). According to the eplaya discussion boards, there's a decent period of re-use on even the standard R-Max type boards. The less accessible improvement is Thermax HD. This is the same stuff, but it has a thicker layer of foil akin to a soda can. This stuff will last a good long time. It's more expensive per sheet and usually requires a special order, therefore you have to coordinate with another hexayurt builder to buy about 30 sheets and split them or something. Seriously consider this if you can be so organized.
Now, an aside here. Plastic is, when respected, capable of being a very environmentally friendly material. Tupperware, for instance, does a job that no non-plastic material I'm aware of can: it stores food in a robust, reliable, reusable and sanitary way. Glass breaks in your bag, a thermos is expensive and usually full of something already and is bulky and costs 20 times as much. Compare to a yoghurt container, used once and abandoned. Tupperware is a good use of plastic, as far as I can tell, because the plastic is saving resources every time it is used.
So if you're going down the insulation board path, be sure that you take good care of your Hexayurt, and use it for many years, or pass it on to somebody who will. You can also reuse the insulation board in home construction projects because the design specifically tries to keep the building materials relatively whole. This is the correct way to bury your Hexayurt - in the walls of a building, keeping other people (or yourself) warm and dry in a permanent dwelling.
The Hexacomb Route
Hexacomb is what the first hexayurt ever built was made out of. Hexacomb for the structure, and R+Heatshield as the insulating layer. R+Heatshield is about $0.25 a square foot and is completely lightproof and reflects away 97% of the heat of the sun. Very useful to cover tents and cars with.
Hexacomb cardboard is a miracle product. It's an inch or more thick and looks a bit like corrugated cardboard, but it is stronger and lighter because instead of little ridges, the interior is filled with hexagonal honeycomb cells. It looks like a bee hive inside. It can be recycled and, for playa use, burned (if you must!) Better to reuse it, of course.
It can, however, be tricky to find distributors for Hexacomb. I really like this material, but it's just not as easy to find as the Polyisocyanurate. My expectation, however, is that if and when we go to mass production of Hexayurts, it will be a hexacomb-based board we use to make them. Great stuff.
If you would like to really go the Green route this year, I would recommend getting together with other Burners and putting in a bulk order for Hexacomb cardboard. Please contact me if you are interested in doing this, and I will put you in touch with the supplier, or you can contact them directly.
It's more hassle, but it's the right thing to do.
Other Materials
There are a lot of other materials that we have not tested. The 6' and 6' Stretch Hexayurt designs are much more forgiving, so if you want to try Coroplast or Triplewall corrugated cardboard or something like that, consider a test run on one of them first. One material you should not use is plywood, or any other heavy building material. The strength-to-weight ratios of plywood does not work well with the Hexayurt design. It's too heavy. They could hurt somebody.
Improving Sturdiness
The pointy ends of the roof pieces are pretty fragile particularly when moving and setting up. Foot-long pieces of sheet rock corners (the light-weight metal angles, about an inch on each side) taped along the side near the point make them very sturdy and only add a bit of weight.
Similarly, pieces could be added to the corners of the square pieces to keep from denting the corners when moving.
Install both with duct or strapping tape before you tape the edges, then tap lightly with a mallet to make it flush. Then proceed with the edge taping.
The Tape
The other key material involved in constructing Hexayurts is tape. Specifically, 6" wide bidirectional filament tape. In English, that's a six inch wide tape with re-enforcing fiberglass strands running in both directions, so that it will not break or tear under almost any imaginable circumstance, including howling playa dust storms. It is amazing and very expensive. Other tapes have been tried-- they aren't great in playa conditions, and those who went off the beaten path regretted it. Some innovations are underway and we'll see what results come back. BTW: don't use duct tape at Burning Man, it just becomes gray goo. There have been some people who say a 'flashing' product called "Vycor" or bituthene tape will be indestructable, but it is opaque black, is even more expensive than the bi-directional tape, and is thusfar untested for hexayurts (if you've done it speak up on the talk page). Additionally, we've got a totally new option gluing strips of vinyl on to create hinges the same way the tape is used, see vinyl below.
The bilfilament tape does not last more than 1-2 weeks of playa heat and sun: it gets crusty and peels off. If you make any permanent hinge or connection with the bifilament tape, it's recommended that you cover it with a layer of foil tape to protect it from UV damage. The foil acts as shade. It's also shiny silver and looks pretty cool, and it should keep your hinges in perfect condition for years to come.
3M 8959 at 6" wide. This tape has also been found as T.R.U. FIL-835, which is the same stuff. You will note that 3M does not give you the option to buy it in that width on their web site. See the playa checklist for even more about this specialty tape and where to find it.
3" tape is half the cost and has its uses on the hexayurt: many steps are perfect for 3" tape, and it's easier to work with than 6" tape. Using 3" tape means you need to be much more precise in the construction process, but is otherwise perfectly viable. You can also save tape and money this way: get a roll of 6" tape from the supplier above. Slit it in half the long way as it comes off the roll. Hold the roll and press a razor blade against it while a friend pulls one 3" wide strip off at a time.
Foil Tape: Time to use some foil tape! This stuff is fairly inexpensive and comes in a variety of widths, we recommend T.R.U. AF-20R it is also available more readily than bi filament tape. It's also very forgiving to work with and is designed to decrease fire risk. Foil tape is ideal for certain steps, but not all steps of construction:
- Foil tape to tape-seal the edges of the panels.
- Foil tape is NOT advised for making tape-hinges or for the connection of panels to each other, or the "tape ring." You need the bifilament tape for this because you rely upon the strength of the filaments and the stickiness of the tape.
- Foil tape is highly recommended to protect the permanent tape-hinges used for semi-folding hexayurts in the camp-danger style or mitered styles.
Foil tape is easy to find in 2" widths. 3" widths are a little easier to work with. For a 'standard' hexayurt roof (H12, H15, etc), you'll need to cover 114 feet of tape-hinges, but the tape hinges are 4 to 6 inches wide. So, remember it's 114 feet, multiplied based on the width of the foil tape (3" tape means 114x2. 2" tape means 114x3.)
The tape needs another layer of protection from the elements if you expect to leave the Hexayurt up for months or years. Foil tape is one good option. There may also be paints which are appropriate.
You can also see the Tape Spreadsheet in the additional resources section of this page. It explains why you need all this tape, and also how much tape you need for manufacture, and on each subsequent building use.
Vinyl instead of Tape for Tape-Hinges
This is a brand new idea (as of 2013), has been tested in fire, in the sun, etc, as well as at Burning Man 2013 and 2014. Vinyl is a great way to make the permanent hinges of the Camp-Danger type, and possibly for sealing the exposed edges of the panels (although foil tape is probably way simpler to use). Here's the whole explanation on vinyl, brought to you by Jacob Rodriguez.
Building Options
Staking Down your Hexayurt
A hexayurt not properly tied down is a large, delicate kite, and it's your home blowing away. Just one panel blowing away and going for a bumpy ride could be disastrous. Generally, when tying anything down at Burning Man: overbuild it, meaning guy it down hard in several places. You'll never regret it. During building, stake the yurt to the ground before taping the it to the tarp, because a yurt blowing away is worse than a little extra dust getting in. There are two main techniques for tie-down, the rope halo or tape-anchors:
Tape Anchors vs Rope-Halo
- Tape Anchors: are prettier than a rope-halo because they are unnoticeable on the surface of the yurt. They are very strong, however they require a lot more of the expensive 6" tape (about 120", or 2/3rds of a 60 yard roll. That's $20 worth of tape). You also have to recreate your tape anchors each time you assemble the yurt because you are using the strength of the tape going up and over the roof peak; you cut them off and make new ones each time. They can fail occasionally in high winds. Tape anchor construction is discussed here: Hexayurt project/Hexayurt playa checklist#Assemble the Roof Cone
- Rope Halo: aka Rope Net, Rope Web, Hexayurt Macrame or "Hexayurt Bondage." Here's a nice picture: [3]. You make a circle out of rope-- big enough that it rests on the roof cone somewhere that you can reach it once your hexayurt is assembled. Fasten from the halo to your ground stakes with 6 other sections of rope. It's cheaper and faster, less pretty. Definitely have one available during on-playa assembly even if you're planning to use tape-anchors, in case of sudden winds. Now you can take the time to make everything equal lengths and pretty. You'll need some extra hands for this part.
Windows
Every hole you make is a place where heat comes in during the day. A single badly-placed window can turn a Hexayurt into a solar cooker, but no windows can also get hot! The smart plan is to keep the "plug" made by cutting out the window so it can be pushed back into the window to seal out the day, like a shutter. Cross ventilation is a must. Remember to tape all raw edges, and always seal any exposed raw panel material! You can cover windows with plastic, or bubble wrap (translucent like shower glass.) You can also leave them open. If you cut the windows as rectangles or very-slightly V-shaped rectangles, you can usually wedge the window piece back into the window at an angle and use it as a sun shade. This is a good solution. But if it's windy one day and you left a window open, so much for your dust-proofing. The cure for this is furnace filters, which are cheap, very effective, and can be taped over windows on the outside. You must put them on the outside, or when they fill with dust and you shake it off them, the dust falls inside your Hexayurt. Keep them on the exterior wall. Some people recommend a filter on each side of a window. Or just cut small portholes, about four or five inches round, and cover them up on the outside with the 6" tape. It's fairly translucent. I leave the inside sticky surface exposed to act as a dust magnet.
- Consider the location of your door (north facing is best), and the location of your windows in relationship to the prevailing winds on the playa; a cross-breeze is key in a hexayurt. (from Julie Danger): I have a window in every side of my yurt to catch a cross breeze on days that aren't too dusty. I use the "plugs" like shutters. I used to tape a cheap vent filter from homo depot to the window-- that way you get light, and heat, but no dust or wind. I cut my windows to a size and shape appropriate to the vent filters I first bought. Light hasn't been much of an issue lately but that's still a good option. Light can come in from the loose Camp-Danger hinges, depending on how you cover them with foil tape. I've also seen a heat proof window glass thingy put in a window on a yurt-- that was pretty sexy. For dust-free light I'm trying out a solar security light (see Harbor Freight.com), it turns on when you move into its space. I will cover it with colored filters so it's not obnoxious and cover its motion sensor when I want it dark indoors.
Doors
(More info coming to this section.) Everything said about windows goes double for doors. The door is the one thing that really isn't perfect about the 6' or 8' Hexayurts, because the door can't be too big and the entry height is only 4'. Sorry. Try the H13 or the Mark II instead, they have taller entryways. Also see below for the BFD mod.
- The size of the door matters-- the bigger the hole you cut, the more structurally unstable the wall panel becomes. The door's panel often needs replacing after Burning Man. A good size is two feet wide, cut one foot from the end of a wall. Some people like a door that goes from the ground to about six inches from the top of the wall. If the door doesn't quite fit now, you can crush the door flap a little by banging it on the ground (really.)
- The wall panel will be more sturdy if you don't cut the door all the way to the ground-- you maintain the "shear strength" of the panel this way. Cut a portal into the material, 2-3 inches up from the ground. This is a very strong door, because it is not cut all the way to the ground. However, you then have a delicate piece of the panel exposed for people to trip on, step on, and crush. Screw two narrow bits of wood to either side, sandwiching the material in between to reinforce this section--that prevents injury to the panel from being stepped on-- it doesn't help with trippers. Some people have used even large pieces of plywood to sandwich their door panel in.
- Another way to increase strength is to have rounded corners on your door instead, as this one does.
- Use a 2" panel just for the door panel - the 2" thickness is much more rigid and durable.
- If a tape hinge is used, be sure to tape it on the inside of the jamb as well - this imparts much greater stability to the hinge.
- Where you make your hinge matters too. Definitely have the door swing outward, always. Hinging the door with tape from the top like a cat flap makes the door stay closed and keeps it very rainproof. This is not the most convenient or aesthetically pleasing door, and it's hard to prop open for air. A hinge from the side is less rainproof, and it's hard to guarantee that it will stay closed on its own, it needs a latch mechanism.
- Don't let your door be blown off: secure it from the outside and the inside with tape so that it cannot be ripped off the face of your yurt.
- Try not to interfere with the tension ring if you want a bigger door. Doing that has structural implications. Remember to orient the door on the North side, otherwise your yurt will be hotter than it has to be and more subject to winds.
- For the sake of convenience, design your door to open outward. This way it will not occupy room inside your dwelling.
- Consider mitering the edges of your door when you cut it out (cut it out on a diagonal angle). This way it will close easily and seal well when closed. If it's cut out like a plug that needs to be forced closed, you will put extra strain on that panel. You can easily do this with an adjustable length/break off blade box cutter knife.
- Some people have even weather stripped their doors with foams or other traditional materials.
- A serious consideration is a door that will stay closed, perhaps with a latch, but that can also be opened from inside and outside the hexayurt-- so that your midnight, mid-dust storm bathroom run will not disturb your hexayurt-mate. And, if they decide that they want to come outside, you have not locked them in.
- Door panels are often damaged during use, such that some clever folks have reinforced their doors by sandwiching them between plywood, as shown below. If you do this you can probably even add a traditional door knob, perhaps a lockable one.
- A very simple closure device can be constructed using two pieces of rope - two feet in length each. Drill a hole the diameter of the rope through the door and the frame 2 inches from the edge, tie a knot near the middle of each rope, thread each rope through each hole, and tie another knot on the opposite side flush with the panel. The ropes won't move in the panel, but you have about 10 inches on each side to tie the door shut. Mind your yurt mate with this option.
The Camp Danger Door has a mitered edge, is not cut all the way to the ground, and hinges from the side.
Camp Danger Door 2.1 (WhiteBuffalo)
The door, explained in part by this handy video. (DEAD LINK)

The Magnetic Door
- This door keeps itself closed using neodymium magnets. In the photo below you can see the two small, but powerful magnets which have been taped to the yurt wall.
- Note: The wall is upside down in the lefthand photo, which is why the kickboard is on top. The kickboard is important because it protects the foam along the door frame.
- To attract the door to the magnets, we attached a small metal plate we found at Home Depot.
- We think this is the best door solution because it is lightweight, packs completely flat, and is very easy to use.
-

magnets on yurt wall
-
two plate design (not ideal)
-
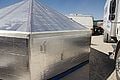
one plate design (ideal)


- We experimented with combinations of 1 and 2 metal plates in horizontal & vertical configurations, but ultimately the single-plate vertical design was the best. It seems to put the least amount of stress on the door and is the easiest to open and close.
- We took great care in attaching the metal panels to the door. First, we put a layer of bi-directional filament tape to protect against tearing. We also used very large washers.

- We sanded down then taped over exposed screws to prevent them from digging into other panels during folded transport. A small piece of cardboard from the magnet packaging keeps the screw from poking through the tape.
-

cut off ends of screws
-
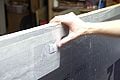
cardboard & tape over screw ends


- The edge of the door is carefully beveled to strengthen it when closed and prevent it from opening into the yurt. This is the most challenging part of building the door!
- The edges of the door are covered in bi-directional filament tape in order to strengthen them.
-
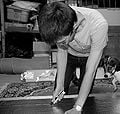
cutting the beveled door
-
unattached door
-
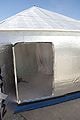
final
-
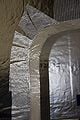
tape on door edge


- We divided our yurt into 3 bedrooms, with 3 separate doors, without compromising the yurt's structural integrity. In the photo you can see 2 of the 3 doors.
-
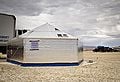
photo showing 2/3 doors
-
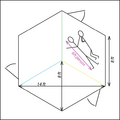
3 door illustration


- Tip: Don't forget to attach something to the inside of the door so that you can pull it shut from the inside.

- Tip: The door can be easily propped open by tucking it under one of the rope Halo leads that secure the yurt to the ground.
more photos of our yurt can be found here: Yurt!
The Anwar Door

This is a hack. It's a hack because the pieces don't quite fit, but the tape deals with the one inch problems you will find. It works, and it does make for a much more open space inside, but it's much harder to build on the playa, and a little more vulnerable to wind. You will have to assemble this one all the way at least once or twice at home if you are going to get it right on the day.
The trick is this. If you cut down one of the isosceles triangles on the roof, and flip the two pieces vertically (using the seam where they are taped to the rest of the roof as a hinge) they mark out an equilateral triangle, 8' x 8' x 8' from the apex of the roof to two corners of the Hexayurt, with the whole triangle level with the apex. In short, you get a flat roof.
So you make an equilateral triangle for that hole. Now if you imagine this modified roof section on the 4' high wall, you see you have an 8' x 8' hole to fill. Two boards, preferably in the vertical orientation (for strength) fill it, and you now cut the door here.
In practice this is hard because there is no good way of taping the edge of the equilateral triangle to the now-vertical roof section. There's just no way to get at it that I know. And everything is off by the thickness of one board.
I mean, I'd love it if this worked. But it just doesn't. I think that in a high wind it's likely to be quite weak and it's a bear to put together. In short? Let's work on this one together and try and figure out a better way of doing it, or something equivalent. It's not ready for prime time, however convenient it appears.
If you're looking to make a hexayurt with a door that's big enough for an average adult, check out Other Shapes, Increased Height.
The BFD Mod

What it is:
- Stretch hexayurt mod
- Adds Big Framed Door (BFD) with real hinges and velcro attachment
- Uses wall precompression with horizontal ratchet tie-downs
- Semi-folding design with beveled panels and cordura hinges enhanced with zippers and velcro minimizes use of disposable bdf tape
- Solo setup in under 1 hour in any weather
- Pictures
More details are at BFD mod page.
The rounded shade structure is called a Love Monkey Hut or Monkey Hut. It uses PVC pipe as ribs for a shade cover over the Hexayurt. More information can be found at: Monkey Hut Link
Rooms
This one is easy. From the corner of the Hexayurt to the center is eight feet. The wall is four feet high. The point of the roof is eight feet high. So a whole 4' x 8' sheet, laid on its side, from the corner to the center of the Hexayurt divides the space perfectly up to 4' in height. The remaining space above the wall is 8' long by 4' high at the point, in short, it is half of a 4' x 8' board. So for three extra boards, one of which is cut in half, you get the ability to divide the hexayurt internally into rooms, either 1/6th, 1/3rd or 1/2 of the hexayurt in size. You could even divide the hexayurt into six small bedrooms with their doors on the outside if you liked. It would be weird, but it would be fifty bucks each.
Curtain room dividers
We divided a yurt into 3 rooms using curtains. It worked great! We used EMT conduit tubes as curtain rods and queen-sized sheets as curtains. If you hang the curtain rods from the center, and secure them in 3 corners of the yurt, you get 3 perfect rooms. Each can sleep a couple. The best part is that you can slide the curtains open if you want to open up the space again. Clothes pins can be used to keep them closed in the center.
-
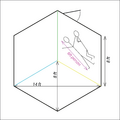
layout and dimensions
-

curtain rods secured in the center
-

one room with curtains closed
-
outside view of room with curtains closed
-
how the curtain rod is secured to the corner


Accessories
Swamp Cooler
The combination of a Hexayurt plus a swamp cooler is unbeatable. You will need a good solar panel, or grid power, but the containment of the coolness and the moisture inside of the Hexayurt produces the most pleasant space I've ever experienced on the playa. It's totally unlike air conditioning, which is still very dry. It's more like... being in Florida rather than Nevada! You can make a rather functional swamp cooler with SOLAR powered materials. Here's instructions for building your own big one that is suitable for a camper, or Figjam's instructions for building a smaller one, which is perhaps adequate for a hexayurt given their inherent insulating properties. Here's Figjam's latest cooling monstrosity, which is considered the best size to properly cool something as large as the hexayurt. Scroll down to the images.
Quick product ideas for the swamp cooler: skip the little computer fans and go for the bigger better the Silverstone Air Penetrator, available from Harbor Freight, also a great place to get a 12 volt fountain pump.
Furniture
https://playatech.com/ has an incredible range of efficiently designed flat pack playa furniture. Each piece - a chair, shelves etc. - is cut from a sheets of 4' x 8' plywood (or other crush-proof materials - not hexayurt boards!) They slot together like puzzle pieces without bolts or screws. Just like the hexayurt, you just download the designs and make them yourself. Perfect for the playa, and the hexayurt plus furniture will pack down into a single 4' x 8' box in your truck or on your roof rack. We think it's an unbeatable combination.
Semi-Folding Option 1: Camp Danger Hexayurt/Hinge Technique
The Camp Danger hinge technique is a simple way to make tape-hinges that allow you to pre-fabricate any light-panel (rigid insulation) hexayurt as a semi-folding hexayurt. This page has step-by-step instructions of everything you need to do to create a semi-folding hexayurt with tape hinges. These instructions describe the technique for the popular 8' Hexayurt, but the hinge technique can be used for any other hexayurt shapes and sizes.
Semi-Folding Option 2: Partial Folding Hexayurt
Semi-folding hexayurts can be made either with just tape hinges, or by mitering the edges of the panels and then making tape hinges. Mitering the edges of the panels does slightly improve insulation, but it's messy and time consuming. No light will enter through the joints during the day. You will have slightly better insulation. If you want to miter the edges of the panels, read on:
The partial folding hexayurt ships in a 4'x8' stack, consisting of two half-roofs and two half-walls, to be sandwiched between light particle board and wrapped with your floor tarp for easy playabound transport. The only additional materials required are two 4x8 sheets of particle board (cheap, I used 1/2" I think), sawhorses or equivalent, a saw with a blade that can be angle-locked, some light spring clamps, scraps of cardboard, and maybe a small, accurate carpenter's square.
I didn't have access to nice shop equipment to cut the fitting angles along the panel edges, so I came up with a cleaner but more time-consuming method. Make guides for your razor/craft knifes by ripping edges of the particle boards with the saw that are angled to match the cuts from the edges of the panels: One at 30 deg down a long side for the wall tops, 30 again along the two short sides for the wall corners and roof bottoms, and then one at 15 deg down the other long side for the roof hypotenuse cuts.
Once guiding edges are ripped, secure a panel to the board with a few spring clamps, making sure to put small pieces of cardboard between the panel and the clamp to distribute the pressure and not impact the panel. When lined up properly, you'll be able to slowly work your way down a panel with your knife at the proper angle by holding the base of the blade along the guiding edge you ripped. You still have to pay attention, as the texture of the panel can mislead the blade increasingly as it loses its sharpness.
I only ripped guiding edges with one particle board, but if I were to do it again I would do it to both so I could put them on both sides of the panel and line up their angled edges with the square. That way the tip of the blade could run along the top guide edge just as the base does along the bottom, and probably not be as easily led astray. You'll need both boards to transport the taped and folded panels to the playa anyway so you might as well.
Make all of your cuts to get 12 equally sized roof and wall pieces each. Tape over all the cut edges and then tape together six of each wall and roof in the same manner as described elsewhere on this page. You want to end up with two 6-piece half-roofs that fold down and fit together as a 6 panel tall 4x8 stack, and two 6-piece half-walls that placed next to each other make another 6 panel tall 4x8 stack.
Setting up isn't as easy as unfolding from one huge piece like a complete folding hexayurt, but connecting the half-roofs (and adding tape anchors at each fold) and half-walls is considerably easier than taping together all 6 walls and roof panels. It's also pretty easy to break down (just cut the half roof/walls apart and refold) and store partial folding hexayurts. Mine is hiding out in a tiny storage space for the next few months in wait for its third Burn.
Here's a detailed construction guide PDF document that you can print out for this style of hexayurt.
The Folding Hexayurt
By "folding hexayurt," we mean fully folding, not "semi-folding." The Folding Hexayurt is a really serious piece of engineering. Looks exactly like a regular Hexayurt, but it folds flat. You basically just take it out of the truck, yank on the sides, and it pops out into a building. It's amazing. The drawbacks are: it ships in a 12' by 8' footprint, and you have to use very precise tools and wood-shop level dust handling systems to make one.
You can watch a clip us figuring out how to open the folding Hexayurt here. The raw footage of the entire folding hexayurt build process gets interesting about half way through.
We have only ever built one. You can see fairly full documentation of that process in the Video Resources at the bottom of this page.
I will be uploading some clips from that video and some notes on how to build one yourself soon.
The hard part about building a folding Hexayurt is the exactness that the building has to be cut with. You will need a table saw. If you cut the Dow materials with a table saw, it will put a lot of fiberglass dust into the air. So you need a table saw with a proper dust handling system, like you would find in a workshop. This is probably not something you should do in your garage.
Should you want to try it be very precise in cutting the dimensions of your unit. A quarter inch can make a significant difference to folding performance. Remember that the walls fold mid-way, so each wall board is now cut into two squares. Otherwise, just like a simple Hexayurt apart from the angles.
The angles are:
- 15 degrees on the hypotenuse of each roof panel.
- 30 degrees on the bottom edge of every roof panel.
- no angle cut on the 8' edge of each roof panel.
- 30 degrees on the top of every wall square.
- 30 degrees on the edges of the wall squares which meet at the corners of the hexayurt.
- no angle cut on the bottom or mid-wall side of each wall square panel.
Opening and closing can be tricky to get the hang of, as you will see in the video. Once you get the knack, however, it is fairly easy. One person pulls one corner of the folded package, a second person pulls the opposite corner (that is, diagonally on the other side of the folded package), and other people grab the sides and pull. It's pretty amazing, really.
You can also make the Hexayurt roof cone at home, leaving just one seam untaped, so that the entire roof cone concertinas down into a package the size of one roof triangle, 12 panels thick.
Global Impact
More than a billion people do not really have good housing. It's not that they do not want a good place to live but they often simply cannot find one they can afford. They do not have access to modern building materials, and local materials are often really unsuited for building. Europeans used to thatch their roofs and now we mostly use tiles and shingles because we prefer the results. We are probably not alone in this preference.
Everybody needs to be warm, dry and well-fed. If you go to Burning Man and the Hexayurt is a good shelter for you, consider helping us develop and test the Hexayurt until it is polished and ready to be made available globally. It's a free / open source project, and with your help perhaps it can become the Linux of housing.
Hexayurt Jokes and Really Important Slogans
If your hexa yurts, you're probably playing with it too much. Recovery from hexayurt addiction requires only a 6-step program. "Come on baby, make it yurt so good" "We're yurtin for certain" Whether you're a real refugee or a recreational refugee, you'll be in A World of Yurt Because everybody yurts....sometimes. Hexayurts aren't just for Burning Man, they're for the world <--- that one's not a joke! I wanna yurt! (yurt).. I wanna yurt! (yurt)... I want to yurt! (yurt).. I wanna yurt! (yurt) Yurt Happens
The Masochist Yurt said to the Sadist Yurt... "Yurt me, Yurt me", The Sadist Yurt replied, "No".
Additional Resources
Personal Technical Support
- The Hexayurt Google Group (direct sign up).
- hexayurt on irc.freenode.net
- hexayurt@gmail.com
- File:8 foot hexayurt worksheet.xls shows calculations for an 8 foot hexayurt, using either classic or semi-folding construction
- Hexayurt thread on Burning Man's ePlaya
Hexayurt Applications and the Big Picture
If you want to know more about:
- Our long term global vision - read The Unplugged.
- Evacuating Cities, like after a big earthquake - read The Hexayurt Mass Evacuation Plan. This was presented to the American Red Cross and highly praised. It's for real.
- Our Refugee and Slum Revolution - read Hexayurt Presentation PDF or Scribd (broken, rotated 90° can anybody fix?). This was presented at the Pentagon to a group of senior logistics officers to high praise. It is also for real.
- Hexayurt-style Distributed Infrastructure (like toilets, stoves and drinking water) - read the Hexayurt Presentation PDF
- Why all the military stuff? - read Military Hexayurts?
- Who we are? - read this interview with Vinay Gupta (inventor of the Hexayurt system) on The Sietch.
Raw Video Footage
I have no skill with video, but we have acquired a decent amount of raw video footage over the last year or so. All of this footage is in the public domain.
Hexayurt Roof Cone Construction
Folding Hexayurt Construction - gets interesting about half way through.
Interviews from Combined Endeavor - gives some context about what we are doing, and what the Department of Defense thinks about Burning Man.
Other Video
8' Hexayurt Walk Thru from 2008
Old, not very good, 8' Hexayurt construction video.
3D Models
Google SketchUp models of all the Hexayurts
Other Resources
Architecture For Humanity Our friends and allies.
Strong Angel III - the demonstration where the hexayurt was first introduced to the military.
History
Of course, like any good idea, it has some deep roots. The hexayurt is based on the work of Buckminster Fuller and Amory Lovins was designed around the conclusions of the Sustainable Settlements Charrette.

Available in other languages: /es /ja /km /ru
Classic Construction: A Step By Step List of Everything You Need To Do.
These instructions are specifically for building an 8 Foot Hexayurt using the "classic construction" technique. See this list of other hexayurt shapes, sizes, and construction techniques (no, really, go look there first for lots of great ideas and upgrades in hexayurt technology). This page houses some detailed information about supplies that are used in building other sizes/shapes of hexayurt, and other construction modes. This hexayurt information references the hot, dusty environment of the Black Rock Desert and the Burning Man Art festival. In other climates and for long term use, you should look at hexayurt.com for instructions using other materials, like plywood.
Building a Hexayurt is easy. You can get everything you need on one trip to a building supply store and one mail order.
This list is not a substitute for the videos. It's designed to be printed out and carried around, to the playa and to the hardware store, to make sure that in the rush you don't forget something important or do the steps in the wrong order. It is very detailed because I know what the last minute crunch is like.
Pictures and Plans
Decide
- Make the decision. Review the materials on the site, and if it's looking good, decide. Consider a semi-folding hexayurt made with simple hinges: Hexayurt Camp Danger two part folding: they are pre-fabricated with the same materials described here, and most of the work is done at home. For the comparison of different size/shape yurts, click: Hexayurt playa#Which Hexayurt.3F
- If you need help deciding, go outside and draw a circle on the ground with a 14' diameter. Your Hexayurt is larger than this - it is the hexagon that fits around that circle. Big, isn't it?
Mail Order Tape
A key material involved in constructing Hexayurts is tape. Importantly, 6" wide bidirectional filament tape. In English, that's a six inch wide tape with re-enforcing fiberglass strands running in both directions, so that it will not break or tear under almost any imaginable circumstance, including howling playa dust storms. It is amazing and very expensive. Other tapes have been tried-- they aren't great in playa conditions, and those who went off the beaten path regretted it. Some innovations are underway, we'll see what results come back (and we'll take reports of success w/ other tapes in the discussion section. Recently, 3" bidrectional tape has been used to cut costs, and foil tape helps out in a variety of applications. See the tape discussion for more.
- Mail Order 240 yards or less of 6" bidirectional filament tape such as 3M 8959 "Extreme Applications" packaging tape, 6" wide. AKA as "WOD FIL-835B/D." 6" is not a standard width, it usually costs around $40. 5" tape is perfectly good. For certain steps, you can use 3" which is half the price and a lot easier to work with. 3" tape for foil tape is ideal for sealing the panel edges during preparation--in fact, you can seal the edges with quite a few tapes. Foil tape has also proven nice for tape-sealing. If you are employing the "classic construction" approach, you will seal all panel edges prior to assembly: that step alone takes 132 yards of tape.
You also use the tape calculator spreadsheet to figure out exactly how much you need.
- AMAZON.com sold as "WOD FIL-835B/D Transparent Bi-Directional Filament Strapping Tape: 6 in. x 60 yds." $42.00/ roll.
- http://tapeproviders.com/ also has a 6" bidirectional filament tape available.
- Distributor Tape. They've been helpful to Vinay, they know what you want the tape for and sell a good product at fair prices. $35.99 per 6" roll, they also now have 3" wide tape, and case prices as well-$230.70 for a case of 8 rolls.
- Walmart.com, sold as "Bi-Directional Fiberglass Reinforced Packing Filament Strapping Tape" $34.99 per 6" roll, plus every other width imaginable, case pricing (36 count) available.
- One supplier is Tapes Unlimited, 1245 Hartrey Ave, Evanston, IL (847) 866-6060. They do not have a web site. But they know Hexayurts and are very helpful.
- http://web.archive.org/web/20150219122634/http://penmar-industries.com/specialtytapes.html#sptp Penmar Industries also carries a bidirectional filament tape in 5" which looks perfectly serviceable although I have not used it personally.
- Check with 3M about direct ordering because sometimes Tapes Unlimited sells out.
- Also hillas.com, these guys apparently sell by the roll as well, but it is a custom order product, so give them at least 10 or so business days to deliver.
- http://taperite.com are aware of the Hexayurt Project and have excellent tape...I couldn't find this tape here.
- Office superstores like Staples carry 3" filament tape (strand tape) which will do in a pinch
- Kragen/O'Reilly Auto Supply sometimes has 3".
Total cost: $150 with shipping, perhaps?
European source for Hexayurt Tape: Eurobands http://eurobandstapes.eu EURO LVB 16165 TRANSPARENT 16 EUR a roll roughly.
Building Supply Run
Building Supply Store. You will need.
- 12 sheets (13 if you want a spare) of 1" thick Tuff-R, Super-Tuff-R or Thermax. Other manufacturers make foil covered polyisocyanurate insulation boards too. Only one side (the outside face) has to be foil. Do not use the bendy bright pink or blue polystyrene boards you see - they are too flexible and smell bad.
- 12 large tent pegs. You could use rebar, or I have also seen 17" bright orange plastic pegs which work very nicely.
- A heavy duty snap-blade craft knife to cut the panels, and one packet of extra blades. You should be able to extend the blade at least two inches. You may need 1 blade per panel (6).
- Two or three light duty knives for cutting tape when you are assembling the buildings.
- A 16'x20' tarp. It can be 14' x 16' but 16'x20' is the closest standard size.
- 100 feet of rope.
- A pair of gloves, safety goggles, and a dust mask or N95 mask. You are a Burner. You have these things already.
- 12 6" long pieces of PVC pipe for the tape anchors. You can find things like this in the plumbing section, or you can buy a pipe and cut it with a hack saw.
- Bubble wrap or foam pipe insulation to pad the ends of your tent pegs.
- Six rolls of 3" or wider foil tape. You will use this to cover exposed filament tape to reduce fire risk (see the Hexayurt Safety Information
- (optional) Mallet to drive the pegs.
- (optional) A 10 ft very straight 1"x4" or other device you can use as a ruler.
- (optional) Plastic sheeting for windows.
- (optional) Furnace filters to tape over vents for dust-free ventilation.
- (optional, but recommended) a one gallon pump sprayer with a misting feature.
- (optional) Something like a broom, or a squeegee on a long pole that will help your tape seal as you make the final seams on the roof cone
- (optional) If you choose the 2D/'Grounded' Assembly Strategy you may want something to use as a guide for making the gaps between panels.
Total cost: under $300, even in San Francisco.
Make the Hexayurt at home
At home, prepare the panels.
- Take the six panels which will be used for the roof cone.
- Draw a diagonal line, left to right, corner to corner, on three of the panels using the ruler or another panel as a guide.
- Draw a diagonal line, right to left, on another three panels.
- Put on your gloves, mask and goggles. This protects you from little bits of fiberglass from the panels.
- Using the snap-blade craft knife, extended about two inches, cut the panels. Expect to change the blade every panel or so, and change the blade as soon as you feel the knife tearing the material rather than cutting cleanly.
- You now have 12 right angle triangles.
- Tape the edges. The best way of doing this is to start the tape about 6" from the point of the triangle, and then have one person run the tape down the edge of the triangle while another person holds the triangle in place. Once the tape is all the way down the edge, have a third person fold the tape down on to the sides of the board smoothly. Then rotate the board and do the next side. This comes easily enough if you think "wrapping presents."
- Now do the same (taping, not cutting) for the 6 boards you are using for the walls.
- You have now completed the first stage of panel preparation.
- Do a test assembly. Instructions are below. You will regret skipping this phase. You do not need to fully tape everything, just a six inch blob top and bottom of each board rather than fully taping the seams. Get a sense of the process (full instructions below.)
- Practice making tape anchors. Instructions are below.
- You will notice there is no door, nor are there windows. You should cut a door now. The strongest door is two feet wide, cut one foot from the end of a wall. It should go from the ground to about six inches from the top of the wall. Cut the section out completely, and tape all exposed edges. If the door doesn't quite fit now, you can crush the door flap a little by banging it on the ground (really.) Then tape the top edge of the door into a hinge, like a cat flap. This is not the most convenient or aesthetically pleasing door. See the "Doors and Windows" section for other ideas.
- Tape the door back into place in the panel in such a way that you can cut it open from the outside. If you do not do this, the panel may break above the door in transit or construction.
- Total time: with three people, probably three hours including the test assembly.
Transport the Hexayurt
Transport arrangements.
- Consider reading the 2D Assembly Strategy below to see if doing any of that work at home is more appealing than in the desert. At this point, you can either just pre-tape together the "kites" and transport them, or use the 2D assembly route that makes an accordion folding hexayurt, which will ship perfectly. You can also pre-tape the wall panels before transport if you like, into 3 sets of 2 panels. Or, you can do it all on-playa.
- Put three wall panels on the spread-out tarp. Stack six roof panels on one side, and six on the other, forming a neat 4' x 8' stack. Put the three remaining wall panels on top, and wrap the bundle very tightly in the tarp. One person lost their panel materials on a roof-rack because the force and the vibration wrecked the panels. I think they were directly exposed to the full force of the air.
- The entire package is an easy carry for two people. It weighs significantly under 100 lbs. It is quite large.
Do read a few hexayurt transport horror stories on the Burning Man discussion boards--because transport would be a terrible way to lose your yurt, injure another car/person, etc. It's recommended to have backup living quarters (even a cheap tent) in the even that your hexayurt sails away during transport or assembly. Remember: this is extreme self-reliance.
Playa Assembly Instructions
On the Playa.
- General procedures
- Never peel tape back off the boards carelessly, because you can rip the foil right off the boards.
- Never cut the board material on the playa because it generates moop.
- Careful juggling sharp knives and heavy rolls of tape!
- Now we have dust and heat to consider. Plan on working when dust and heat are minimized - early morning is the best time to do construction. If you arrive in the day, you can try the late afternoon, before dusk. Start early or you will be racing against darkness, which is no fun. No matter how eager you are, don't stupidly lose your yurt by setting up in high wind.
- People. Plan on a core team of three to five people. You will need an additional half a dozen for about fifteen minutes when you lift the roof cone on to the walls.
- Start with a little magic. Visualize clearly what you are about to build. This helps you do the construction efficiently. The clear picture in your mind helps you work correctly and coordinate with your helpers.
Pick your Assembly Strategy
Developments have been made in classic Hexayurt construction that have created an alternate method of on-playa hexayurt assembly. There are two Assembly Strategies:
3D/Midair Strategy: historically, roof pieces were assembled in midair, with 3-4 friends to hold them in position, in the shape of the finished hexayurt. Almost all of the videos show this assembly strategy. You will find in the videos that this strategy creates several mishaps that are time and tape consumptive.
2D/Grounded Strategy: You can assemble a hexayurt in 2D, which requires 2 people until you lift the roof onto the walls. This strategy keeps all of the pieces on the ground for the majority of assembly. (Video to come soon. Consider watching the Camp Danger assembly videos as a guide) Also coming soon: PDF guide for 2D/Grounded Assembly
3D/Midair Assembly Strategy
Overview: 3D/Midair assembly, as described above in Pick your Assembly Strategy is the oldest assembly method, and perhaps more inaccurate and cumbersome. Inaccuracies are never fun, but they can be especially painful when working with expensive tape that might be in limited supply. Take at least a quick look at the 2D assembly strategy and see if it sounds reasonable. Whichever strategy you choose, print the assembly instructions before building and print the instructions for cutting down your hexayurt, which are good guidance for cutting your yurt down so that it is much easier to reconstruct next time.
- Unwrap the panels from the tarp. If you do this right, you should wind up with the panels sitting on the tarp, never having touched the playa.
Assemble the Roof Cone
Do the roof cone.
- You will need to learn this from the videos because it is hard to visualize from written instructions. This list is a reminder. Anybody want to take a crack at an illustrated guide?
- VIDEO: 30 minute roof cone construction video
- VIDEO: Video Clips Homepage
- Take one wall panel and set it on its side. This panel is a prop to rest the roof cone on as it is assembled.
- Take four roof triangles, two right and two left. Place them into two isosceles triangles. These triangles should be directly opposite each other, resting on the prop.
- Make a tape anchor.
- Cut 12" off a roll of tape and keep it.
- Take one of the 6" plastic pipes and the roll of tape. Roll the pipe in the tape two or three times.
- Now take the 12" piece of tape and stick six inches of it to the sticky side of the tape just above the pipe. This sticky-to-sticky connection is very strong.
- Then take the remaining length of the 12" piece of tape and wrap it around the pipe, so that the pipe cannot unroll from the tape.
- You need to see this done.
- Position the tape anchor about six inches below the ground edge of an isosceles triangle, where the split in the two boards is. It is still attached to the roll of tape!
- Have one person roll the tape about half way up the panels starting from the tape anchor.
- A second person stands by the prop and reaches down to take the tape from the first person, and rolls the tape all the way to the top of the boards.
- Make sure there is a gap between at the apex of the roof cone before going further. Pause, because this is important.
- VIDEO: mind the gap!
- At the point of the roof cone, where you are about to tape, there must be a gap. There is no gap between the two right-angle triangles making one roof triangle. That is not where we want the gap. We want the gap at the apex of the roof cone, between the point of the two triangles.
- If this gap is not left, then as you get to the end of the roof cone process, it will become impossible to fit the pieces correctly. It is like trying to jam 105% into a pie chart - the pieces seem too big for the alloted gaps. If you wind up in this position, you will probably wind up trimming one of the boards and that is frustrating.
- So how big should the gap be? About an inch and a half between the closest points. Possibly two inches. Too much is definitely better than too little.
- The prop, however, won't hold the pieces in quite that alignment. Perhaps wad up a T-shirt and put it on top of the prop? I usually just fudge this, but I think making a tool by padding the prop is likely a better idea.
- Now, gap assured, roll the tape down the other side. The person by the prop will roll it about half way, and a third person will take it down to the ground edge.
- At that place, make another tape anchor. You must not cut the tape in the wrong place.
- To make this anchor, roll the tape out about 18" past the edge of the roof boards and do not let it touch anything. Cut the tape at this 18" point.
- Roll the piece of plastic pipe up the exposed piece of tape coming off the roof, and finish the tape anchor as you did the first one.
- Breathe. It's a lot when you see it written down. The first time you will wonder if you are doing it right. Many things which start that way turn out very well. You are now well started.
- Take two more boards. While the previous tape ran along the 8' vertical edge of two boards, the next straps of tape run up the hypotenuse. This is easy to see - you just take the next board, and fit it along side of what you have taped already, and you see you're taping slightly differently. Now the tape runs up the edge of the roof, and the boards meet at a slight angle.
- But the procedure is exactly the same. Position the board, make an anchor, run it up half way, pass it off to the next person, ensure there's a bit of a gap (less important with each passing board), position the board on the other side, run the tape back down again (without cutting), make the anchor on the other end.
- Keep going. In about 40 minutes, you will have done all the pieces but the last boards.
- The last boards are different. Firstly, they can be really hard to get into position if you did not consciously leave a gap as you went about taping the apex.
- Secondly, there is no place to stand to hand off the tape from one person to another.
- Finally, the taping of the last board snaps the entire roof cone into its perfect geometrical shape. Right now, with an open edge, the roof cone can be too high or too low and you won't really notice. That is about to change.
- Have one person get under the roof cone. Sit, don't crouch, you're going to be there for a while. Take the weight of the roof cone (it's light!) and pull out the prop. Your job is to move the roof cone up and down a little to help get all the pieces fitted in correctly.
- Now position the last boards. The easiest way to do his is to splay the roof by having the person inside lower it a little, then slide the last two boards into position.
- VIDEO: adjusting a roof cone board.
- Then, if they fit nicely, have the person inside lift the roof cone gently until the ground edges of the boards come tightly together, forming a perfect roof cone.
- If it worked that way, thank your gods. Now quickly make another tape anchor on a roll, and stretch out 20 feet of tape between you and another person. Keep it pulled very tight indeed. Walk so you are on opposite points of the roof cone.
- Now gently, gently lower the tape until the tape touches the very point of the roof cone. Keep it tight. If it is positioned correctly, then lower your end of the tape towards the ground edge, patting it down against the seam with a stick or a broom. Make the final tape anchor, and laugh at your friend who is stuck under the roof cone.
- It's never quite this easy. Usually those last boards need some force to position them correctly. There's shoving and swearing and cajoling. Sometimes you have to trim a board.
- How far out of whack can it be and still work? How precise do you have to be? Well, that tape is six inches wide. Any gap should be bridgeable by the tape, and still have good adhesion on both sides, so you have about two inches to play with. However, I've seen much wider gaps handled. You can actually kind of screw this up and still have a perfectly sturdy Hexayurt.
- When in doubt, remember this golden rule: it's better to trim the boards at the point, so they all fit, than to trim them at the base, which distorts the shape of the roof cone where it joins the walls.
- (Optionally) lift the edge of the roof cone to let your friend out.
Assemble the Walls
Do the walls. This is the easy bit.
- In terms of positioning, you can either move the roof cone away and work on the tarp, or you can "open" the walls slightly so they fit around the roof cone. Either way works. Watch, if you move things off the tarp, that they do not get dusty. If they do get dusty, wipe them down with a damp cloth and dry them before attempting to tape them to things.
- Have two people take one panel each and hold them in position while a third person handles the tape.
- Put the walls roughly in position over the hexagon you drew. This helps tape the angle correctly. Also the angle that the boards make to each other stops the walls you have taped already falling over.
- Tape all six of the walls into shape, but leave one connection open. It can be very useful to be able to get in and out of the walls quickly.
Put the Roof Cone on the Walls
This bit is pretty easy too!
- First, find some helpers. 9 is a good number.
- You want six people to lift the roof cone. Each should stand in the middle of a wall with their hands spread as wide as possible, and they should lift in a coordinated fashion.
- If the walls are positioned just outside of the roof cone, around it, the lifters should now step under the roof cone and lower it close to wall height.
- If the walls are beside the roof cone, the lifters should carry the roof cone over the walls.
- Either way, the hustlers should now position the walls under the roof cone.
- Before you start to tape, get things lined up. Make sure that all the corners, all the way around, are about right.
- Now tape. Start in the middle of a wall, and put the end of the tape over the seam between roof and wall. This part is pure magic! You run the tape all the way around the building, a single unbroken strand that acts just like the tension ring in a yurt. It's also fun because the tape makes a nice noise as you zoom it out along each side, and people get very excited.
- When you get to a tape anchor, you have a choice. Over or under? I've tried it both ways and I can't figure out which is best, so I'm going to suggest you go over the tape which holds the tape anchors, so that the actual plastic tubes stick out just under the tension ring. Going under the tape anchors is fine too, however.
- Now cut the tape that is currently holding the door closed and let your friends in/out.
Tie it to the Playa
Almost done! Almost Done!
- The Hexayurt sits on the tarp, and is not yet guyed down.
- Go inside of the Hexayurt and tape the joint between the wall and the floor. If you are feeling fussy, do this inside and out. This is your dust lock and really makes life much more pleasant.
- Now cut away the excess tarp, or just leave it. This may depend on your siting.
- Now drive in your tent pegs. They should be pretty close to the bottom of the yurt. Make sure to pad the ends and mark the guy lines with something easy to see at night.
- Run the rope through the plastic tubes at in each tape anchor.
- Guy that puppy down. I, personally, favor the "trucker's hitch" to get a good, tight guy line.
- Basically, tie the rope through the plastic pipe, and run the free end down through the tent peg and back up. Put it through the triangle made where the rope is tied through the pipe, and pull until it is tight enough for your liking. Then tie it off just below the triangle.
Final Finish Work
- Tape your furnace filters to the outside of the hexayurt, over your vents, so that if you bang the dust off them it falls on the outside of the building, not the inside.
- Put the foil tape over your exposed filament tape seams to protect them from fire. This is really important. In 2009 we'll have a tape which combines the filament tape and the foil tape in a single product, but it is not here yet.
- You are done.
Congratulations!
2D Grounded Assembly Strategy
These instructions allow you to tape together the roof cone pieces while they are flat on the ground, and will only require 2 people for almost all of the assembly. This is almost as good as making a semi-folding hexayurt, except you are working in desert conditions instead of at home, and there will be bits of exposed tape (it likes to stick to stuff). Finally and barely in time for Burning Man 2011: the 2D Assembly PDF Guide Media:2D instructionsPDF.pdf. Brought to you en route to the playa from the Donner Pass. It is assumed that you already did the steps of "preparing your panels” at home, meaning you have 6 full size 4’x8’ panels, 12 triangular half panels, and all of these have had their raw edges sealed with tape. Never cut panels at Burning Man, never bring un-sealed panels to Burning Man, they create MOOP (litter).
If you want to save yourself the trouble of doing these tasks again next year, make your hexayurt a reusable semi-folding hexayurt during this assembly process. Pointers for doing that will be noted in the text below. The advantage of a semi folding hexayurt is: when you cut your hexayurt down, you will have 4 accordion-folding pieces that will ship in a 4’x8’stack, and will be easy to reuse and reassemble next time. This will save you a lot of work and tape next time you want to use your hexayurt. Understand that a semi-folding hexayurt made at this point will not be quite as strong as making a semi folding hexayurt at the outset of construction. Let's call this method the pseudo-semi-folding hexayurt for now. If you choose not to make a pseudo-semi-folding hexayurt, you can still cut it down in a way that can save you some trouble next time.
Start by assembling the roof, it’s less likely to blow away than the walls
1: Lay two triangular roof panels out flat on the ground, aligning their hypotenuses (the longest, diagonal side). This makes a shape like a kite. You probably want the logos on the inside of the yurt, so have their non-logo side facing up. Hiding all commercial logos is a Burning Man tradition, although it’s becoming a lost standard. (*Not all the triangles are the same, so keep picking triangles until you get a pair who will line up this way without their logos showing. If you can’t find two, it’s because you didn’t reverse the direction that you cut your panels during prep. Just an aesthetic problem.)
2: When you tape the hypotenuses together, leave a gap between the panels that is ½ the thickness of your panels (if you used 1” panels, it’s ½ inch. If you used 2”, make a gap that is 1”, etc). If you leave a gap that is ½ the thickness of your panels, by the magic of geometry, your roof will have the perfect angles to fit on your yurt walls. This gap is how you avoided building the roof cone with it suspended in midair by your friends. It will also leave a bit of exposed tape in between the panels—careful not to let it stick to everything. And don't be too perfectionistic about the perfect measurement on your gap-- tape is very forgiving. 3: Do this a total of 6 times: you will have 6 “kites.” You can add something to cover the exposed sticky tape so that it doesn’t stick to everything. A strip of masking tape, ribbon, playa dust, etc will do. Properly made semi-folding hexayurts have hinges that use bi directional filament tape on both sides, because the tape-to-tape connection is very strong and the hinge itself seals the raw material and the sticky tape on both sides of the hinge. You probably don’t have enough tape to do that, so the hinges will be vulnerable and delicate. Just be careful that you don’t rip the tape off the panels. To protect against that, you can use a few 2-4" tape-patches from the opposite side of the hinge--some of the tape will touch the gap-tape, some will contact the panel. It'll help.
4: Tape together the “kites” that you just made. Be careful to line up the “bases” of the triangles as you do this—the sides that will rest on the tops of the walls should sit flat.
If you want to make your hexayurt a pseud-semi-folding hexayurt, tape the kites together with the logo side facing up (meaning, you'll see this tape from inside your yurt--later it will make your roof accordion folding. If you want slightly better waterproofing, tape them together with the non-logo side up (this won’t accordion fold for shipping later). Do this until you run out of panels.
- You will have some trouble making the final seam because there is nowhere to stand (a common hexayurt assembly problem in all construction modes). Use a few "tape patches" (segments of 6" tape-- about 2-6 inches long) to get the roof cone into it’s final position. Tape patches will make your life much easier and are surprisingly strong. This technique may need some improvement, but one way to tape the halves together and seal out rain is to create 1 long (16') length of tape, held between two people and lifted over the roof with the help of a broom handle. Use the broom handle to land the tape at the tip of the roof cone, try to make it even but don't be too concerned. Then use the bristles of the broom to smooth the tape down to the roof panels. This finishes the final seam and waterproofs the hexayurt roof.
If you are using tape-anchors for to stake your hexayurt down, make them now. Read this for a comparison of stake-down options, tape anchor construction is discussed here here Note: hexayurts, once taped together, are large, lightweight, fragile things that will catch the wind like a sail, and blow away like a kite. Be prepared to stake your hexayurt to the ground before you tape the roof onto the walls. Consider driving 3 stakes into the ground and have some rope ready. While the probability of a rogue dust storm during hexayurt construction might seem low, it can happen and has happened. Do not lose your hexayurt this way.
For the Walls: 1: Lay 2 wall panels out flat on the ground. You probably want the logos on the inside of the yurt, so place them with their non-logo sides facing up. 2: For the best dust/waterproofing, tape together all the wall boards from their outside or logo-free side, leaving a gap between the panels that is equal to the thickness of your panels (if you used 1” panels, it’s a 1 inch gap.) Like the roof, the gap is the perfect size gap for the angles that a hexagon takes—just trust it. Alternatively, you can just tape from the interior side of the panels without a gap. This is going to take up quite a bit of space on the ground, so tape together just 2 or 3 panels at once. Luckily there’s a lot of space at Burning man, but if you’re cramped for space, panels are easily transported somewhere more spacious and then brought to your camp for final assembly. Pseudo-semi-folding hexayurt info, for the walls: to keep it simple, you could do as listed above (gap or no gap), and when you cut it down, cut it into 3 wall sections (of 2 panels each, they will fold closed like books.) If you want to make a semi-folding hexayurt, you'll need to alternate what's listed above, taping panels with a gap (taped from the outside, gap is equal to the thickness of the panel) and a tight hinge from the inside (without a gap). 3: Stand the panels up, and complete the walls by circling them up and taping the final seam(s). Now your hexayurt is assembled. Go back to Put the Roof Cone on the Walls to finish assembly.
Cutting your Hexayurt Down and Going Home
This is important. Don’t forget during your mind blowing Burning Man Experience!
When you cut your hexayurt apart to go home, if you made a semi-folding hexayurt: 1: Cut the tape ring that connects the roof to the walls, and take the roof off. 2: Then, cut the roof in half: choose a line where there is no gap to cut your roof cone in half: that means on the “legs” of the triangles, not their hypotenuses (the hypotenuse is the diagonal side, or longest of the triangle. Don't cut the hypotenuses. This line is actually important-- because next time you put together your roof, you don’t have to worry about making those tricky gaps in the “kites.” 3: Divide the walls into three, sections, of 2 panels each. Careful not to let the exposed tape stick to everything. This will go back home in a neat 4’x8’ stack, and the next time you assemble your hexayurt you will use much less tape, time, and effort! When you cut your hexayurt apart to go home: If you did not make a semi-folding hexayurt: 1: Cut the tape ring that connects the roof to the walls, and take the roof off. 2: Then, cut the roof panels apart in pairs. You can cut them apart in a pair that is the shape of an isosceles triangle or in the shape of a kite. The best way to cut them apart is so that you keep the shape of the kites-- that means cut along the flat faces , do not cut along the hypotenuses of the triangles (hypotenuse=diagonal side of the triangle.) [You will find the place to cut if you stand in the middle of your 8' wall sections, the hypotenuse of triangles is at the corners, between two 8' rectangles.] This is actually important-- next time you set up your hexayurt, you’ll only have to tape 6 flat seams (the easier ones), and you will not have to hold the roof up in midair. 3: Divide the walls into three pairs (2 piece sections.) This will go back home in a neat 4’x8’ stack, and the next time you assemble your hexayurt you will use much less tape, time, and effort!
New York Times
August 28, 2006
This Is Only a Drill: In California, Testing Technology in a Disaster Response
By JOHN MARKOFF
(this article included an image of the hexayurt, and a printable version is linked below)
...Also on display was a novel low-cost refugee shelter designed by Vinay Gupta, a software engineer in Chicago. Called Hexayurts, the buildings are fabricated from four-by-eight sheets of foam or hexacomb cardboard and duct tape and can be built for about $1,000 apiece. Mr. Gupta set up several of the buildings in a plaza and showed how they could be equipped with a high-efficiency wood stove for cooking, a composting toilet and a small fluorescent light.
Although there has been no mass production of the buildings, which are large enough to shelter a family, Mr. Gupta has put design instructions on the Internet and placed them in the public domain. He thinks they are sure to find users.
“A FEMA trailer costs $30,000,” he said. “I’m waiting for the next hurricane season.”
Full article text with picture (pdf)
Treehugger / Burning Man / Current TV Participate! Contest Winner
The Hexayurt the Treehugger Participate! contest and was at Burning Man 2007.
Strong Angel 3 Final Report
- Hexayurts
a. A surprisingly interesting temporary shelter, a Hexayurt, that costs about US $300 appeared on the site as a part of a comprehensive family support unit that included gasification stoves, uniquely small composting toilets, and other items involving low-impact and sustainable support to displaced populations. The Hexayurts, brainchild of Vinay Gupta of Scotland and featured in the Architecture for Humanity publication Design Like You Give A Damn, are created from conventional laminated insulation and built on site with scissors and duct tape. Initially ignored on the SA-III site, participants gradually drifted in to one of them and stayed because it was a bit cooler. Eventually an Afghan NGO built one itself next door on the Strong Angel Plaza and used that as their base of operations, decorating the doorway with photographic examples of where such a shelter could work. Hexayurts weigh very little and can be lifted by a single individual, can be anchored firmly to the ground, and can last for 5 years. Several were built on the site in an afternoon. Florida Emergency Services is evaluating them for disaster response, and that effort should be tracked.
http://web.archive.org/web/20060716165651/http://www.strongangel3.org:80/
Design Like You Give A Damn
On the other end of the Burning Man spectrum lies Vinay Gupta, who tested his small, low-cost refugee shelter, the Hexayurt, at the festival in 2003. The Hexayurt is designed to create as little waste as possible in its production. Gupta got the idea while hanging around the Rocky Mountain Institute, where he heard about Strong Angel, a project instigated by the US military to test emergency shelter and communication systems (see below). The design can be built using any four-by- eight-foot (1.2-by-2.4-m) sheet material. Construction requires only six straight cuts across the diagonals of the sheets, to make the roof triangles.
Gupta added to an improvised swamp cooler, in this instance, a 12-volt computer case fan pulling air through a plastic tub filled with four inches (10 cm) of water. This helped drop the internal temperature even further. In addition to being affordable, the Hexayurt is designed to be lightweight and portable. One adult can carry the hut without difficulty.
http://files.howtolivewiki.com/hexayurt_design_like_you_give_a_damn.pdf (9M) - Full text plus pictures.
http://www.architectureforhumanity.org/designlikeyougiveadamn/
Available in other languages: /ja
The Shipping Density Problem
Hexayurts are light, but they are not small. An 8' unit (160 square feet) takes 12 4' x 8' sheets, or a package four feet by eight feet by one foot. A 40 foot sea container will only fit 80 units, and that's just not nearly enough.
There is an answer: ship the buildings without the air which provides both strength and insulation, and expand the dense shipping form into buildings at the disaster site / war zone.
It involves developing some new technology, but it is clearly within the scope of the possible, and possibly even the easy, at least in one case.
Materials Options
There are two promising construction materials we have worked with.
The first is modified polystyrene coated with aluminium foil (commonly used in the construction industry for insulating houses - go to any Home Depot and ask for Tuff R by Dow.) That's what most of the units I've made were built from.
The other is hexacomb cardboard, used universally in the packaging industry. Hexacomb cardboard looks like an inch thick honeycomb, with the faces covered with nice thick craft paper. In a hexayurt context, a foil facer would be added for waterproofing, and there are a lot of options with this material for additional waterproofing and strengthening treatments.
Hexacomb Cardboard from Pregis - These folks have been really nice to me over the years, and incredibly helpful, particularly Mark Jacobson, one of their salesmen with some long standing expertise in using this material in building applications (they used to do it in California in the 1980s).
Either one of these materials can be shipped in a much, much more compact form than 4' x 8' x 1" boards.
Foam Boards From Liquids
The insulation boards could, in theory, be shipped as liquids. The feedstock chemicals would then be mixed on site in a portable factory, either built in a sea container, or built on the back of a very rugged 18 wheeler truck. On site, in a camp or a disaster zone, the truck rolls in, the chemicals are mixed on site and foam up into the board mold, and are coated with the silver foil.
An 18 wheeler can carry around 36 tons of liquids. Assuming 10 lbs of chemicals per board, that's 7200 boards, or 600 units. At UN occupancy densities (3.5 square meters per adult, if I recall correctly) that's shelter for 2700-ish people per truck. That's beginning to look like a reasonable shipping density.
I discussed this idea briefly with Dow Chemical, who know their way around this stuff (Steve Harasim) and they say "it's not easy, but it's plausible. It's not trivial to get good quality consistent product, there are a lot of factors."
Developing this kind of technology is, I think, a job for the military.
Flat Packed Cardboard
This approach to building hexayurts gives a reasonable $100 home ($0.60 per square foot) - suitable for long term use in many areas of the world.
Note this page was revised, December 2007, to revise the price estimate to $160 ($1/sq. foot) based on using a much more durable aluminium exterior. I believe that the $100 home is still possible, but it's going to require vast economies of scale, and developing world material prices. In that context, however, it should be perfectly possible.
http://files.howtolivewiki.com/rapid_deployment_concept.mov (3mb) for some film of hexacomb core and a brief discussion of this approach to making Hexayurts.
Like corrugated cardboard, Hexacomb is flat materials arranged into a 3D form which is much, much stronger. The honeycomb can be shipped "collapsed" - enough material to form the honeycomb center of a 4' x 8' x 1" board is shipped as a solid block 1" x 4" x 6'. (1/6 cu. ft.) The solid block is stretched out to it's full volume by hand or with a simple machine called an expander, which simply grabs the cells of the honeycomb and pulls them open from the flat pack core: it's a simple mechanical device.
The honeycomb is a very strong, very lightweight structure, and it can be filled with blown cellulose (shredded newspaper, for example) to provide insulating properties.
Then the facing materials - something light, waterproof and tough - either tyvek or, for longer life, aluminium-faced kraft paper are stuck directly on to the open honeycomb, forming the panels. A close analogy is shipping corrugated cardboard as a roll of flat material, then corrugating it on site. Hexacomb is about that complex - no fiddly chemistry, just paper, shapes and glue.
To seal the edges of each panel, one can use tape, or have the facing material be significantly larger than the panel, and glue-and-fold the edges over several times, rather like the sealing mechanism on the waterproof bags that kayakers and divers use. This approach removes the need for taping the edges of each panel. Before the panel is sealed, moisture absorbing materials could be thrown into the open face of the panel to help with longevity by absorbing any atmospheric moisture trapped inside during fabrication. The little silica packets that are shipped with items like shoes or computer equipment would be one example of that kind of moisture absorber.
Densities for these buildings are going to be a lot lower than the liquid-ship form documented above. My guess is 400 units a truck, but there are some significant unknowns in all of this. Or about 7000 units per TEU/6meter container
Finally, add a container load of pedal-powered table saws (or a generator and portable table saws, $100 each retail price) to cut the boards, and a crate of tapes per truck.
The other approach is to fabricate the panels using a much simpler and lower tech approach. Rather than the expander and the portable factory, the panels are assembled by hand using unskilled refugee labor guided by a large group of leaders. This approach has the advantage that the refugees are left with an upgraded skill base, which may have utility outside of their immediate circumstances, and the buildings are good enough quality to be useful after the immediate crisis is over, particularly in extremely poor areas.
Here is a projection for cardboard-and-ply-press mass deployments. In this scheme, panels are made by hand, using a simple plywood press. The alternative method, using a mechanical expander and press, is also viable but is not documented here yet.
The process works like this:
- A container load of cardboard, presses and finished hexayurt panels is sent out, with multiple containers of raw materials (hexacomb and facing sheets, glue etc.) following.
- If outdoor conditions are inclement (rain, dust) the finished panels are assembled into factory hexayurts, and the presses are moved inside.
- Panel components:
- Facers (sheets of kraft paper-backed aluminium)
- Hexacomb
- Glue
- Assembly and press components and tools:
- Flat table
- Flat dry surface (plywood on 2x4 framing)
- Three plain boards
- One pinboard. This board has hundreds of nails of the correct length pounded through the board in a triangular grid pattern. They will hold the hexacomb in the expanded form. Experiment with pin density.
- Glue roller
- As many refugees as can sit comfortably on one board
- To make a panel:
- Set plain board on table.
- Set pinboard on top of that, points up.
- Stretch out enough hexacomb over pinboard to form a 4' x 8' panel.
- Roll glue over top of the hexacomb.
- Apply a facer to the hexacomb, aluminium side up. Wait 30 seconds for the glue to begin setting.
- Flip over the pinboard like a spatula and drop the glued single-faced panel onto the plain board. Carefully put the pinboard aside.
- Roll glue over the other side of the hexacomb.
- Apply the opposite facer.
- Lift the plain board with the new panel onto
- Put a panel on top. Several refugees sit on the top panel while the glue dries.
- Process notes:
- Keep one board under the whole stack and one board under the top panel. The boards rotate between the stack and the table
- Every 30 minutes, start a new pile, leave the completed pile 30 minutes to dry, and move the dry, oldest pile to the trimming phase.
- Trimming phase:
- Trim and seal the panel edges either with tape or by folding and crimping the edges shut with more glue.
- If using glue, replicate above 30 minute drying cycle.
- Once enough panels for one hexayurt are dry, begin assembly.
$100 per press—2x4s, plywood, nails. some metal rods or pegs. Guess 3 minutes per panel=20 panels per hour per press. Stacks of 20 or 40 panels being left in the press for half hour to dry.
$4.50 for each honeycomb core.
- 1mm thick aluminium foil costs around ten cents a square foot in industrial quantities. This is *quite* durable - you can't get a finger nail or a pencil through it. That comes to, say, $6.50 per sheet, for a total of $11 per panel. The previous estimate of $7 per panel might cover a much thinner aluminium foil coating, and be suitable for limited lifespan applications, but let's price this out for a somewhat longer-life shelter.
Total of, say $12 per panel with panel facings and glue.
- 100 presses = $10,000.
- 100 presses * 20 panels per hour * 12 working hours a day = 24000 panels per day
- 24000 panels * $7 per panel = $288,000 of cardboard etc.
- 24000 panels per day / 12 panels per basic house = 2000 houses per day.
- 12 panels * $12 per panel = $144 per house for panels.
- Assuming $16 of other bits (tape, etc): $160 per house.
Right around $1 per square foot. (Can we get it down to $100 for the entire house? Yes, but it requires enormous economies of scale, and production in a developing world economy. It cannot be done at that price in the developed world.)
- 166 square feet each, or shelter for around five people: roofs over 10,000 per day, assuming there are people to tape up houses and work panel presses.
Now shipping volume.
- A panel weighs about 7 lbs, between facings and core.
- A 20 ft sea container can be loaded to 40,000 lbs (up to about 50,000 lbs I believe)
- 40,000 lbs / 7 pounds per panel / 12 panels per house = 475 units per sea container.
- 475 units is shelter for about 2400 people, assuming 5 per unit.
So you need roughly four 20ft containers per day to keep the presses running. I'm not sure what that is in Chinook loads, but I think it's about 20 runs. A chinook helicopter will carry about half what an 18 wheeler will, so we're talking about housing for 1000 people per chinook run.
Assume the presses weigh 100 lbs each = 10,000 lbs of presses.
Both the presses and the core are heavy enough to be weight rather than volume bound for the shipping container.
So the first 20ft container ships with 100 presses and and as many panels as can be fitted in, to make the "factory" units. Panels fit 480 per full container (or 40 hexayurts per 20 ft container).
I think the approach is to send two to five 20 ft containers of panels or pre-fab buildings, emergency food, water purification tablets and panel presses. Then as quickly as possible get the panel presses going, and ship in the rest of the infrastructure packages.
What's interesting is the cost for 100,000 people comes out to be about $2 million, give or take, just for housing, and more like $4 m ($40 per head) with a very basic infrastructure package. I think those are quite attractive numbers, really.
Additional data:
- http://files.howtolivewiki.com/rapid_deployment_concept.mov (3mb) see some hexacomb material and get a better insight into the system
- hexayurt rapid deployment hinge and lock - an alternate approach from Woody Evans
Hexayurt rapid deployment cardboard cost Hexayurt rapid deployment hinge and lock
So, here are the 15 research questions which I think are relevant to the bigger long term and emergency sheltering question, divided into three sections.
For more detailed research questions, particularly on structural engineering, see the Hexayurt Frame TUE Research Outline and the Hexayurt Plywood TUE Research Outline
SECTION ONE: ENGINEERING WITH INEXPENSIVE MATERIALS
GOAL: Prove that there are materials which can build a 5+ year shelter for a price which is around that of a disaster relief tent ($265) or a winterized disaster relief tent ($500.)
1> Develop a low cost aluminium / honeycomb panel.
I believe that 100 micron foil is suitable for this purpose, but possibly thinner foils will work. The foil may or may not need to be backed with another material (glass fiber? kraft paper?) Initial research indicates appropriate foils cost around 1 euro per square meter, giving a total panel cost of 10 euros per panel or less in mass production, for a hexayurt cost of 150 euros approx. Small runs of these panels can be made by hand, and structural and durability questions would be answered in the laboratory. Corrosion resistance is an open question: which alloys, which coatings are appropriate for which lifespans and climates. Sealing the edges of each panel to make it water tight (probably by folding over the aluminium skin over the panel edge and gluing is) also an open question. If this was a student competition, I would hold it annually, to design the cheapest, lightest, strongest panel. Public testing by loading different panels to failure could keep students on their toes!
2> Comprehensive analysis of other possible approaches to ultra-low cost panels.
Conduct a survey with particular attention to any panel options which can be shipped "flat" - without shipping any air. There are many other approaches to doing a sandwich panel which may be appropriate. Prioritize research into technologies which are already beyond the reach of patent so that NRC and other groups can get their shelters built at minimum cost through an open bidding process, rather than being locked into buying a specific product from a specific vendor. Research should also encompass hybrid approaches like deploying a cardboard building and upgrading it later with a cement coating, or other approaches to "upgradable" buildings. I feel the key here is to be guided by the occasional exceptional synergies which can be found between unusual combinations of materials.
3> Ground fixings. Develop a long-life alternative to the tent peg and rope.
In long term use, the tensile materials which hold down buildings will rot in the sunlight. One obvious approach is a metal peg and a chain, but this doesn't allow the building to be put under tension because the chain is inflexible. The same is true of steel aircraft cable. So what is needed is a UV-resistant tie down which will keep the building under tension (pulling it towards the ground) which greatly enhances building rigidity, but without greatly increasing cost. A suitable problem for mechanical engineers: the answer may be in sprung steel tent pegs or some similar innovation, but this is a genuinely hard problem. For one thing, you cannot simply tie knots in steel cables which makes it hard to adjust the length of a steel cable, or fastening it to another object. One approach is to have a single element which weaves through every tent peg and tent tie down point and has elasticity added by a single component, like a spring, and an adjustable tension element (like a turnbuckle.) What about sand and snow?
4> Building floors.
Another really hard problem. The current Hexayurt approach is to go without a floor in dry areas, or to have a "bathtub" floor in the shelter, by taping a hexagonal tarp 30 cm up the walls. Ultra-light buildings do not require foundations, but this problem may be more soluble if it is thought of using concepts from foundation construction rather than conventional flooring approaches. The critical question probably turns out to be "how do you do flooring using tensile materials?" because the strength/weight/cost ratios of tensile materials are enormous compared to available compression materials. There are no obvious answers. I suspect an approach where one over-builds the shelter, and then *hangs* the floor inside of the shelter, may turn out to be the best way of doing this. How would we do floors if we had never seen concrete or wood, only tensile materials and light plastics?
5> Advanced Structural Adhesive Composites.
Or, as we say in the Hexayurt business, tape. We have a specification for "supertape." It should be wide (15 cm?), it should stick forever to paper, plastic or metal, it should resist water, and it should last forever exposed to the elements. One approach is to take a bidirectional filament tape (such as 3M 8959) and give it a foil facing to protect it from being damaged by UV light from the sun, and the elements. But 8959 is enormously over-specified - 400 kg breaking strength - and a typical hexayurt uses a lot of the material, causing the building itself to be over-specified. The task here - and it may be beyond students - is to design a construction tape which is suitable for use as a standard building material. All kinds of stressed skin structures are possible if you can effectively (and waterproofly!) join panels together securely. Supertape is an enabling technology for a whole class of ultra-light buildings. But nobody has seriously examined tape as a building material, have they?
WHOLE SYSTEMS ENGINEERING: from this agenda, you have panels, you have a floor/foundation, you tent pegs or other building anchors, and you have tape. That's all there is to a hexayurt, so this is actually a comprehensive push on the materials science end of hexayurt design.
SECTION TWO: STRUCTURAL AND THERMAL AND OTHER ANALYSIS
GOAL: Develop a comprehensive understanding of the hexayurt as a class of structures, so that one can readily understand how a hexayurt will perform in the field from examining the materials it will be built from.
6> Develop a standard structural model of the hexayurt.
This model should include the large 276 square foot units, and also the small units. The model is significantly more complex than it appears because the Hexayurt is not a simple structure. There are four separate but interconnected structural systems in the building. They are:
- Panels as compression elements.
- Tape as a tensile grid. This is a model where the tape forms a cone, with lines of force going from the pegs on the ground up to the point of the building, and then down the other side back to the pegs there. This is the primary load handling structure of the hexayurt for wind loads.
- Tape as a tension element holding the boards in compression, and preventing the roof cone from spreading apart under loads. Compare the tension ring of the mongolian yurt.
- Adhesive strength, modeling under what circumstances the panels can separate from the tape causing building failure.
My amateur guess is that this is going to require finite element models. Of the three building failures we have seen, each displayed a different mode of failure.
- Was built in a snow load area with a roof slope of 30 degrees. The snow smashed the building flat by bending the panels like bananas, but the tape holding the building together held almost perfectly, leaving something that looked like a fallen souffle.
- Was assembled with duct tape, with no reinforcing strands, and blew apart in the wind. It appears that the panels separated from the tape, rather than having the tape tear.
- Was staked down with toothpicks and dental floss (string and small tent pegs) and ripped them out of the ground before becoming a kite and blowing across the park.
Given that we've seen three failure models in the field, and there are certainly more waiting to be discovered, a good model seems essential. It will be particularly valuable for value engineering - cutting the strength of the tape and panels and so on to something which can survive in the real world without carrying so much extra capacity.
I think this might be challenging work for graduate students, and might make a pretty good thesis for somebody - structural element models featuring processes like tape tearing off a panel surface are probably not in common use because nobody else does this kind of stuff.
7> Develop a standard thermal model of the hexayurt.
Considerably simpler, but also important. I do not think that there are any particularly complicated pieces here. The building has the four following thermal properties.
- The metal surface reflects away sunlight, and on the interior, may help retain body heat.
- The insulation value of the building shell prevents convective and conductive losses.
- The floor absorbs heat from the building envelope.
- Ventilation (see below) moves heat in and out of the building.
Important notes:
- the analysis should consider areas where it is too hot, and areas where it is too cold. It would be nice to know if snow area hexayurts should be black on the outside, for example.
- a hexayurt in a desert area, with the doors closed, cools down rapidly because the heat in the air inside of the building is cooled by contact with the cold earth, which has been shaded for several days. A single window in the south side of the building lets in enough sunlight to completely counter-act this effect: apparently the thermal balance is quite delicate. I'd like to understand that phenomena much better.
- Thermal stratification inside of the buildings is important. In once instance, we had two hexayurts of identical area next to each other, but one was 1.2 meters taller than the other. The taller building was much cooler than the smaller one, in part (we think) because the hot air collected at the top of the building.
8> Develop a standard ventilation model of the hexayurt.
As mentioned in the thermal section, air movement within the units may contribute significantly to overall building performance. However, there are three more pressing issues we have to consider.
- condensation and moisture handling inside of the building: how much ventilation is required to keep the walls of the shelter from becoming damp, possibly causing structural issues or mould over time?
- how do we handle cooking smoke? Should the building have a chimney? If so, one logical suggestion is to have the pipe run up the center of the building and vent at the point, where smoke and hot air would naturally collect. However, this interferes with the tape, which also uses that important point on the building for transfer of forces. Then there is rain to consider. A thermal model and a ventilation model combined could help us understand the optimal way of handling cooking smoke without impacting the thermal performance of the building, or perhaps even improving it. One approach would be to use solar powered fans to provide additional cooling by moving hot air out of the point of the building.
All of this goes faster with computer modeling than by experiments.
9> Develop an individual level stocks-and-flows model of a refugee camp or other large encampment.
Numerical modeling of an abstract refugee camp can help model the effectiveness of interventions. What is needed is a model which has resolution down to the individual family cooking each individual meal, combining so much water with so much millet with so much wood to produce so many calories. This approach is simpler than that taken by many modern video games, and is certainly within the reach of computer science students. It might take a few years, starting with simple projects, with each year of students inheriting the model from the previous year, but (speaking as a former professional computer programmer) this is not a terribly difficult simulation.
Things like number of miles walked to carry water can be modeled also.
Then the effect of interventions can be modeled. What is the impact of introducing a wheeled carrier that moves five times as much water? What is the economic impact of a more efficient cooking stove? How does it affect local deforestation?
Once the model displays broadly reasonable behavior, in general agreement with observed phenomena in the typical case in the field, it becomes possible to plug in the hexayurt and the associated whole systems based utilities package, and model their effects.
Although no computer model does more than reflects the data fed into it, it is likely that some interventions and technologies can be prioritized for testing based on modeling data. I believe we will find that efficient stoves are one of the largest single point interventions possible, and that the potential of solar cookers is still largely unrealized (although see recent work in Africa from Solar Cookers International.)
10> Develop macroeconomic models of appropriate technology interventions, like efficient cook stoves.
In many areas, families spend 20% of their income on fuel and drinking water supplies. Introducing technologies like solar water pasteurization, and fuel efficient or fuel-free cooking methods may be equivalent to boosting the family income by 10% or more. Good macroeconomic models of these processes can allow appropriate technology to compete for funding on the same basis as power stations, dams, and other large scale infrastructure projects. See "Small is Profitable" by Lovins et. al. for some approaches to this evaluation.
The microeconomic models of individual households are often reasonably well understood for at least some of these interventions. At this point I do not know of macroeconomic analysis of those same systems.
WHOLE SYSTEMS ENGINEERING: This ambitious program can guide small issues, like building design for a given climate, through to big issues, like whether to invest in a coal fired power plant, or a hundred thousand efficient wood stoves.
I think there is work here for generations of students.
SECTION THREE: OPEN INFRASTRUCTURE DEVELOPMENT
GOAL: Develop standard off-the-shelf or open-source implementations of advanced technologies for living well at the $1 per day or refugee level, and slightly above.
11> Build on the Integrated Cooking work of Solar Cookers International
SCI has excellent programs using solar cookers, and insulated boxes into which hot food is placed to continue cooking when it is no longer in the cooker. They also deploy rocket stoves, which are not as efficient as wood gasification stoves, but are much cheaper. There are some very interesting and subtle approaches, like the Solar Funnel, which can act both as a cooker and as a cooling system. All of these devices share a single problem: they rely on a constant supply of plastic bags to surround the pot with food to prevent convective heat loss. This entire arena is food for engineers and scientists from high school through to post doctoral work.
12> Design and prove a next generation composting (or other) toilet design
Approaches to consider: solar toilets, thermophilic composting toilets, various kinds of urine separating toilets. Right now, there is a gap between the "sawdust toilet" approach (use a bucket, cover each deposit with saw dust or straw or grass, then put in a pile in the back yard where bacterial action kills disease organisms in a few days... *usually*) and the $1000 commercial composting toilet designs.
13> High quality testing of solar (and other) water purification approaches
Again, there are multiple approaches which are promising, but very little data on comparative field trials. Much of the data that there is was collected by groups advocating one approach or another, and so bad results often get buried. Independent testing, perhaps by a university biology or pathology lab which carries the project forwards over years.
14> Design and test an integrated power services package
The Hexayurt package was designed (in general outline) in 2002. Since then, the technology landscape has shifted considerably: different battery technologies, and great advances in solar panels, although even greater changes are coming in the next five years. That system needs an update. Key questions involve the design of infrastructure (i.e. an architecture which provides services) rather than designing objects (like a self-powered lamp.) Here is a need for collaboration between designers, engineers and scientists.
15> Long term studies in partnership with educational institutions in the developing world
For all of these systems. We need to take the laboratory and engineering resources of the schools in the developed world, and the practical realism which comes from living in a culture with serious poverty issues, and combine them into a new generation of collaborations which succeed in solving the basic problems of life in poverty. Then we need to take the results of these collaborations, and accelerate them into deployment through partnerships with NGOs and governments.
WHOLE SYSTEMS ENGINEERING: The Hexayurt gives us one reasonable approach to extremely low cost construction for people who would otherwise likely be homeless. It is not a building system for people earning more than $5 or $10 per day. The infrastructure systems may apply to a significantly wider range of budgets, including
Available in other languages: /fi /fr /ja /pt /ru /tr
All hexayurts are cut neatly from 4' x 8' sheets, the standard size for most construction goods.
The large sizes require only one kind of cut - diagonal cutting straight across six boards to form the roof triangles. Six 4'x8' boards are cut along the diagonal, three right-to-left, and three left-to-right. From these twelve right-angled triangles, six isosceles triangles are formed, making the roof cone. The vertical walls are formed from whole 4'x8' sheets.
The smaller sizes require a somewhat more complex cutting pattern for efficiency but all details are below.
If you are cutting angles (mitering your panels):
- the angle between vertical boards and other vertical boards at the corners is 60° so you cut 30° on each edge.
- the angle between the vertical boards and the roof is also 60°.
- the angle between the boards on the roof cone is 29.5° so you might as well cut a 15° angle on each board.
- all boards which meet flat should have no angle cut on them at all, of course.
Angle cutting is not required for a perfectly good hexayurt of any size, as long as one is using wide enough tape. 3" will do, 6" is better.

The schematics below describe the smaller 6' hexayurts. The larger, and now more commonly used designs are compared here, with links to instructions.
The Six Foot Hexayurt
The 6' Hexayurt is good for one person, although very cramped for two.


Six Foot Stretch Hexayurt
The 6' Stretch is cozy for two, but provides little storage or room for people to socialize in your cool, dust-free place.
A 6 foot stretch with an additional 2 feet added to the walls becomes more attractive.
the 6 foot hexayurts can easily be assembled with one person, which is pretty awesome.Here's a photo of a rather nice one.

Proof that your 6' stretch hexayurt can (with a little wasted tape) be assembled as semi folding with just one whole person!!
Here's a diagram showing how to construct a semi-folding 6' Stretch hexayurt using Camp Danger hinges. [4] The goal is to connect as many parts together as possible with hinges that each allow the minimum amount of flexibility required for the connection. Corey McGuire's hinge tutorial [5] and tutorial on hinge placement [6]
Materials Total for Large Hexayurt
The larger hexayurt (18 sheets of 4x8 panels) requires 150 feet of tape for the edges.

Substitute for pit latrines, septic systems or conventional sewage handling with:
- area-appropriate composting toilet design
Financial model:
Possibly as cheap as $20 per household in warm areas, assuming shared toilet banks. Practical, realistic designs have not undergone the "value engineering" necessary for this application yet, so are still too costly, although clearly a cheap, basic, functional unit for any given climate could be created.
Water System
Priorities
- public health is the overwhelming priority.
- low cost is essential - if it's not cheap, it won't be used as much and won't achieve as much.
- low ecological impact is very desirable if it doesn't compromise public health.
- suitable for various cultural practices. Target users may be accustomed to using water to cleanse (but can most often cope with small amounts of water), or other anal hygiene methods, so the device should ideally tolerate sticks, rocks, paper, or whatever else is likely to be thrown in.
Options
- Ventilated Improved Pit Latrine (Practical Action Technical Brief) A simple design for a toilet that can be dug anywhere. Fill the pit with refuse and plant a tree when you are finished!
- Composting toilet
- Biogas toilet, too large scale for the specs; for longer term settlement (due to capital cost, time for construction); relatively unproven. (E.g. Bio Latrines in Kenyan Slums.)
- Non-composting, non-biogas toilets
- Emphasis on public health (rather than sustainability or treating the waste as a resource).
- e.g. the BiPuW
- Cost? Chriswaterguy to find out.
- What's the status of the solid material afterwards? Can be composted?
- Proven in the field, including Aceh.[verification needed]
- Ultra-cheap systems, based on the Kamal Kar's work. Any applicable to this situation? Chriswaterguy to find out.
- What about small community based Constructed wetlands?
- Sawdust bucket toilet, after Joseph Jenkins' "Humanure Handbook" (fundamental reference on this topic, free to download) -- hygienic, private, cheap, hard to screw up, makes great compost... why aren't you using one?
Substitute for national grid or heavyweight solar with:
- One 80 watt panel connected to a 15 minute AA battery charger (e.g. the new generation Rayovacs)
These items will be connected into a "power pillar" - a walk-up charging station where people come with their empty NIMH batteries, drop them into the charger, wait 15 minutes, then take them home. Assuming a 10 hour charging day, that services 40 sets of batteries.
Each AA NiMH battery has a capacity of approx 2000 mAh at 1.25V, equivalent to 2.5 VAh. If charger efficiencies are 25% (my guess) then we need about 10 Wh to charge each battery.
80 W for 10 hours is 800 Wh per day or enough to charge 80 batteries a day.
Applications for this system include:
- Lighting: cold cathode fluorescent lights (see: http://ledmuseum.candlepower.us/dbright.htm ), LED headlamps, etc.
- Communication: cell phone chargers, FRS-type radios, other battery powered radios etc.
- Entertainment: pretty much any general purpose device can be found in a AA configuration, like televisions (http://www.amazon.com/Casio-TV-980-2-3-Portable-Color/dp/B0000CGCCM)
- Wood gasification stove (see below)
What won't work:
- Heavy-draw mains appliances (toasters, video projectors)
Financial model:
- $400 for the panel, $100 for the charger and pillar. ($12.50 per household)
- $200 for 80 fast charge AA batteries say 4 each for 20 households.
- $100 or 20 lighting units.
- $700 total or $35 each for 20 households.
$50 per household should comfortably buy everything required for basic electrical services. A bare bones system (lighting and stoves only) would be about $12.50 per household because the cost of the panel, charger and pillar could be split between 80 households.
We need expertise in logistics and manufacturing, as well as really needing expertise in:
- composting toilets
- wood gasification technology
- cheap solar system
- materials science relevant to tapes and adhesives, and UV resistance
- solar water pasteurization
This information will be organized on the following infrastructure pages:
If you would like to help with any of these tasks, please email hexayurt@gmail.com.
- Images: how to handle the dozens and dozens of images we have kicking around
- Flickr? - good, but we don't own it, and it's not very permanent
- on the Wiki? slow to upload
- Video
- Same issue; we have a lot of unedited stuff which needs turned into proper video clips
- Then, the hosting issue. We have a lot of hosting via http://www.dreamhost.com/r.cgi?53212 - about 400 gig of storage, and about 10 times that much bandwidth. So we can do video. To a certain extent. But it won't scale against a real spike.
- Bittorrent?
- text clean up
- Wikitext clean up. I used uneven capitalization in a lot of places. OOps. It should be *all lower case* or perhaps conformant to the WikiPedia norms. Anybody who is familiar with Wikipedia want to help us out?
- Currently being done. Let me know if it looks like it needs more after July 28th, 2007. --Lonny 15:58, 28 July 2007 (PDT)
A substitute for Water purification plants and pipelines, or trucked-in water, achieved with: Solar water pasteurization.
Purpose
Primary use of the cooker is to heat water to 160+F for the full day as a means of sterilizing both it and the container.
Designs
Build a simple solar cooker into the side of each hut using the same building materials as the rest of the unit (i.e., reflective insulation boards).
Issues
- Sterilisation is effective against biological contamination however it will not remove heavy meatal contamination.
- If the water temperature is less than 160F then bacterial growth will increase rather than killing bacteria off. Reliable indicators that the water has been fully treated, are being worked on by a variety of groups.
- Also, I do not suggest cooking on the Solar cooker as a core technology. General field reports seem to indicate solar cooking doesn't go over terribly well in many areas.
- The aim of this is to capture solar heat and concentrate it in the water. This conflicts with the general cooling strategy for the Hexayurt, which is to reflect as much solar heat as possible and prevent it from being captured. Better would be to place the solar cooker facing away from the Hexayurt, towards the sun. Then it will intercept solar energy that would have hit the Hexayurt and direct it towards the water.
Cost & Materials
The financial model is based on $10 or less per household for one solar cooker.
Interwiki Links

Available in other languages: /fi
The "Pup Hexayurt" is a small structure made from a single sheet of 1:2 material (usually insulation foamboard, like the large hexayurts). Cutting the sheet into four equal rectangles, there is enough to create the needed roof triangles and all wall panels but one. Useful for sheltering equipment and supplies.
Detailed Instructions

So, if you start with one sheet, this is the overview of cuts, where "W" is "wall", numbers are roof triangles (5a and 5b make a 5, likewise for 6):
You can also make a pentayurt (not a hexayurt) with 5 walls and 5 roof triangles (so it's taller than the hexayurt would be), and 6 (a and b) being waste.
Sample images of completed pup hexayurts:


If you change the cut pattern a little, you can get six walls rather than five. To do this each wall shrinks a little, being only 4/5ths of a square high. (19.2 inches by two feet.)
Here’s how:
- Cut the board two, along the long axis, giving you two 2′ x 8′ pieces.
- Cut one of those pieces into five identical rectangles.
- Cut the other as described to give you the triangles, plus a square, which you trim down into the sixth rectangle.
- Not *quite* as elegant as the five wall because it produces some wastage, but workable.
- Hexayurt project
- Projects
- SDG07 Affordable and clean energy
- Construction
- Energy efficiency
- Heating and cooling
- Funding
- Gasification
- Devices
- SDG09 Industry innovation and infrastructure
- SDG15 Life on land
- Electricity
- Solar
- Water
- Emergency logistics
- Burning Man
- Construction and materials videos
- Toilet designs
- Composting toilets
- Energy
- Renewable energy
- Water purification