| (One intermediate revision by the same user not shown) | |||
| Line 8: | Line 8: | ||
{{boxbottom}} | {{boxbottom}} | ||
==Abstract== | ==Abstract== | ||
This page is dedicated to the design and development of an open-source Hands-Free Crutch for the developing world. All components are designed with open-source software. OpenSCAD, FreeCAD and/or Blender have been utilized for digital file generation (STL). All components have been printed on a [http://www.appropedia.org/Athena_Build_Overview MOST - Athena Delta Printer]. | This page is dedicated to the design and development of an open-source Hands-Free Crutch for the developing world. All components are designed with open-source software. OpenSCAD, FreeCAD and/or Blender have been utilized for digital file generation (STL). All components have been printed on a [http://www.appropedia.org/Athena_Build_Overview MOST - Athena Delta Printer]. | ||
| Line 14: | Line 13: | ||
# Paragraph description of the OSAT - why is it Appropriate? What need does it fulfil? Are there case studies you have found of a technology being used successfully? | # Paragraph description of the OSAT - why is it Appropriate? What need does it fulfil? Are there case studies you have found of a technology being used successfully? | ||
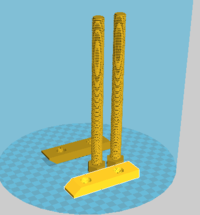
# Picture of completed print using your printer [[Image:Wood_WorkingClamp_Parts.png|200px|right]] | # Picture of completed print using your printer [[Image:Wood_WorkingClamp_Parts.png|200px|right]] | ||
=Gallery= | |||
Add your image and link the gallery below in a single line after the last one in the list | |||
<gallery caption="777 OSAT 3-D Printable Designs"> | |||
Image:FullCrutch_1.jpg| | |||
</gallery> | |||
== Bill of Materials== | == Bill of Materials== | ||
Revision as of 19:35, 5 December 2016
Hands-Free Crutch
Project developed by [[[User:JLaureto|JLaureto]] (talk) 07:27, 17 November 2016 (PST)]
Template:Statusboxtop Template:Status-design Template:Status-prototype You can help Appropedia by contributing to the next step in this OSAT's status. Template:Boxbottom
Abstract
This page is dedicated to the design and development of an open-source Hands-Free Crutch for the developing world. All components are designed with open-source software. OpenSCAD, FreeCAD and/or Blender have been utilized for digital file generation (STL). All components have been printed on a MOST - Athena Delta Printer.
- Paragraph description of the OSAT - why is it Appropriate? What need does it fulfil? Are there case studies you have found of a technology being used successfully?
- Picture of completed print using your printer

Gallery
Add your image and link the gallery below in a single line after the last one in the list
- 777 OSAT 3-D Printable Designs
-


Bill of Materials
- Printed Components
- Upload and link to all source files from open source CAD
- Secondary Components
Tools needed for fabrication of the OSAT
- MOST Delta RepRap or similar RepRap 3-D printer
- 6mm Hex Wrench (Application: Tightening M6 Bolts)
- 10mm Wrench (Application: To fixture nylon nut while tightening)
Skills and Knowledge Necessary to Make the OSAT
- If you used special skill – link to relevant wikipedia or wikiversity articles/courses
Technical Specifications and Assembly Instructions
- Print all printable parts from Bill of Materials. Printing time will be approximately 49 hours 41 mins.
- Insert the tongue on the knee side of the leg into the groove of the ankle side of the leg rest. Press firmly until the internal faces of the two parts are flush.
- Insert bolts into the tabs on the sides of the leg rest piece, beginning on the side closest to where the knee will rest and exiting on the side where the ankle will rest.
- Thread nuts onto the nuts and finger tighten. Use a wrench to tighten further, being careful not to tighten fr enough to damage the plastic.
- Thread the central threaded rod into the threaded cylinder located on the bottom of the legrest piece. Continue to thread until the support rod stops, lying flush with the bottom of the leg rest piece.
- Thread the foot onto the adjustable adapter for the bottom of the main support. Hand tighten until there is no longer movement.
- Thread the adapter to the main support onto the main support. Adjust as needed to fit the height of the subject.
- Thread both vertical supports into the slots on the top of the leg rest piece. Hand tighten until there is no longer movement.
- Secure the thigh rest on top of the two vertical threaded rods.
- Thread desired straps through the slots on the top side of the leg rest.
- Assembly time will tke approximately 10 minutes.
| Example video summary of textbook |
|---|
Error in widget YouTube: Unable to load template 'wiki:YouTube' |
Common Problems and Solutions
- Ensure you do not apply excess force in tightening the bolts. These should tighten just until strain is felt on the wrench, no further.
- If threads do not fit correctly, an x-acto blade can be used to clean up any defects that are visible. Otherwise, the provided OpenSCAD includes parameter "tolerance", which can be increased or decreased s needed.
Cost savings
- If your solution is not a low cost one then it is not really appropriate.
| Estimate your costs | Commercial equivalent link/Cost US$ | Approximate Savings in US $ and % savings |
|---|---|---|
| $23.57 [1] | [2] $149.99
or [3] $ 149 |
$ 125.43 and 84.18 % |
References
- The sources of information (e.g. engineering handbooks, journal articles, government documents, webpages, books, magazine articles etc.). References should use the <ref> </ref> and <references/> tags and can be in any format but should include all the information necessary for someone else to find the same information you did. For example: [1]
- ↑ web page: Department of Energy (DOE) Landscaping and Energy Efficiency, DOE/GO-10095 (1995) Available: http://www.eren.doe.gov/erec/factsheets/landscape.html
Based on the developmental needs addressed (e.g. food, heat, electricity, clean water, health care, etc.) be sure to label your device in the proper categories e.g. use [[Category:Water]]. Be sure to categorize your device so that it will be easy to find – for example “Low voltage connection basics” is categorized in [[Category:How tos]] [[Category:Electricity]] [[Category:Electric lighting]].