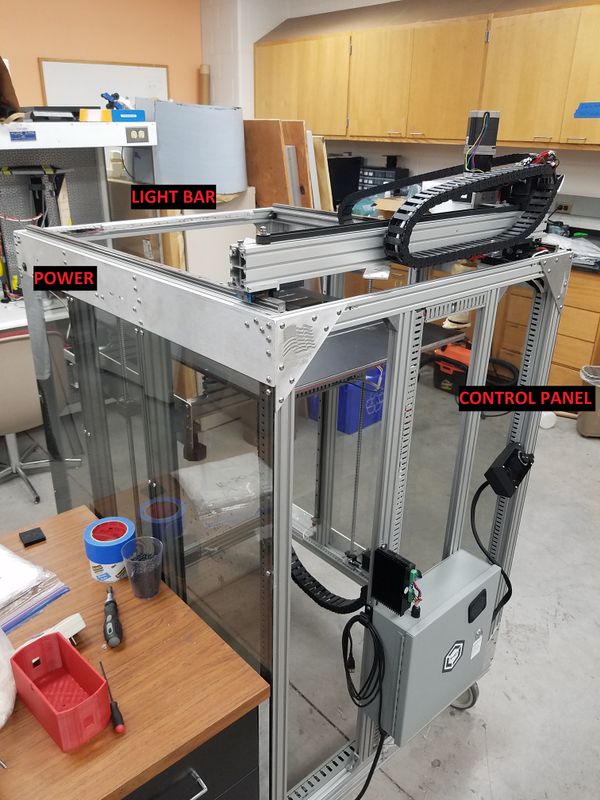
Prototype Gigabot X printer user guide
This guide will walk through the steps to successfully operate the prototype Gigabot X from Re3D.
Printable Materials
So far, the Gigabot X has been tested and proven to work with the following pellets (see paper Fused Particle Fabrication 3-D Printing: Recycled Materials’ Optimization and Mechanical Properties
- Virgin PLA, with MasterBatch Mixing
- Recycled PLA from failed 3D Prints
- Recycled ABS
- Recycled PET
- Recycled Polypropylene
More studies on the way
- Recycled Polycarbonate
- Recycled ASA
Drying Instructions
- Evenly fill up aluminum trays with plastic you want to dry.
- Place both trays into vacuum oven and close/latch the door.
- Rotate temperature knob to select desired oven temperature. Numbers and their corresponding temperatures are shown on the oven.
- Push in square button on the oven to turn on the heat, the light should illuminate.
- To turn on vacuum oven, fli[ switch on power cord.
- Make sure vacuum is being pulled on oven by listening to the release valve on top of control panel, if air is being sucked in, turn valve to close.
- Wait amount of time depending on plastic type
- Turn off vacuum, turn off oven by clicking in red button again, open valve on top of control panel to let air back into oven chamber.
- Open door once all air is back into chamber, use oven mitt to grab out aluminum trays.
- Dump dried plastic into ziplock bags with 1 or 2 desiccant packages and close tightly.
- Done!
Drying Temperatures and Durations:
- PLA: 60C for 2-3 hours
- R-PLA: 60C for 4 hours
- R-ABS: 80C for 4 hours
- R-Polypropylene: Unnecessary
- R-PET: 100C for 6 hours
- R-Polycarbonate: 110C for 4 Hours
- R-ASA: 80C for 4 hours
How to use
Power and Lights
The power can be turned on via a small toggle switch on the top of the printer. The lights can be unplugged via a small connector behind the wire organizer on the top of the printer.
Interface
The interface is just like any other RepRap 3D Printer. It does use a mini SD card instead of a full size one however. Also there are two extruders, extruder one is for the bottom heater and extruder two is for the top heater on the extruder.
Slicing
- Build size: 560 X 710 X 600 (mm)
- Extruders: 2
- Heated Bed: Enable
- Enable Cooling: Off
- Nozzle Diameter: 1.75mm
- Retraction: 14mm
- Retraction Speed: 20mm/s
Purging Materials
To purge from one material to another, a g-code has been made to purge 8000mm worth of material through the extruder. This process takes about 20 minutes to complete and sometimes needs to be ran several times to get all the old material out of the extruder.
Make sure to remove hopper extenders, and clean out any remaining material in the hopper with a vacuum, this reduces the amount of time to purge to the new material.
When purging from a high temperature plastic such as polycarbonate to a lower temperature plastic such as PLA, it is best to step down to the temperature by first purging to something like polypropylene or ABS and then purging to PLA. This reduces the chance of the PC clogging and the PLA burning.
More testing is required with extrusion purging compounds to see if they are worth buying and using.
New Material Testing
For new materials, a line test is performed. More information can be found here on the Speed vs Temperature Line Test: (Link) Once the line test is complete, the sweet spot for print speed and extrusion temperature is obtained and can be used for optimum results on the Gigabot X.
Tips and Tricks
If the SD card menu gets really slow, reformat the sd card on your computer. instructions here: https://www.sdcard.org/downloads/formatter_4/


