Vermicomposting Bin see the discussion tab above for some comments then delete this line


Introduction
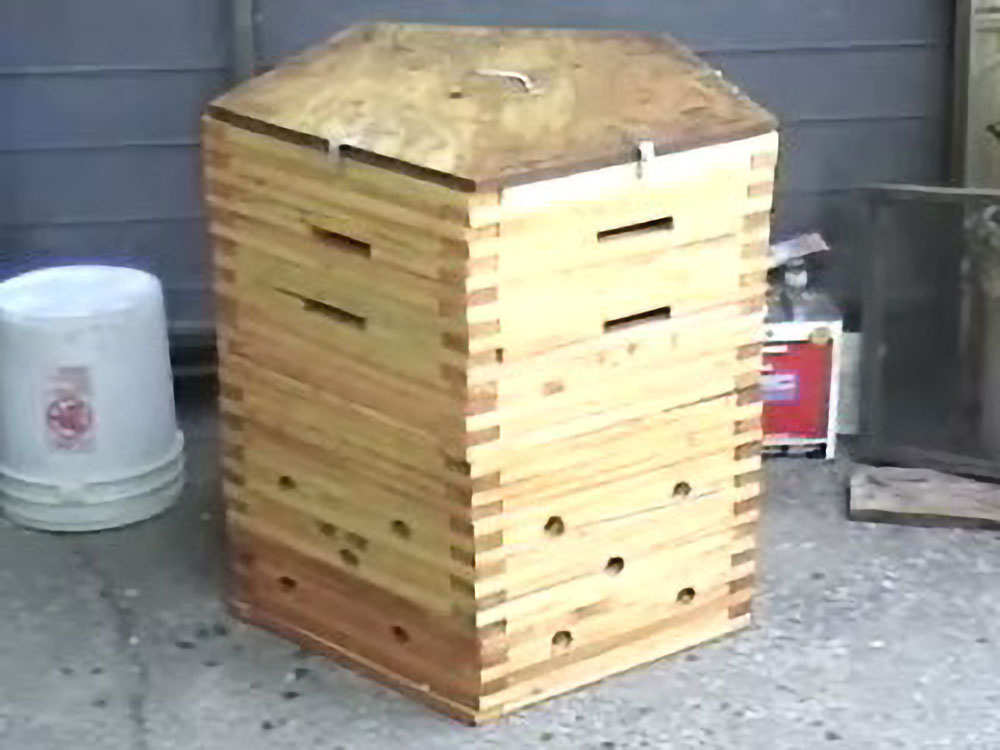
I am very excited to be posting directions for building your very own home vermicomposting bin! The methods employed will produce a bin appropriate for a household of 3-5 people and should last a number of years if constructed properly. There of course are many types of bin designs out there and I thought it to be the most creative to make up my own. In looking for ideas in a gardening magazine, I noticed a pentagon shaped planter for gardens and I really like the shape. I decided a pentagon is also practical because compost is less likely to get stuck in the corners as often happens in normal square shaped designs which keeps the organic materials from cycling properly. I decided on making a two-part stackable bin such that dealing with the finished compost would be easier. Once the compost is processed it is easy to take off the top section, dump the compost in the garden and put it on top to be filled again. The partitioned design is also benificial for increased airation to speed up the composting process. Airation is also provided by the holes drilled in the sides of the bin. The bottom of each bin section is finished with wire mesh to keep the compost in place. The holes of the wire mesh are large enough to allow worms and microbes to enter the system and speed up decomposition. The top is simple plywood cut to size with a brass handle and L-brackets to keep the lid in place. The bin was lastly finished with natural organic Linseed Oil as a sealer for endurance in the elements and general durability. I hope you enjoy!
Project Description
Materials
- 80-2" Di-chromate screws,
- 30-3" Di-chromate screws,
- 12-1" Di-chromate screws,
- 2-bundles of 1"*3"*36" Douglas fir location stakes,
- hand saw,
- wood cutter,
- protractor,
- measuring tape,
- hand drill,
- 5 feet of 1.5" mesh chicken wiring,
- staple gun,
- staples,
- chrome handle for lid,
- 3'*3' piece of plywood,
- wire cutting sheers,
- fine precision wire cutting sheers,
- 5 L-brackets
- Organic natural Linseed Oil
Steps
- Cut all wood into identical pieces
- Arrange base layer of pentagon
- Build up each layer screwing in 2" screw every 3rd layer
- Cut rectangular airation holes with hand saw periodically
- Every 6th layer screw in 3" screw
- Stop when base stackable bin is at 17 layers
- Staple wire mesh onto bin surface covering one side
- Add 18th layer ontop of wire mesh
- Use regular sheers to cut wire to pentagon shape
- Use precision sheers to clean up pokey sides
- For second stackable bin repeat steps #1-10
- Cut plywood to pentagon shape
- Attach chrome handle and L-brackets on each side of pentagon
- Seal final product with organic natural Linseed Oil
Methods
Final Construction
Conclusions
This was a very fun and satisfying project to have worked on throughout the semester. I have an approximate catalogued work time of 32 hours that I spent on the bin. This probably seems like alot of time but it would have gone much faster if I had a useful webpage such as this to follow step by step.
Common Errors to Avoid
1) It is good to make sure that each angle of the bin is exactly fit with the layers above and below it. If this rule of thumb is followed, you will have nice smooth surfaces along each face of the pentagon. I didn't realize that I had a poorly framed base initially where the angles of the pentagon were not lined up. This took much time to fix because I had screwed many layers together before realizing, after which I had to undo alot of work to fix the angles. 2) Cut airation holes as you build up each layer of the bin. It was difficult to drill holes in the final project as there were screws everywhere and everytime I hit a screw it caused the drill to dull and kick back. 3) I should have kept better symmetry with the airation rectangles that I cut in the top bin, merely for improved aesthetic purposes.
Final Comments
I am very pleased with the finished product of this design. The Campus Center for Appropriate Technology has already begun to put the bin in use. It is a sturdy design that will last them for years to come. I am glad that I could assist them in adding to the girth of sustainable practices employed here at Humboldt State University.