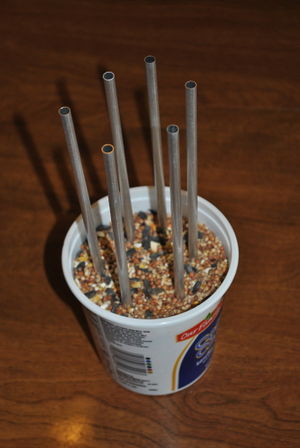
Container filled with dry granular material (bird seed, rice, etc.)
Note
The ball bearings will be epoxied to one end of the aluminum tubes at a time so start this assembly relatively early in the build to allow time for the epoxy to cure.
Procedure
Connecting Rods
There are six connecting rods that connect the end effector to the printer via magnetic ball joints. Each rod consists of an aluminum tube with steel ball bearings epoxied to each end.
Container with dry granular material to stand tubes in.The tubes must stand upright while epoxy cures. Find a suitably tall container and fill with a dry, granular material like bird seed or rice.
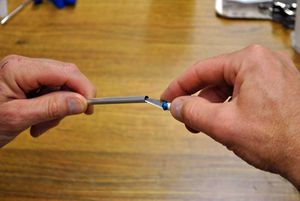
Reaming aluminum tube only if burrs are present.If burrs exist in the inner diameter of the aluminum tubes, ream them with the precision knife so that the ball bearings fully seat in the ID of the tube.
Cleaning ball bearings in solvent.Thoroughly clean the ball bearings with a solvent as they come coated with a corrosion inhibitor that may impede wetting with epoxy. Acetone is a good solvent, isopropyl alcohol will also work.
Perform a practice run prior to mixing the epoxy: Push the tubes into the holder so that the tube axis is vertical. Place a ball bearing on top of each tube and ensure that the tube and ball bearing remain relatively stationary. (Ball bearings must not fall off the tube.) Don't start mixing the epoxy until you are confident that you can finish the process before it sets.
Remove all the tubes from the stand and shake out grains of the holding medium.
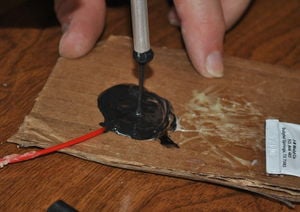
Applying epoxy to an aluminum tube.Once comfortable and confident in your technique, mix a small amount of epoxy following the instructions on the package (which you should read) and dip one end of a tube in it. Place the tube into the holder with the epoxy facing up. Repeat with the remaining five tubes.
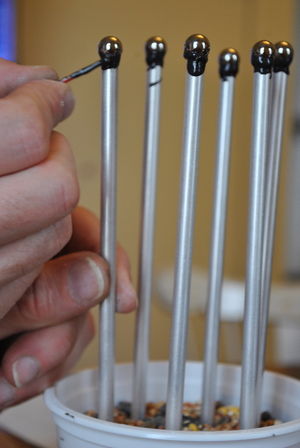
Epoxying the ball bearings to the aluminum tube.Carefully dip one part of a ball bearing in the epoxy and place the wetted portion on one of the wetted aluminum tubes. Repeat with five more bearings. Unless there's a terrible mess, don't try to clean up excess epoxy - it can be removed with a sharp knife after it cures.
Maximize contact area.With the epoxy mixing stick, carefully push the epoxy up onto the ball bearing while rotating the tube in the holder. This helps to maximize the surface area in contact with epoxy, making a stronger joint.
Keep the excess mixed epoxy at-hand to test set (usually about 15 minutes for quick-set epoxies). Wait until the epoxy has thoroughly set or fully cured before disturbing the rods. Repeat the process on the opposite end of the rods. Make sure all the grains of holding medium are shaken out of the tubes before proceeding to epoxy the remaining ball bearings on them.