Overview[edit | edit source]
This project was a suggestion by the lab coordinator at NTC in Wausau Wisconsin. He stated that when showing off the 3D objects to tours coming in throughout the day that they would apply to much pressure or "test" the objects and end up breaking them. He wanted a safe way in order to have each object automated so that people could see how each of them worked without having to reprint an object because of someone breaking them. So i came up with an idea that would use a glass display case, an Arduino, three laser cut display bases, several servos, and a 4dsystems LCD touchscreen.
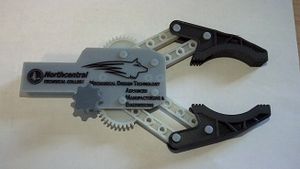
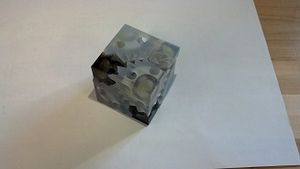
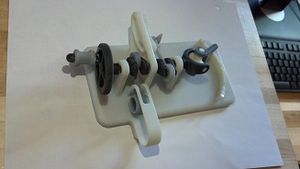
Sadly the video I have showing how it works is to large to be uploaded onto this page, but I did upload pictures of the original 3D objects that I used before I automated them via servos. Each of the objects required some way to transfer the rotation from the servos into there own rotation, which I was able to do because of the 3D printer that was in our lab. Every coupler was custom made by me in the 3d design software Solidworks, and printed at NTC with their 3D printer.
The Claw coupler was my favorite one that I printed because I purposely printed them with .001" tolerance just to test the accuracy of our 3d printer and it fit perfectly. this coupler was shaped very similar to a motor coupler that you would use in order to attach two shafts of a motor/generator combo together.
The Cube coupler was shaped like a corner cap with a cylindrical shaft going out to the servos. In order to get the cube to move properly I was required to use two different servos that rotated two separate corners simultaneously.
The Rotary coupler was just a cylindrical shaft reaching out and fitting into the wheel on the machine, which rotated the machine in either direction.


Arduino[edit | edit source]
I used an Arduino Mego 2560 in this project in order to translate the messages from the 4Dsystems screen into either left or right rotations on the servos that I utilized. The code was about two pages of mostly basic but I did import a separate library that 4Dsystems provided to handle the events for the LCD screens touchscreen capabilities.
4Dsystems[edit | edit source]
I used the 4dsystems 4.3" LCD screen as the controller of this project. 4dsystems has a great free software download of their GUI editor program called Workshop4 along with Visi-genie. 4Dsystems was a pleasure to work with very easy to get used to after a day or so of watching tutorials and experimenting. The screen itself is very fluid and responsive.