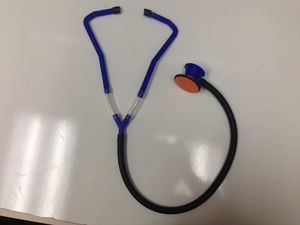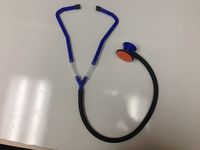
Stethoscope Upgrade - OSAT project[edit | edit source]
Project developed by [[[User:Kev Man|Kev Man]] (talk) 23:21, 7 December 2015 (PST)]
Abstract[edit | edit source]
3D printed stethoscope (with minimal/cheap non-3D printed parts). Having 3D printed medical diagnostic equipment could give underprivileged areas cheap and easy access to much needed tools, while also letting these areas save money for more complex equipment that they may not have had access to otherwise.


Bill of Materials[edit | edit source]
Non-Printed parts
- 1/2" (outer diameter) Black rubber tubing - 24" long - (~ $8.00 USD / 5 ft)
- 2" (outer diameter) plastic O-ring (~ $2.00 / 2 )
- 1/2"(outer diameter) tygon tubing - 2 pieces 6cm long (~ $40.00 USD / 10 feet)
- small balloon (5" round if blown up) - pack of 30 ~ $2.00 USD
- Epoxy - any type
Source and STL files[edit | edit source]
Tools needed[edit | edit source]
- MOST Delta RepRap or similar RepRap 3-D printer
- Scissors or knife
Skills and knowledge needed[edit | edit source]
- If you used special skill – link to relevant wikipedia or wikiversity articles/courses
No special skills needed to make OSAT
Technical Specifications and Assembly Instructions[edit | edit source]
- Include print time estimate ~ 4 hrs, 30 min.
- Include assembly time estimate - 5 minutes
To assemble:
- Print all pieces
- Cut tubing to lengths mentioned above.
- Add epoxy to the outside of the cylindrical part of the nozzle
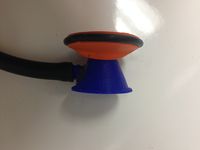
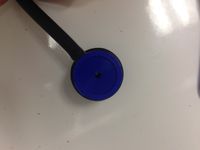
- Insert the nozzle into the diaphragm with the tapper end facing out (epoxy end goes into the diaphragm).
- Let dry
- Attach black tubing to nozzle, and single end of the ear split.
- Attach the tygon tubing to each 'Y' section of the ear split, and the other end to an individual ear piece (section farthest away from the bend).
- Cut the inflation end of a balloon and stretch the remaining balloon over the large end of the diaphragm
- hold the balloon in place using the O-ring.
- place a small amount of cut black tubing over the other end of each ear piece
Common Problems and Solutions[edit | edit source]
- Include common mistakes/problems to avoid in building your OSAT and how to overcome them
- To get the best sound out of the stethoscope, place a finger over the top hole of the diaphragm when using the end with the balloon attached.
Cost savings[edit | edit source]
- If your solution is not a low cost one then it is not really appropriate.
- Estimate your costs : 63 g pla( $1.58), cost of non-printed parts ( ~ $5.60 USD) = Total: $7.20 USD
- Find a commercial equivalent : low end cost - $14.00 + diaphragm membrane ( $4.00 ) = $18 - $20 USD
- Calculate $ savings and % savings: Saved 9 - 13 dollars, 64% saving (if buying the $20 version)
.