
We are taking Engr305 – Appropriate Technology at Cal Poly Humboldt. The project we have chosen is to design and build furniture made from cardboard for those people who want to save money, reduce their carbon footprint, or just be creative. We want to demonstrate that stylish furniture can be made completely from recycled materials at a very low cost.
Our plan:
- To up-cycle all or most of our materials, e.g. taken out of the waste stream.
- To use recycled cardboard donated from businesses or individuals in the community.
- Make our own homemade eco-friendly non-toxic glue from rice, flour, or liquid glycerin.
- Use eco-friendly fabrics and paints for upholstery and decoration.
Video


Opportunity Definition
During the 2010 spring semester at HSU we decided to build stylish and functional furniture for Engineering 305, Appropriate Technology. We want to demonstrate that furniture could be made with reused and renewable materials using sustainable methods. We also want to be able to create a design on par with trendy brand name furniture as well as be safe and durable. Our goal is to describe a method in which students on a budget can have furniture they can be proud of and feel comfortable using in their dorm room or first residence. We hope to try out different materials, binders, paints, upholstery and cushions.
Furniture Design and Inspiration
Inspiration for designs and projects can be found everywhere around you and can be made out of a variety of materials, including cardboard.[1] The aesthetics and design will be an important component of this project. Anyone can make any type furniture. Cinder blocks and plywood can be a functional bookshelf, a stack newspapers can serve as a seat, or wooden cask can be used as a table. We can stack cardboard to an appropriate height for a chair, but the overall look and feel would not be appropriate for a warm and inviting living space. For the aesthetic design, we can get inspiration from traditional furniture designs,[2] from artistic designs,[3] or from simple functional designs.[4] The chair will be my own (Stanley Instness) design was inspired from art deco architecture. Once the general look of the furniture is decided upon the dimensions and functionality will be determined. The dimensions for the chair have not been determined as of yet, but size will be typical of a cushion-armed chair. The method of design will vary for different projects. For this project I decided on the look first and the dimensions and functionality second, but some projects may be limited by space, in which you would want to determine your dimensions first and then find an appropriate look or design that works for the space.
Literature Review
This is a review of some of the available literature pertaining to Cardboard Furniture.
Cardboard Architecture
Cardboard is used extensively for packing and shipping, but it's use as structural material has only been minimally explored,[5] but there are examples of architects and designers who have used cardboard to make different types of furniture and temporary structures. Cardboard is relatively inexpensive and easily recyclable, which makes it's use as structural material appealing to those willing to explore alternative building material uses. We are confident that we can reuse cardboard shipping material for furniture and add another use to its life-cyle. When our furniture reaches its end-of-life, it can then be recycled as it would have been following its shipping use.
Forces
When designing furniture out of cardboard it is necessary to take into account the structural integrity of what you are building. In the case of using cardboard, you must consider the five forces that act upon your structure. These five forces are:[6]
- Compression - is when the load is applied to the top of a structure.
- Tension - is load applied along the structure in a pulling action.
- Bending - is like a bookshelf loaded down with heavy books.
- Shear - is when forces are exerted on the same plane but in opposite directions.
- Torsion - describes forces that try to twist the structure apart.
Ply's of Cardboard
Corrugated cardboard comes in different ply thicknesses:[7]
- Single Ply - is the most used cardboard when making furniture because it's readily available, extremely inexpensive, and ease of use.
- Double Ply - is used when structural support is important, like when making bookshelves or beds.
- Triple Ply - is the least used cardboard because it is hard to find and very expensive.
Upholstery
The art deco inspired chair will be upholstered. This will disguise the cardboard structure and is necessary to cover and protect the cushion material. The method of upholstery will be learned from how-to-websites.[8] The fabric will be made from eco-friendly or reused materials.
Safety
Upholstered furniture should be fire resistant.[9] Since some people smoke, we want to make sure that a burning cigarette will not set the furniture on fire. We will conduct tests on sample pieces by doing a flame test on glues samples of cardboard.
Types of Glue
Natural home-made non-toxic glues can easily be made out of a variety of materials, including wheat flour, rice, or liquid glycerin.
Rice
Rice glue is an extremely resistant adhesive and can be used to glue all types of paper. In Asia, it is used in traditional bookbinding and luxury cardboard products: papers bonded with rice glue are considered tear-proof. Though white when moist, rice glue becomes transparent as it dries.[10] By adding a little turpentine to the mix, it gives the glue natural pesticidal properties.[11]
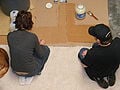
We made 3 batch of glue. The first two batches were with 4 cups of rice each and the third was with 2 cups of rice. First, you cook the rice as normal. Then add some more water and keep cooking the rice, stirring occasionally. Strain the rice into a bowl to collect your glue. After straining, put the rice back in the pan, add more water and repeat. I kept it in the fridge, and it lasted 1 week before it started smelling funny.
-
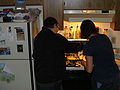
Making the glue.
-
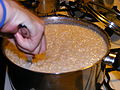
Add water and over cook the rice.
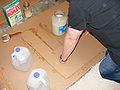
-
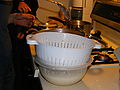
Strain the rice over a bowl to collect your glue.
-
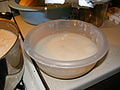
Liquid glue.


Liquid Glycerin
Glycerin, derived from plants or animals, can be purchased at your local craft or drug store, and can make your glue waterproof.[12][13]
The glycerin glue is made by putting 6 tablespoons of water in a pan. Bring it to a boil, remove from heat and completely dissolve 2 packets of unflavored gelatin. Once the gelatin is dissolved, add 2 teaspoons of liquid glycerin, 2 tablespoons of vinegar and stir. Pour into a seal tight jar. This glue will become gelatinous when cool, just heat it up in the microwave for 10 seconds or put the jar in hot water, to use it.
Testing
The first test we performed was a qualitative test on glue strength. We glued small pieces of cardboard together, then we let the glue set up. Once dry, we did a destructive analysis by pulling the pieces of cardboard apart. We determined that the rice glue was stronger than the liquid glycerin or flour glues.

Our next test was a fire test which was performed to see if borax, used as an additive to the glue, would retard combustion. We lit 2 pieces of 3 inches by 3 inches, glued cardboard on fire, one with borax and one without. The cardboard sample without borax caught on fire after 36 seconds and was completely burnt by 1 minute 6 seconds. The sample with boarx caught on fire after 1 minute 13 seconds and was completely burnt by 2 minutes and 14 seconds. The boarx does act as a fire retardent.
-
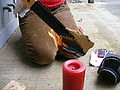
35 seconds into the flame test for the rice glue alone.
-
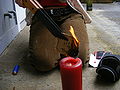
~1.5 minutes into the flame test for the rice glue with Borax mixed in.


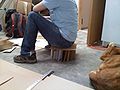
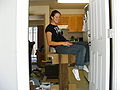
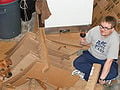
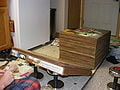
The final test was a weight test on the final projects. This was a non-destructive test to see if the projects would be safe for normal use. The tests were performed by sitting on each piece and shaking slightly so we can evaluate stability. The stools held the weight of one adult holding 50lbs of weight and were very stable. The table held the weight of one adult, but could only sustain a minimal amount of shaking. The table and especially the stools withstood the application of all the forces listed above. The upholstered chair could support the weight of two adults and withstand shaking, but the chair back felt weak and was unstable when leaning back.
-
This design did not stand up to testing.
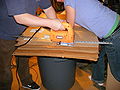
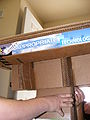
-
Testing the stem and base for the different forces using my weight - 130 lbs.
-
That is one strong table! Except for a slight wobble.


The table and stools should be safe for normal use and hopefully last for a long time. The upholstered chair should work fine if the seat back is against a wall. By itself, the chair back will likely fail. The seat of the chair is strong enough to support two adults and will be safe for routine use.
Criteria
Upholstered Chair
The upholstered chair will be donated to an appropriate technology instructor, and used by his students for office hours. The client specified a chair that was comfortable enough for 20 to 30 minute sessions. The chair will be used several times a day by different individuals, and will be moved throughout the office, therefore, the chair must be durable enough to withstand this type of stress. The office is newly remodeled and the chair should reflect professional quality along with a neutral color scheme. The client specified having a chair with low embodied energy as a priority. Despite being upholstered, the client would like some of the cardboard exposed to show what the chair is made of.
| Criteria | Constraint | Weight |
|---|---|---|
| Durability | Must hold up to normal wear and tear on a daily basis | 8 |
| Aesthetics | Must have an appealing and desirable look | 7 |
| Mold Resistant | Must resist mold propagated by Arcata's wet climate | 9 |
| Cost | $100 dollar Budget | 8 |
| Pest Resistant | Must not attract pests for nesting or food | 6 |
| Sustainability | Low eco-footprint, low embodied energy and recyclable | 10 |
| Niftiness | Should have at least one innovative feature | 5 |
| Fire Safe | Resist igniting from a smoldering cigarette | 4 |
| Strength | Glued joints should not fail from weight of adults | 10 |
| Ease of Construction | Must be replicable and easy to build | 6 |
Table and Stools
The table and stools will be donated to CCAT - Campus Center for Appropriate Technology, where it will be used as a nook table on the bottom floor. After sitting down with Myles Danforth from CCAT, we determined the criteria to be:
| Criteria | Constraint | Weight |
|---|---|---|
| Durability | Must hold up to normal wear and tear on a daily basis | 10 |
| Aesthetics | Must have an appealing and desirable look | 6 |
| Mold Resistant | Must resist mold propagated by Arcata's wet climate | 4 |
| Cost | $100 or dollar Budget | 3 |
| Pest Resistant | Must not attract pests for nesting or food | 4 |
| Sustainability | Low eco-footprint, low embodied energy and recyclable | 8 |
| Niftiness | Should have at least one innovative feature | 6 |
| Fire Safe | Resist igniting from a smoldering cigarette | 4 |
| Strength | Glued joints should not fail from weight of adults | 7 |
| Ease of Construction | Must be replicable and easy to build | 5 |
Budget
Budget: This is our final budget. We did purchase other materials for testing which glue we wanted, but those costs are not included since we decided to use rice.
Upholstered Chair
| Qty | Material Needed | Source | Cost | Total cost |
|---|---|---|---|---|
| 4 months | Workspace | Warehouse space donated from Italian Dragon Pasta | Donated $0 | $0 |
| 50 lbs | Cardboard | Various sources | Donated $0 | $0 |
| 1 spool | Upholstery Thread | joann.com | $2.29 per spool | $2.29 |
| 1 bat | Cotton fiber insulation | Alternative Building Center | Donated $0 | $0 |
| 4 yds | Organic Hemp Fabric | Eureka Fabrics | $12.99 per yard | $51.96 |
| 10 cups | Rice | Already had some in the back of the cabinet | Donated $0 | $0 |
| 1 | Box cutter | Harbor Freight, Arcata, Ca. | $2.99 | $2.99 |
| Total Cost | $ 57.24 | |||
Table and Stools
| Qty | Material Needed | Source | Cost | Total cost |
|---|---|---|---|---|
| 4 months | Workspace | Warehouse space donated from my friends with Italian Dragon Pasta | Donated $0 | $0 |
| 50 lbs | Cardboard | Various sources | Donated $0 | $0 |
| 1 container | Organic Vegetable Liquid Glycerin | Wildberries | $5.99 per container | $5.99 |
| 2 boxes | Unflavored Gelatin | Wildberries | $1.79 per package | $3.58 |
| 24 tablespoons | White Vinegar | Wildberries | $1.89 per container | $1.89 |
| 10 cups | Rice | Already had some in the back of the cabinet | Donated $0 | $0 |
| 2 | Paint brushes | Harbor Freight, Arcata, Ca. | $0.49 each | $1.00 |
| 1 box | Borax | Ray's in McKinleyville, Ca. | $4.39 | $4.39 |
| 1 | Box cutter | Borrowed from Chris Rose | Donated $0 | $0 |
| 2 packages | box cutter blades | Ace Hardware, Arcata, Ca. | $2.70 each | $5.40 |
| Total Cost | $ 22.25 | |||
Proposed time line
| To be Completed | Date of Completion |
|---|---|
| Finish gathering all supplies/tools | 03/14/2010 |
| Design construction | 03/14/2010 |
| Actual construction | 03/28/2010 |
| Testing | 04/11/2010 |
| Finish Appropedia page (Infrastructure) | 04/30/2010 |
| Turn in completed project | 05/09/2010 |
Construction
Upholstered Chair Frame
Originally, the chair was going to be a series of cut cardboard glued together to provide a solid frame, similar to the stools. The shape of the frame required our largest pieces of cardboard, and we needed to be able to use some of the large pieces on the table and stools. The design was changed. Instead of a bunch of pieces glued together, the frame was made up of 13 2-ply ribs, hand cut, spaced 2 inches apart. The ribs were notched and are held in place by 6 notched bracing members. There are 2 bracing members in the chair back, 2 on the bottom and 2 on the seat. The bracing members are 26 inches long, 4 inches wide and 1.5 inches thick. They were made by gluing 15 pieces of cardboard together and then cut to the above dimensions with hand held jig saw. During the dry fit, the ribs and bracing members held tight enough, that it was decided glue would be unnecessary. Once the frame was together, 3 plies of cardboard was glued to the seat and seat back.
-
Gluing the ribs together.
-
Apply pressure after gluing.
-
Cutting the cross braces.
-
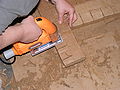
Cutting the slits in the cross braces.
-
Assembling the frame of the chair.
-
The last piece glued on before applying the batting and upholstery.


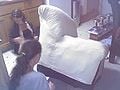
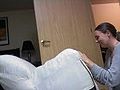
Batting and Upholstery
The batting comes from one bat of cotton insulation that was 16 inches wide. The bat was donated from the Alternative Building Center. It was considered defective and was to be sent back to the manufacturer. The batting is made from recycled blankets and denim.
The Batting was cut and placed on the seat and seat back. The seat back piece extended over the top of seat back frame and was folded back and held in place by the upholstery fabric. Additional pieces were placed on the sides in between the protruding bracing members. Scraps were used to bolster the seat, which caused the seat to be a little lumpy.

There 2 types of upholstery fabric. The first was a black piece that was purchased from a thrift store for $1. This piece was used on the bottom, but it extends up 3 inches on either side. The other piece is neutral hemp purchased for $12.99 per yard from Eureka Fabrics. 4 yards were purchased. The fabric was 60 inches wide. The fabric was draped over the chair and pinned to the bottom piece. Folds were made and pinned on the sides which would become the seams. The fabric was hand stitched with and double loop stitch, followed by a straight stitch. 1 yard of fabric was left over. The front of the chair has flap that can be lifted so that the ribs and bracing members can be seen.
-
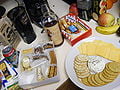
Necessities for a sewing party.
-
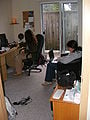
Jen and Carrie taking a break.
-
Sewing the chair.
-
Thank you Carrie for your wonderful sewing job.


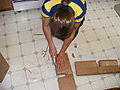
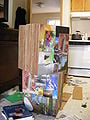
Construction of the Stools
The stools were made by gluing 16 inch by 19 inch hand cut pieces of cardboard together. Some pieces were two ply and other one ply. The plies were alternated 90 degrees on every piece. One stool has 68 pieces and the other has 78 pieces. The stools have different thicknesses, 14 inches and 15.5 inches. The sides of the stools were decorated with a decoupage of appropriate technology pictures, using glycerin based glue.
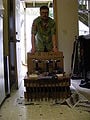
Construction of Table
The table is made up of three parts; the feet, the stem and the table top.
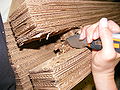
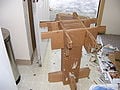
The feet were made by gluing 13 pieces of alternating plies of cardboard together. There are two pieces that are 19.5 inches long, 5.5 inches wide and 1.75 inches thick. Each piece was notched in the center by hand to receive the other piece, forming a cross which supports the stem.
The table stem is made of 7 inch by 29 inch pieces of 2-ply cardboard. 23 pieces were used and glued together, which resulted in a thickness of 6.25 inches. 1.75 inch wide slots were cut in the bottom on both sides. Each slot is 5.25 inches deep. The slots were cut by Miles Smith, my IT 225 Construction Systems instructor, on a band saw. The slots were designed to receive the feet. The sides of the stem were decorated with a decoupage of appropriate technology pictures.
The table top has 4 layers. The top layer is a 24 inch by 24 inch piece of salvaged particleboard that Miles Smith squared on a table saw. The 2nd layer is made up of 3, 24 inch by 24 inch alternating pieces of 2-ply cardboard, designed for extra stability. The third layer is a single piece of 2 ply cardboard, 34 inches by 34 inches. The edges were creased, cut and folded underneath, then glued in place. A 2 inch flap on the underside of the table allows for a connecting surface for the stem connection piece. See diagram.
The final layer is the stem connection piece. The stem connection piece has 4 sections which are notched and fitted together in the shape of tic-tac-toe. Each section has tab on either end that tucks under the 2 inch folded section of the third layer. The table stem is glued into the center square and the whole section is glued to the third layer. Each section is made up of 4 layers of cardboard glued together. Each section is 23 inches long and 7 inches wide. The tabs are 2 inches wide.
-
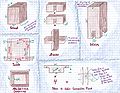
The dimensions of the table and stools.
-

Having fun with Shadow instead of working.
-
Cutting the base so it will sit level.
-
Whittling out the cuts in the stem.
-
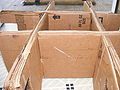
The stem to table top connection piece. The two inch flaps are to fit under the lip on the bottom side of the table.
-
The base, stem and table top connection piece.
-

Gluing the base to the stem.
-
Decorating the table top edge.
-
Gluing the table top to the stem.
-
The finished stools.


Conclusion and Reflection
Upholstered Chair
The upholstered chair underwent several design changes. The original design called for a series of pieces of cardboard glued together to make the frame. This would have created a solid piece that would have been extremely stable. The ribbed frame is strong enough to support over 300 lbs, but the seat back is unstable. The seat back wobbles and will fail over time. In order for the chair to be functional, it will have to be placed against a wall. A cross bracing piece was place where the seat back meets the seat, the point of failure, but this didn't help. Using more ribs, spaced 1 inch apart, having a solid frame or making the seat back portion wider would make the seat back more stable.
Originally, the chair was going to have upholstered arms, but we were limited by the amount of large pieces that would be necessary to make the arm pieces. Omitting the arms has the added benefit of making the chair smaller and more appropriate for a small office; however, the arms would have made the back of the chair more stable. Legs were omitted when it was agreed that chair height was ideal and comfortable by those who tested it.
Hand cutting the cardboard was a challenge. Over time I was able to cut straighter lines, but my first cuts were very crude. Individual pieces of cardboard were cut with a box cutter. I would recommend using a band saw to anyone attempting to make their own furniture. A band saw would ensure more uniform and straighter cuts, and it may be faster.
The cotton insulation works well as a seat cushion, but I would recommend using a 6 inch thick piece or two 4 inch thick pieces. The insulation used was from a 4 inch thick piece and you can feel the hard portion of the seat. Overall, cotton insulation is an excellent alternative to foam cushioning. The biggest test for the upholstery fabric is the test of time. I am curious to see how well the fabric holds up, as well as the hand sewn seams.
My original goal was to create chair out of environmentally friendly or reused products that would be indistinguishable from a designer chair. The chair fails in this regard, but I'm still proud of the end result. I'm confident that with what I've learned and with more practice I could create really nice furniture. I've never made a chair before, so this is my prototype. If I were to make another, it would be much nicer, and incorporate all that I've learned from this experience.
Table and Stools
Originally, I wanted to build chairs similar to Frank Gehry's design but that proved to be very difficult. So I settled on just making stools. The table took some figuring out, which I am very grateful for Miles Smith's help in that. Once he showed me how to fold the table properly to get an edge underneath to attach the stem, it went quite well and was easy to assemble. I was very pleased with the way the table and stools turned out. I was especially happy that I was able to retrieve most of my materials from the waste stream, to keep my project sustainable. The only things I had to buy were the Borax, paint brushes, glycerin, gelatin, and box cutter blades. If I had not decorated it, the entire project would have only cost me $10.79 for the brushes, blades and Borax. It was very easy to build, it just took time. The cardboard is strong enough to enjoy the table and stools for a very long time, as long as it doesn't get wet or there is a fire. Be creative and have fun with building eco-friendly and stylish furniture for your home.
Warnings
- Drink lots of water and wear gloves while working with the cardboard, it dehydrated me severely.
- Put as much pressure on your glued product as you can, especially on the corners. We used two 100 lb bags of sand and piled things on top and I still had issues with the corners.
- Make sure that you let the glue dry thoroughly before use.
- Don not use the furniture in rooms where the floor gets wet often.
Acknowledgements
Donated or Collected Cardboard
Alternative Building Store, Eureka, CA
Costco, Eureka, CA
Sears, Eureka, CA
Harbor Freight Tools, Arcata, CA
Deidre Russel, Thanks for collecting and delivering extra cardboard.
Sapphira, Thank you for donating cardboard.
Arcata Recycle Center, 2 hot water heater boxes made 40 pieces of the stool.
Donated Cotton Insulation
Alternative Building Store, Eureka, CA
Individuals

Billy Askew
Thank you for taking our pictures and the video.
Carrie and Jen
Thanks for your sewing work and teaching me how to sew.
Miles Smith
Thank you for squaring off the table top, cutting the stem, and your help and your ideas on how to make the table work, I wouldn't have been able to do such a good job without you.
Workspace
Italian Dragon Pasta and Noodles - Which can be found in Wildberries' deli case - Garlic parsley is my favorite.
Thank you for providing us with a space to put our project together.
References
- ↑ Ragsdale, Linda. Creative Cardboard: Making Fabulous Furniture, Amazing Accessories & Other Spectacular Stuff. illustrated edition ed. New York: Lark Books, 2002.
- ↑ Emery, Marc. Furniture by Architects. New York: Harry N. Abrams, Inc., 1983.
- ↑ Domergue, Denise. Artists Design Furniture. First Edition ed. New York: Harry N Abrams, 1984. Print.
- ↑ Hennessey, James. Nomadic furniture 2,. 1st ed. New York: Pantheon Books, 1974.
- ↑ Eekhout, M., F. Verheijen, and R. Visser. Cardboard in Architecture: Volume 7 Research in Architectural Engineering Series. illustrated edition ed. Amsterdam: IOS Press, 2008.
- ↑ Linnell, Charles C.. "Designing and Building a Cardboard Chair: Children's Engineering at the TECA Eastern Regional Conference." Technology Teacher, The, April 1, 2007.
- ↑ Hennessey, James. Nomadic Furniture 1. New York: Pantheon Books, 1973.
- ↑ "Learn to Do It Yourself: How to Reupholster Furniture." Repair-Home - Kitchen, Bathroom, Window, HVAC and Other Home Improvements. http://web.archive.org/web/20101010120259/http://www.repair-home.com:80/how_to_reupholster_furniture.html (accessed February 13, 2010).
- ↑ Waxman, Lisa K. 2008. Voluntary Flammability Regulations for Residential Upholstered Furniture. Journal of Family and Consumer Sciences 100 (4): 34-39.
- ↑ esprit cabane. "*** Rice glue recipe, esprit cabane, eco-friendly DIY and decorative arts." *** esprit cabane, the magazine of crafty & green living ideas. http://web.archive.org/web/20140927172154/http://en.espritcabane.com:80/green-diy/rice-glue.php (accessed January 28, 2010).
- ↑ esprit cabane. "*** Wallpaper paste recipe, esprit cabane, eco-friendly DIY and decorative arts." *** esprit cabane, the magazine of crafty & green living ideas. http://web.archive.org/web/20140927163719/http://en.espritcabane.com:80/green-diy/wallpaper-paste-recipe.php (accessed January 28, 2010).
- ↑ " Formulas making your own homemade glue." Welcome to Make-Stuff. http://web.archive.org/web/20110216191355/http://www.make-stuff.com/formulas/glue.html (accessed January 28, 2010).
- ↑ Gaulin, Pam. "Paper Crafts: Homemade Glue Recipe for Kid Crafts - Associated Content - associatedcontent.com." Associated Content - associatedcontent.com. http://web.archive.org/web/20111104030400/http://www.associatedcontent.com:80/article/295379/paper_crafts_homemade_glue_recipe_for.html?cat=24 (accessed February 13, 2010).
All references are in Chicago style format and were obtained from http://www.bibme.org/.