The can lantern is a very simple way to make a lantern that throws light in a pretty pattern of your choice. It makes use of an opened can that would otherwise be recycled, giving it a new use for a while longer.
Preparing the can[edit | edit source]
Find a suitable can for making the lantern from. A standard food can is perfect, just ensure that there are no rough parts from where the can lid was removed.
Clean the can out completely using warm, soapy water. Remove any labels and glue residue. Allow to dry completely before using.
Simple paper covered lantern[edit | edit source]

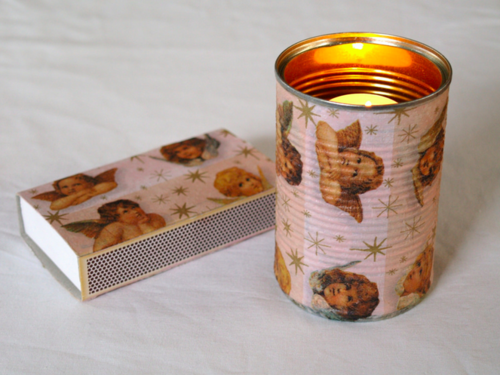
Take the clean and dried can and place on a work surface. Select paper that you'd like to use to wrap around the can. This paper should be something pretty and preferably something leftover so that it can be repurposed. No need for new paper here!
Wrap the paper around the can to determine the size. Cut to fit the can. Use craft glue to attach the paper, pretty side facing outward, to the can. Leave to dry completely.
Stick a tealight or short, thick candle into the base of the can. That's all there is to this can lantern. It's now ready for lighting (see image above).
Holey can lantern[edit | edit source]

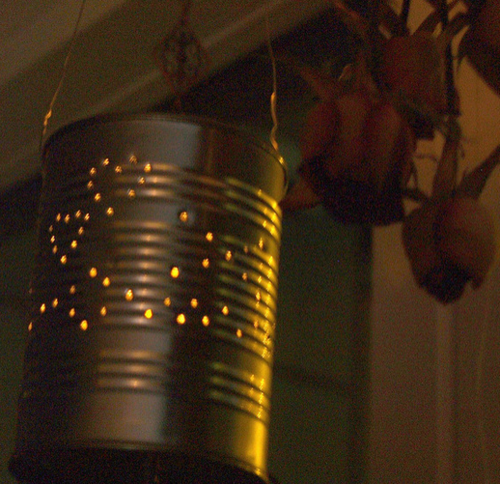
The design is drawn onto the can first, then formed with nail holes hammered into the design lines. The light then flows through these holes, making the pattern glow from the can.
Making the lantern design[edit | edit source]
Prepare your design outline on a piece of paper first. The design should go the whole way around the can, so measure the paper to fit the can, cut to size, then use for the design.
Keep the designs simple and focus on patterns and geometric shapes. Good design ideas include: Stars, squares, circles, hearts, diamonds; and pattern formations using triangles, diamonds, squares, etc. to form rows, radiating designs, etc.
Draw the design onto the paper with a marker. Transfer the design from the paper onto the can, copying with great care to ensure that the design is the same as on the paper.
Freezing the can[edit | edit source]
This step is important to ensure that the can will maintain its rounded shape when hammering in the design. Fill the can with water and lace it into the freezer. Leave to freeze solid. Once that has happened, you're ready to add the holes to the lantern.
Adding holes to the can[edit | edit source]
Remove the can from the freezer. Place the can on its side on a non-slip surface, such as a silicone mat. You could also wedge it between two blocks of wood, so that it stays in place and you don't have to freeze your fingers off trying to hold it in place.
Use a nail and hammer to knock holes into the can following the design you've made. Different sizes of nails can be used to enhance the overall look of the design. Keep spaces of 1cm or 1/4 inch between each of the holes, as you don't want the holes running into each other. Try your best to keep the spaces even but don't worry if there are differences, it's not meant to be perfect.
If the ice melts too much, return the can to the freezer for a short time, then remove and repeat until done.
Warning! Be very careful doing this part of the project, as the sharpness of the can metal and the use of a hammer and nail can cause injury if care is not taken.
Finishing up[edit | edit source]
Remove the ice from the can. Either let the ice melt in the sink or run hot water over it to help it to fall out and leave the remaining block to melt in the sink or outside.
Let the can dry completely, either in the full sun, on a sunny windowsill or dry with a teatowel, taking care not to catch it on the sharp edges created by the nail holes.
Add a thick, wide and short candle to the middle of the can. It needs to be able to stand upright without aid.
To use, simply light the candle and place the lantern can where it will shine beautifully.
Precautions[edit | edit source]
- Never leave a burning candle unattended.
- Handle can holes and edges with care.
- Use great care when hammering the can.
- Do not leave the can lantern near flammable objects or near anything that could knock it over.
- Do not cover the top of the can or use anything flammable on it.