Before You Begin[edit | edit source]
Familiarize yourself with nomenclature.
Parts printed for the parallel build supplied by MOST are color coded:
- Silver: Frame (vertexes, rod clamps, wire holders, Melzi board mounts)
- Black: X-axis (motor and idler ends, x-carriage, belt terminators, end stop holder, 12 tooth T5 pulley)
- White: Y-axis (motor mount, belt terminators, y-carriage corners and bearing saddles, 12 tooth T5 pulley)
- Yellow: Z-axis (motor mounts, guide rod clamp, z-motor couplings, bar clamps, end stop holder)
- Red: Extruder (extruder drive body, idler, gears, extruder drive spacer with Bowden nut trap, extruder drive mount)
Note that printed parts expected to function adjacent heated components (y-carriage parts, x-carriage) are printed with ABS. PLA tends to soften and lose integrity upon even minor heating and will certainly fail in critical components such as the x-carriage.
Before assembling make sure you have all the parts necessary in the BOMs and the necessary tools.
The build process is broken into logical steps and then arranged such that the build can commence with a solo builder or tandem builders. Both processes are presented below.
Events hosted and provisioned by MOST will have parts prepared such that no soldering is required. All soldering has therefore been grouped into a separate task list.
Main alterations from standard Prusa[edit | edit source]
The design goal was, as much as possible, to keep true to the RepRap organic model, building a machine that can largely self-replicate. For instance, T5 timing belts are employed as very good pulleys can be printed with this machine. A secondary goal of minimizing cost also influenced design and selection of components. A slight departure from minimizing cost was made in the selection of stainless steel fasteners and threaded rod.
- A lightweight carbon fiber rod y-carriage that has the capacity to increase y-travel to 250mm and increase print speed
- 3mm Bowden extruder with 0.5mm nozzle
- Z-motor coupling
- Minimal x-carriage for J-head hot end
- There are other minor mods like redesigning the end stop holders and belt terminators for providing tension and activating limit switches.
- Cost was minimized by using the Melzi board, minimizing the lengths of structural steel components and replacing fasteners with printed components as much as possible.
Printed Parts[edit | edit source]
| File | Summary |
|---|---|
| White abs Y.stl | Y-axis ABS parts (white or natural ABS) |
| White pla Y.stl | Y-axis PLA parts (white PLA) |
| Black abs X.stl | X-axis ABS parts (black ABS) |
| black pla X.stl | X-axis PLA parts (black PLA) |
| Red abs ext.stl | Extruder ABS parts (red ABS) |
| Red pla ext.stl | Extruder PLA parts (red PLA) |
| Yellow pla z.stl | Z-axis PLA parts (yellow PLA). Two required but will produce extra end stop holder and rod clamp. |
| Silver pla frame.stl | Frame PLA parts (silver PLA). Two required. |
Tools[edit | edit source]
- Wrenches: 2 x 13mm, 7mm, 5.5mm
- Hex key (Allen key) set: 3, 2.5, 1.5mm
- Measuring tape
- Needle nose pliers
- Diagonal cutters
- Small X-acto type knife for prepping printed parts.
- Drill bit size 5/16" (8mm), #9 (0.196", or 5mm) 1/8" (3mm) (to clean out holes). These are most comfortably handled with a printed handle.
- Wood jigs (290mm, 234mm) pictures below
- Gloves – to prevent cutting fingers on threaded rod and sharp edges of printed parts
- White lithium grease (to lubricate bearings)
- Torpedo or bubble level
- File
- M8 die recommended to clean up cut threaded rods
- Pencil sharpener
- Five minute epoxy
- Wire strippers
- Soldering pencil, solder and flux
Building[edit | edit source]
The tables below list the order in which things are built for tandem (left) and solo (right) builds. Each page starts with a BOM for that part of the build process.
The only "wrong" build process is one that produces a non-working printer. This process will produce a working printer and there is always room for improving it. As much as possible, pointers for facilitating the build and reducing build time are included. A few key points should be kept in mind during assembly:
- The "front" of the the printer is where the y-axis motor is located. References to left and right are made assuming the front of the printer is facing you; in this position, the x-axis idler end is on your left.
- The printed plastic parts are surprisingly robust. It's unlikely that anything short of a deliberate attempt to destroy them will result in damage that renders them unusable. When instructed to ream holes, especially with frame components, some gusto can pay dividends, but it can also be overdone. Be prudent and exercise care with thin profiles, otherwise the printed parts can be handled pretty roughly without fear of breakage.
- Teflon (PTFE) tubing is used in areas where there are very high temperatures and where low friction is required - all around the hot end. For all intents and purposes, PTFE does not melt and if even small pieces of it get into the hot end, it can plug the nozzle, which can be difficult to clear. Take extreme care to ensure that no PTFE shavings get into the hot end.
- Pay attention to polarity when it comes time to wire motors and power to the printer controller! A misstep, especially with the latter, can result in damage to the controller. Polarity is highlighted where it is important.
- The whole process is about building fearlessness with regards to indulging your creativity and imagination. The task of building a 3-D printer is not trivial, even for experienced tinkerers, but it will be completed and the results will produce even more fearless creativity!
| Tandem Build | |
| Person 1 | Person 2 |
|---|---|
| Soldering | |
| Y carriage | Frame |
| X axis | Y axis |
| Extruder and X-carriage | Z axis and frame alignment |
| Braid motor wires | Electronics |
| Firmware | |
| Finish the build | |
| Solo Build |
| Soldering |
| Y carriage |
| Frame |
| X axis |
| Y axis |
| Extruder and X-carriage |
| Z axis and frame alignment |
| Braid motor wires |
| Electronics |
| Firmware |
| Finish the build |
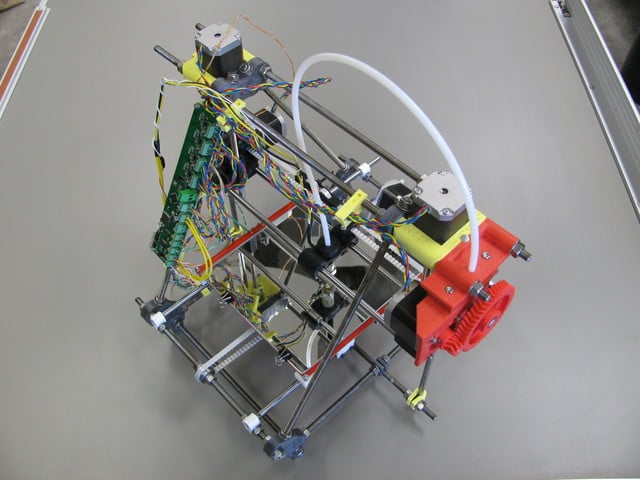
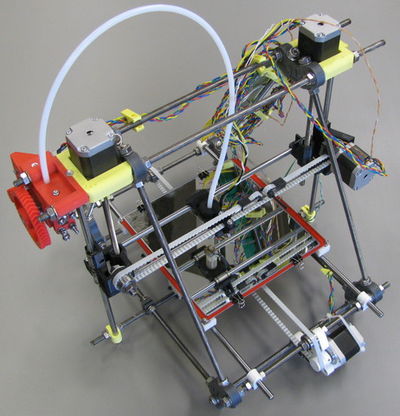
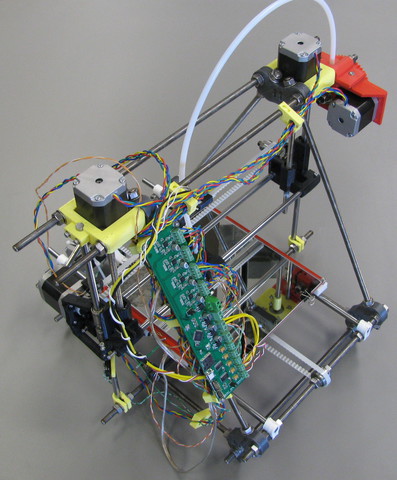
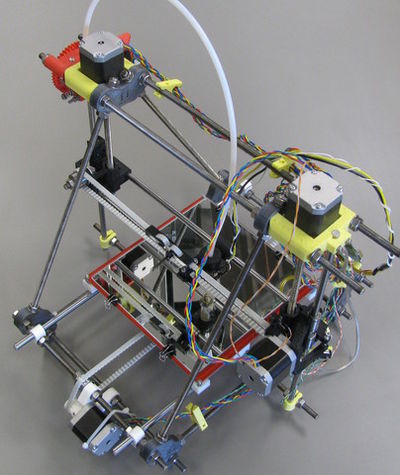
After all is done, the result should look like this:


