This is the detailed timeline of Las Malvinas ecoladrillo schoolroom 2012.
-
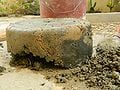
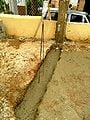
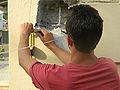
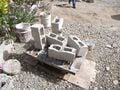
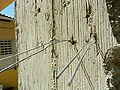
Before: East wall
-
After: East wall
-
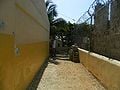
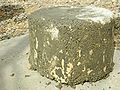
Before: South wall
-
After: South wall


Timeline[edit | edit source]
To return to the main page: Las Malvinas ecoladrillo schoolroom 2012
June[edit | edit source]
Jun. 7, 2012[edit | edit source]
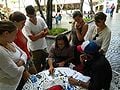
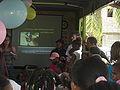
- First group meeting with the community
- Multiple projects and alternative materials are presented
- Community members takes a vote on which project they are most interested in
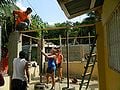
- The decision is made to construct an additional classroom at the school
- High interest in using papercrete as a building material
-
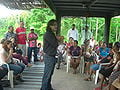
What project should we work on?
-
Everyone at the school


Jun. 9, 2012 - Jun. 10, 2012[edit | edit source]
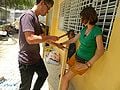
- Meeting with Revark at the building site to take measurements
- Ideas about new room location are discussed
- Possibility of building two smaller rooms instead of one large room
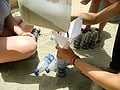
- Begin soaking paper from the trash for papercrete (later discarded because organic material such as food waste on the paper brought on accelerated decomposition)
- Acquire large free source of sawdust from a nearby coffin manufacturer (decision is made to explore sawdust as possible building material)
-
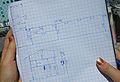
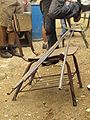
Building measurements
-
Before: North wall
-
Before: West wall

Jun. 11, 2012[edit | edit source]
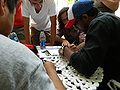
- Divide research and material acquisition responsibilities amongst the team
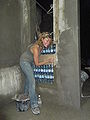
- Begin collecting bottles off the street for ecoladrillo
- Begin building ecoladrillo test brick #1 with 2"X4" wood and 2 layers of sand filled bottles
- Shalyn is dedicated official scribe due to the need for thorough project notes
-
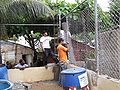
Trash can in La Zona
-
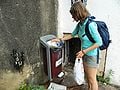
Picking plastic bottles out of the trash
-
First prototype
-
Constructing a prototype frame
-
Securing chicken wire to the frame


Jun. 12, 2012[edit | edit source]
- Meeting with Revark to look over building design
- Commit to traditional column and beam style structure with some type of alternative infill
- Start search for community members with construction experience who could assist in the building of the columns
- Develop criteria set and weight each criterion by importance
- Begin visiting hardware stores to scope out materials and prices
-
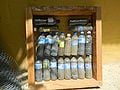
Option A
-
Option B


Jun. 15, 2012[edit | edit source]
- First meeting with school director to discuss building design and location
- Issues with design/location:
- New room would block windows of existing room
- Idea to move windows to north wall is rejected due to importance of opposite facing windows for airflow
- Close proximity to the bathrooms
- Blocked on east and west walls by existing structures, which are the ideal walls for window placement
- Decision is made to build a long, narrow, rectangle shaped room in the available area on the north wall of the school
- Possibility of constructing additional recycling structure in the front of the school
-
Building location
Jun. 16, 2012[edit | edit source]
- Begin constructing "labyrinth" of ecoladrillo
- Three more test blocks are constructed
- Test block #2: 1 square meter 1"X3" wood frame, one layer of empty bottles (size/shape not taken into consideration), open spaces stuffed with plastic trash.
- Test block #3: 1 square meter 1"X3" wood frame, one layer of empty Dasani water bottles (bottom row full of sand for stability and increased thermal mass), 4 rows of 13 bottles, open spaces stuffed with plastic trash
- Test block #4: 1 square meter 1"X2" wood frame, one layer of empty similar shaped bottles, less need for trash stuffing due to thinner wood
- Start experimenting with sawdust plasters on test blocks (discredited because the test plasters were covered up by a community member due to miscommunication)
- General test notes: Sand filled bottles are too heavy and time consuming to make, 1"X2" wood requires less trash stuffing but is too weak, over-packing makes plaster application more difficult
- Finalize literature review and problem definition
-
Construction of an ecoladrillo prototype frame
-
Filling bottles with sand


Jun. 17, 2012[edit | edit source]
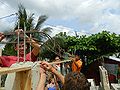
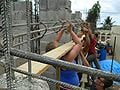
Structure
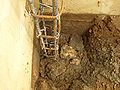
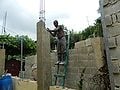
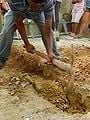
- Take measurements for columns and excavate for foundations
- Decide to build walls on top of existing short perimeter walls to maximize room space
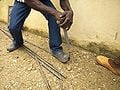
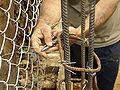
- Begin cutting, bending, and tying rebar into appropriate forms for the columns
- Pour concrete foundations and secure rebar column forms
- Build wooden moulds and pour concrete for column bases
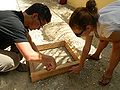
-
Getting ready for the rings
-
Bending rebar for the beams
-
Securing rings
-
Placing rings - every 40cm
-
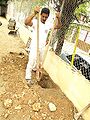
Digging a hole for a column
-
Sinking the columns
-
Stabilizing the rebar


Infill
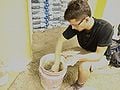
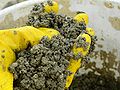
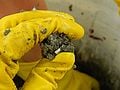
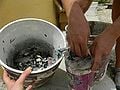
- Further testing of sawdust plasters for ecoladrillo:
- Ratio #1: 3 sawdust, 2 sand, 1 cement, 0 lime
- Ratio #2: 3 sawdust, 3 sand, 2 cement, 0 lime
- Ratio #3: Equal parts sawdust, sand, and cement, 0 lime
- Ratio #4: 1 sawdust, 1 sand, 1 cement, 1/2 lime
- General test notes: ratio #1 is very chunky and poorly mixed, ratio #2 is clearly smoother and stronger within the first hour after application (strong possibility), ratio #3 and #4 are very similar to ratio #2 (decision is made to experiment with ratios close to ratio #2)
- More bottle collection off the street for ecoladrillo (decision is made to explore other bottle collection methods because street collection is too inefficient)
-
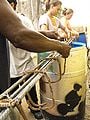
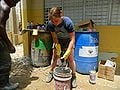
Eric mixing plaster

Jun. 18, 2012[edit | edit source]
- Group meeting to break into teams and develop team objectives for the following day:
- Team structure (Camille and Jocelyn) objectives: Re-plum rebar to prep for column pouring, pour concrete for the full height of the 4 columns, remove razor wire and poles from chain link fence
- Team ecoladrillo (Eric and Ariel) objectives: Review previous plaster ratios and continue testing new plaster ratios, gather more sawdust from coffin manufacturer
- Team papercrete (Shalyn and Amber) objectives: Find large source of clean free paper and begin soaking paper with lime
Jun. 19, 2012[edit | edit source]
Structure
- Remove fence and razor wire surrounding the building site to make room for wooden column moulds
- Acquire more scrap wood from community members for wooden moulds
- Decide to use existing fence posts to bolster strength of columns
- Decide to drill holes in column moulds for protruding steel wire ties secured to rebar within the column
- Steel wire will be used to tie walls into columns
- Begin cutting, bending, and tying rebar forms for concrete beams
- Decide to build 1 beam on top of each perimeter wall instead of 2 (one on top and one in the middle) due to the added strength of the preexisting foundation for the low perimeter wall
- Build moulds and pour concrete for 2 of the 4 columns
-
Taking down the fence
-
Securing wire
-
Bottom part of column


Infill
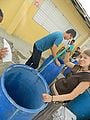
- Begin mixing and testing papercrete:
- Test mix #1: 8 soaked and blended newspaper, 4 cement, 2 sand, 1 soaked lime
- Test mix #2: 8 soaked and blended office paper, 4 cement, 2 sand, 1 soaked lime
- General test notes: Newspaper is much easier to re-pulp than office paper, both tests are insufficiently mixed resulting in strength and aesthetic inconsistencies, over blending of the paper results in minimized tensile strength and under blending of the paper results in greater mix inconsistency, water used in paper blending and lime soaking is sufficient to add and mix in sand and cement (no need to add extra water), both mixes are left to dry in 5 gallon buckets (for lack of proper moulds) and their removal is incredibly difficult (not recommended)
- Further sawdust plaster tests for ecoladrillo:
- Ratio #5: 4 sawdust, 3 sand, 2 cement, 1/4 lime
- General test notes: Sawdust and lime are soaked with water before being added to the mix, ratio is mixed on the ground with shovels instead of in a bucket by hand (achieve much more consistent mix), ratio #5 is similar in strength and smoothness to ratio #2 despite increased sawdust and decreased cement (decision is made to attempt ratio #1 again with new soaking and mixing technique)
-
Gloves are recommended
-
Pulped newspaper
-
Blending newspaper to a pulp


Jun. 21, 2012[edit | edit source]
Structure
- Chisel the 2 previously poured columns to the right height (poured too high)
- Build moulds and pour concrete for the final 2 columns
-
Corner column
-
Measuring height
-
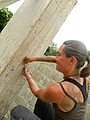
Chiseling down column
-
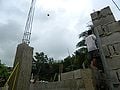
Kites above columns


Infill
- Further testing of papercrete:
- Test mix #3: 9 soaked and blended newspaper, 3 soaked and blended office paper, 6 cement, 2 sand, 1 soaked lime
- General test notes: Test mix #3 is very heavy (too much cement and moisture retention from the paper), decision is made to experiment with less paper and cement and more sand
- Further testing of sawdust plasters:
- Ratio #6 (back to basics): 3 sawdust, 2 sand, 1 cement, 1/4 lime
- General test notes: Ratio #6 is the same as ratio #1 but with an addition of lime, new mixing and soaking technique results in much smoother and more consistent mix, higher sawdust content results in much longer drying time (5+ days with afternoon sun exposure and minimal rain)
-
Pulped paper
-
Need more tests
-
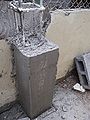
Bucket shaped block #1
-
Bucket shaped block #2
-
More testing


Jun. 22, 2012[edit | edit source]
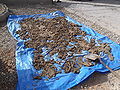
- Acquire large source of donated newspaper from El Nuevo Diario, a local news provider (10 bales)
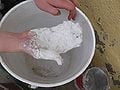
- Begin shredding and soaking paper for new papercrete tests
-
Thank you El Nuevo Diario!
-
Shredding paper
-
Soaking paper


Jun. 23, 2012[edit | edit source]
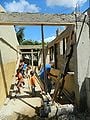
Structure
- Dig and pour foundation for the south west corner between the perimeter wall and the school
- Cut the extra rebar off the tops of the columns
- Cut, bend, and tie all of the rebar forms for the beams
- Chisel into the north wall of the school where cross beams could be tied in
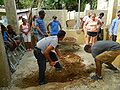
- Determine that the clay content in surrounding earth is high enough to attempt testing rammed earth as an option for the schoolroom floor
-
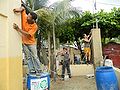
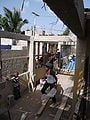
Trenching out for the front wall
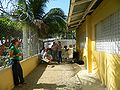
-
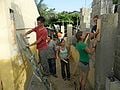
Many hands make light work
-
Front wall foundation
-
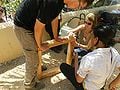
Lonny drilling out for cross beams
-
Camille drilling out for cross beams
-
That's where we'll tie in a beam


Infill
- Secure free usage of a local industry's block making machine to make legitimate papercrete blocks (first available time slot is early the following morning)
- Blend paper to prepare for block making
Jun. 24, 2012[edit | edit source]
Structure
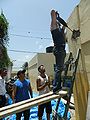
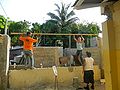
- Build supports and place rebar forms for the beams
- Tie and weld rebar from the columns to the beams and from the crossbeams to the existing schoolroom
- Build moulds and pour concrete for all 6 beams and crossbeams
- Drill holes in beam moulds for protruding steel wire ties secured to rebar within the column
- Steel ties will be used to tie the wall into the beam
-
Leveling for the beam
-
Supports for beam mould
-
Installing the beam mould
-
Let's keep it level
-
Domingo gettin' it done
-
Putting up the rebar
-
Beam me up!
-
Drilling holes for wire


Infill
- Use of the block factory for papercrete is pushed back one day due to insufficient quantity of mix (need 10 gallons of mix to press 4 blocks)
Jun. 25, 2012[edit | edit source]
Infill
- press first four papercrete test blocks at block factory with new ratio (test mix #4: 4 paper, 2 sand, 1 cement)
- General test notes: First mix is too wet to use (second mix has to made with hand pressed paper), factory workers add a large amount of sand and some cement (quantities indeterminable) to the mix to improve the consistency, blocks break later due to excessive handling while still drying
- Decision is made to sun dry paper before mixing as well as to increase the ratio of sand and cement to paper
-
Factory pressed papercrete!
-
Paper laid out to dry


Jun. 26, 2012[edit | edit source]
Structure
- Acquire wooden beams for the roof
- Meeting with school director to revise Revark's letter asking for a roof donation
- Remove moulds from finished beams
-
Master of the situation
-
Beams are up!
-
Wire for ecoladrillo


Infill
- Press second four papercrete test blocks at the block factory with adjusted ratio (test mix #5: 2 paper, 2 sand, 1 cement)
- General test notes: Unsifted sand is used without any apparent disadvantages, sun dried paper and adjusted ratio work much better, use of block press reduces drying time from 5+ days to about three
- Decision is made to use test mix #5 with sun dried paper and unsifted sand in final block making (See Papercrete for final process details)
- Prepare 100+ gallons of papercrete mix for a full day of block making scheduled on Jun. 28
- Sort bottles for ecoladrillo
- Frame west wall for ecoladrillo
Jun. 27, 2012[edit | edit source]
- Fill and secure bottom two quadrants of west wall with bottles and chicken wire for ecoladrillo (See Ecoladrillo for final process details)
- Frame long north wall for ecoladrillo (south wall is kept unframed for ease of access to back work area, east wall is left unframed in hopes of using papercrete)
-
West wall with ecoladrillo
-
North wall framed


Jun. 28, 2012[edit | edit source]
Structure
- Construct wooden rafter for zinc roof (slopped to the west, with the north west end 2 inches higher than than southwest end for ease of potential rainwater catchment installation)
- Community members express concern with rainwater flowing off new roof onto where they park their cars (increased motivation to install rainwater catchment)
- Representative from INCA comes out to building site (strong possibility of roof donation)
Infill
- Block press at the factory breaks, putting papercrete on indefinite stand-by
- Fill and secure west wall and 2/3 of north wall with ecoladrillo (1,231 bottles used, about 115 bottles for every 8ft squared)
- Final 1/3 cannot be filled before backside is plastered (because backside inaccessibility requires it to be plastered from the inside
Jun. 29, 2012[edit | edit source]
- Take day off from site to collect bottles for final few quadrants of ecoladrillo
-
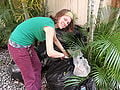
Jocelyn enjoying a day off!

Jun. 30, 2012[edit | edit source]
Structure
- Stack and mortar concrete blocks for east wall and south wall door frames
- Tie block columns into beams
- Acquire large source of free broken tiles for flooring
Infill
- Begin mixing and plastering interior ecoladrillo walls with sawdust plaster (ratio #5) (See Sawdust Plaster for final process details)
- Cut in edges where wall and column/beam meet with traditional cement plaster
- Plaster the backside of half of the inaccessible wall and fill and secure with ecoladrillo
-
Cutting in
-
Plastering the inaccessible


July[edit | edit source]
Jul. 1, 2012[edit | edit source]
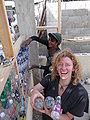
- Celebrate Jocelyn's birthday onsite with a mid-day singing, dancing, and ice cream break
Structure
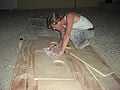
- Begin first broken tile floor test
- Test mortar #1: 1/2 inch layer of sand, 3 inch layer of mix (4 sand, 1 cement), tile layer with mortar (4 sand, 1 cement)
- Test mortar #2: 1/2 inch layer of sand, 3 inch layer of mix (4 sand, 1 cement), tile layer with mortar (2 sand, 1 cement)
Infill
- Frame south and east walls for ecoladrillo
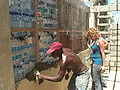
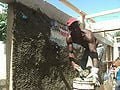
- Begin plastering exterior walls with sawdust plaster
- Finish plastering backside of inaccessible wall
- Finish filling and securing north wall with ecoladrillo
- Begin applying second layer of sawdust plaster over interior walls
-

Happy Birthday Jocelyn!
-
Frankie lovin' it


Jul. 3, 2012[edit | edit source]
Structure
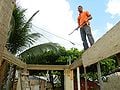
- Receive roof donation and begin securing it to the rafters
- Start welding metal door pieces together
- Secure donation of waste particle board from local industry (for infill below roof and above beams)
Infill
- Fill east wall with ecoladrillo
- Apply second layer of sawdust plaster to exterior
- Plane interior walls and begin applying final layer of sawdust plaster
- Apply thin layer of splattered mortar to columns and beams (to create a rough surface for final layer of sawdust plaster to adhere to)
-
Domingo welding doors
-
Finishing up the interior


Jul. 4, 2012[edit | edit source]
Structure
- Finish securing zinc roof to rafters
- Build moulds and pour mortar for window frames and sills
- Continue welding doors
Infill
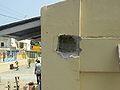
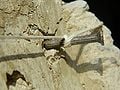
- Secure plexiglass truth window to ecoladrillo on east wall
- Begin measuring and cutting particle boards to size for the upper infill
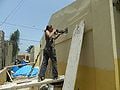
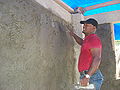
- Begin applying final layer of plaster to exterior (traditional plaster with iron oxide to dye walls yellow)
- Finish applying final layer of sawdust plaster to interior walls columns and beams (with the exception of the area surrounding the truth window)
-
Yellow pigment in the plaster
-
Measuring wood for Jocelyn


Jul. 5, 2012[edit | edit source]
- Project presentation at UNIBE to faculty and future program participants
Structure
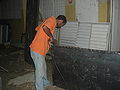
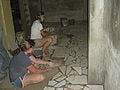
- Level floor to prepare for tiling
- Pour and tamp half inch layer of sand over entire floor area.
- Lay mortar bed and tile over area from the west wall up until the south door
- Build moulds and pour mortar for door sills
- Finish welding and begin painting doors
Infill
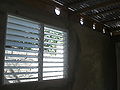
- Begin plastering ecoladrillo around truth window (sawdust plaster below, traditional plaster above to prevent dripping or spilling into the window)
-
Jocelyn making door sills
-
Peeking in the truth window


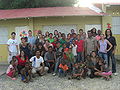
Jul. 6, 2012[edit | edit source]
- Project presentation in Las Malvinas II to community members to describe the process and to give thanks to participants
-
Final Presentation
-
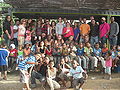
Awesome group photo


Jul. 7, 2012[edit | edit source]
Structure
- Lay mortar bed and tile along entire north wall
- Finish painting doors
- Receive windows
Infill
- Finish applying final layer of plaster to exterior
- Finish applying final layers of plaster to area surrounding truth window
-
Tiling along North wall
-
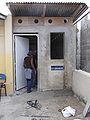
Front door
-
Back door
-

Final view of Truth Window


Jul. 9, 2012 - Jul. 10, 2012[edit | edit source]
Structure
- Pull up and re-lay tile along north wall (floor was too uneven)
- Re-level rest of un-tiled floor
- lay mortar bed and tile over the rest of the floor
Infill
- Secure particle board infill above the beams and below the roof along the north and east walls
-
Wood installed above beams

Jul. 11, 2012 - Jul. 12, 2012[edit | edit source]
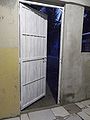
Structure
- Grout the spaces between the tiles and complete the floor
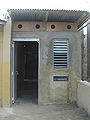
- Secure metal door frames and hang finished doors at south and east entrances
- Secure windows into north, east, and south locations
-

Finished floor
-
After: East wall
-
After: South wall
