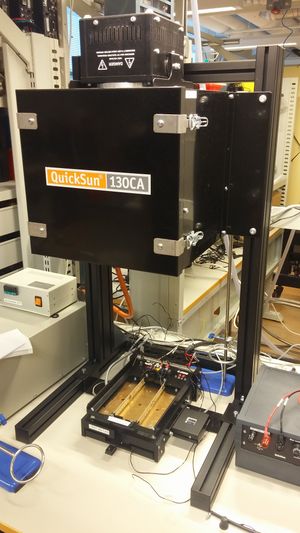
Nanostructured silicon surfaces (black silicon, bSi) show great promise in solar cell applications due to their superb absorbance on a wide spectrum of light and wide angle of acceptance. In order to get all the benefit out of the high-absorbing bSi surface,it is beneficial to build high-efficiency bSi solar cells so that all the electrical contacts are on the back of the cell. However, the Electron Physics research group currently lacks the experimental setup for measuring the efficiency of these kinds of solar cells. In addition to this, there are no simple commercial solutions for measuring the angle dependence of solar cell efficiency, at least to my knowledge.
In this project, I aim to overcome these limitations by designing a 3D-printable measurement stage adapter for the Endeas Quicksun 130 CA solar simulator using OpenSCAD. The parametrized wafer adapter can be customized to fit round wafers of all sizes, and it is possible to equip the adapter with a rotating motor that enables angle-dependent measurements.
This project was performed as a final project of the L3999 course Fall 2017.
Concept[edit | edit source]
The measurement stage adapter consists of a wafer adapter, adapter lid, vertical stands, and bearings and metal rods. The wafer adapter contains slots for 1) circular bearings with a 1 cm outer diameter and 0.5 cm inner diameter, and 2) 25 mm x 75 mm x 1 mm metal plates, which can be used utilized to keep the electrical contacting wires in place with magnets. It is advised to stop the printing before inserting the bearings and metal plates, and to continue the printing afterwards to firmly lock them in place. By default, the wafer adapter and lid are suitable for 4 inch wafers, but this can be easily changed by modifying the wafer diameter in the.scad file. In order to make sure the contacts stay in place during the measurement, the lid secures the wafer to the adapter by pressing it from the top.
Bill of Materials[edit | edit source]
- 3D printed Wafer adapter
- 2 circular metal bearings
- 2 metal plates
- 3D printed lid
- 3D printed stands
- 2 metal rods
Estimated Costs[edit | edit source]
- Wafer adapter: $1.68
- Wafer lid: $0.40
- Two stands: $5.28
Costs for the 3D printed parts are calculated using ABS by IC3D as the printing material. 1 kg reel of ABS costs $40, and the consumption of the filament is approximated by the Lulzbot Cura slicing software with standard printing settings. The bearings, metal rods, and metal plates are relatively cheap, in the order of a few US$, so the total costs of the measurement stage adapter are approximately $26 at this stage of development. The estimated cost does not contain the micromanipulators, which are required to accurately position the electrical contacts, nor the rotating motor. However, the total costs of the entire operational measurement stage can still be below $200, if open-source versions of the aforementioned components are used.
If a similar customization were to be ordered from the equipment vendor, the total costs of the modification could speculatively start from thousands of dollars, as design work can be very expensive.
Directions[edit | edit source]
Download the designs (.scad and.stl files) from the NIH repository. The designs are suitable for 4 inch wafers by default, and the size of the metal plates in the design is 25 mm x 75 mm x 1 mm. The preset bearing outer diameter is 1.0 cm and and the inner diameter is 0.5 cm, and the diameter of the rods is 0.5 cm.
Use OpenSCAD to set the parameters in the scripts as needed, and make sure that the same wafer diameter is used in all files. After all changes, export the.stl files.
Load the files into a slicing program and prepare the printing file. I recommend printing the stands overnight during the same run, as printing the stands takes a bit over 5 hours per piece with the default standard settings for LulzBot TAZ 6 and ABS by IC3D. The wafer adapter and the lid can be printed in the same run in approximately 3 hours. Remember to pause the printing of the wafer adapter and add the metal plates and bearings in place, then continue the print.
Planned upgrades[edit | edit source]
- Print a test design and adjust dimensions, if needed
- Add micromanipulators for accurately positioning the electrodes to the measured cell
- Add a tilting option for angle-dependent measurements
Parts[edit | edit source]
-
Wafer adapter
-
Adapter lid
-
Stand
-
All parts
Images of Prints[edit | edit source]
Scaled-down versions of the Wafer adapter and lid were printed at an early stage of development using LulzBot TAZ 6 and ABS by IC3D as the printing material. The print speed was 50 mm/s and the layer height was 0.35 mm.
-
Scaled-down print of an early model.


